Create an Agent
What this guide covers
Sets up a new user account with specific roles and permissions, granting market operators or support staff access to manage the Byte Commerce Admin Portal.
Steps
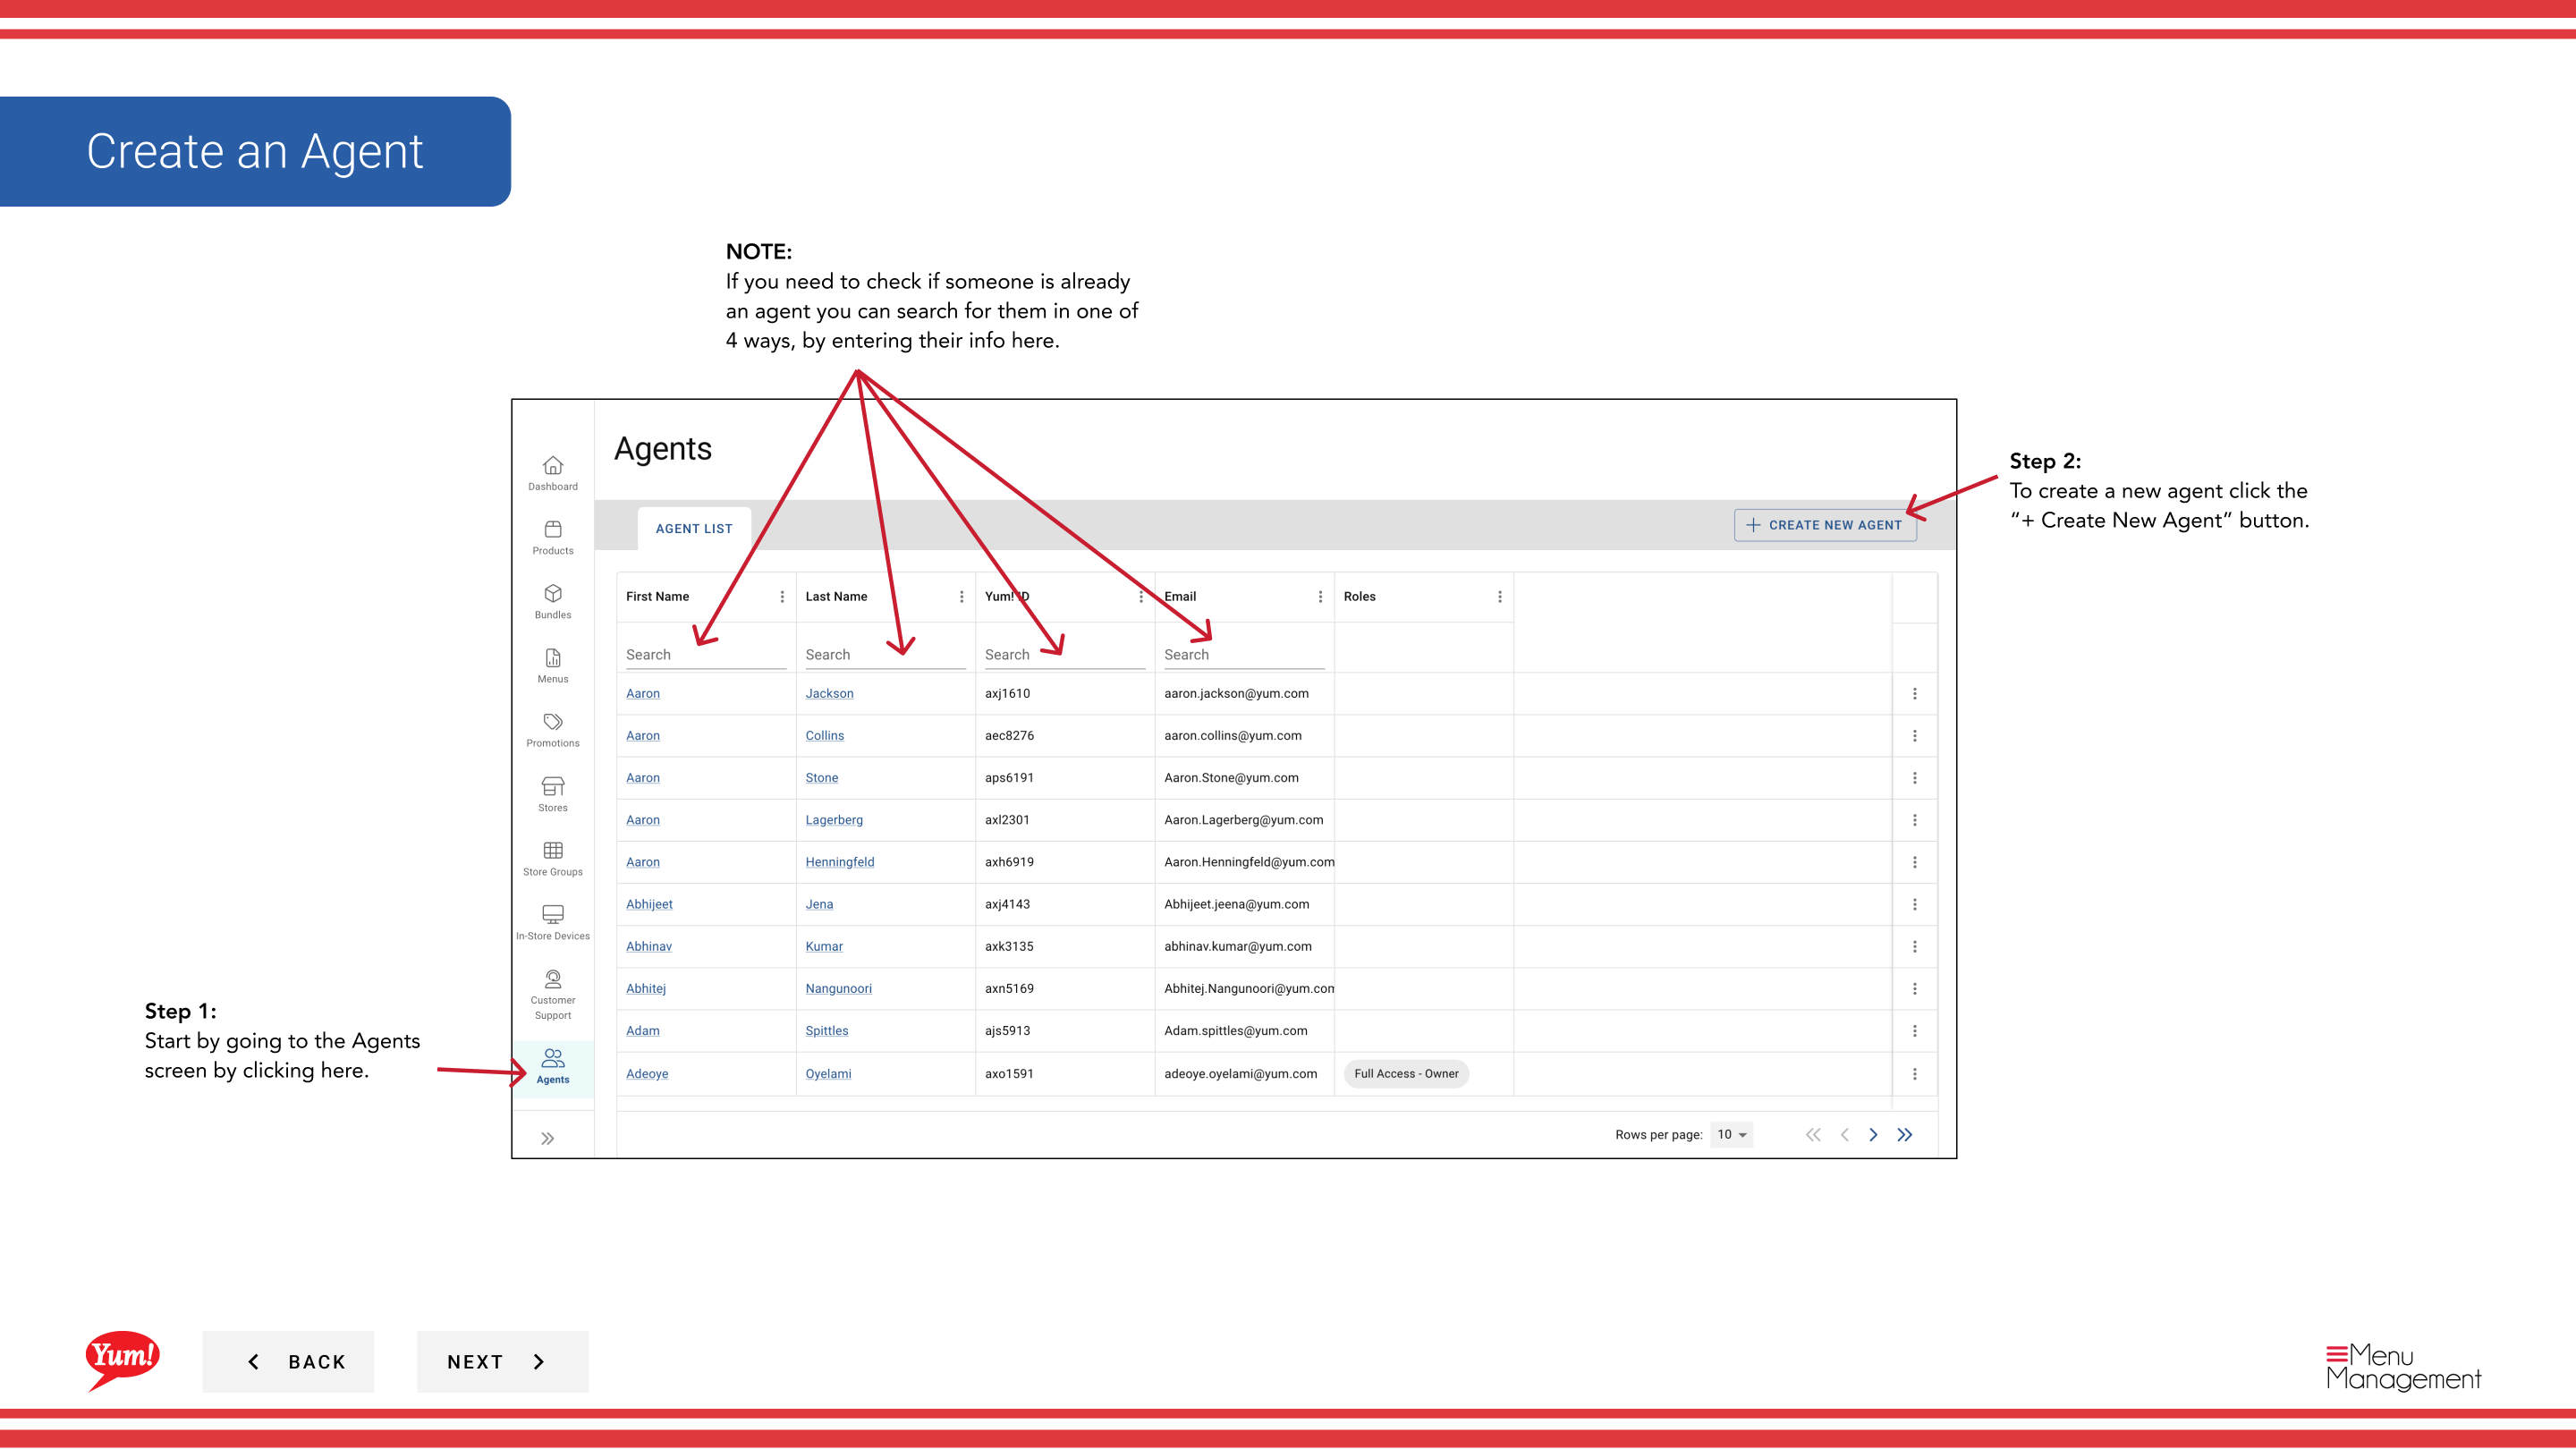
Step 1: Navigate to the Agents section using the left-hand navigation menu.
Step 2: Click the + Create New Agent button.
Step 3: Fill in the agent details on Page 1. Fields marked with * are required.
| Field | What to enter | Notes |
|---|---|---|
| First Name * | Agent’s first name | e.g., “John” |
| Last Name * | Agent’s last name | e.g., “Smith” |
| Email Address * | Valid email for login and notifications | Must be unique — no two agents can have the same email. Used for password resets and system messages. |
| Username * | Login identifier | Must be lowercase letters only — no spaces, numbers, or special characters (e.g., jsmith, john.smith). Cannot be changed after creation. |
Before creating a new agent, search by First Name, Last Name, Email Address, or Username to verify they don’t already have an account.
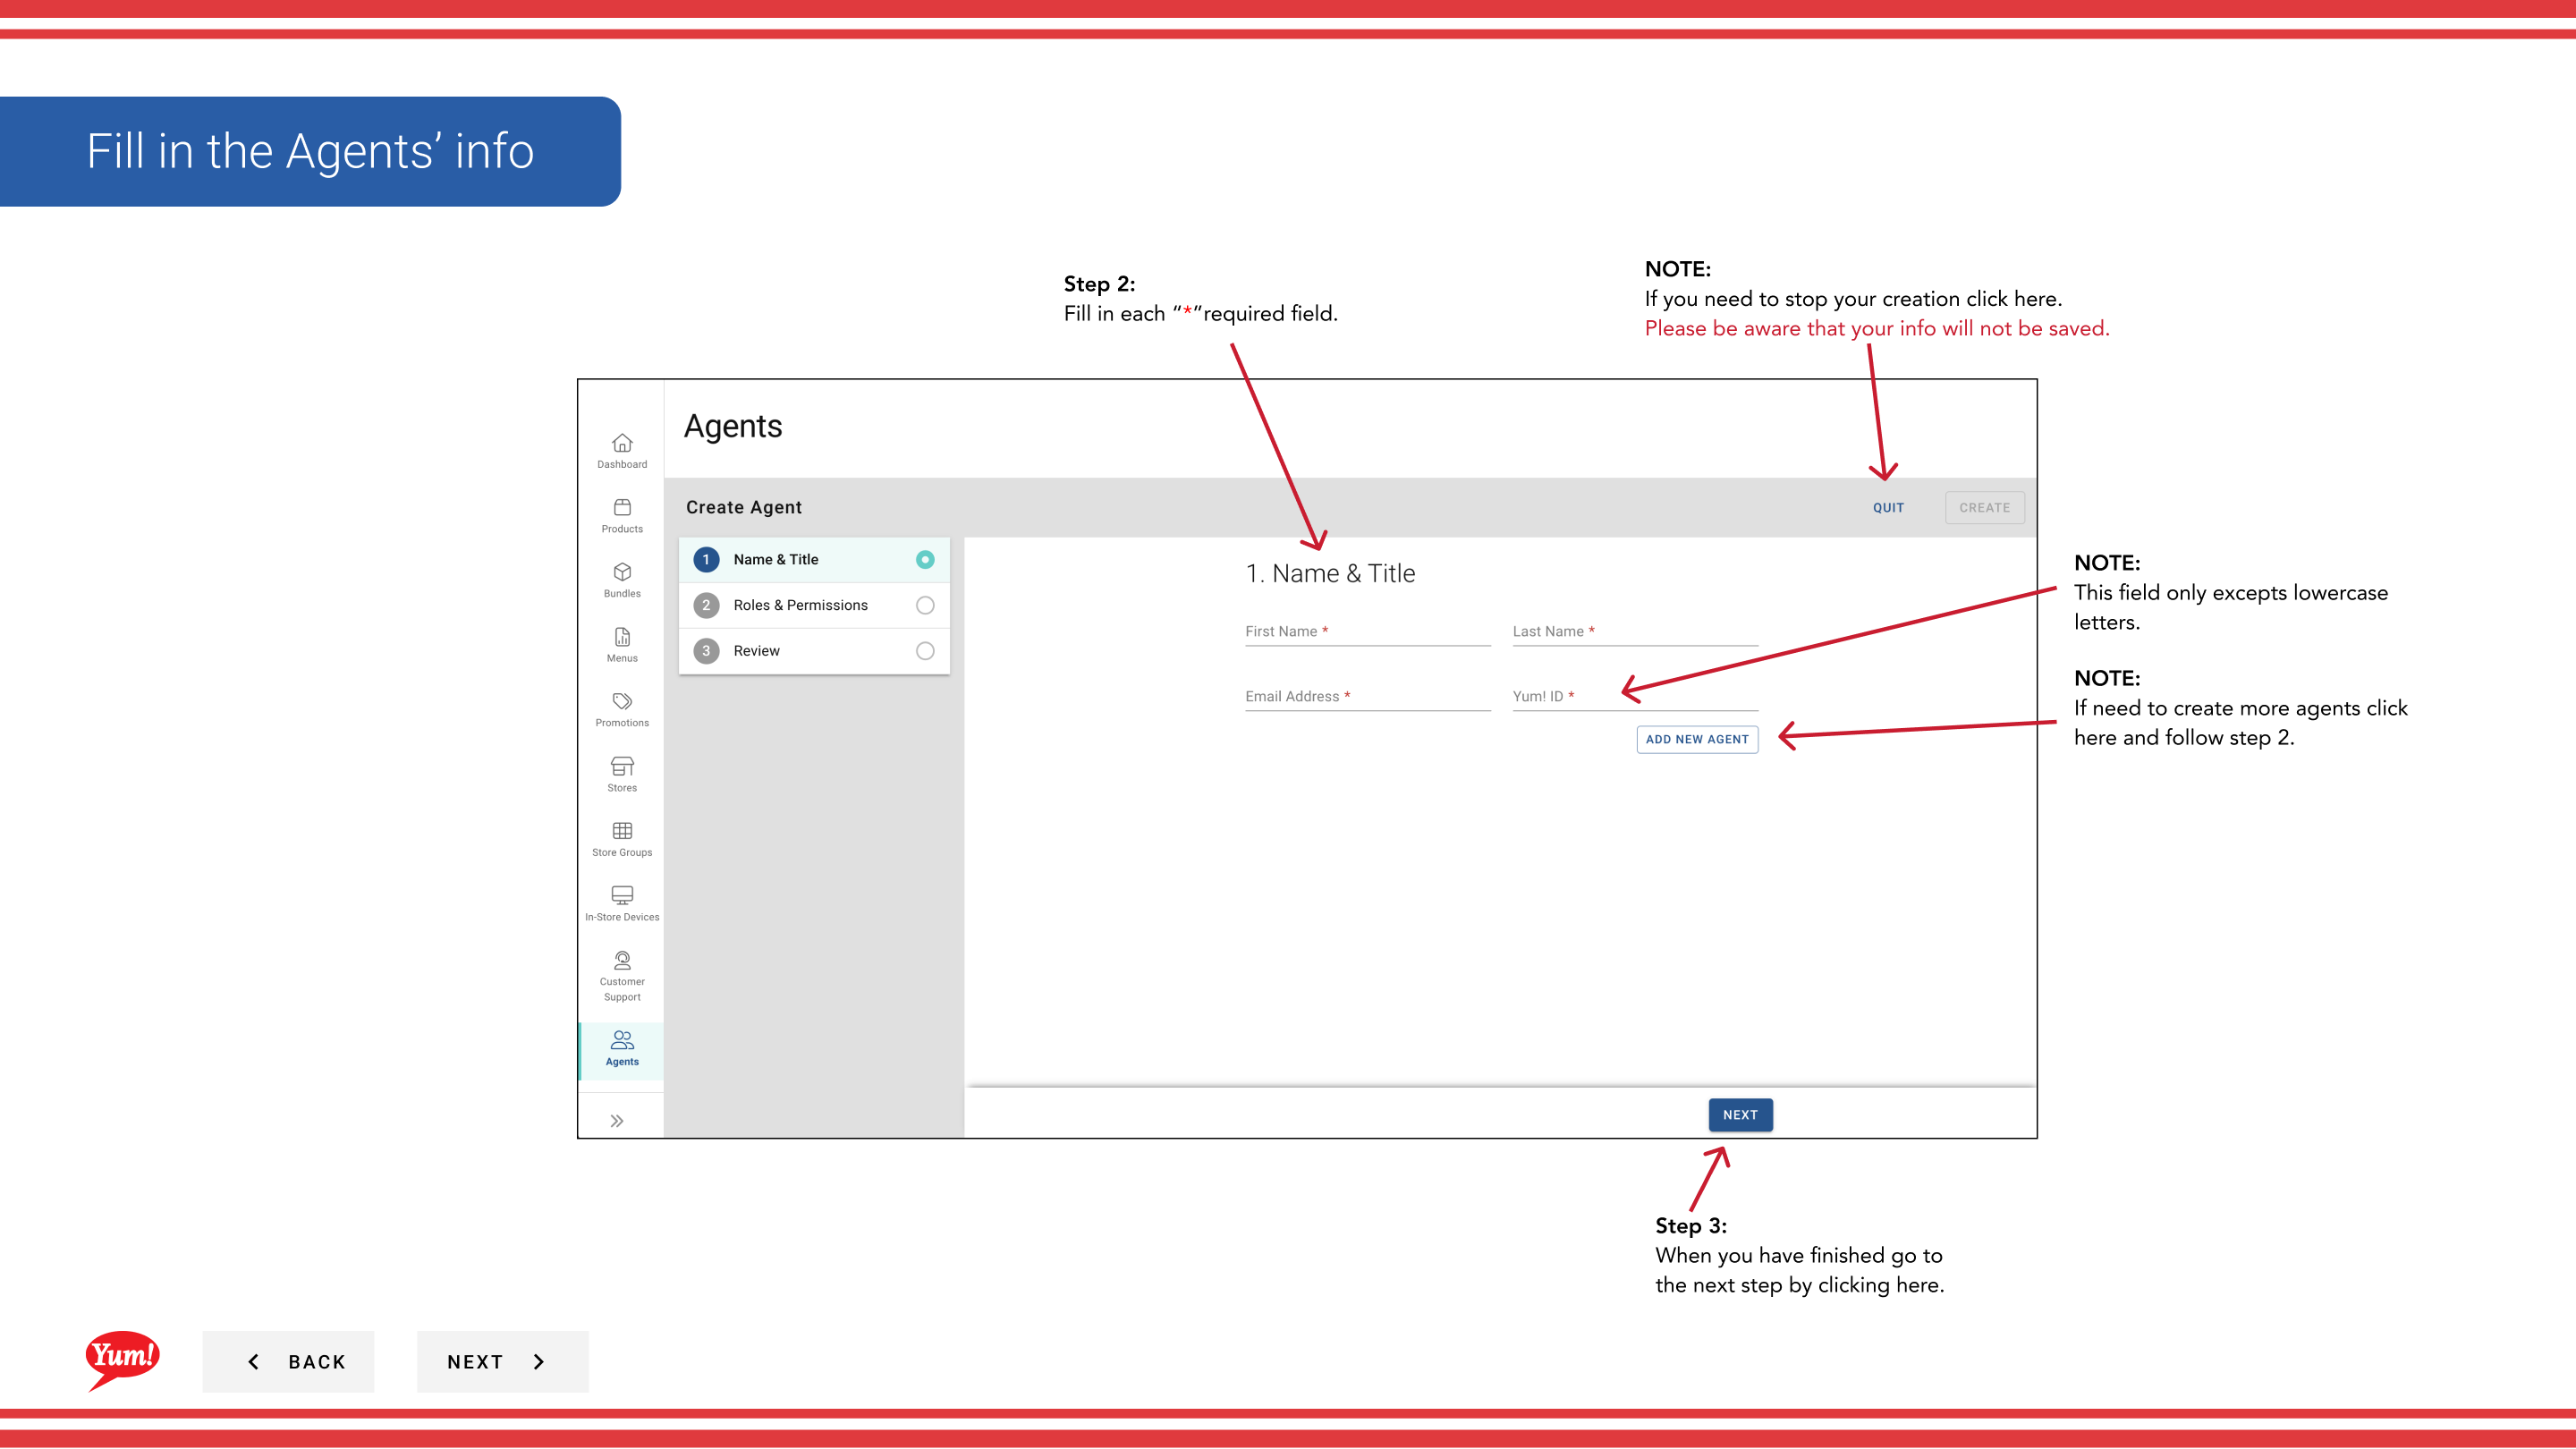
Step 4: Click Next to proceed to Page 2 — Roles & Permissions.
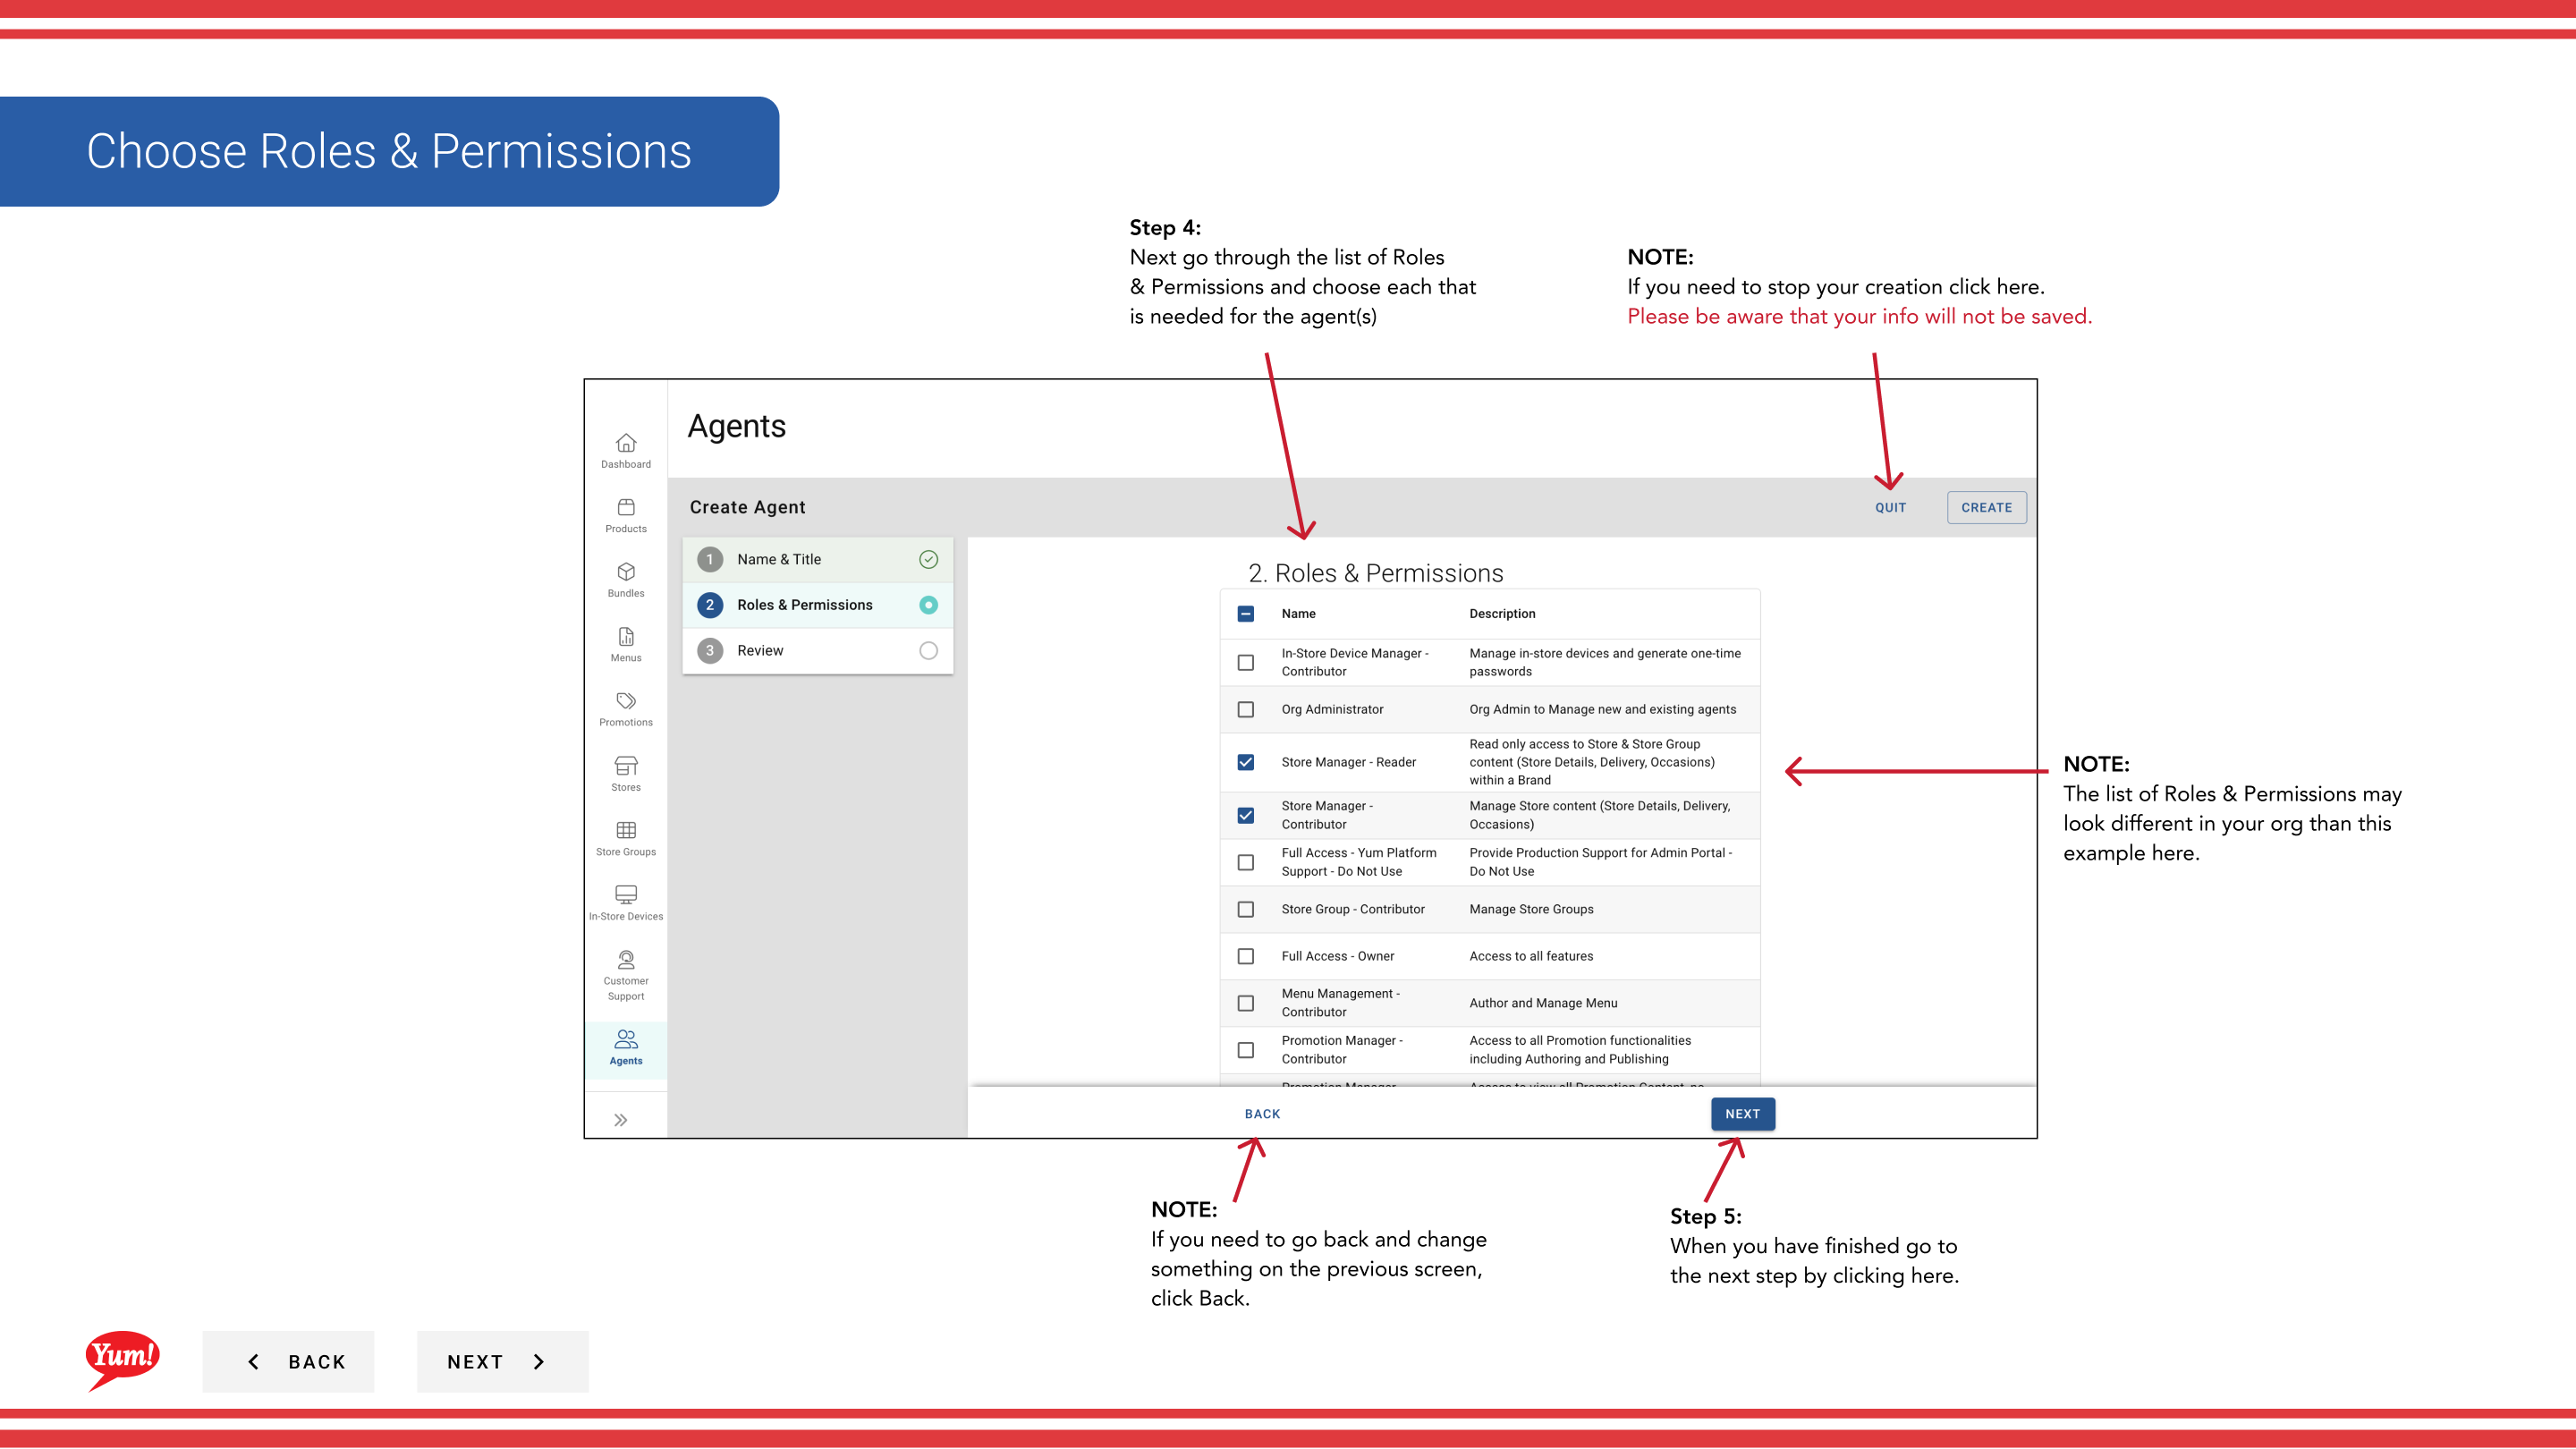
Step 5: Review the available roles and check all that apply to this agent. Roles control which sections of Byte Portal the agent can access and what actions they can perform.
| Role | What it does |
|---|---|
| Menu Manager | Can create, edit, and publish menus |
| Store Manager | Can manage store settings and configurations |
| Promotions Manager | Can create and manage promotions |
| Customer Support Agent | Can search orders and customers, issue refunds |
| System Administrator | Full access to all Byte Portal sections |
Available roles may vary depending on your organization. Check the boxes for every role this agent needs.
Step 6: Click Next to proceed to Page 3 — Review.
Step 7: Review all entered details for accuracy. Click any blue section header to jump back and make corrections.
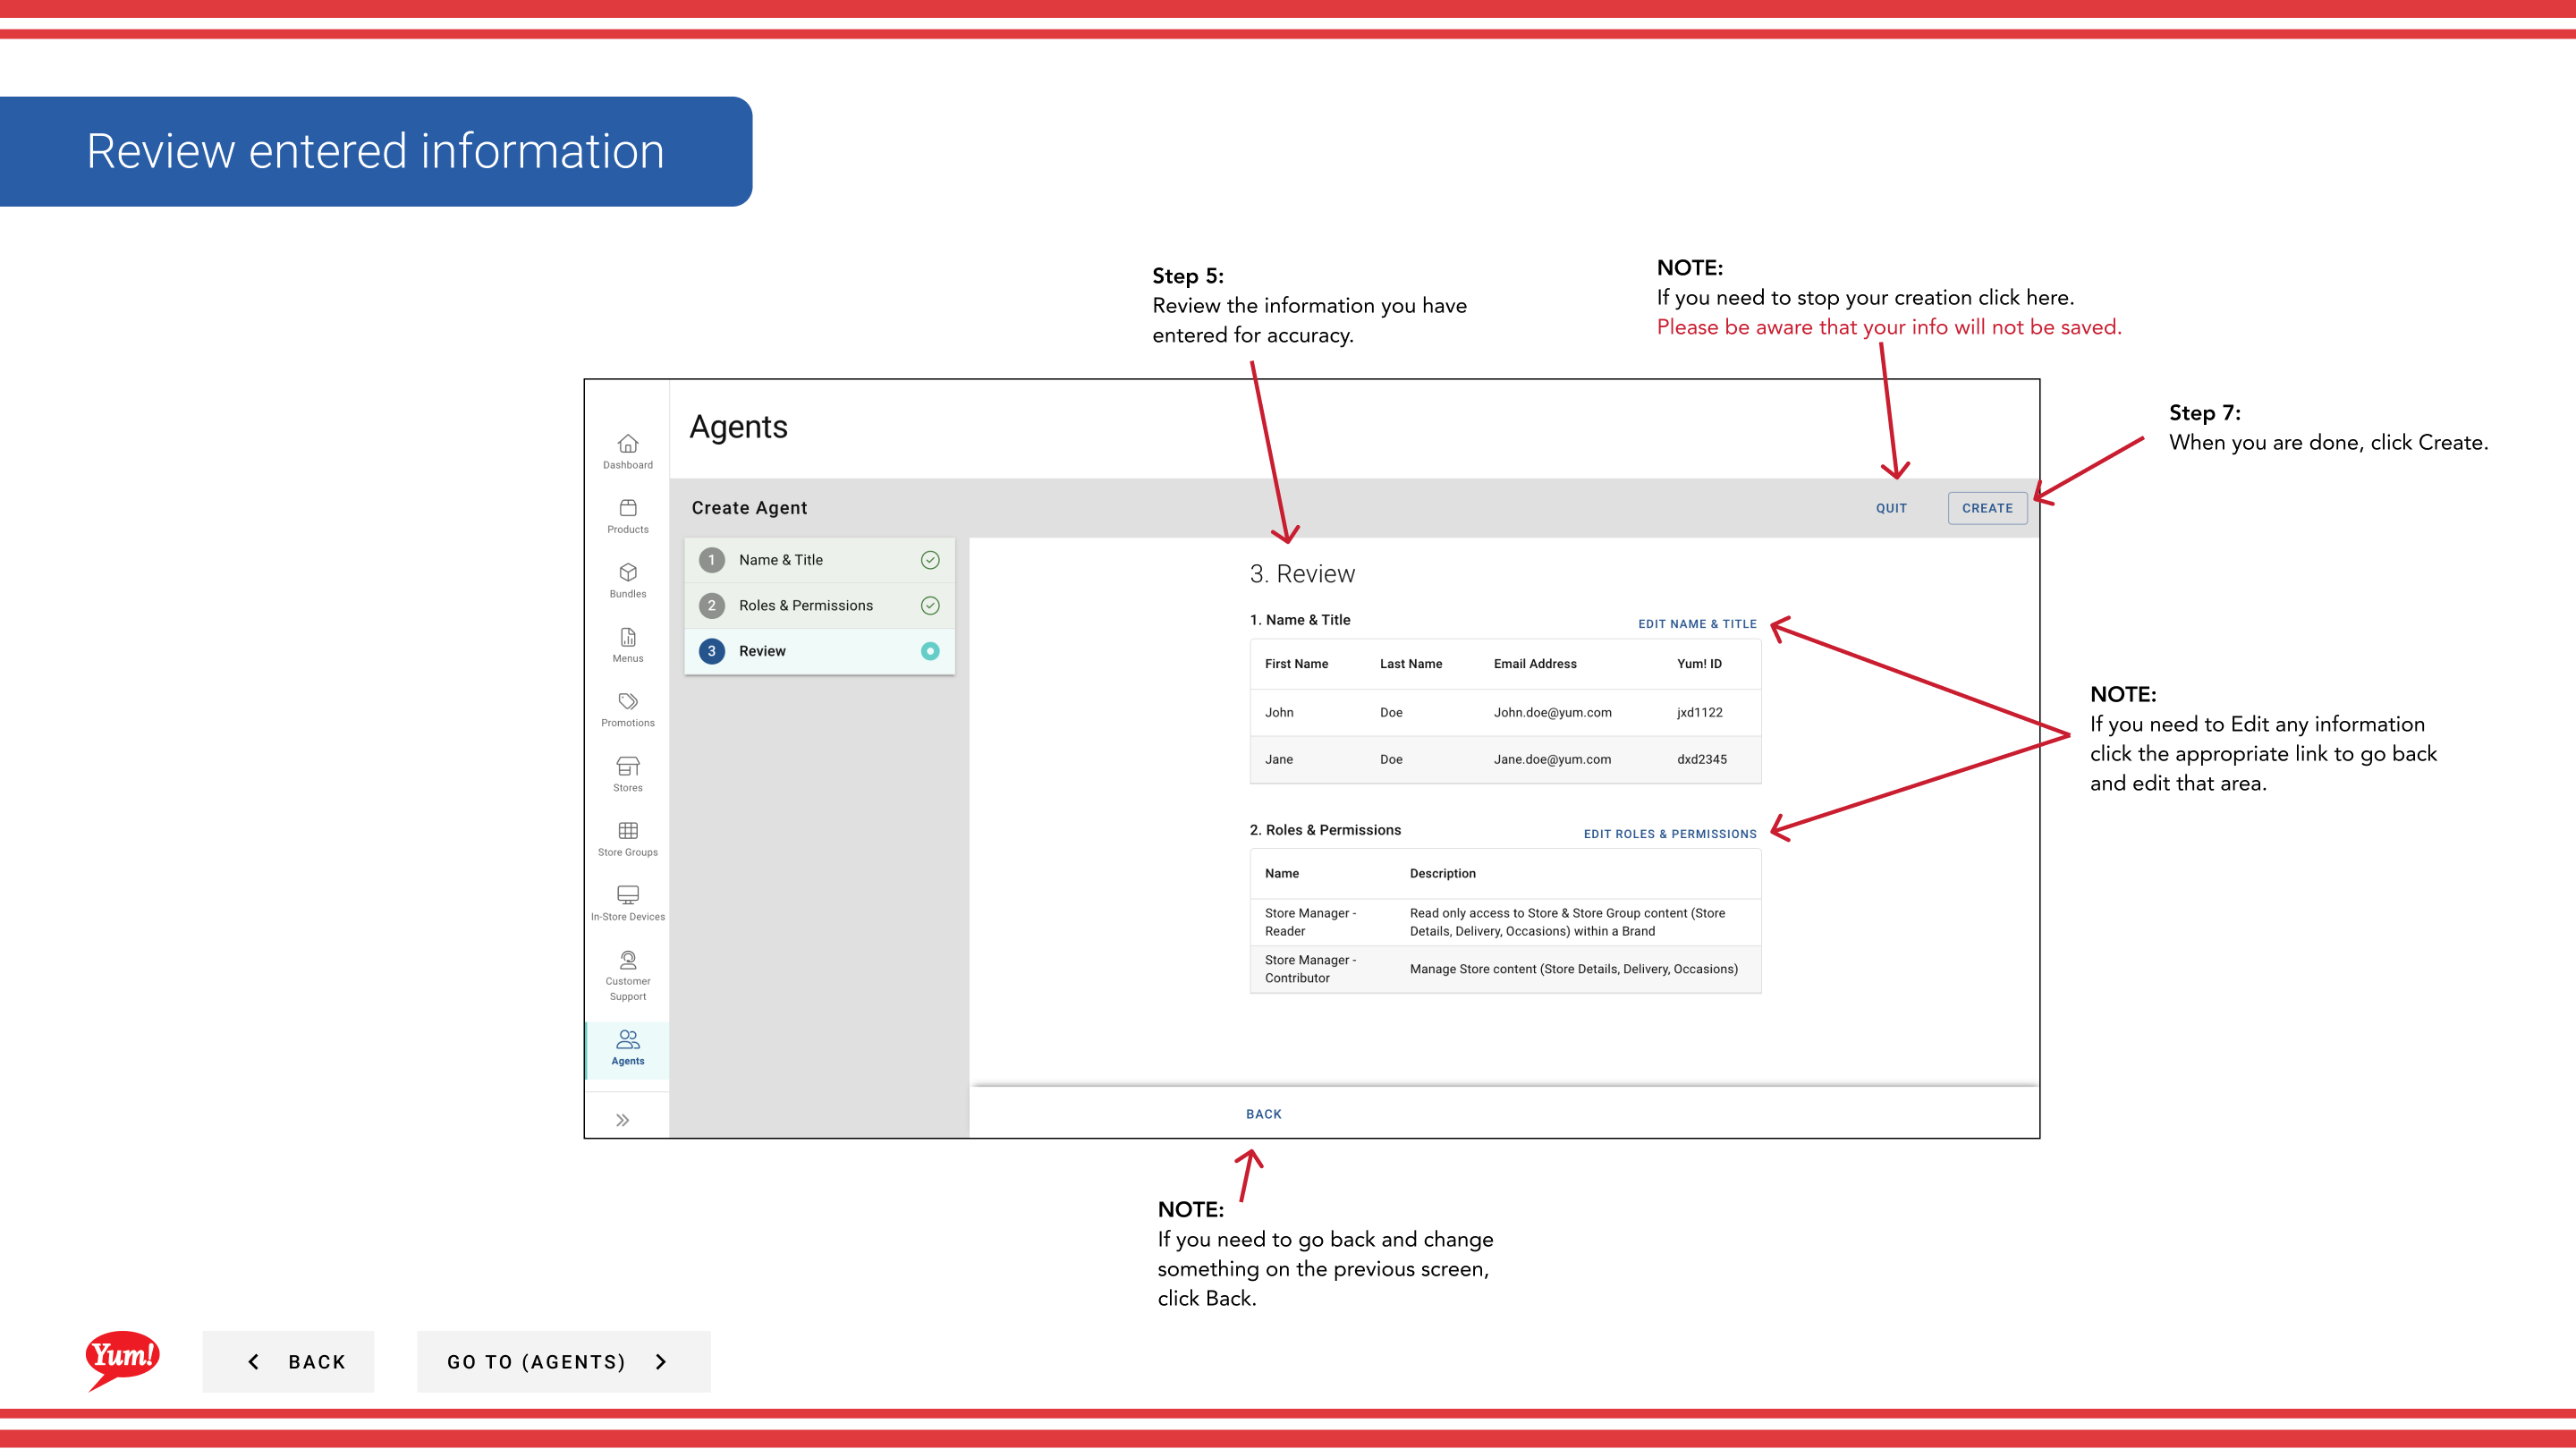
Step 8: Click Create to finalize the agent account.
After creating one agent, you can click Add Another Agent to create additional agents without returning to the Agents list.
Clicking Cancel at any time discards all unsaved information.
Related guides
Part of the Admin Portal Guide · Section: Agents