Edit an Agent
What this guide covers
Updates an existing agent’s account details, roles, or access permissions.
Steps
Step 1: Navigate to the Agents section using the left-hand navigation menu.
Step 2: Search for the agent you want to edit. You can search by:
- First Name
- Last Name
- Email Address
- Username
Enter any of these details and the list will filter.
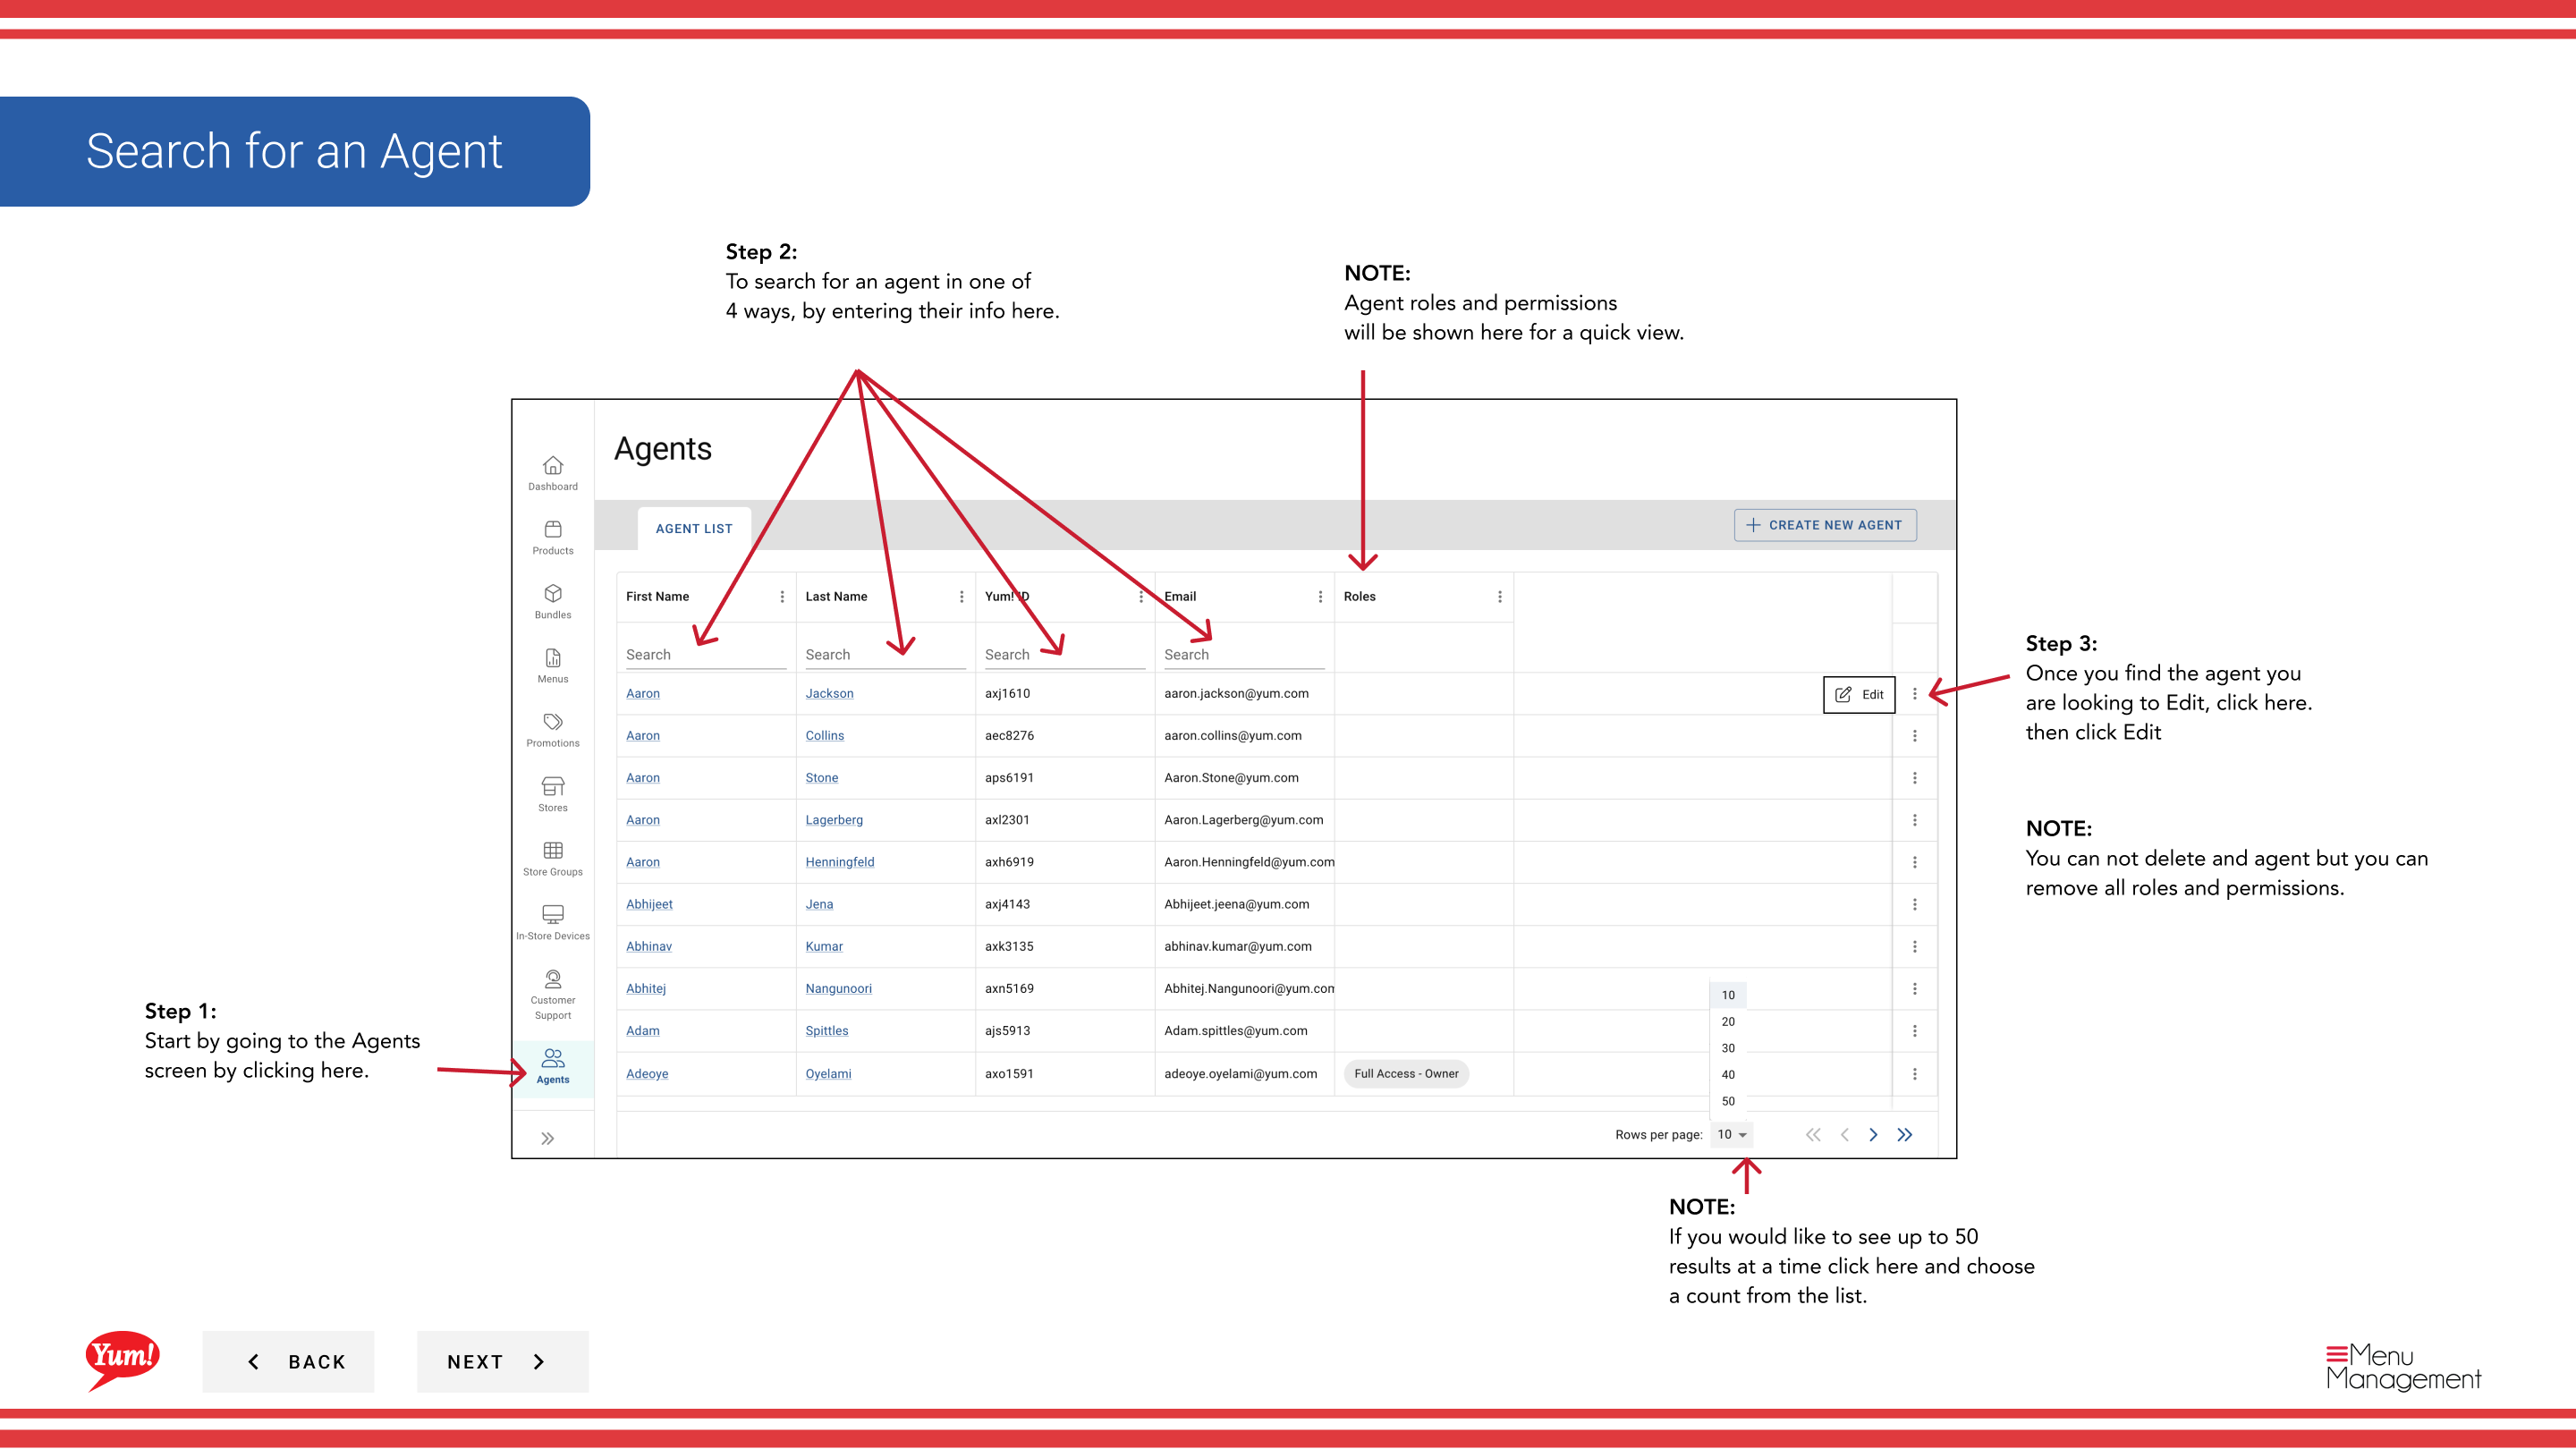
Step 3: Once you find the agent, click the ⋮ (three-dot menu) button in the same row, then select Edit.
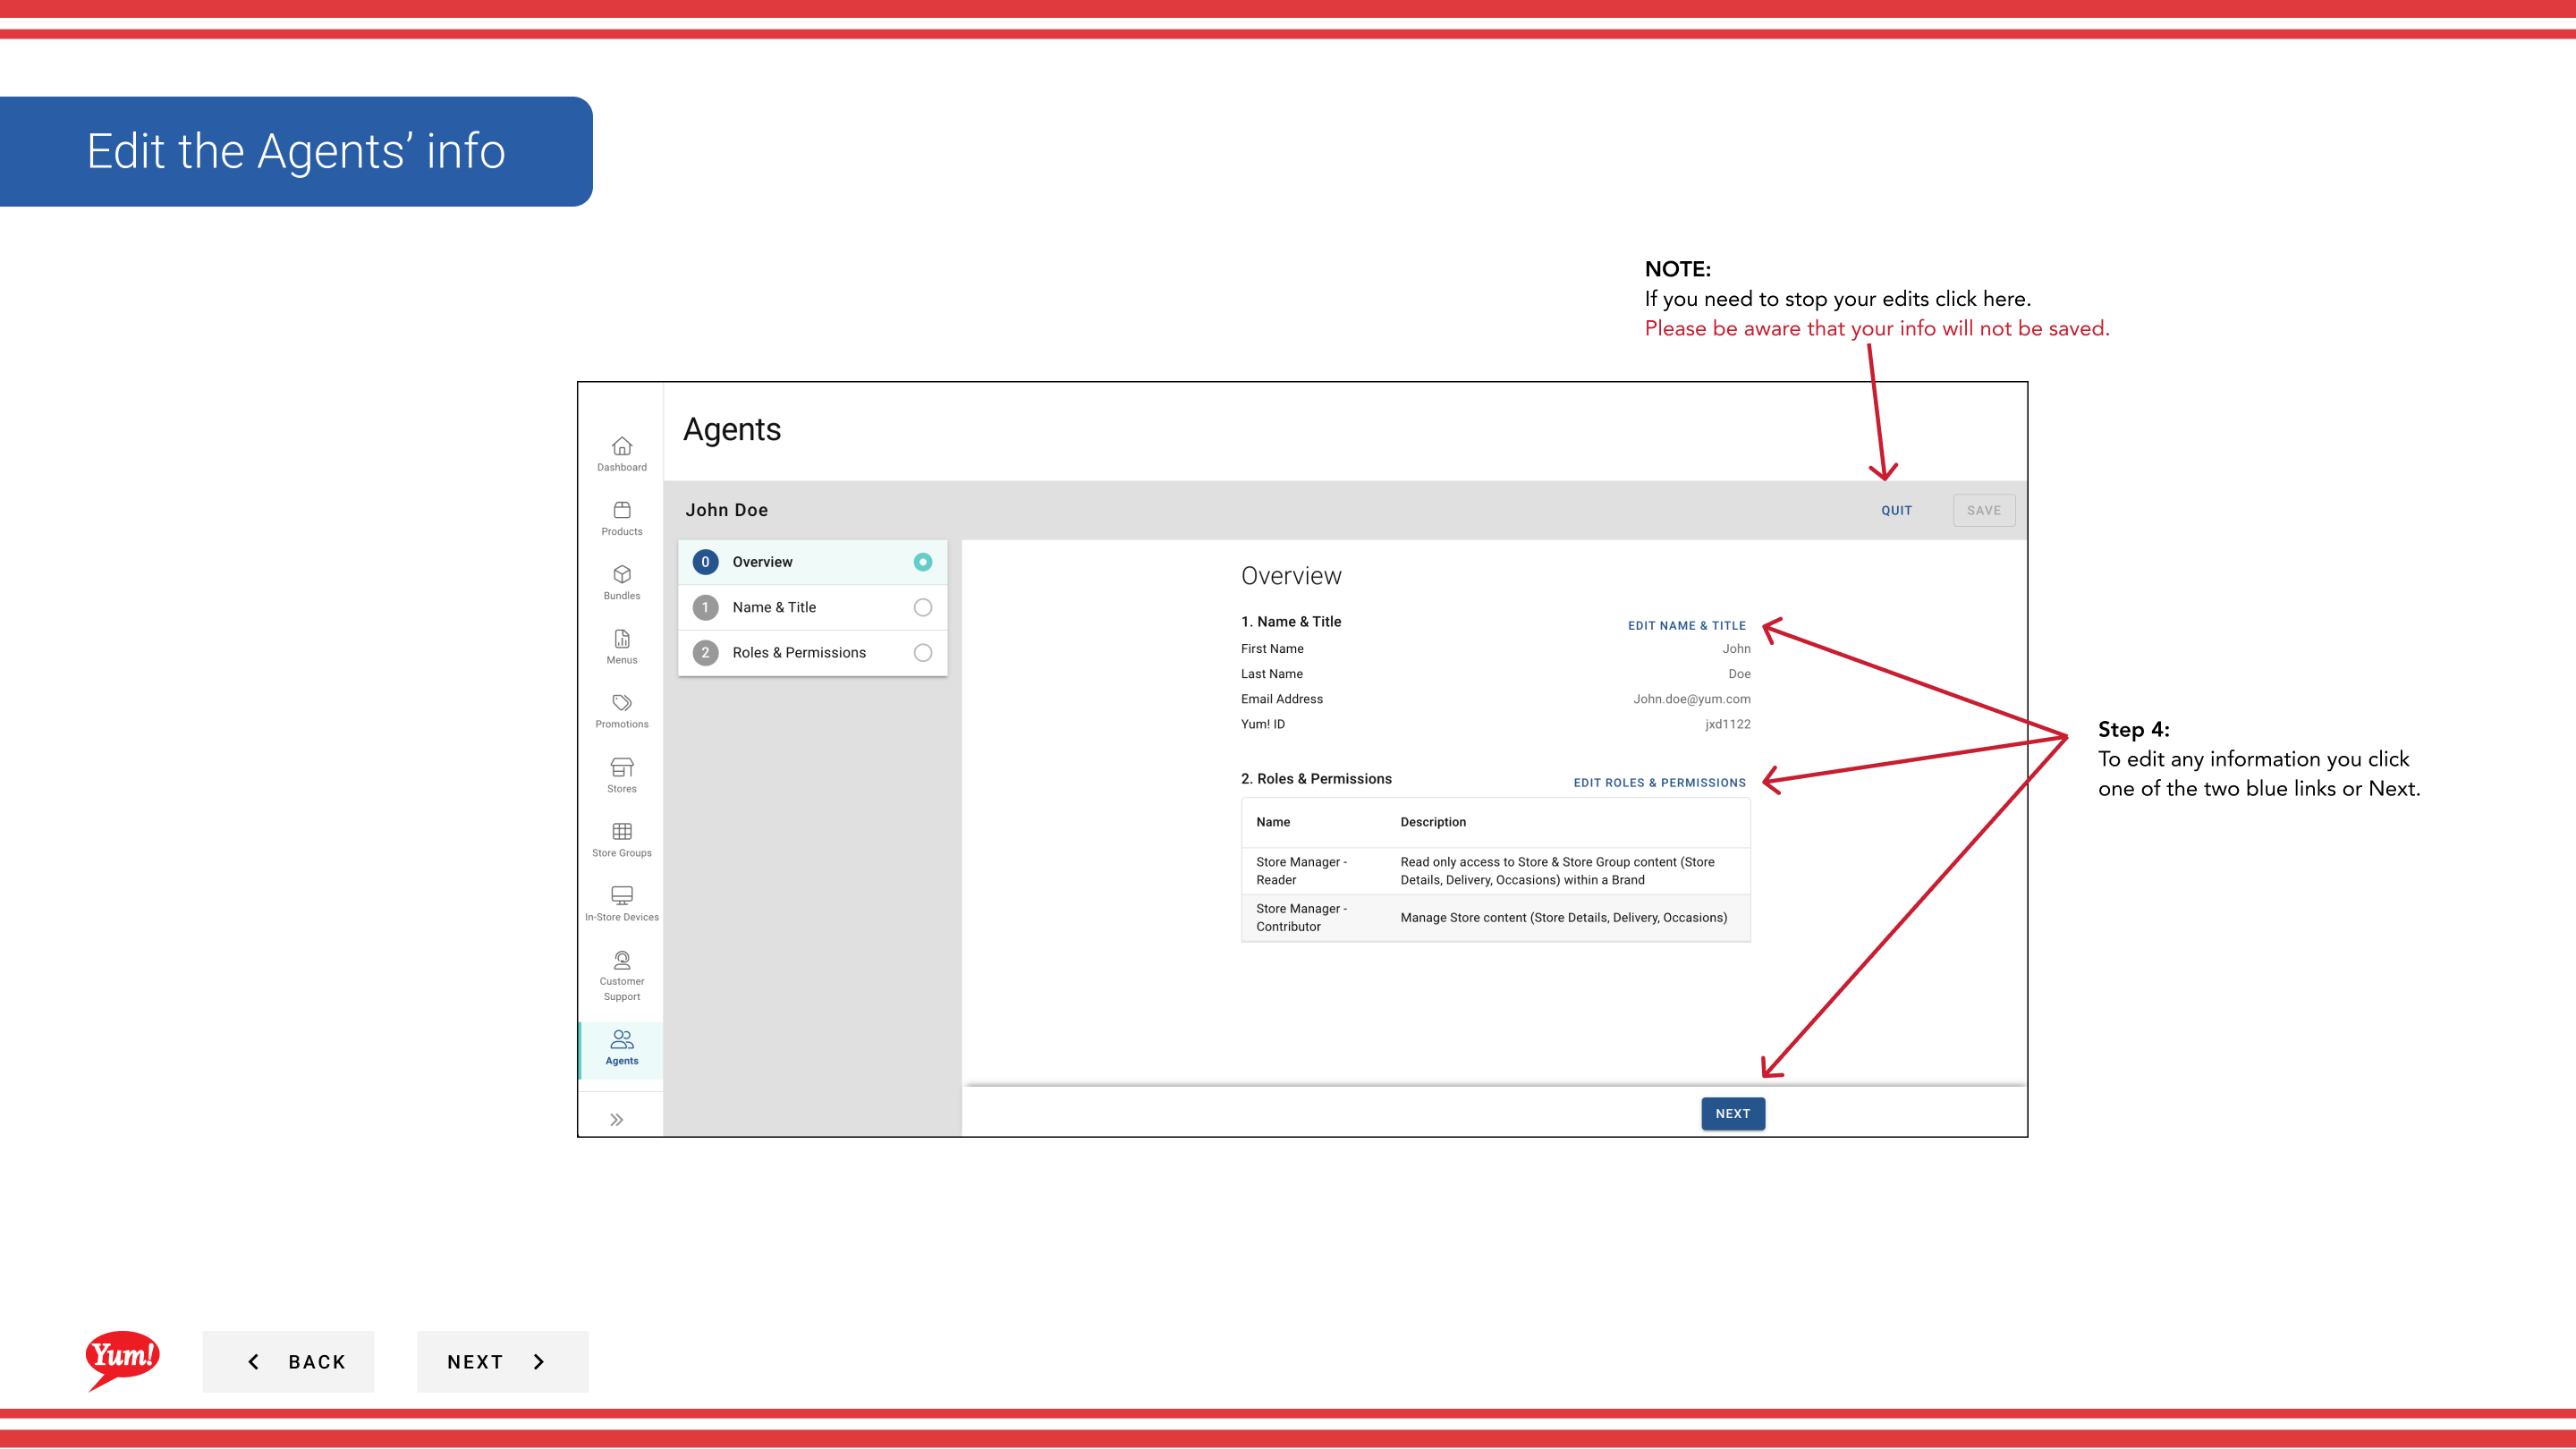
Step 4: The edit form opens with the same sections as agent creation:
- Agent Information (Page 1): First Name, Last Name, Email, Username
- Roles & Permissions (Page 2): Role checkboxes
- Review (Page 3): Summary of all changes
Click blue section headers to jump between pages, or click Next to move through them sequentially.
Step 5: Make any necessary changes to the agent’s details or roles. You can:
- Update First Name, Last Name, or Email Address
- Add or remove roles by checking/unchecking boxes
- Note: Username cannot be edited after creation
Step 6: Once you’ve made all changes, click Save to commit them.
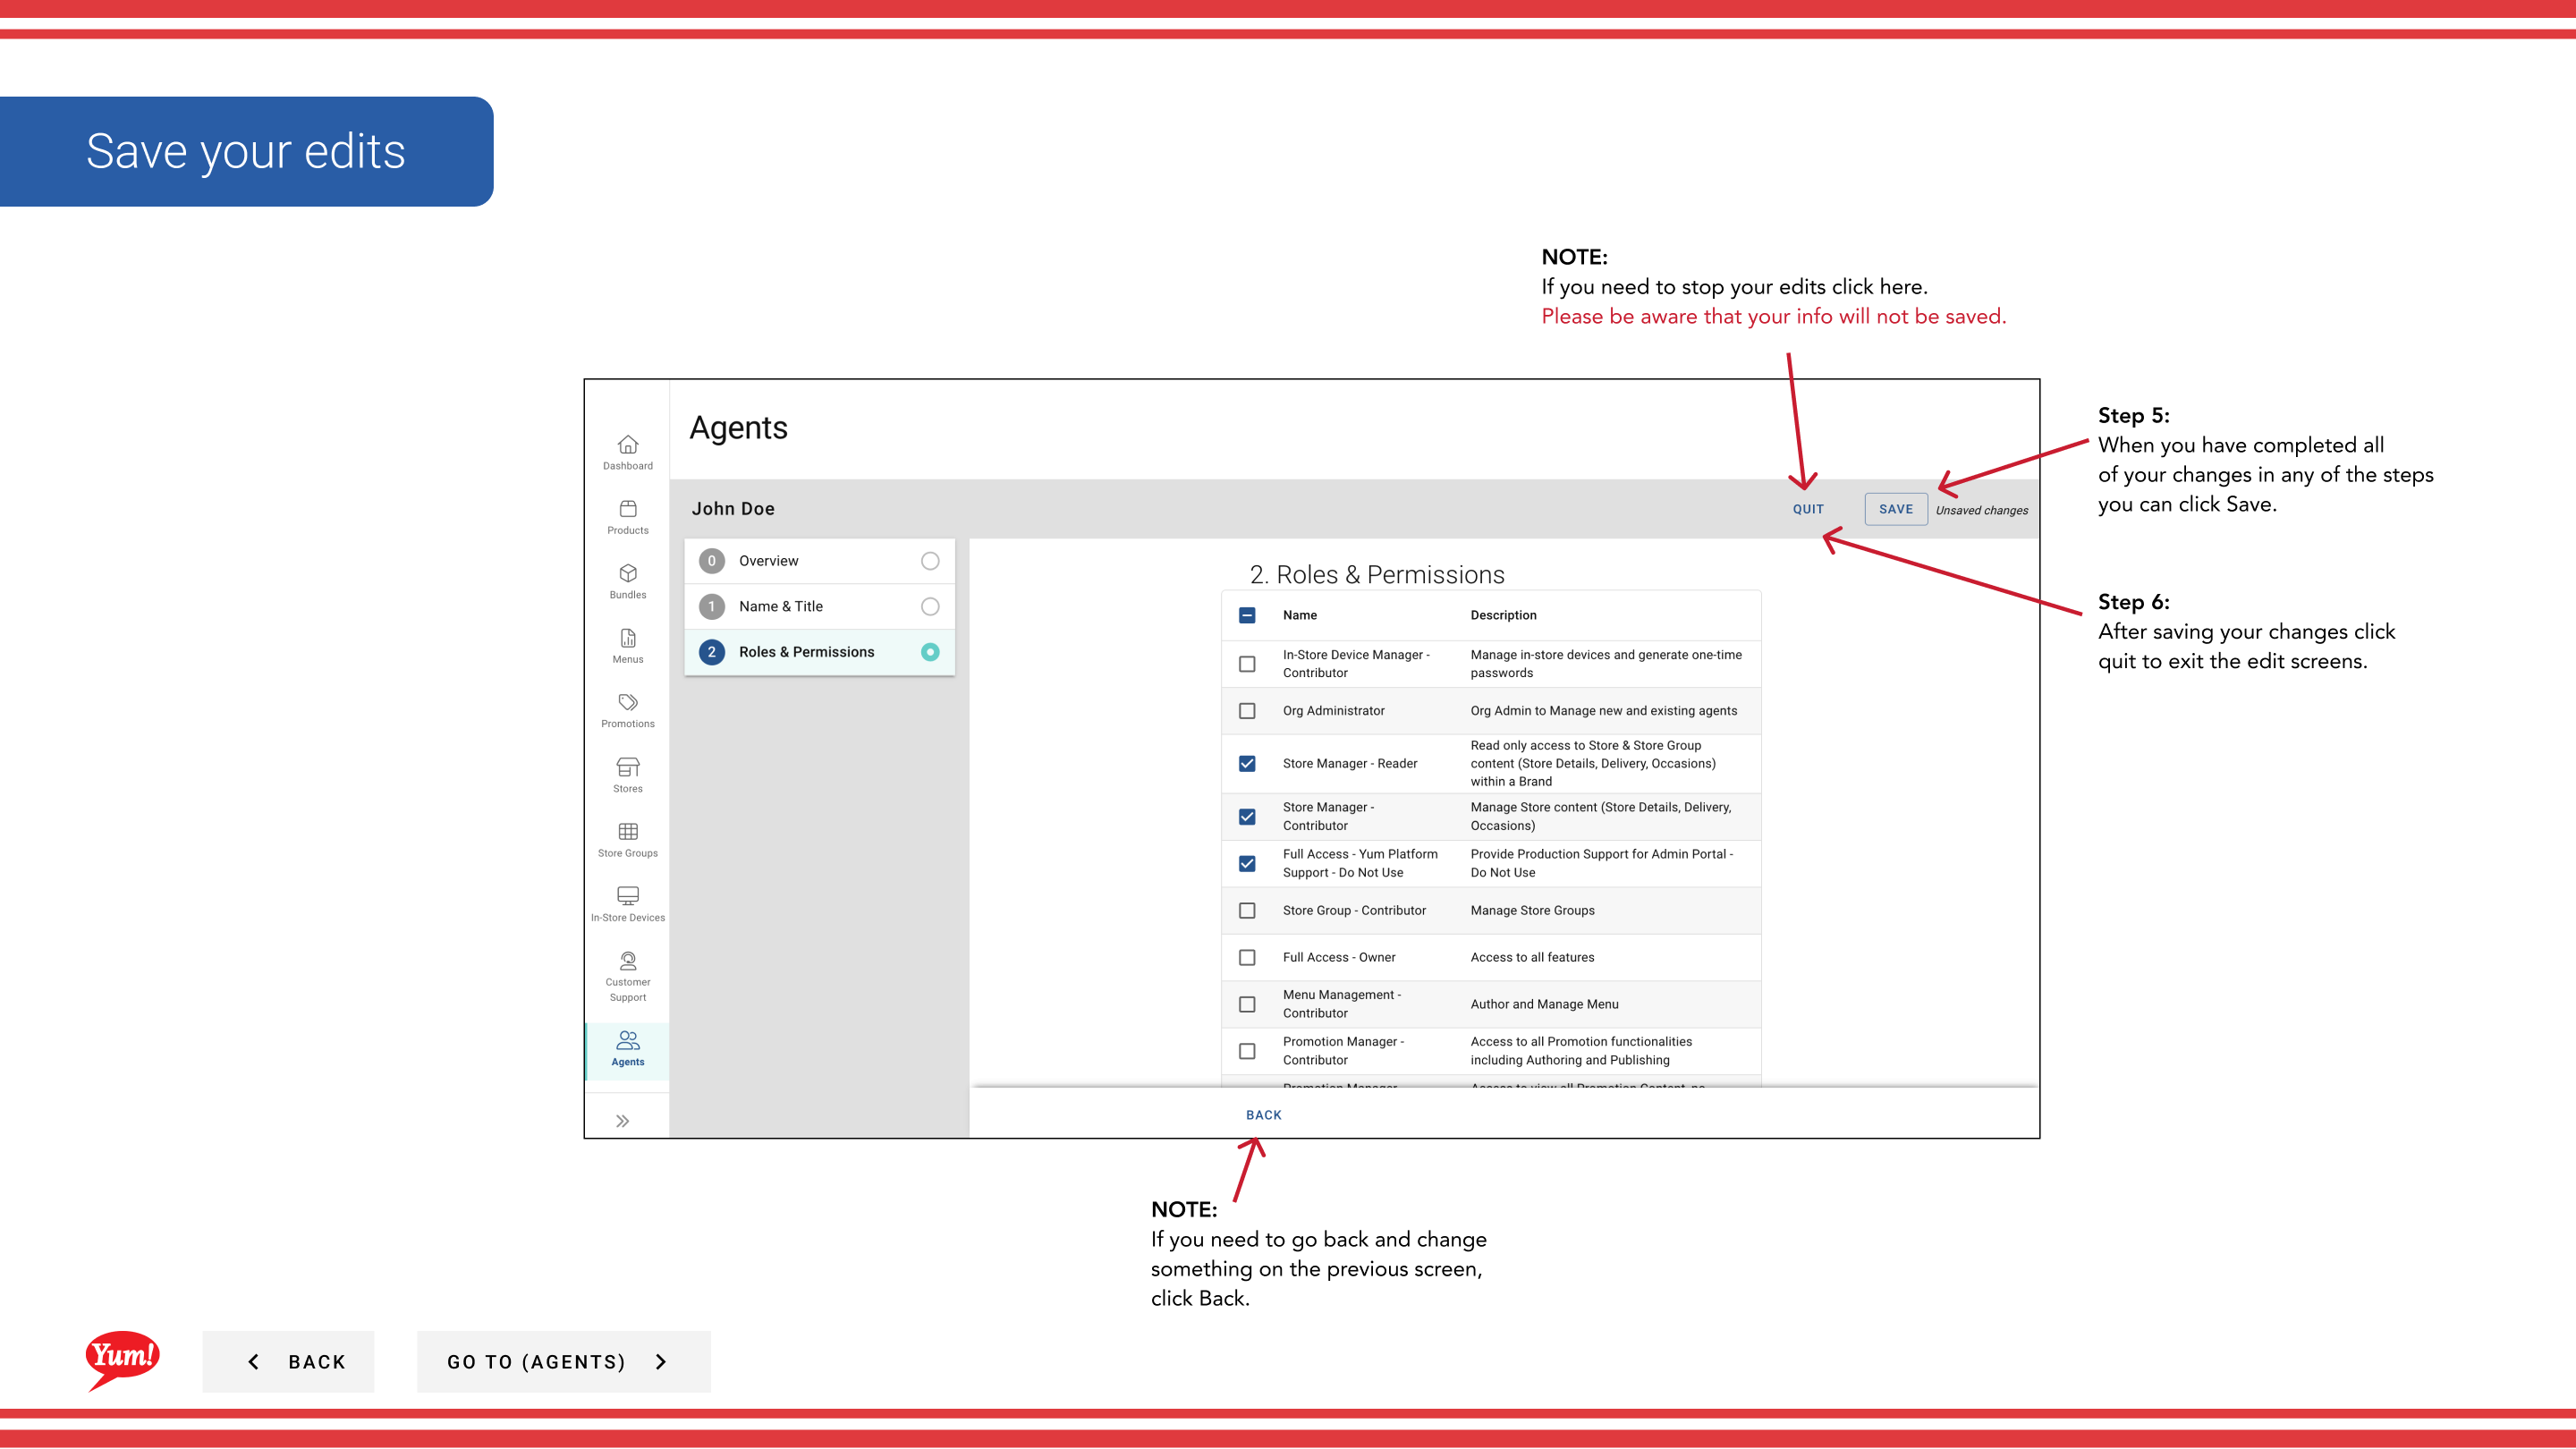
Step 7: After saving, click Quit to exit the edit screen and return to the Agents list.
The agent’s current roles and permissions are displayed at the top for quick reference. You can remove all roles if needed, but you cannot delete an agent account entirely — only strip their permissions.
Clicking Cancel discards all unsaved changes.
Related guides
Part of the Admin Portal Guide · Section: Agents