Assign a Patch (Replace Existing List)
What this guide covers
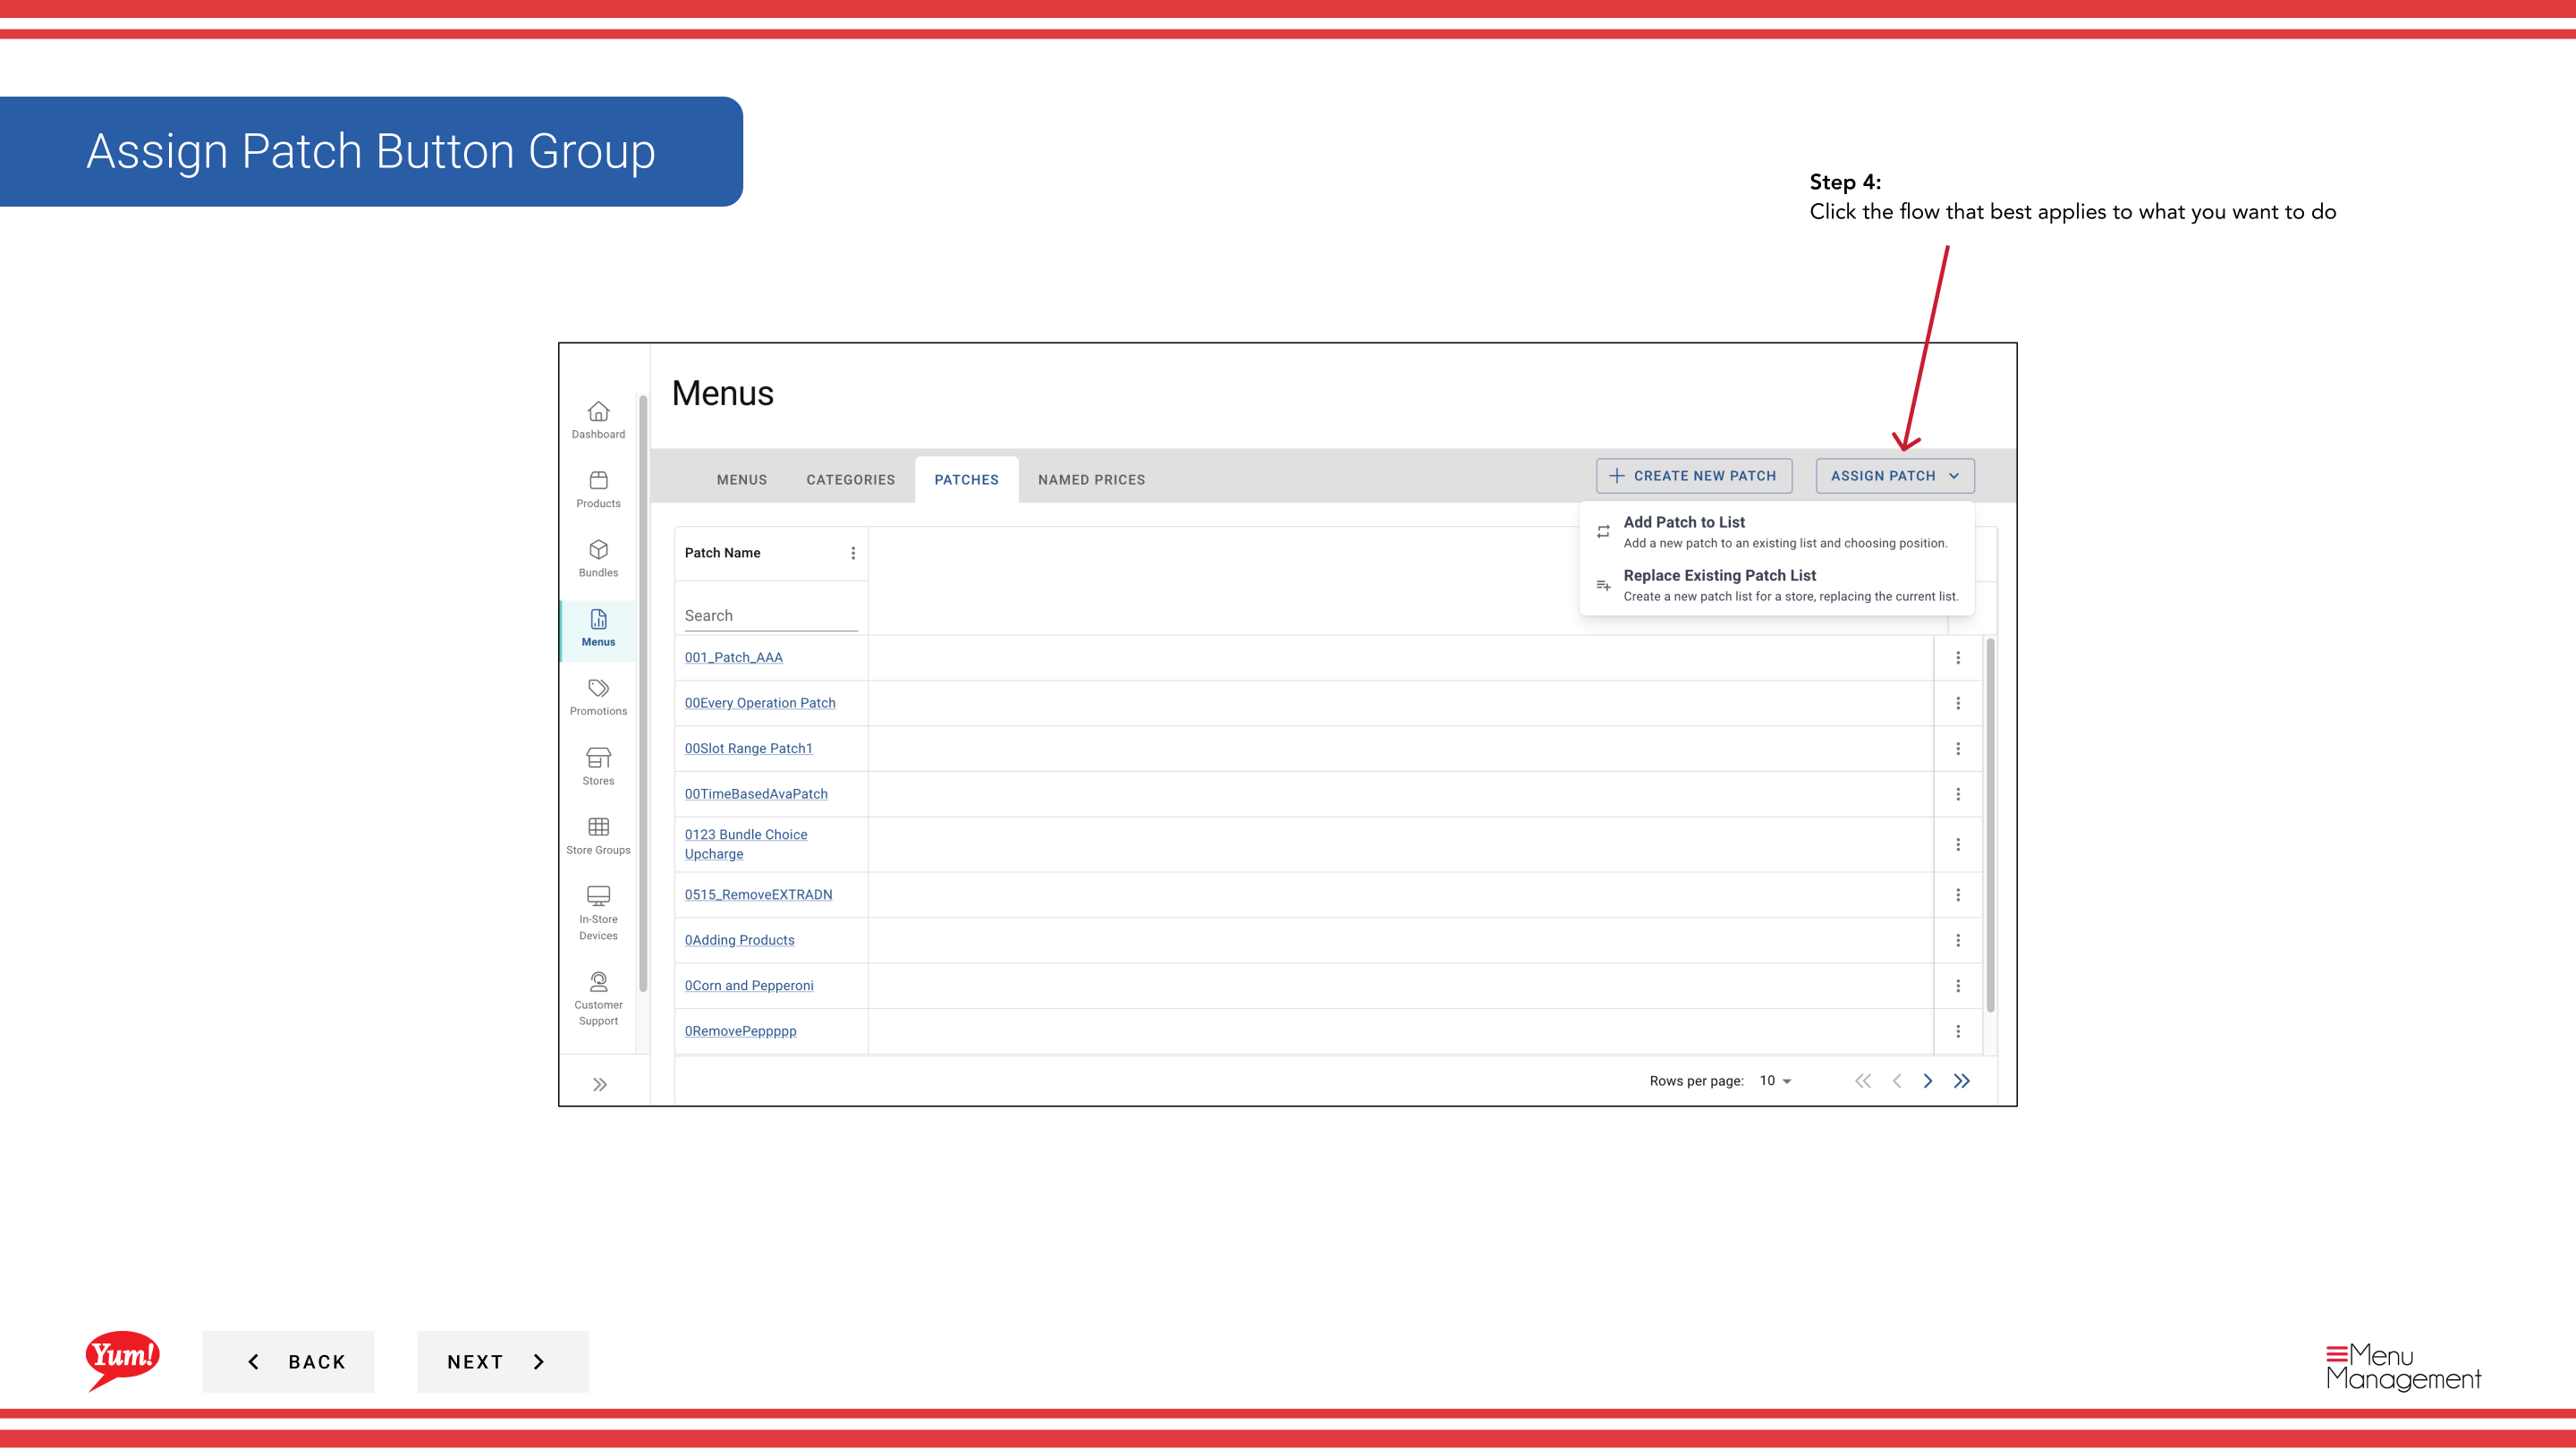
Replaces a store's entire patch list with a new single patch, removing any previously assigned patches. Use this when you need a full reset of patches for a store or channel.
Steps
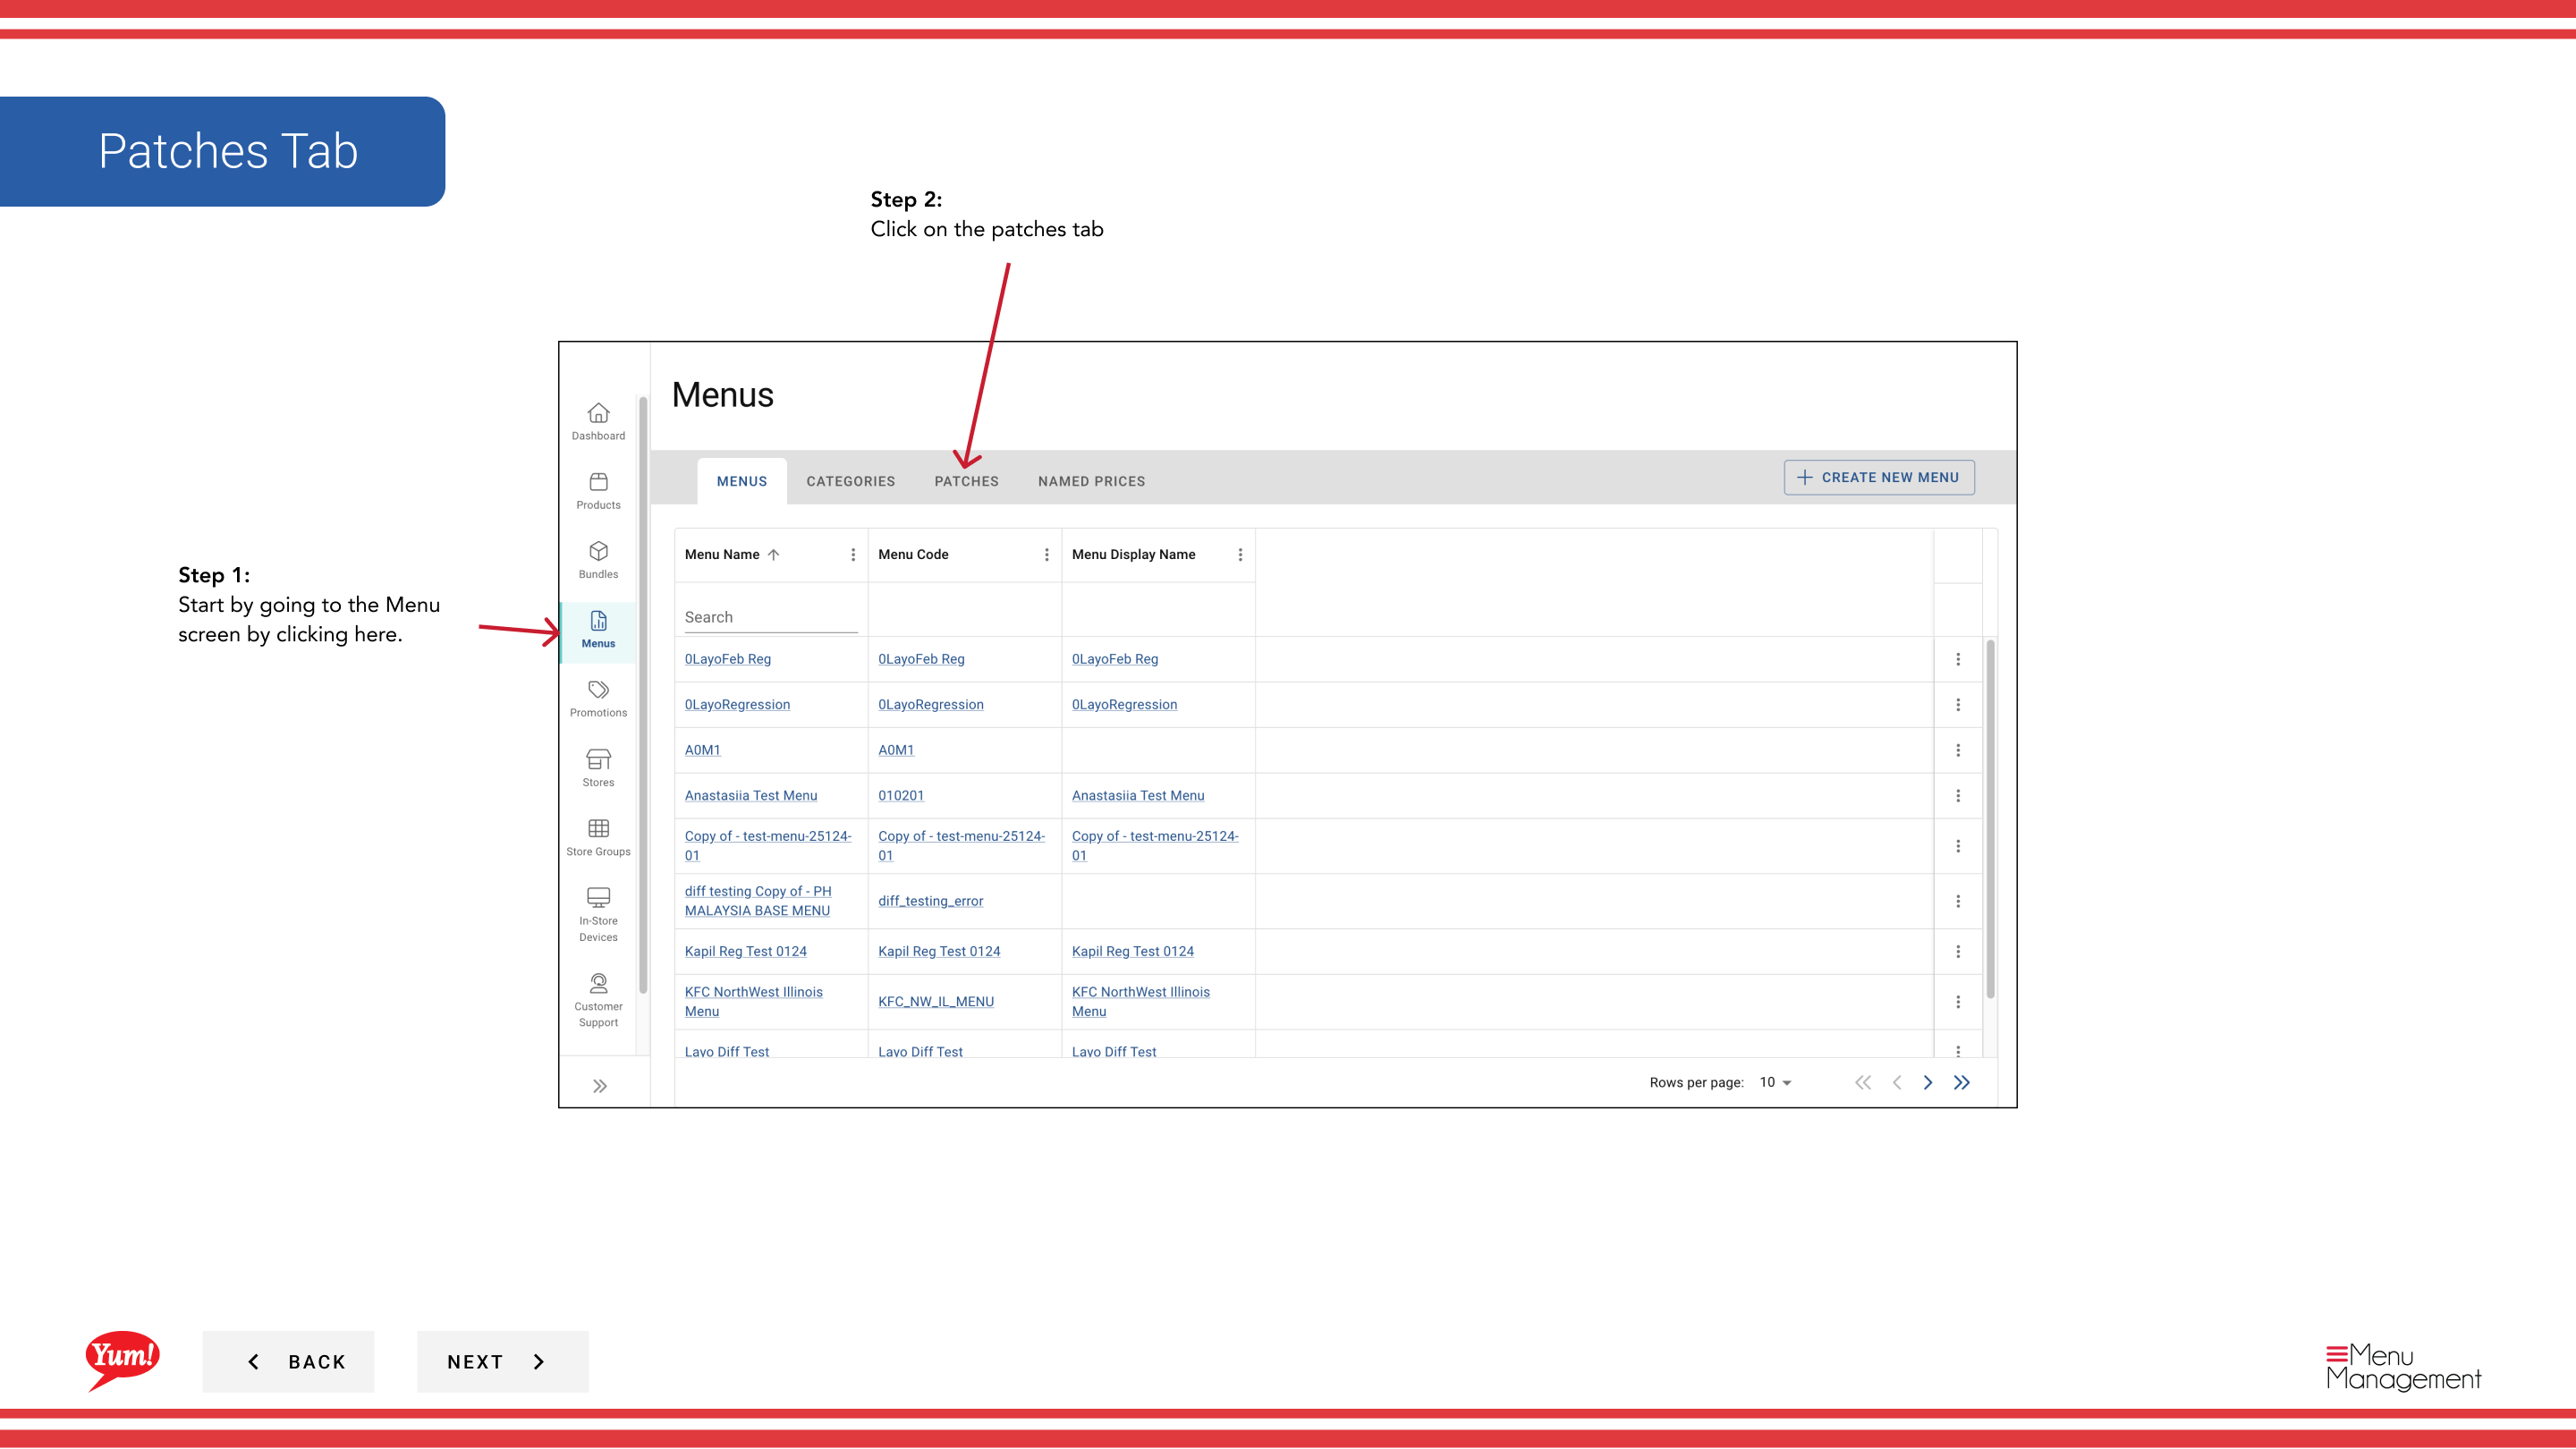
Step 1: Navigate to the Menus section using the left-hand navigation menu.
Step 2: Click on the Patches tab to view all patches.
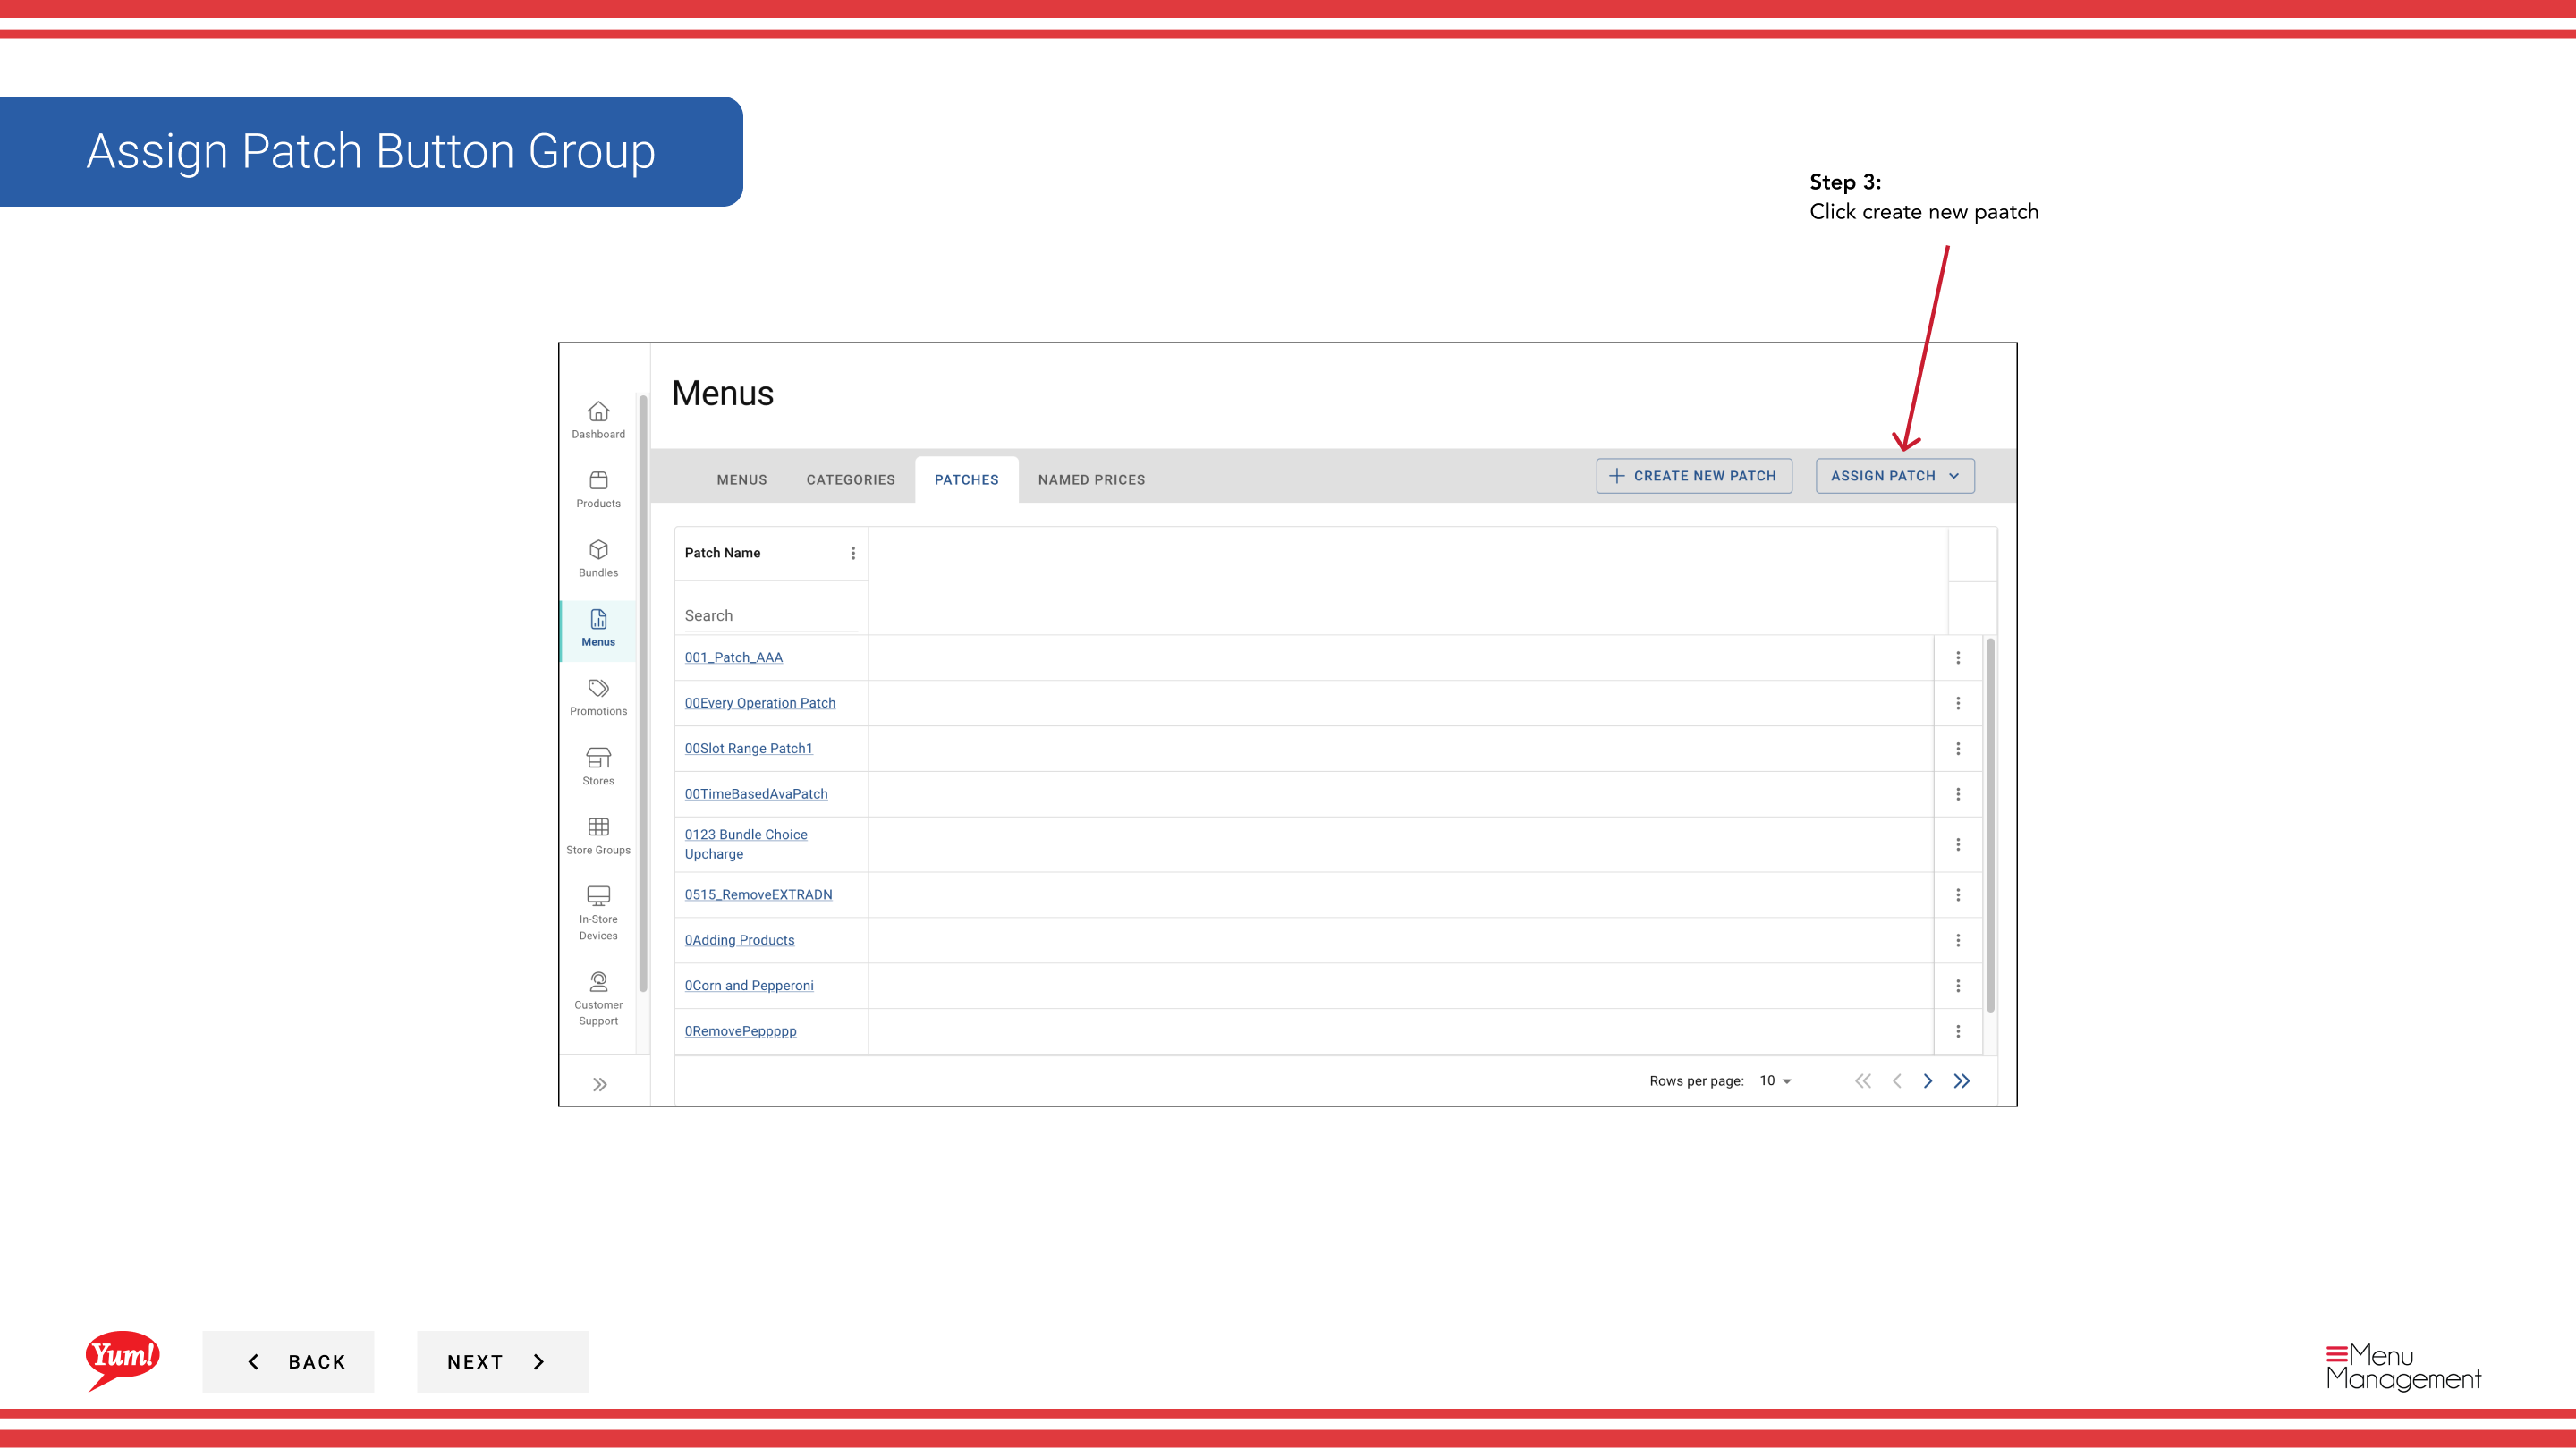
Step 3: Click the Create New button to begin a new patch assignment.
Step 4: Select Replace Existing List to replace the store's patch list entirely.
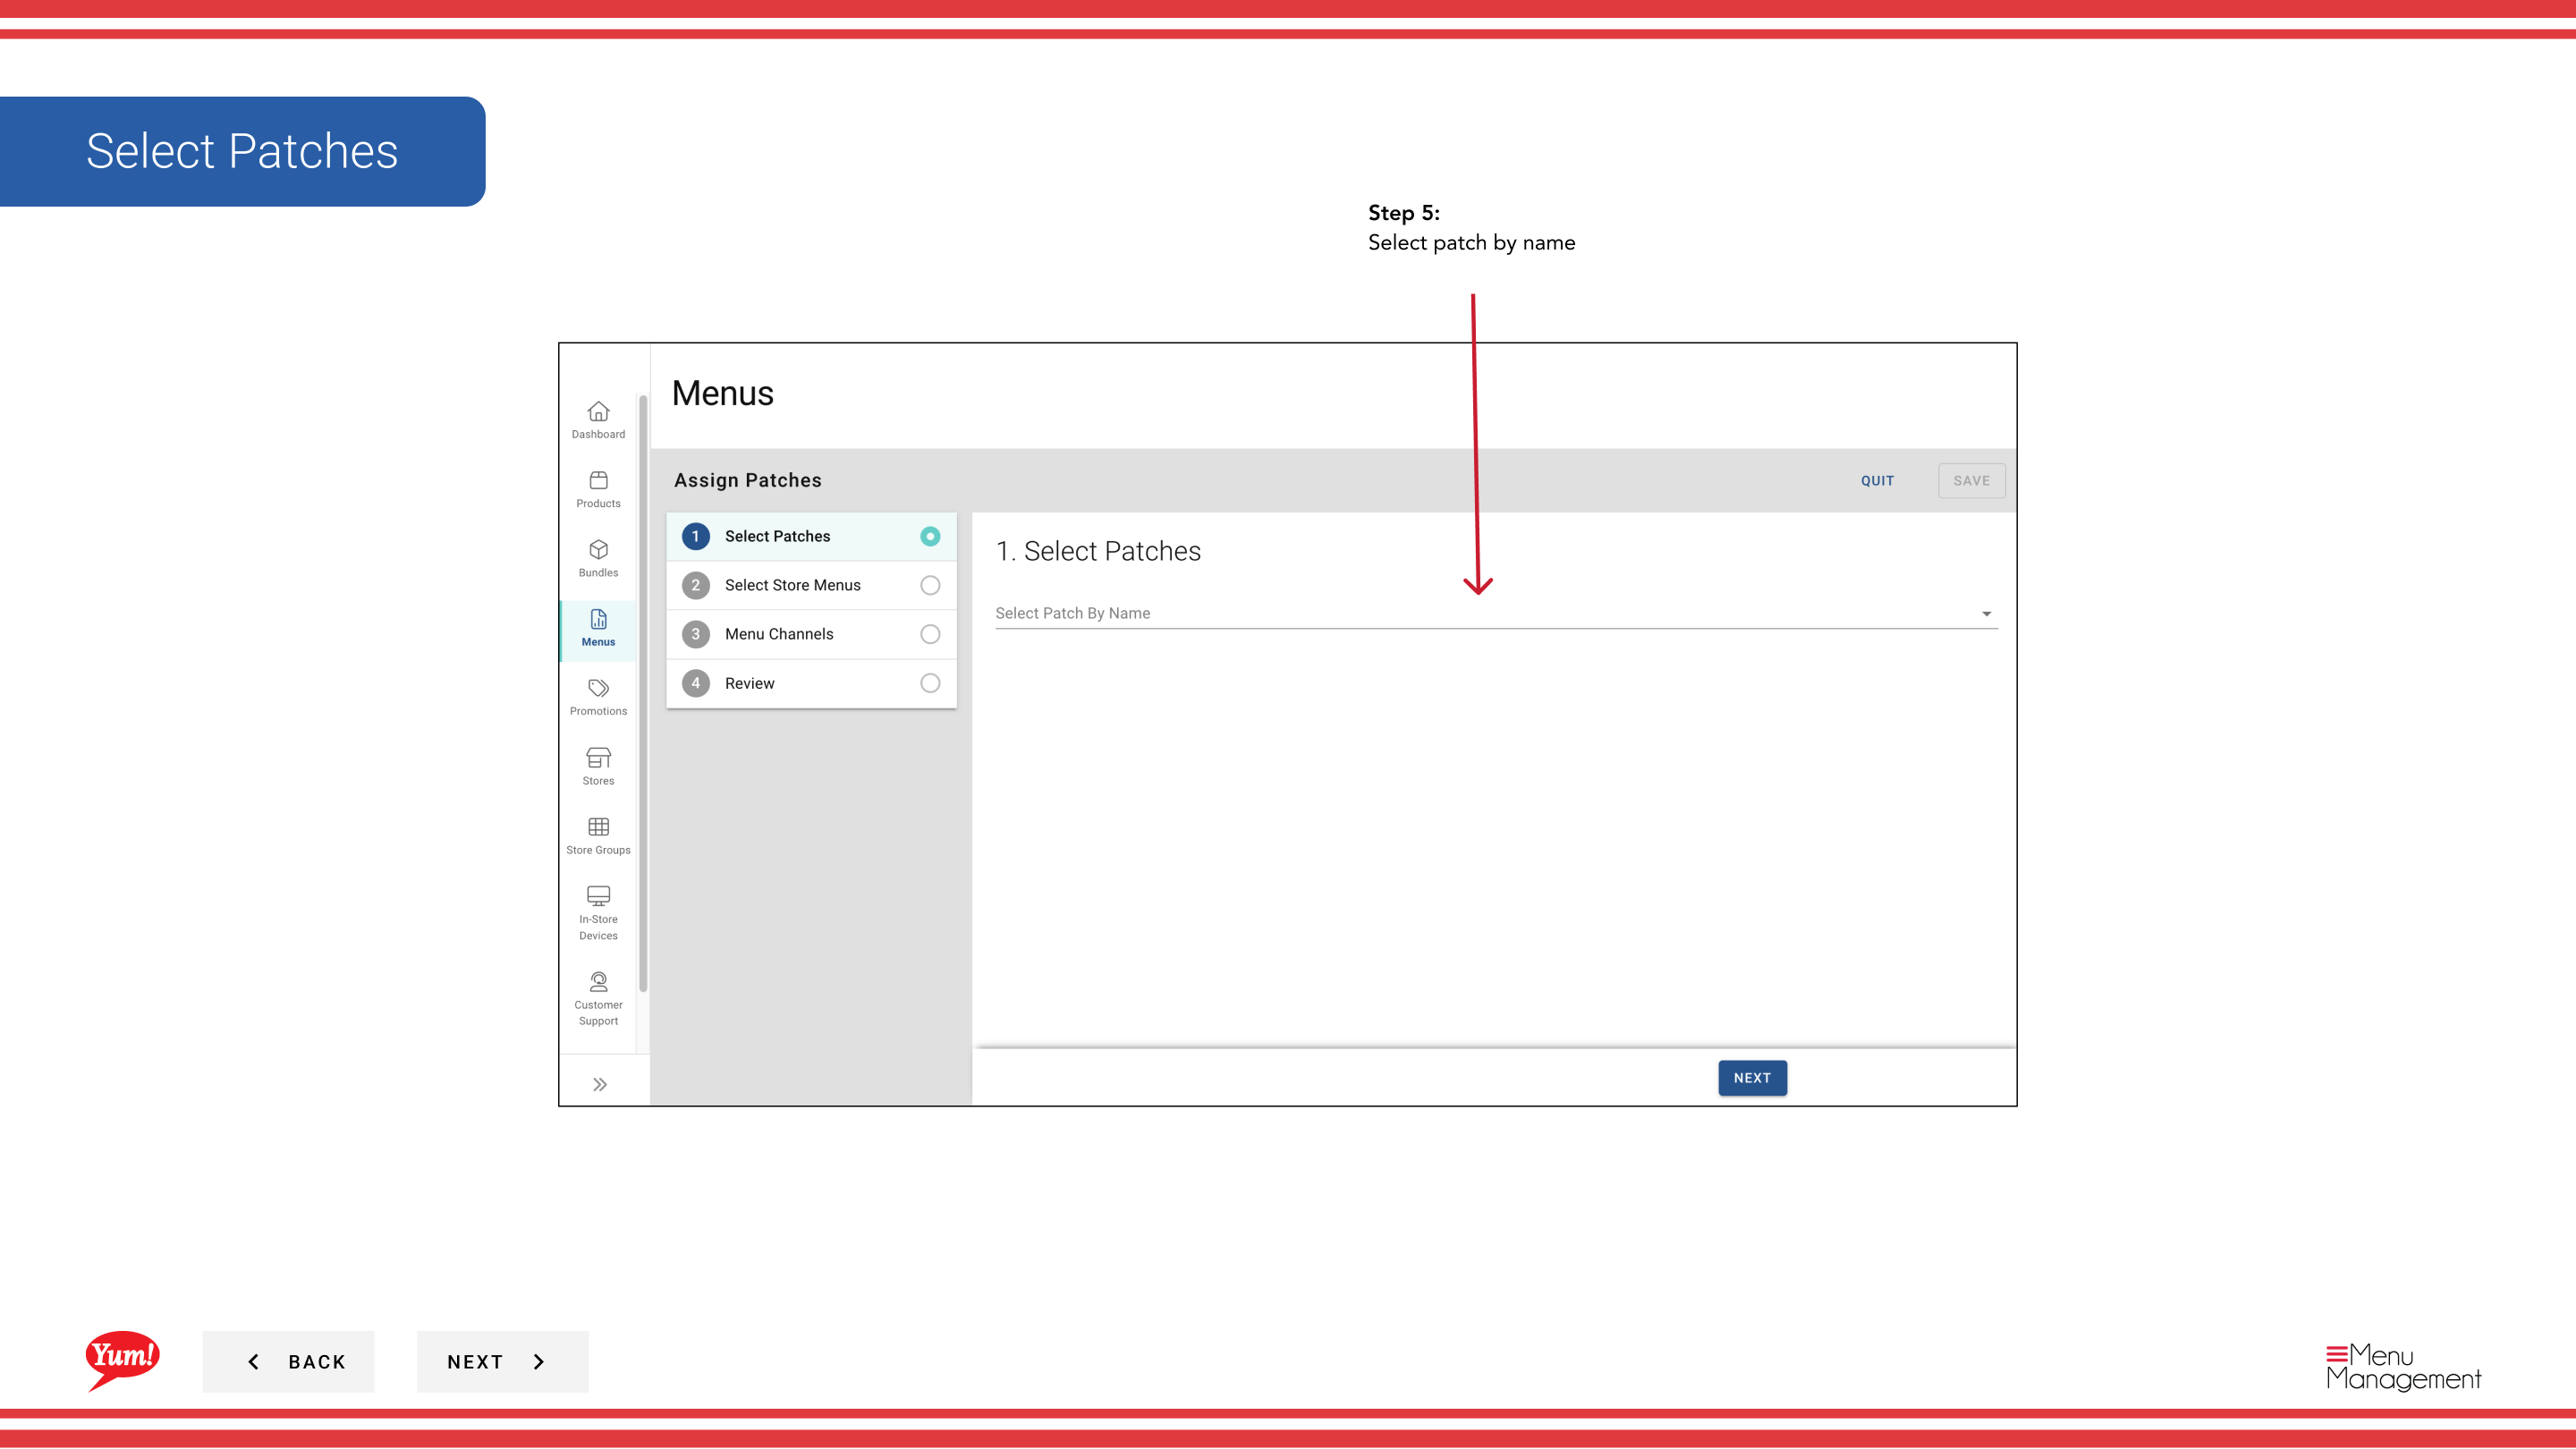
Step 5: Select the Patch you want to assign from the dropdown. This patch will replace all currently assigned patches.
| Field | What to enter | Notes |
|---|---|---|
| Patch * | Select from the list of available patches | Choose the patch that will be the only patch on the selected stores. All previous patches will be removed. |
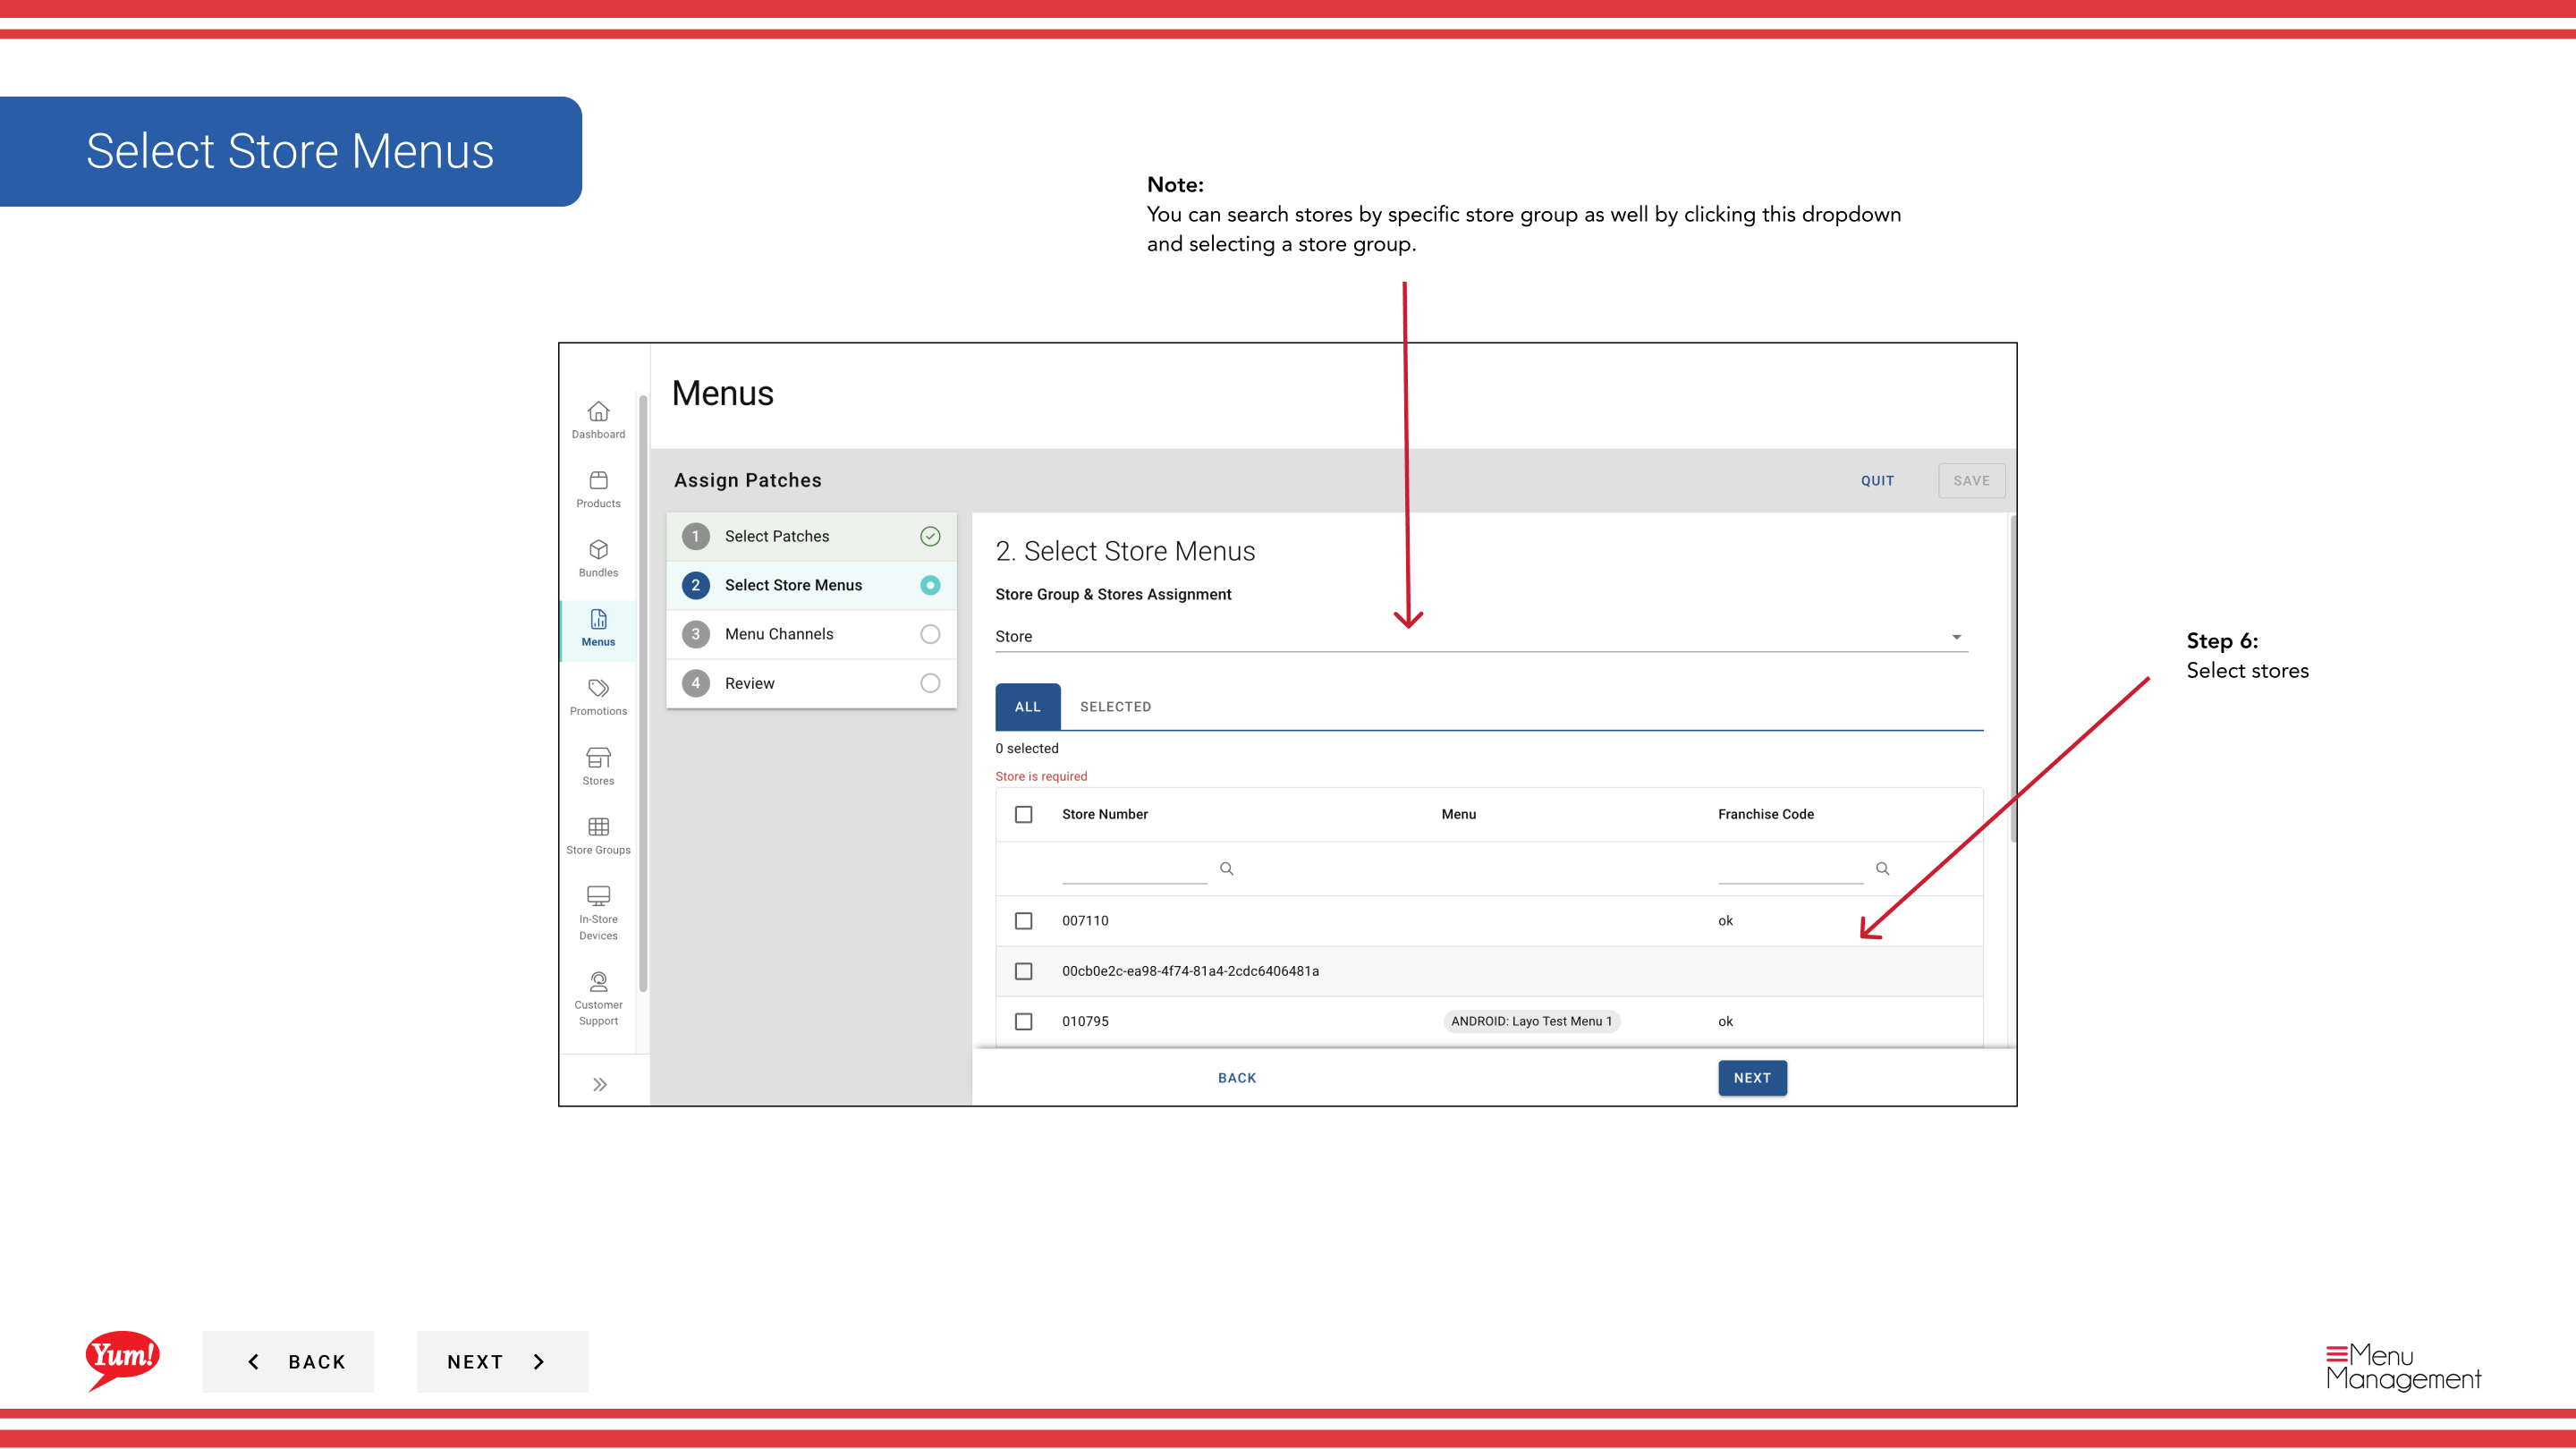
Step 6: Select the Stores that will receive this new patch list. You can search by store name or select by store group using the dropdown filter.
| Field | What to enter | Notes |
|---|---|---|
| Stores * | Select one or more stores | Use search to find stores, or click the dropdown to select entire store groups. Only selected stores will have their patch list replaced. |
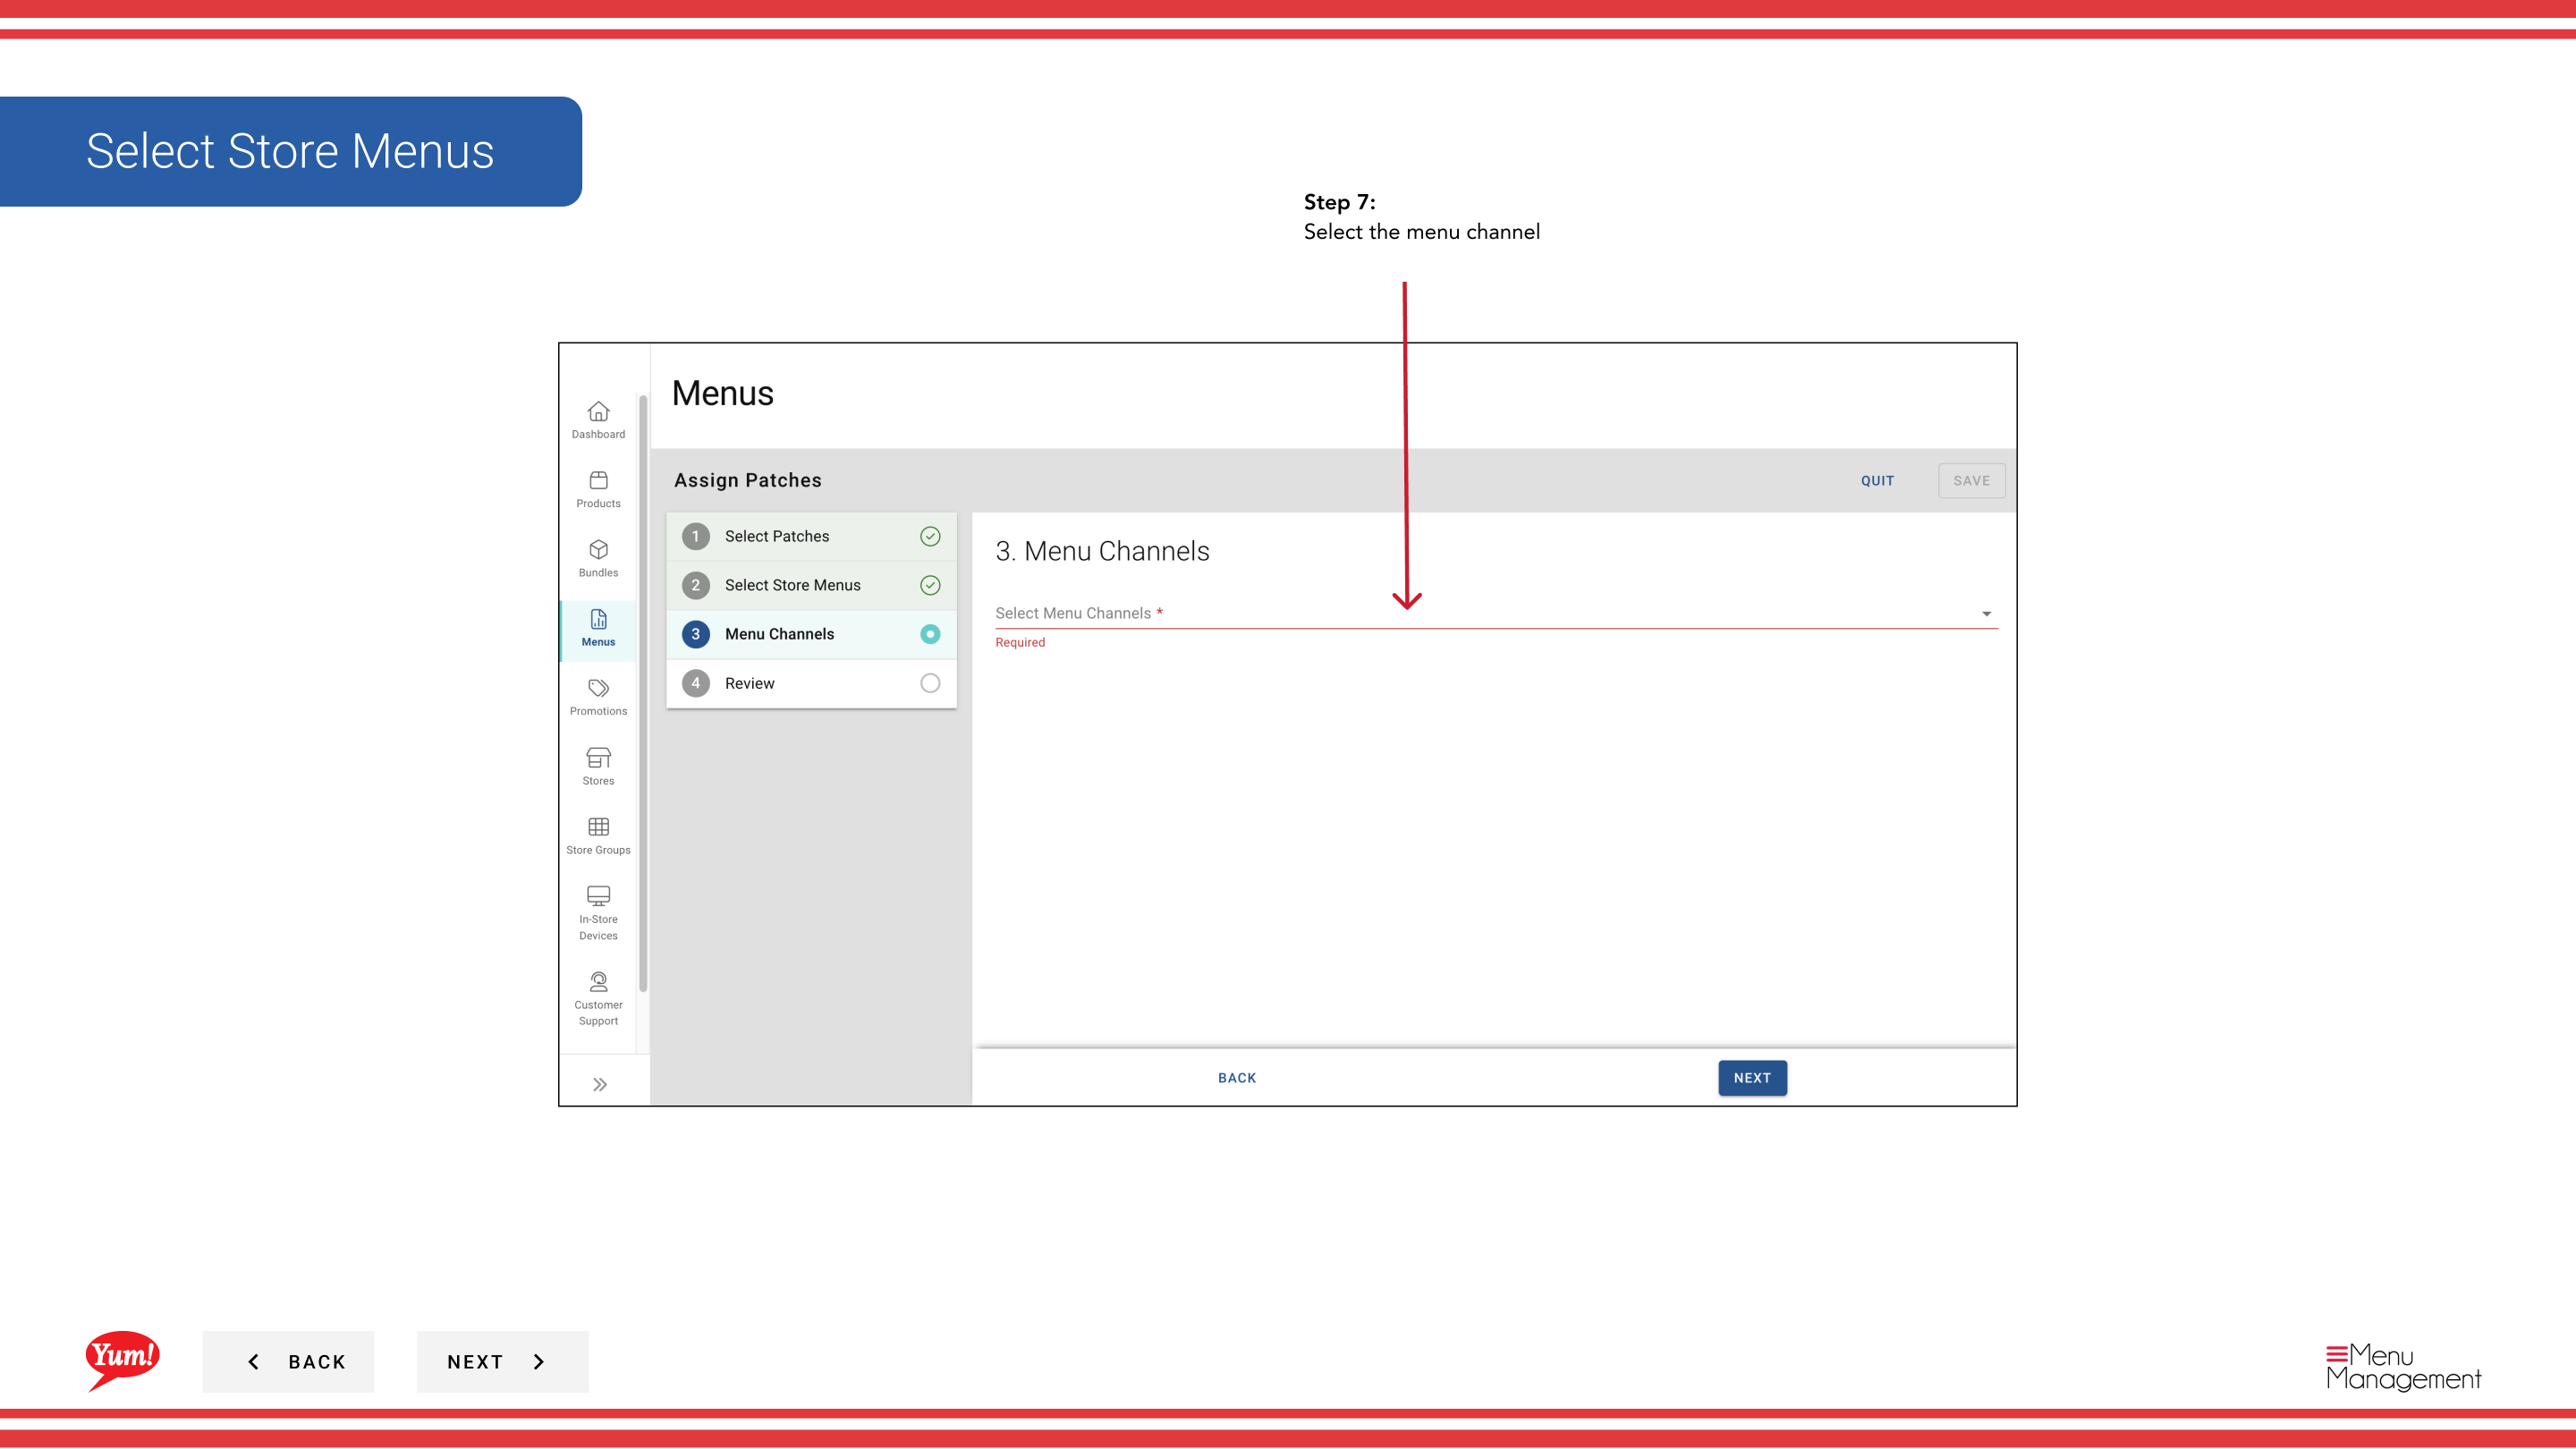
Step 7: Select the Channel where this patch replacement applies.
| Field | What to enter | Notes |
|---|---|---|
| Channel * | Select the ordering channel | e.g., "Web", "Mobile", "Delivery Platform". The patch will only be assigned on the selected channel. |
Step 8: Review your selections on the Summary page to confirm the stores and patch, then click Save to replace the patch lists.
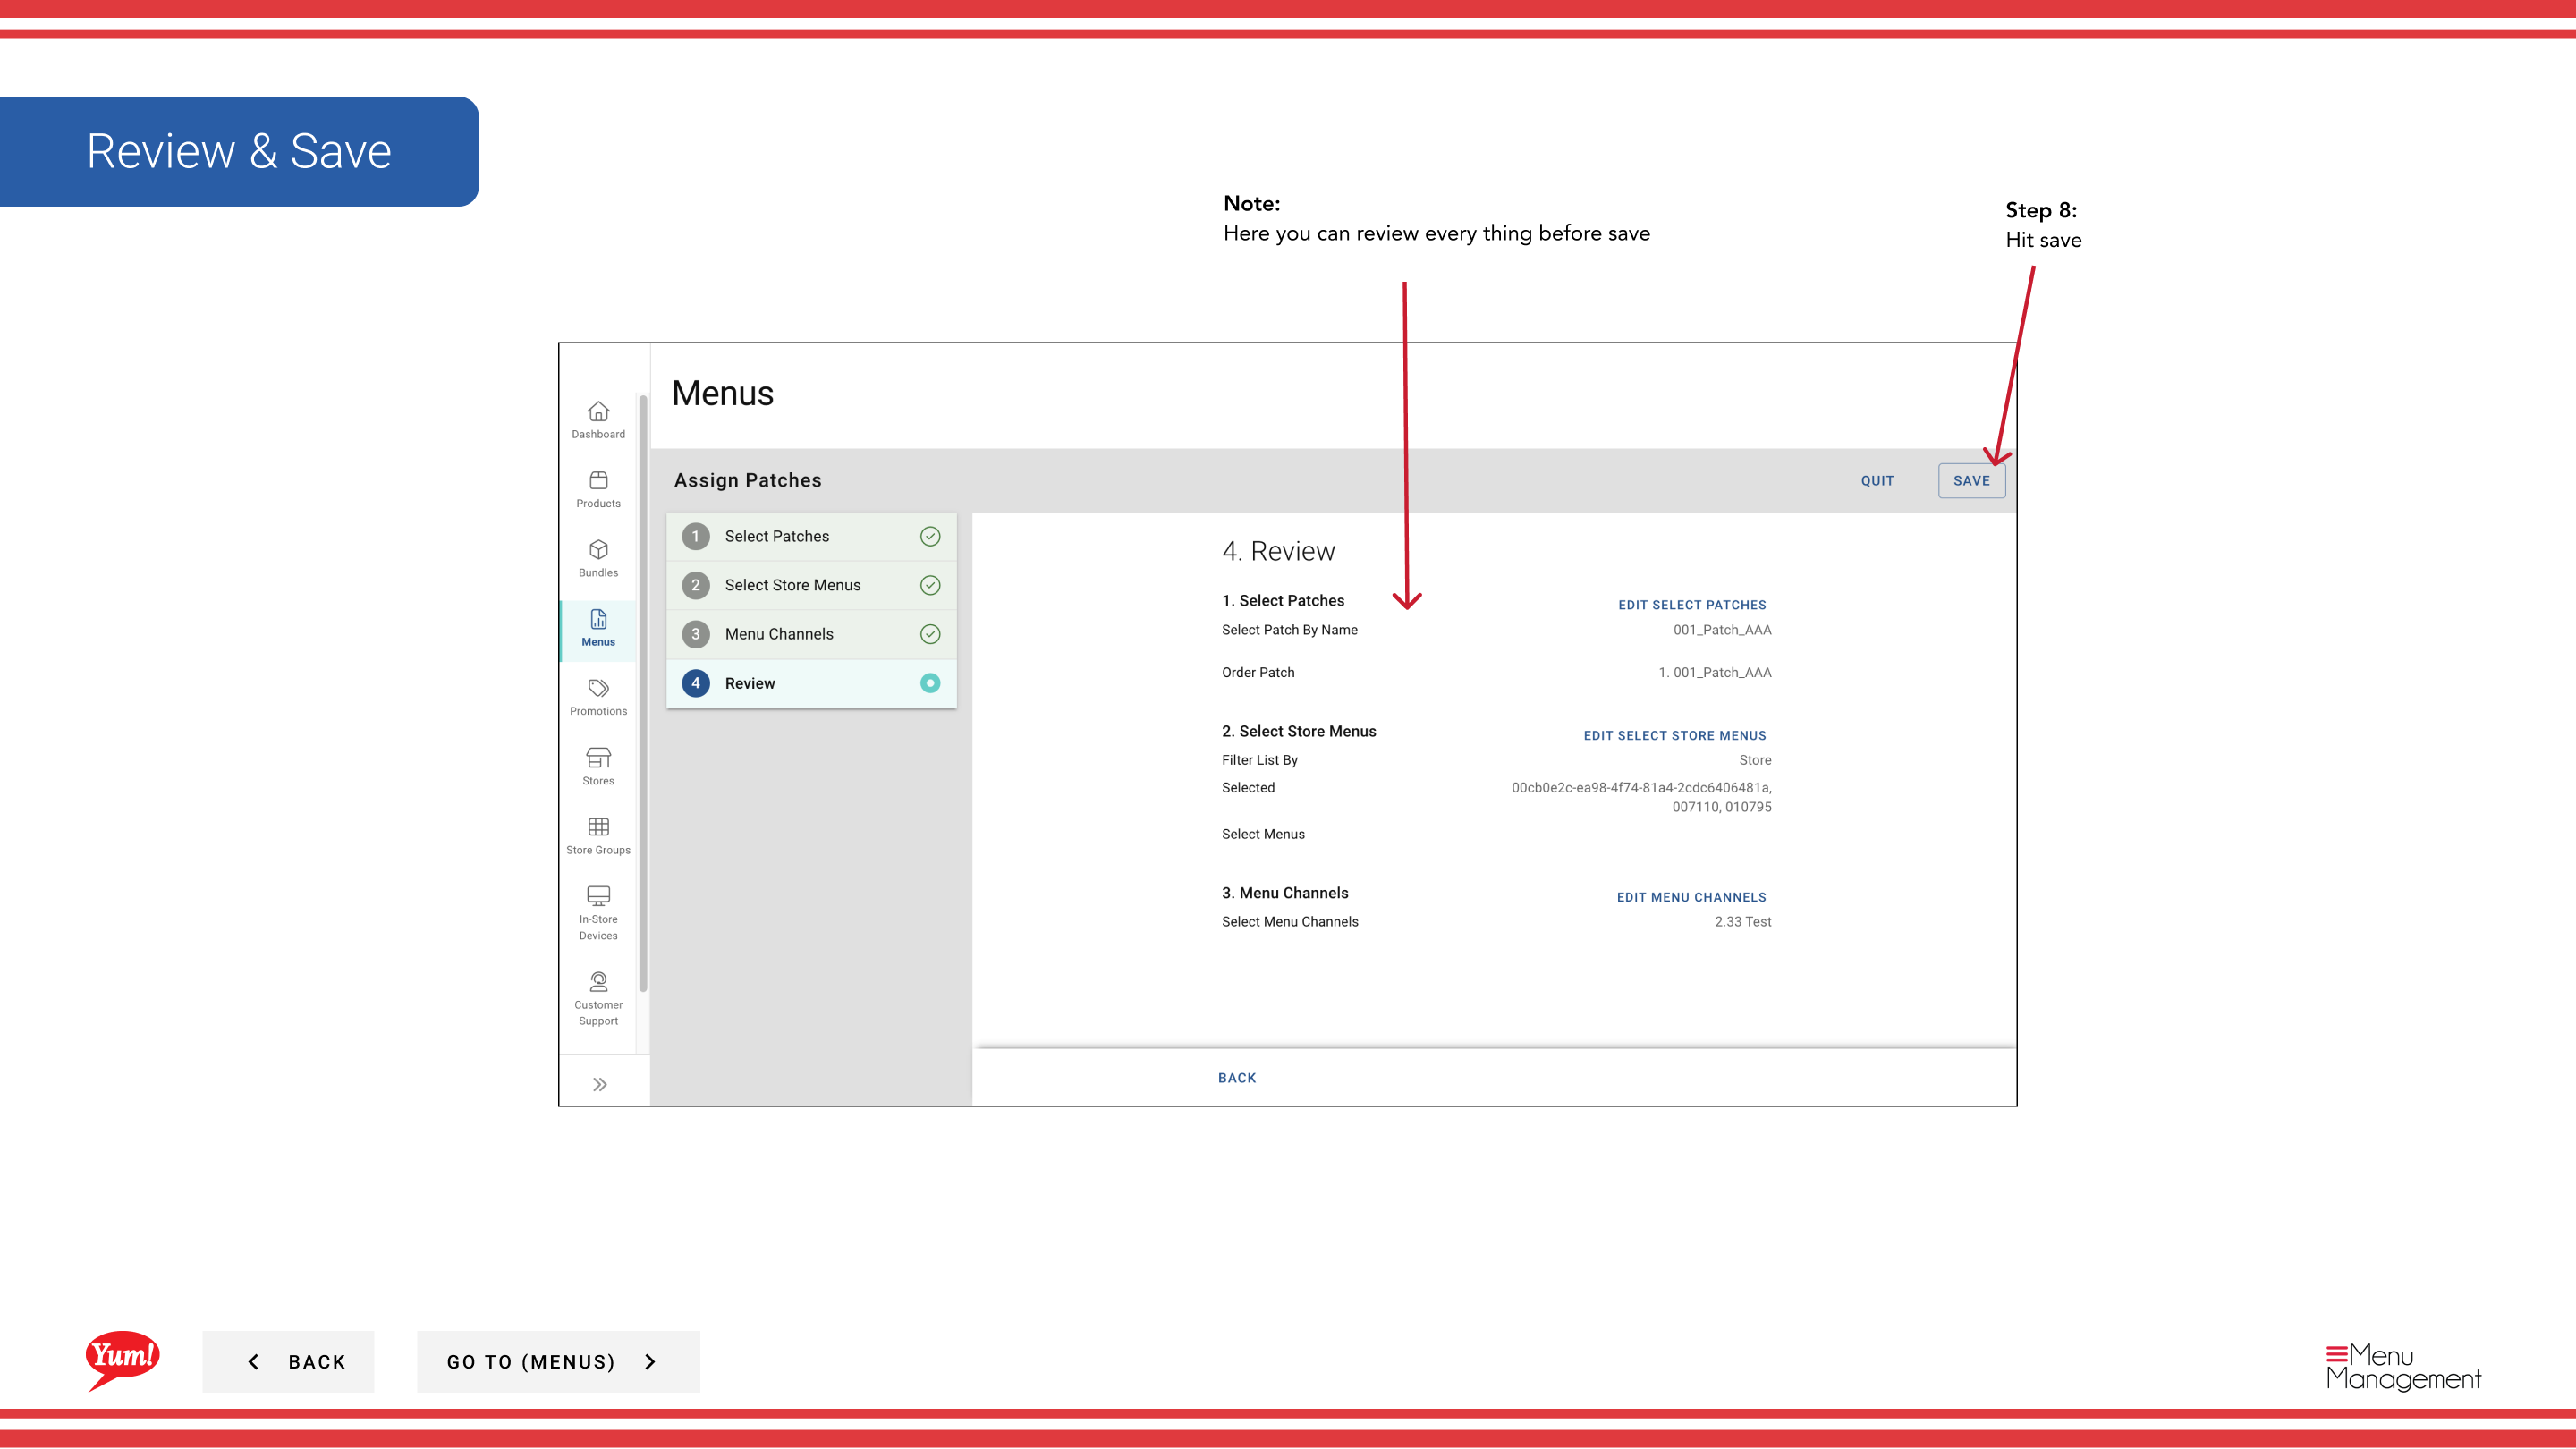
Replacing a patch list will remove all previously assigned patches from the selected stores on this channel. Any overrides from the old patches will no longer apply. This action cannot be undone — if you need the old patches back, you must reassign them manually.
Related guides
- Assign a Patch (Add to Patch List) — Add a patch without removing existing ones
- Edit a Patch — Update a patch before assigning it
- Create a Patch — Create a new patch to assign
Part of the Admin Portal Guide · Section: Menus