Create a Category
What this guide covers
Creates a grouping label (e.g. 'Chicken', 'Sides', 'Desserts') to organize products within a menu for customers browsing the ordering interface.
Steps
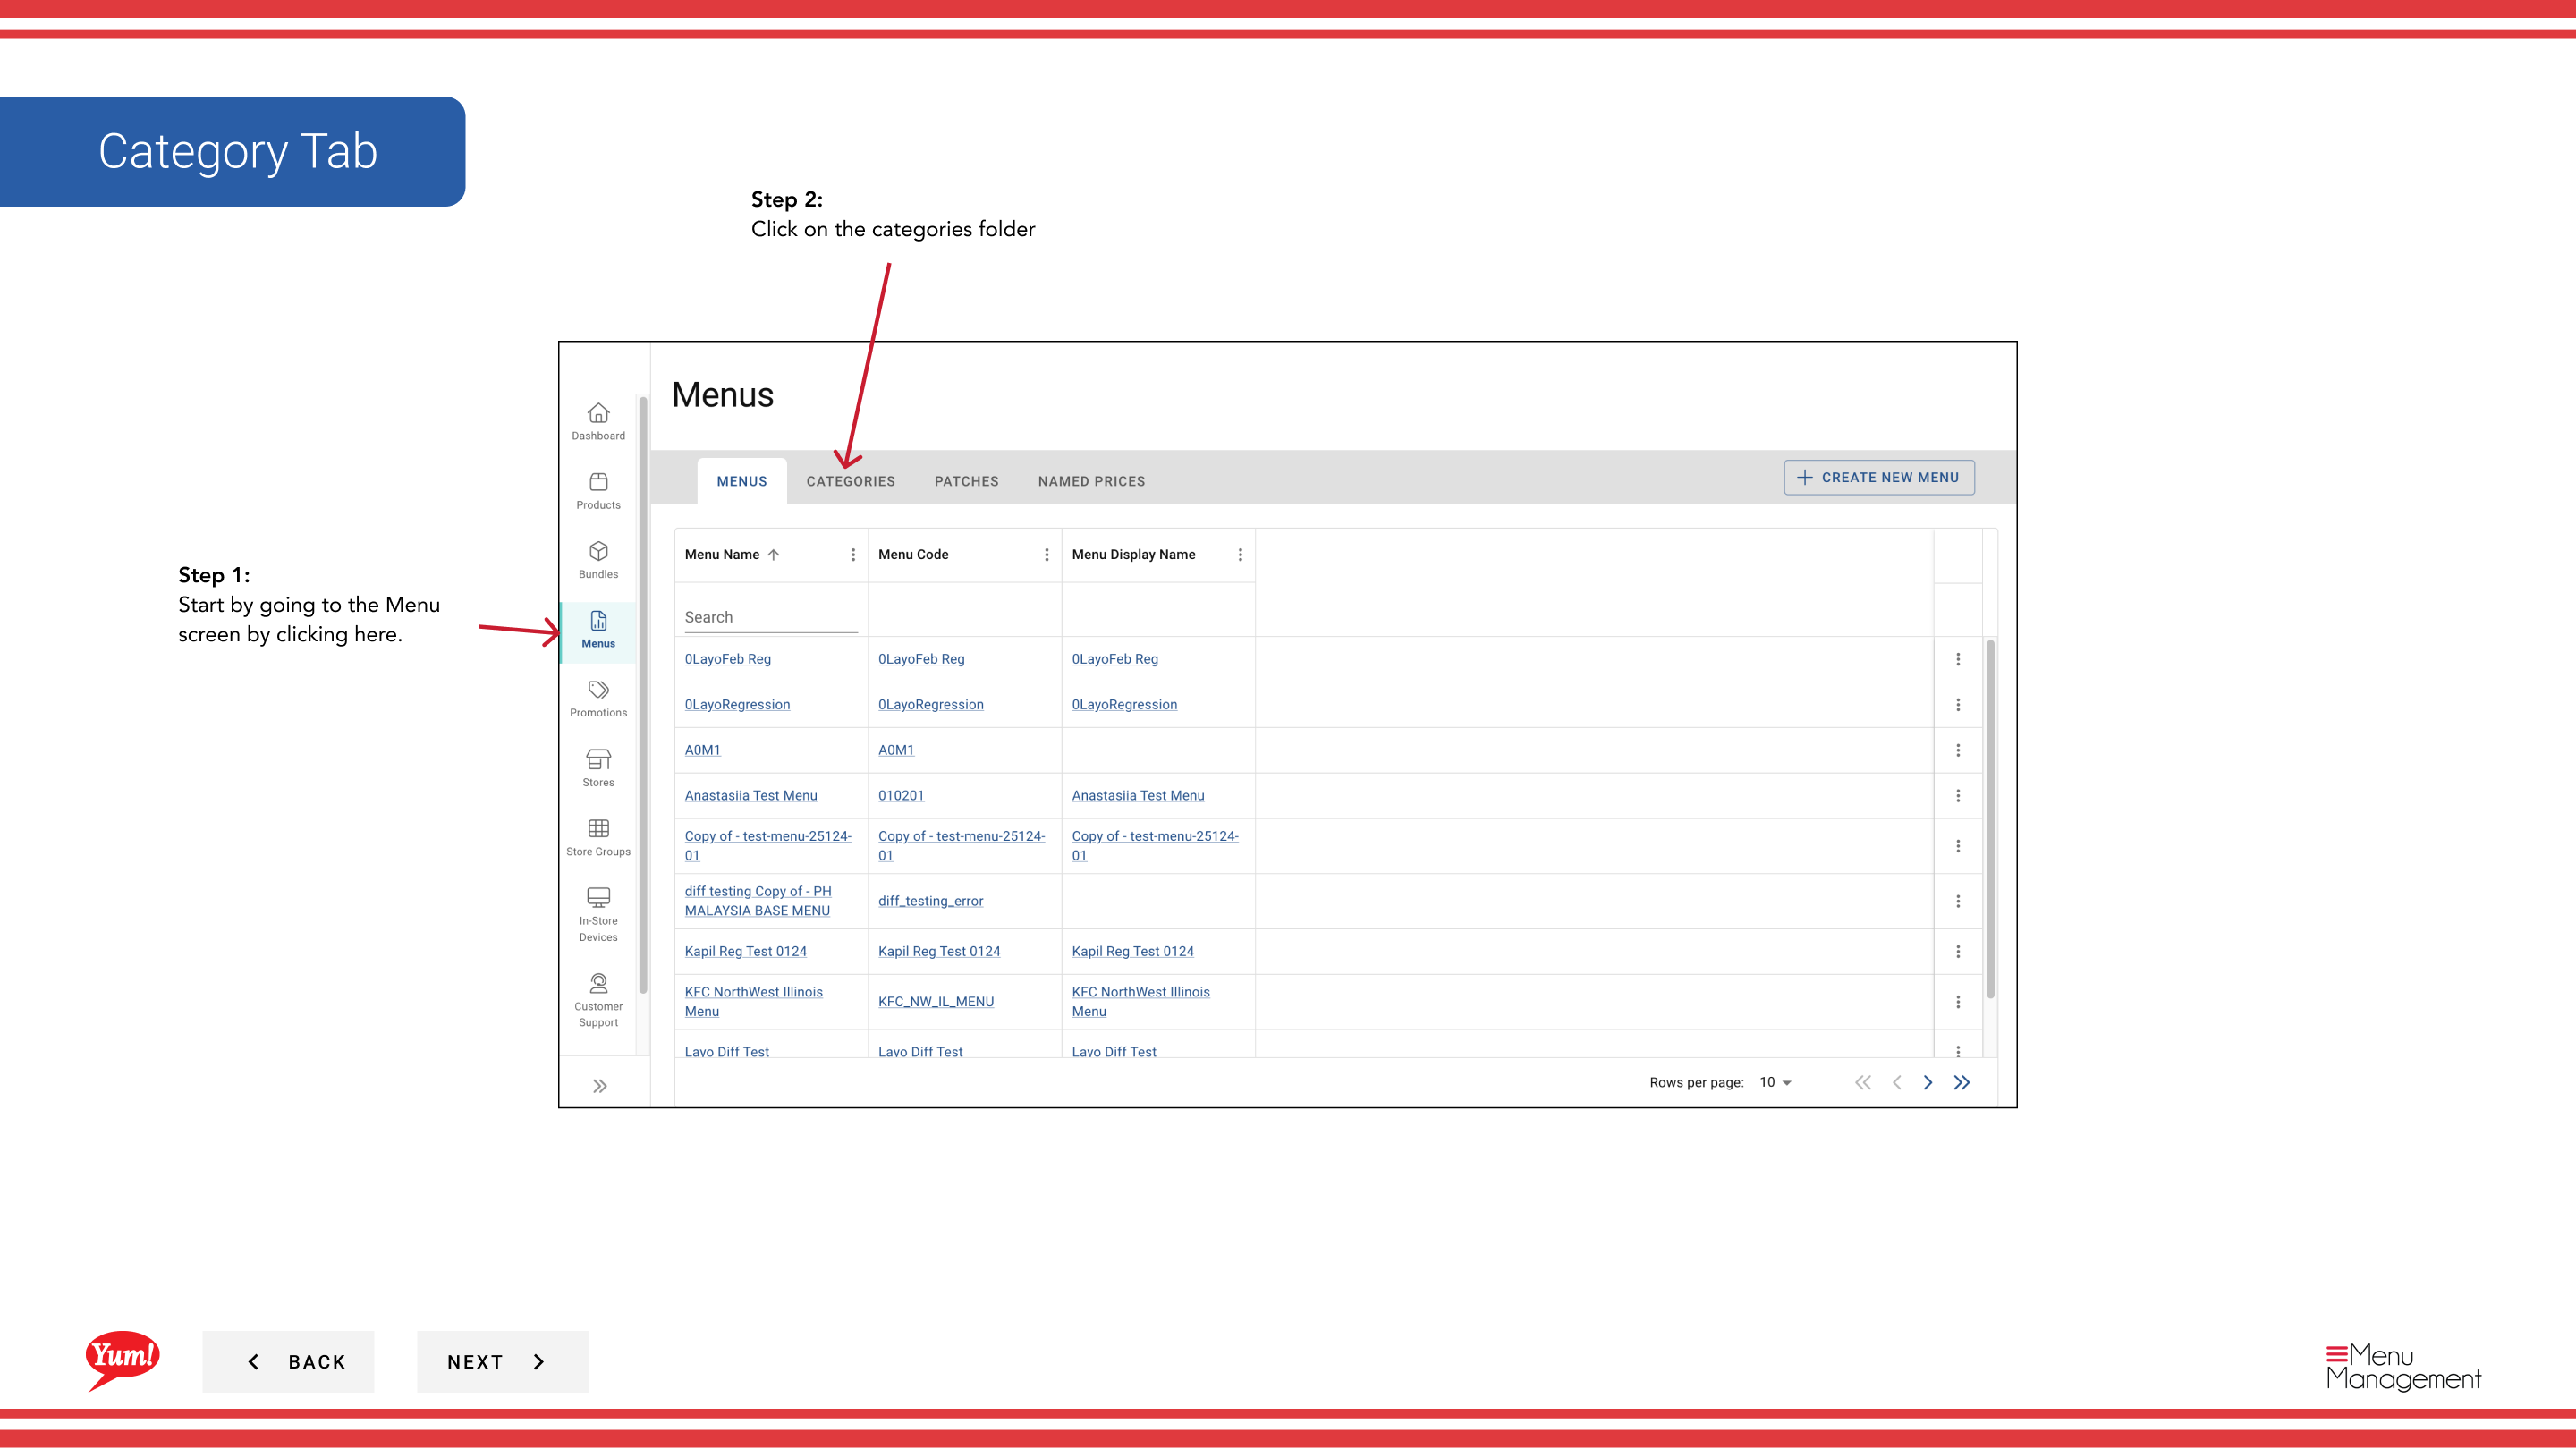
Step 1: Navigate to the Menus section using the left-hand navigation menu.
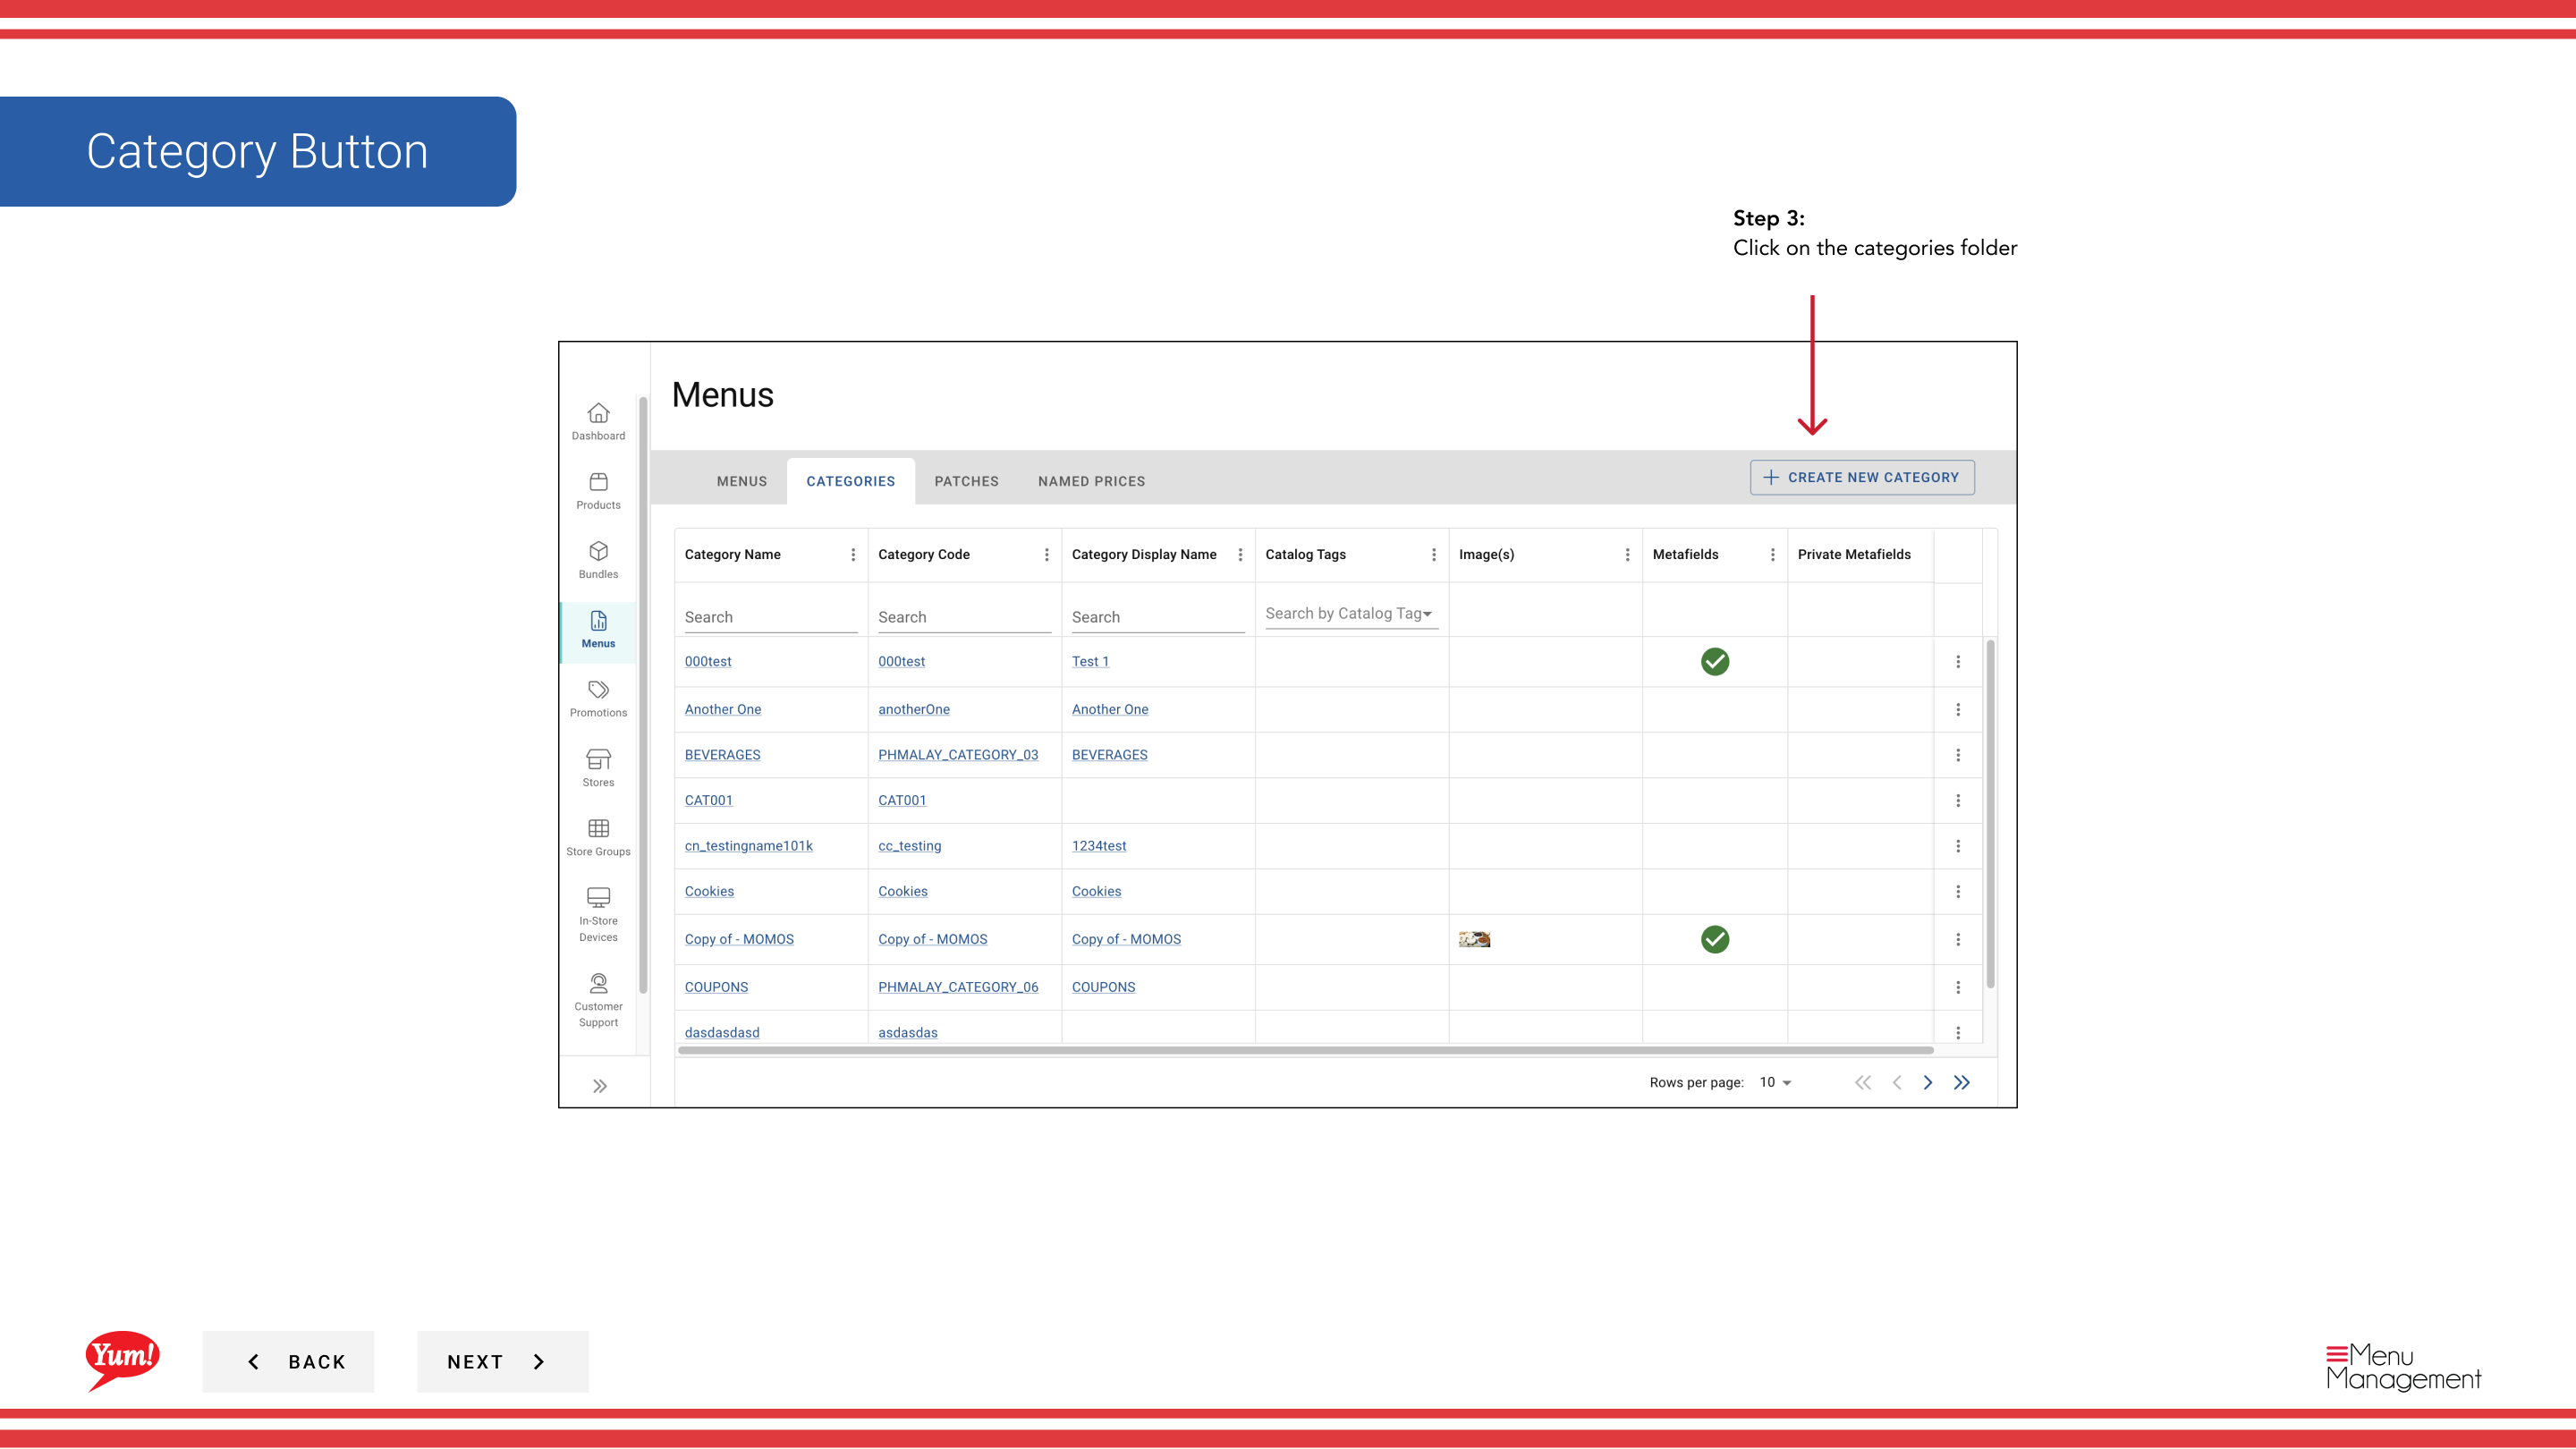
Step 2: Click on the Categories folder to view all existing categories.
Step 3: Click the Create New Category button.
Step 4: Fill in the category details. Fields marked with * are required.
| Field | What to enter | Notes |
|---|---|---|
| Category Code * | A unique identifier for this category | Use uppercase letters and hyphens — e.g., CAT-CHICKEN, CAT-SIDES. Used in system integrations. Cannot be changed after creation. |
| Category Name * | The display name for this category | e.g., "Chicken", "Sides", "Desserts". This is what customers see when browsing the menu. |
| Display Name | Optional alternate name for specific channels | Use a shorter label if needed on certain platforms (e.g., "Drinks" instead of "Beverages"). |
| Description | Optional internal notes about this category | e.g., "All grilled chicken items", "Available during breakfast hours". Visible only to your team. |
| Available Hours | Optional time window for this category | Restrict availability to specific hours — e.g., "6:00 AM - 11:00 AM" for breakfast items. Leave blank for all-day availability. |

Step 5: Once you have filled in the details, click Create Category to save.
tip
After creating the category, you can add products to it when building or editing a menu using the Add Products/Bundles dropdown.
Related guides
- Edit a Category — Update a category's name or configuration
- Delete a Category — Remove a category from the system
- Add Metafields to a Category — Attach custom data to a category for integrations
Part of the Admin Portal Guide · Section: Menus