Create a Patch
What this guide covers
Creates a menu patch — a targeted override that modifies specific items (products, bundles, or variants) in a menu without replacing the entire menu. Commonly used for localized pricing or regional availability changes.
Steps
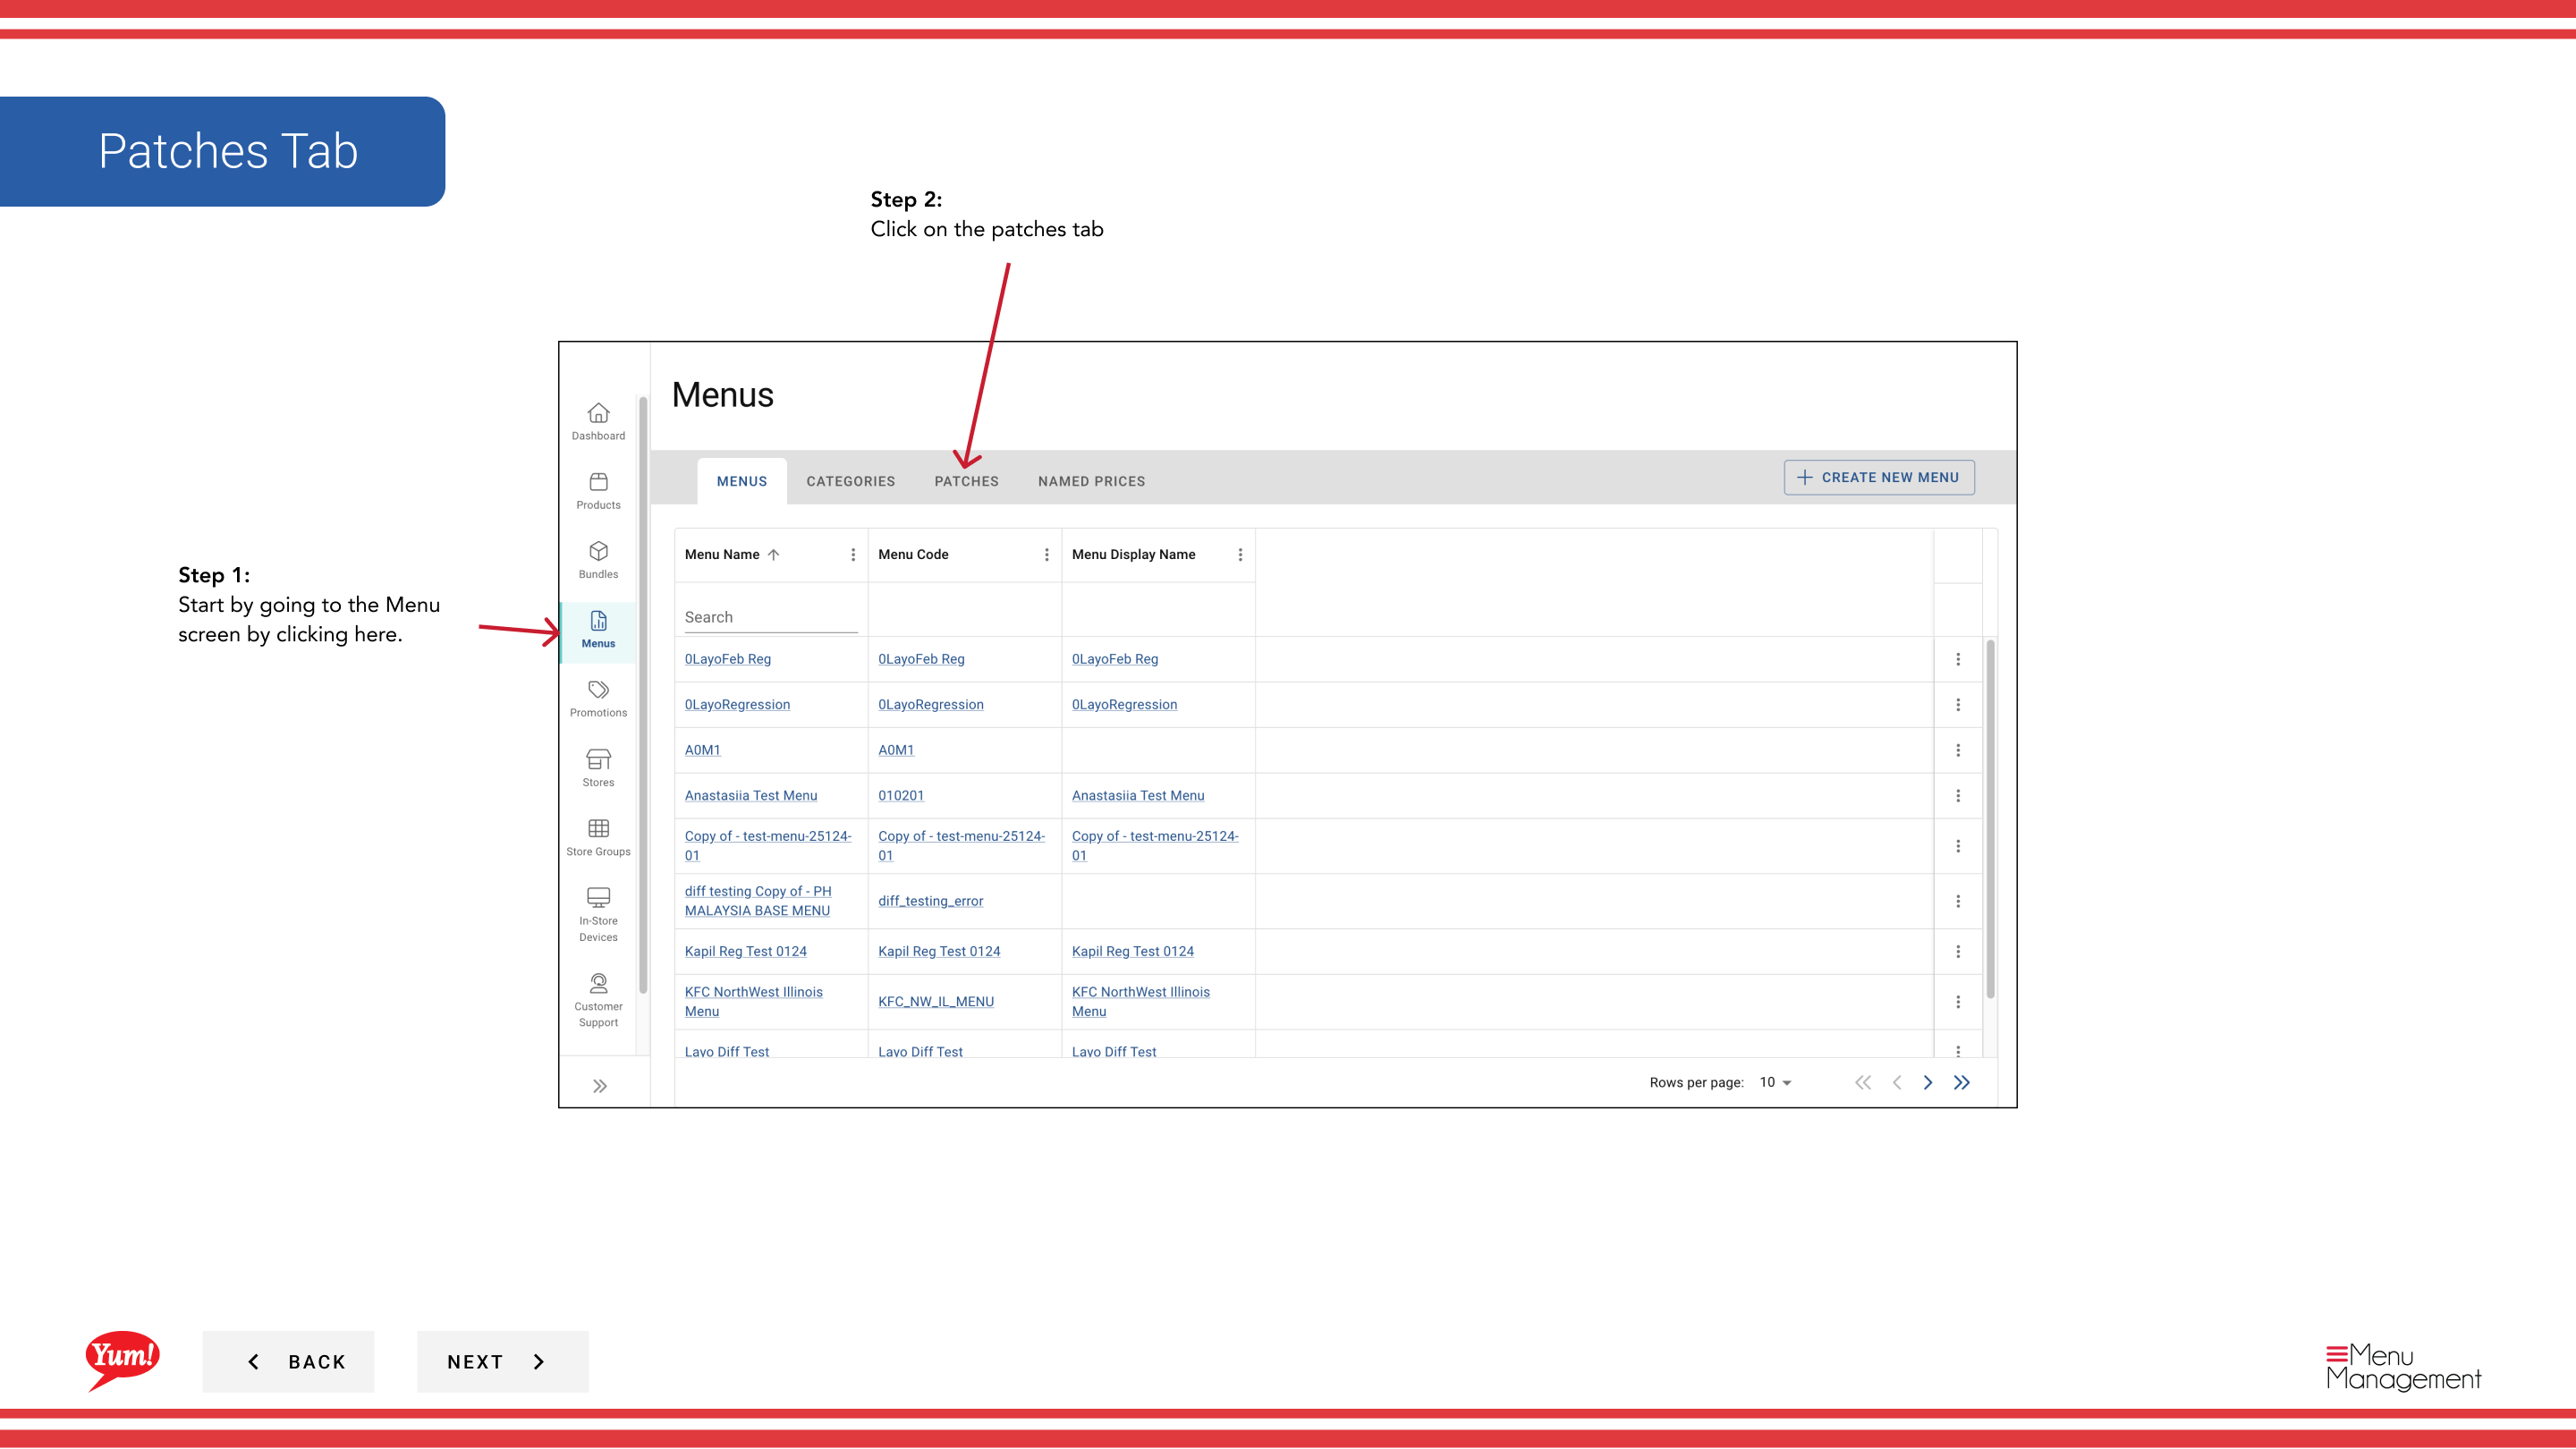
Step 1: Navigate to the Menus section using the left-hand navigation menu.
Step 2: Click on the Patches tab to view all patches.
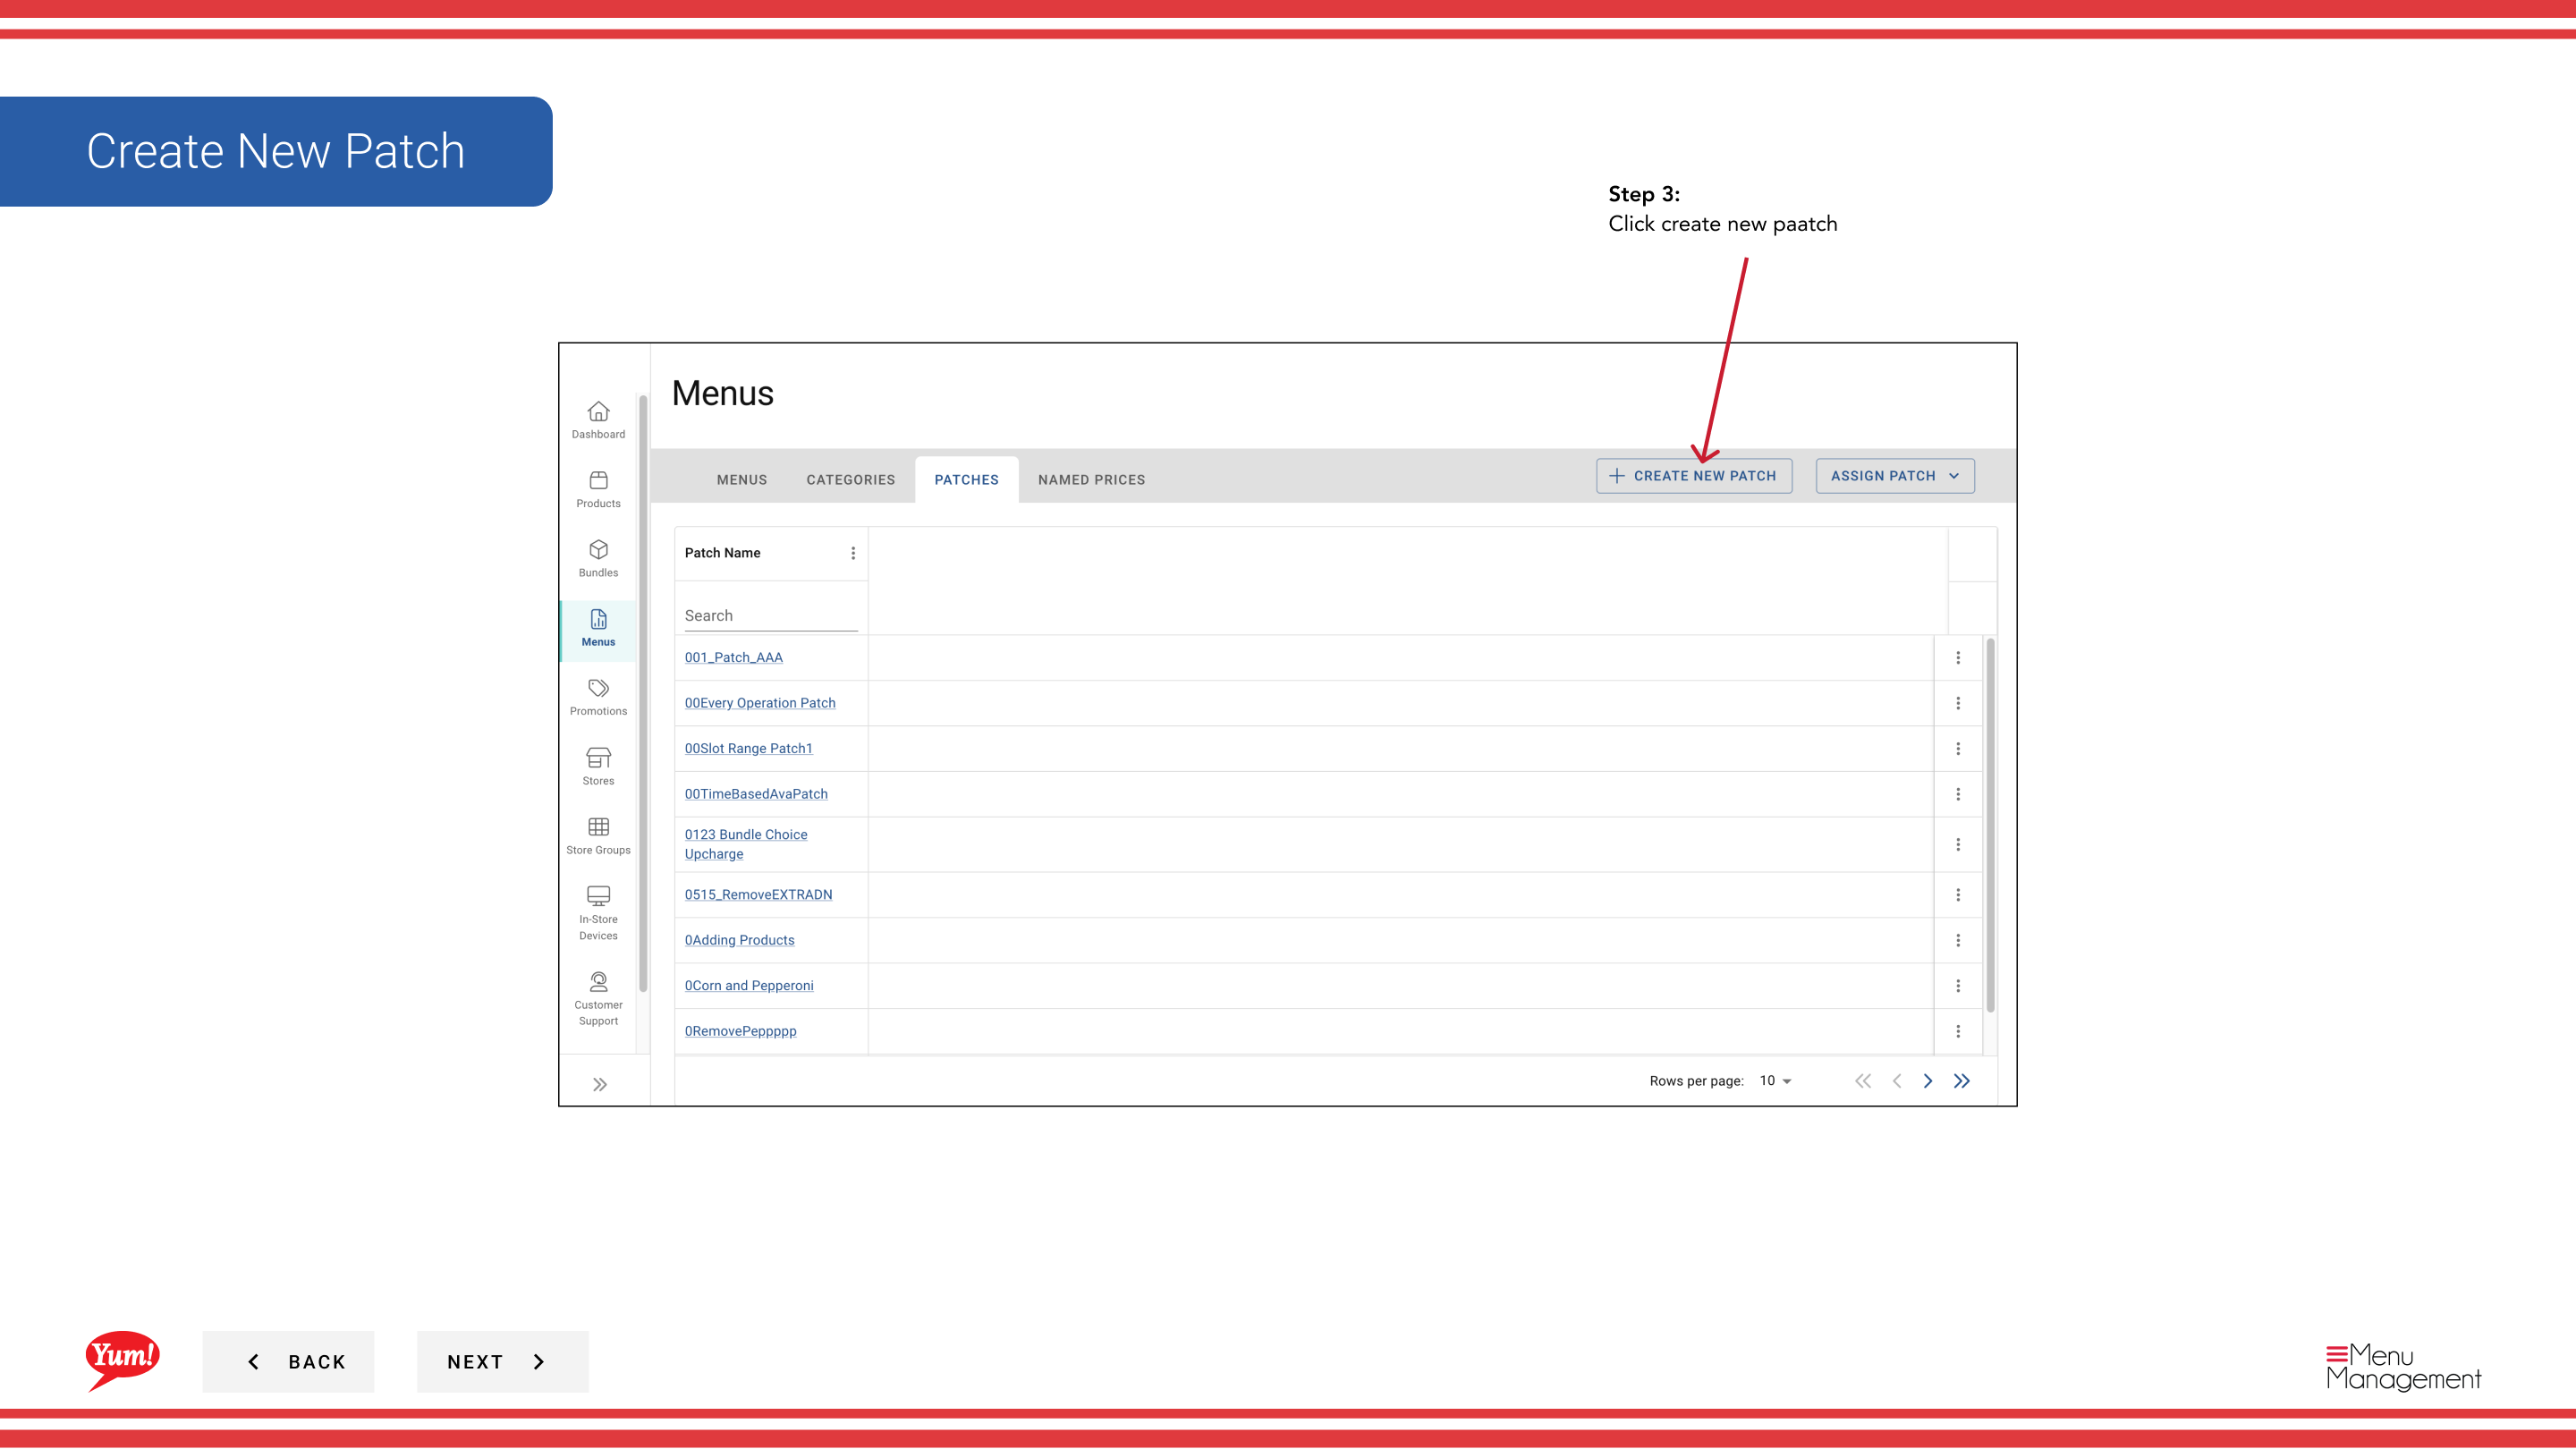
Step 3: Click the Create New Patch button.
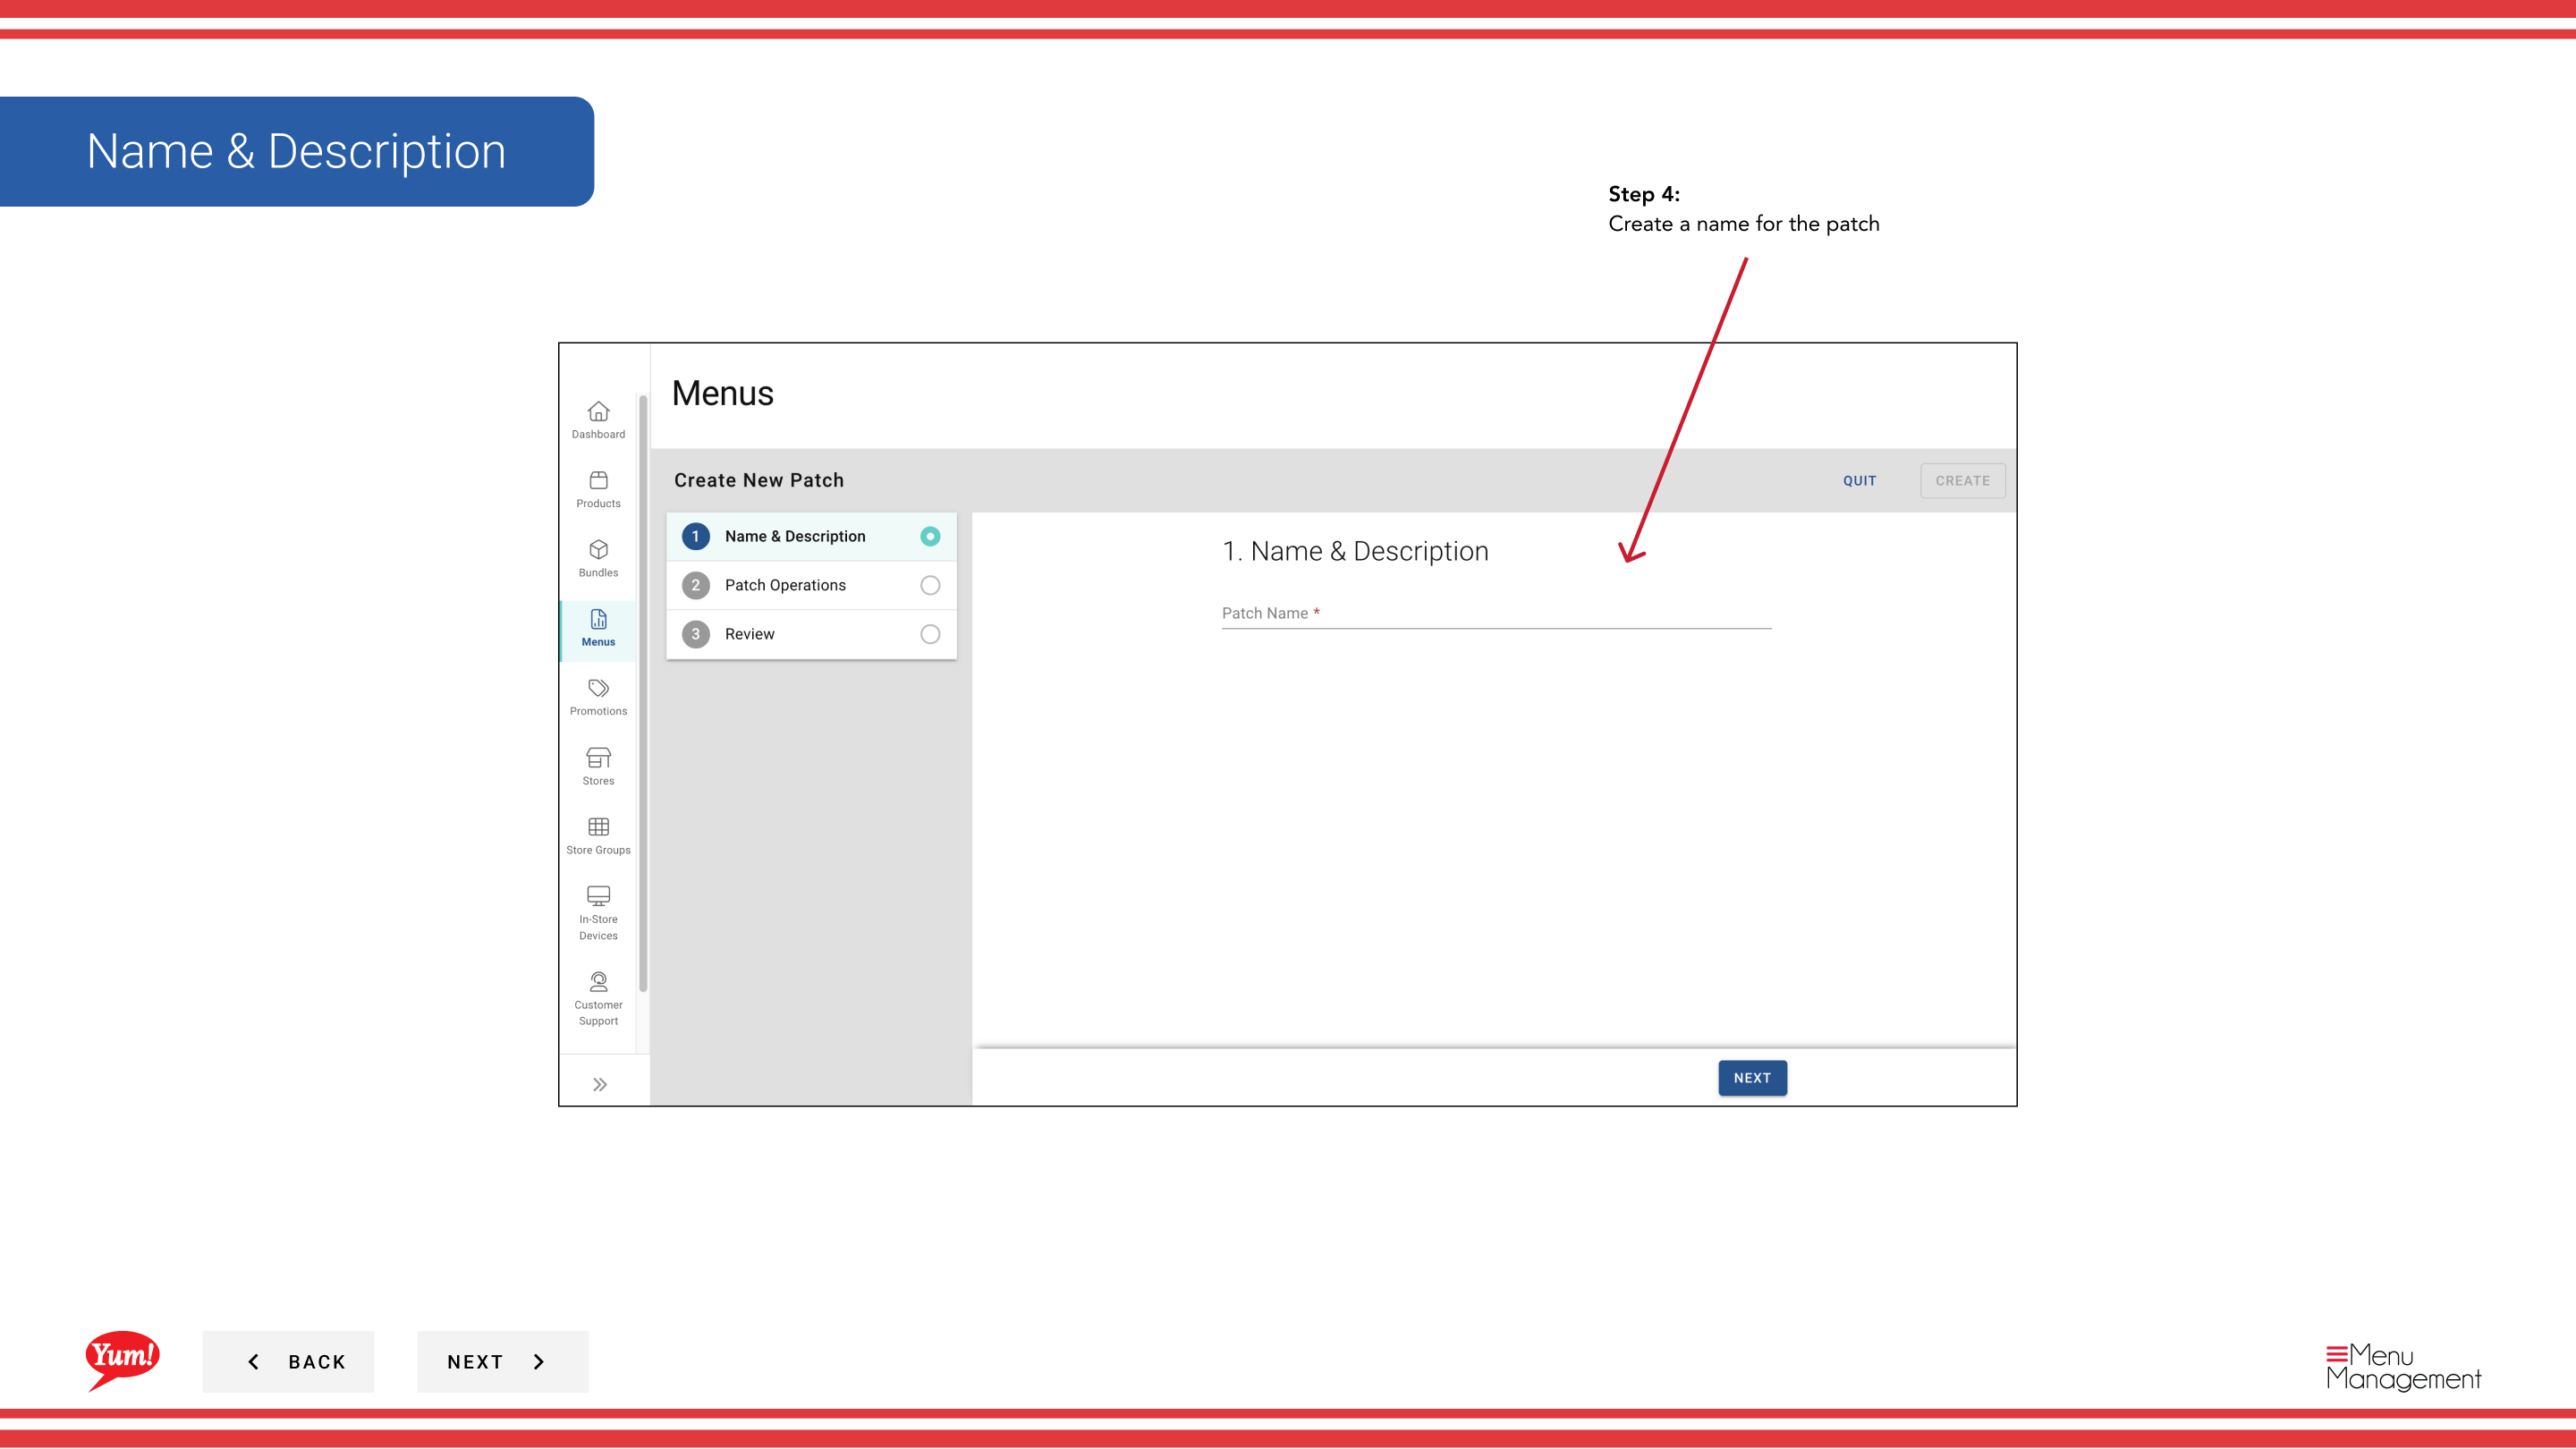
Step 4: Enter a descriptive name for the patch. Fields marked with * are required.
| Field | What to enter | Notes |
|---|---|---|
| Patch Name * | A descriptive name for what this patch changes | e.g., “Sydney Q1 Pricing Override”, “Halal Menu Availability Fix”, “Regional Promo Discount”. Used to identify the patch in lists. |
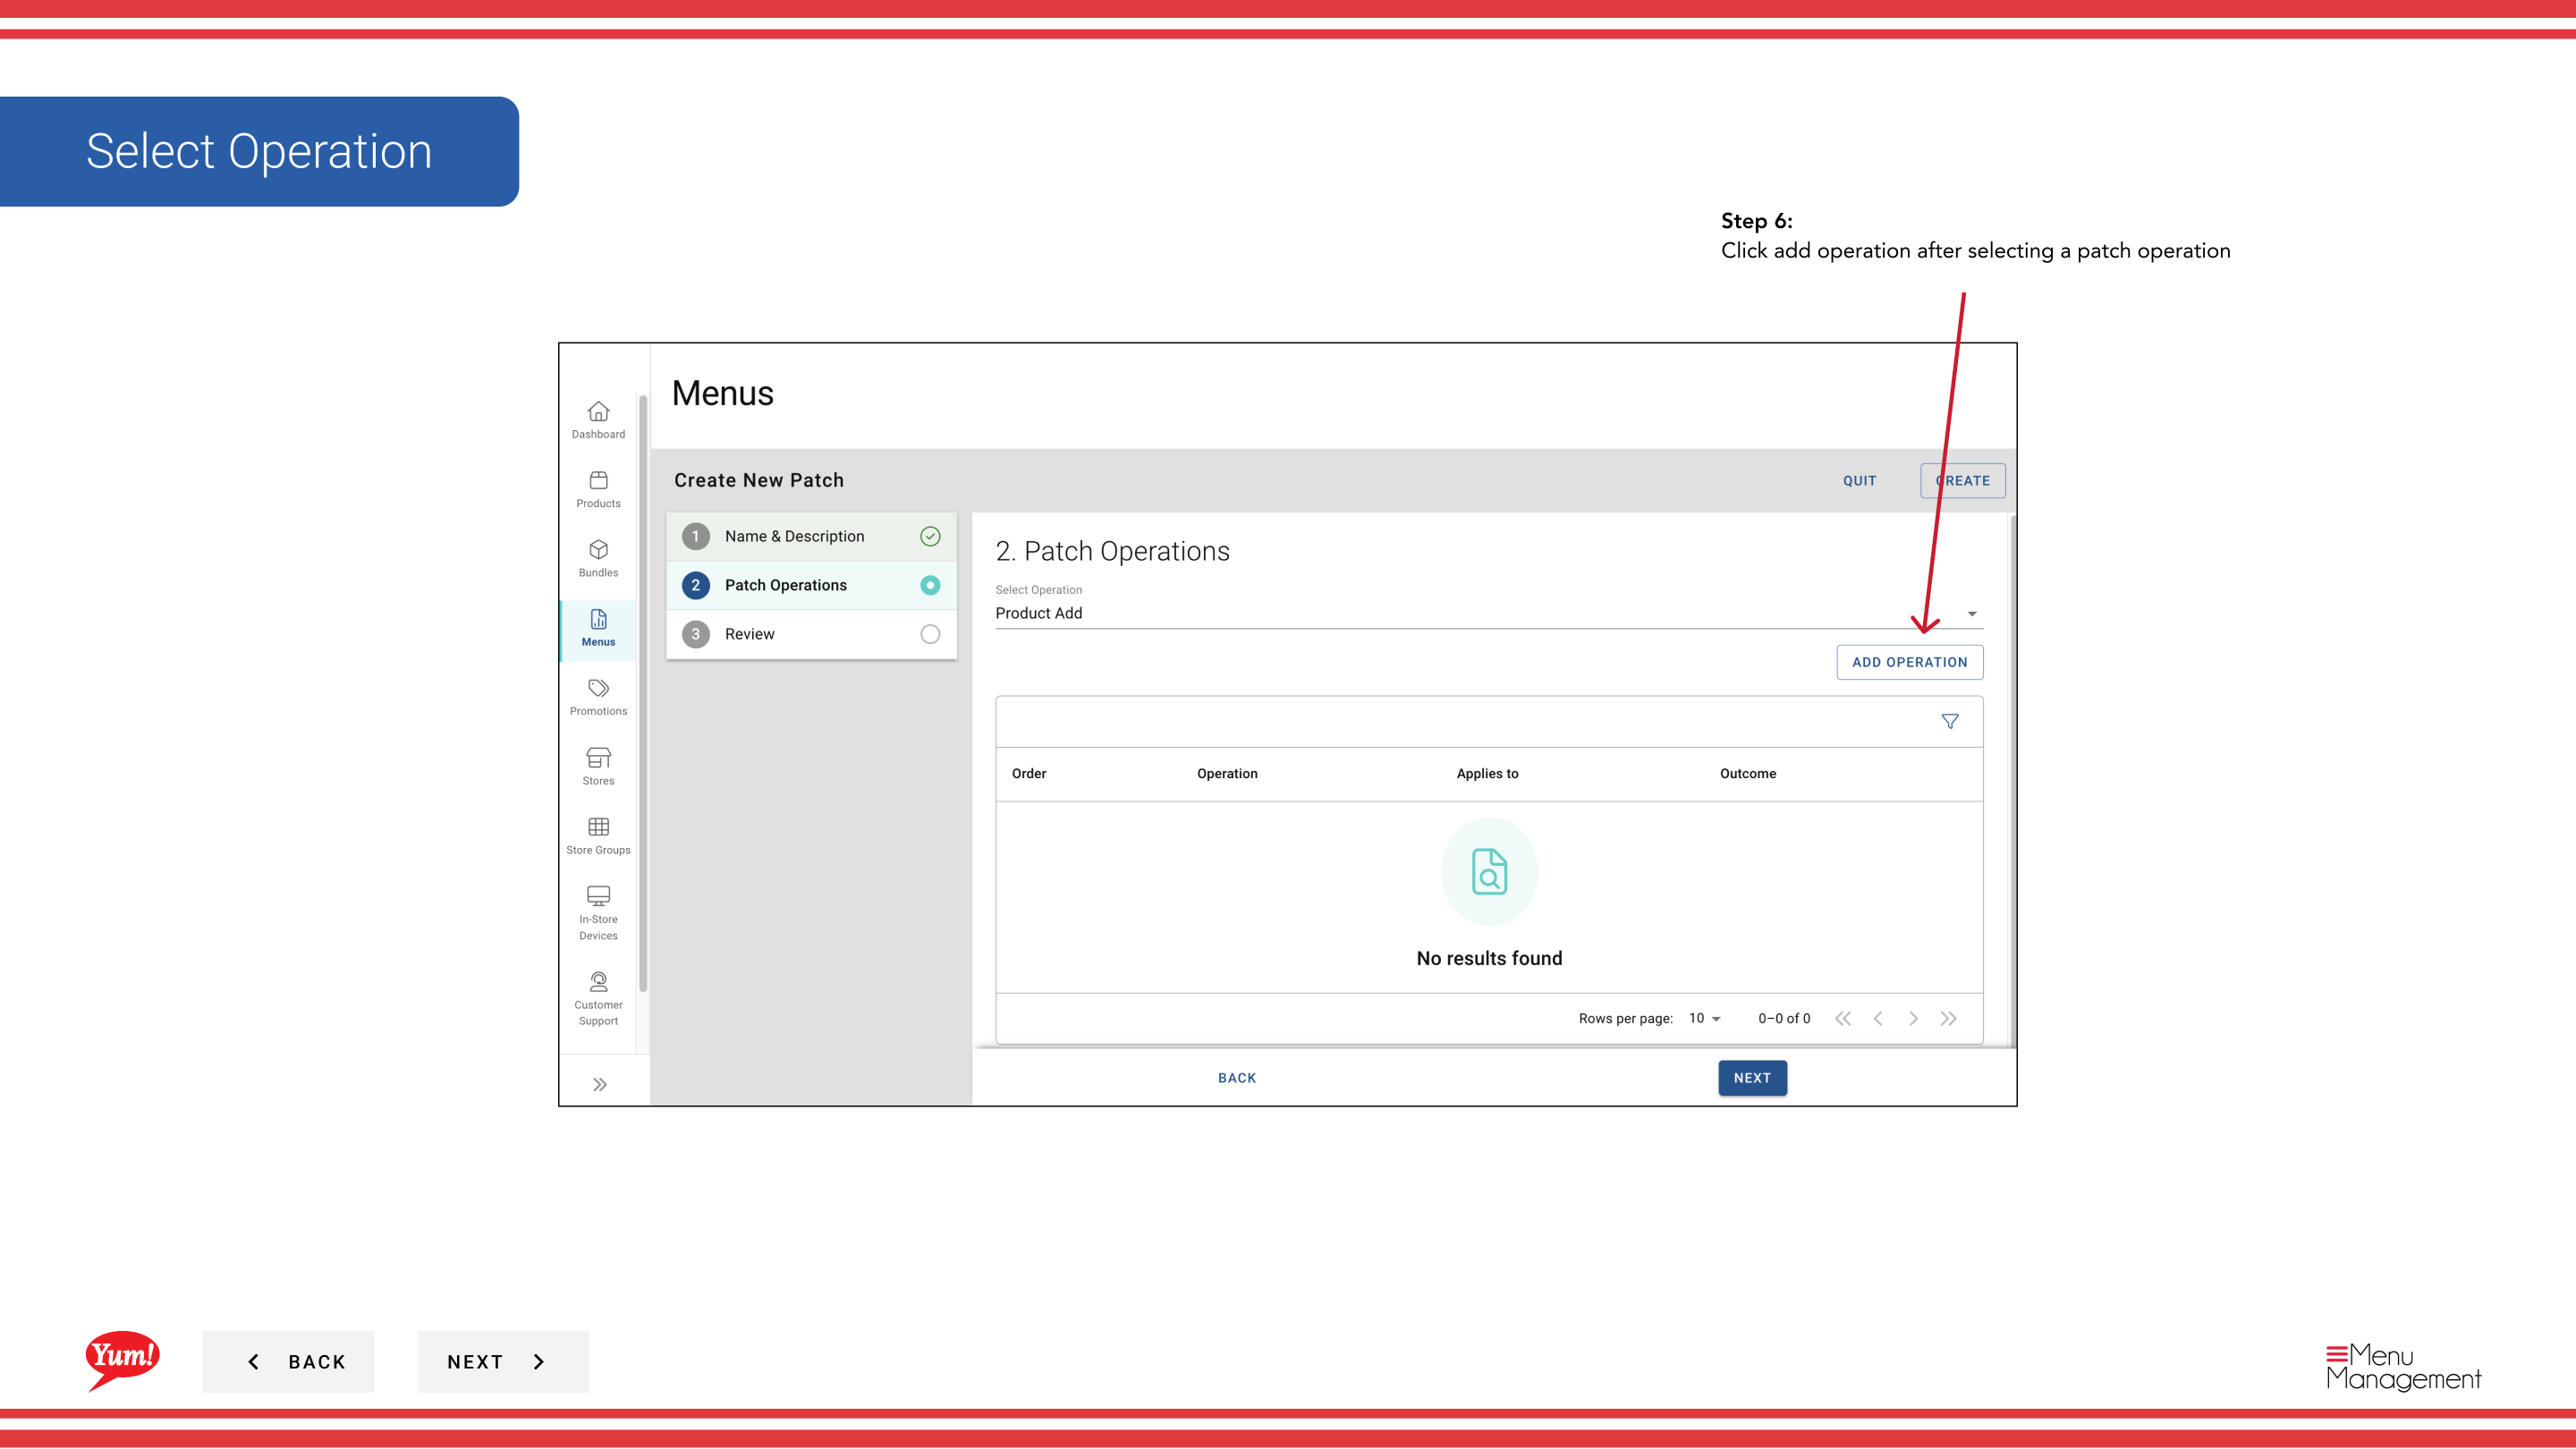
Step 5: Select an Operation from the dropdown. This defines the type of change the patch will make.
| Operation | Purpose |
|---|---|
| Price Override | Change the price of specific items |
| Availability Override | Enable or disable items at certain times |
| Item Enable/Disable | Turn items on or off |
| Other custom operations | Depends on your system setup |
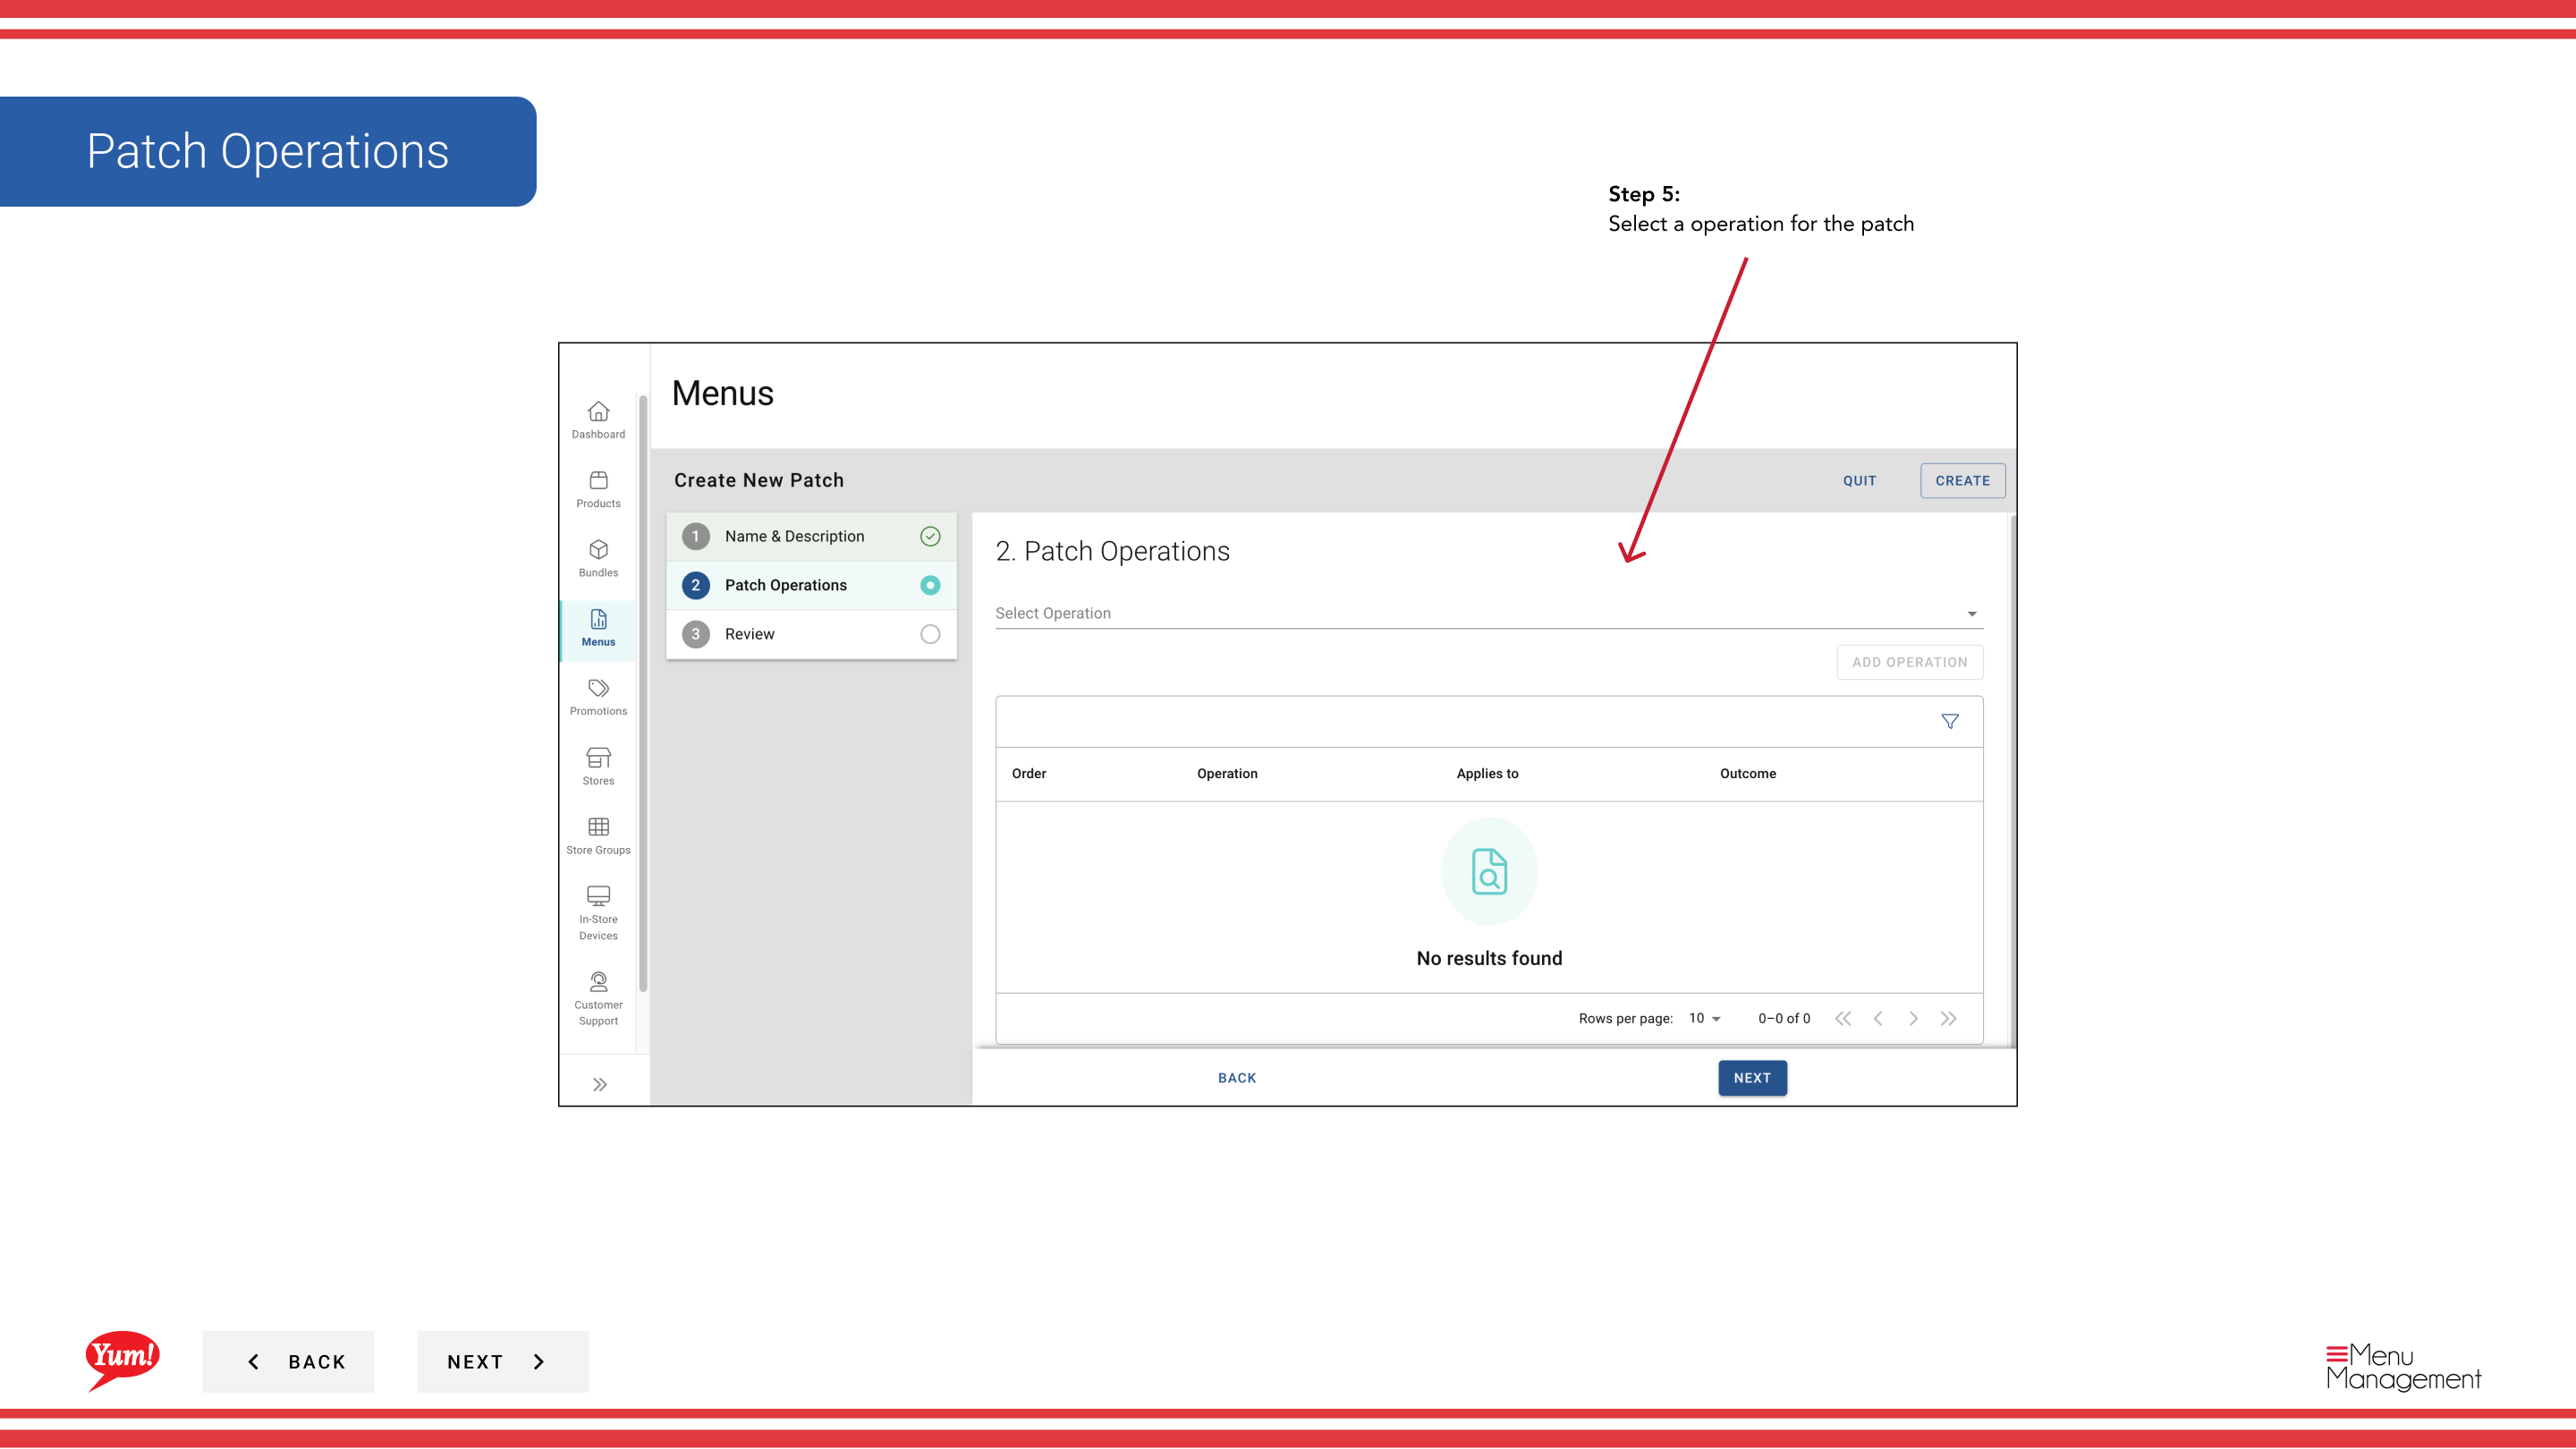
Step 6: After selecting an operation, click Add Operation to proceed.
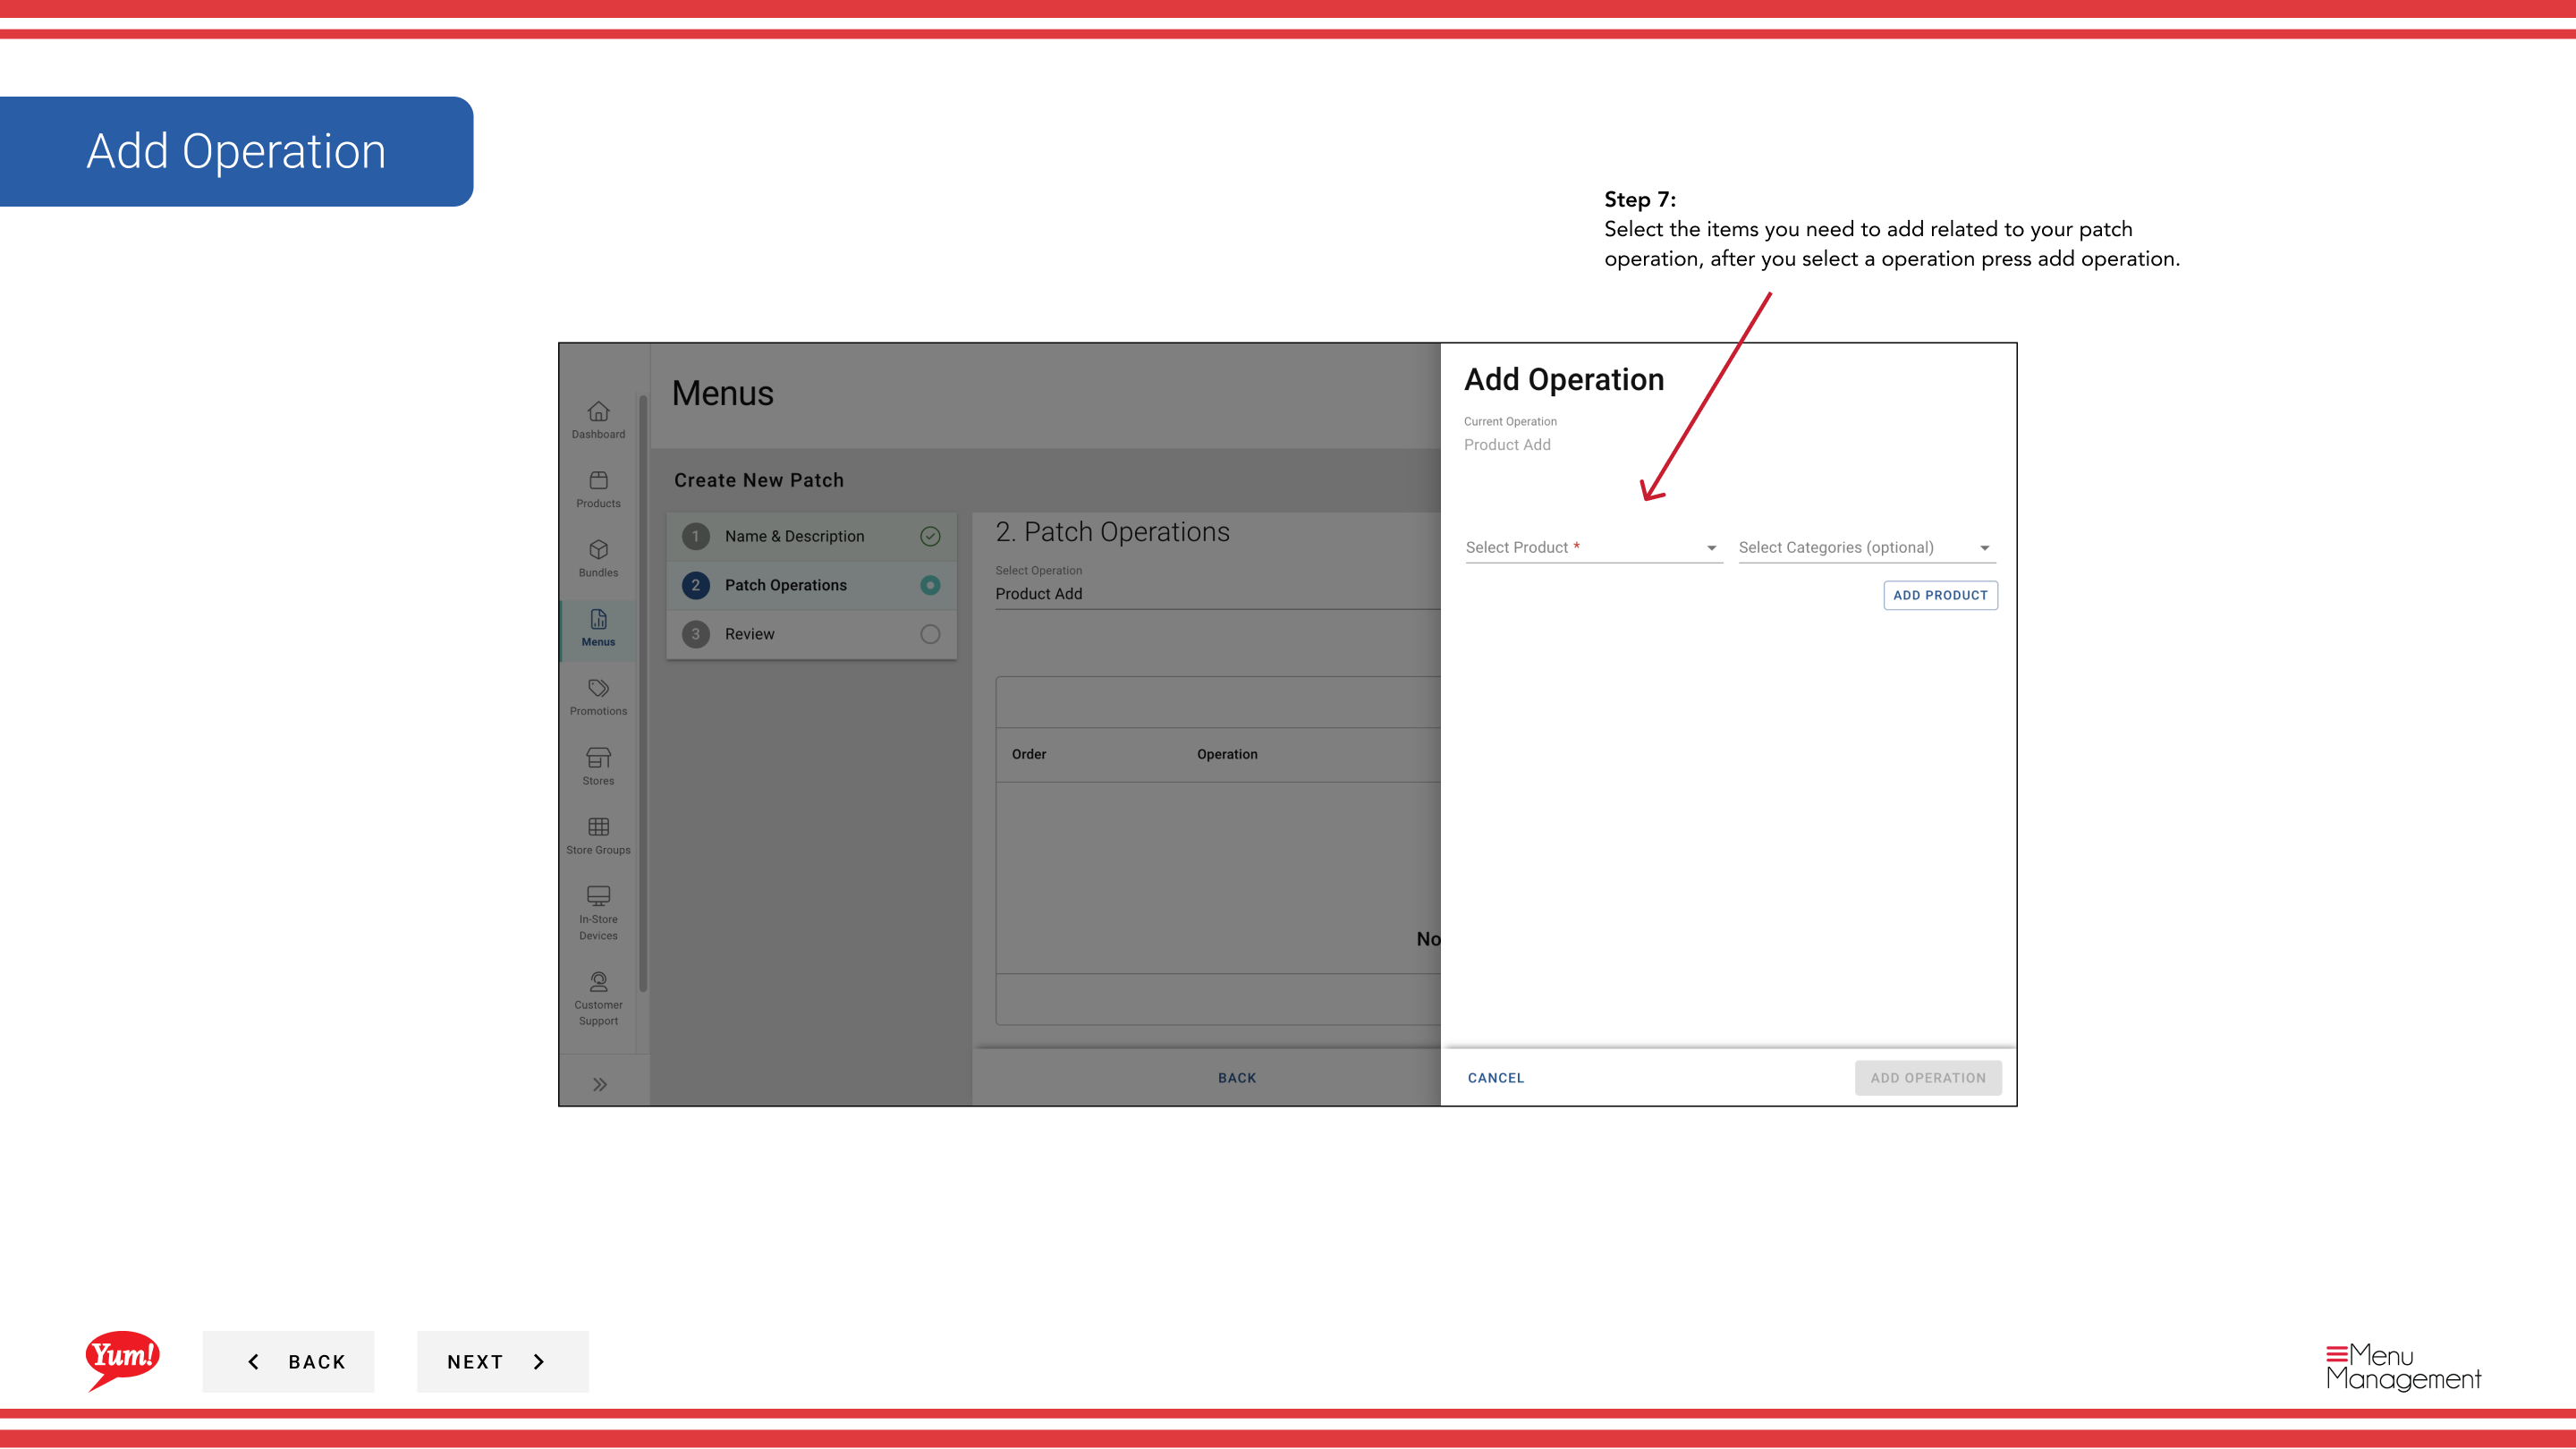
Step 7: Search for and select the specific products, variants, or bundles that this operation applies to. Once you have selected all needed items, click Add Operation to save them.
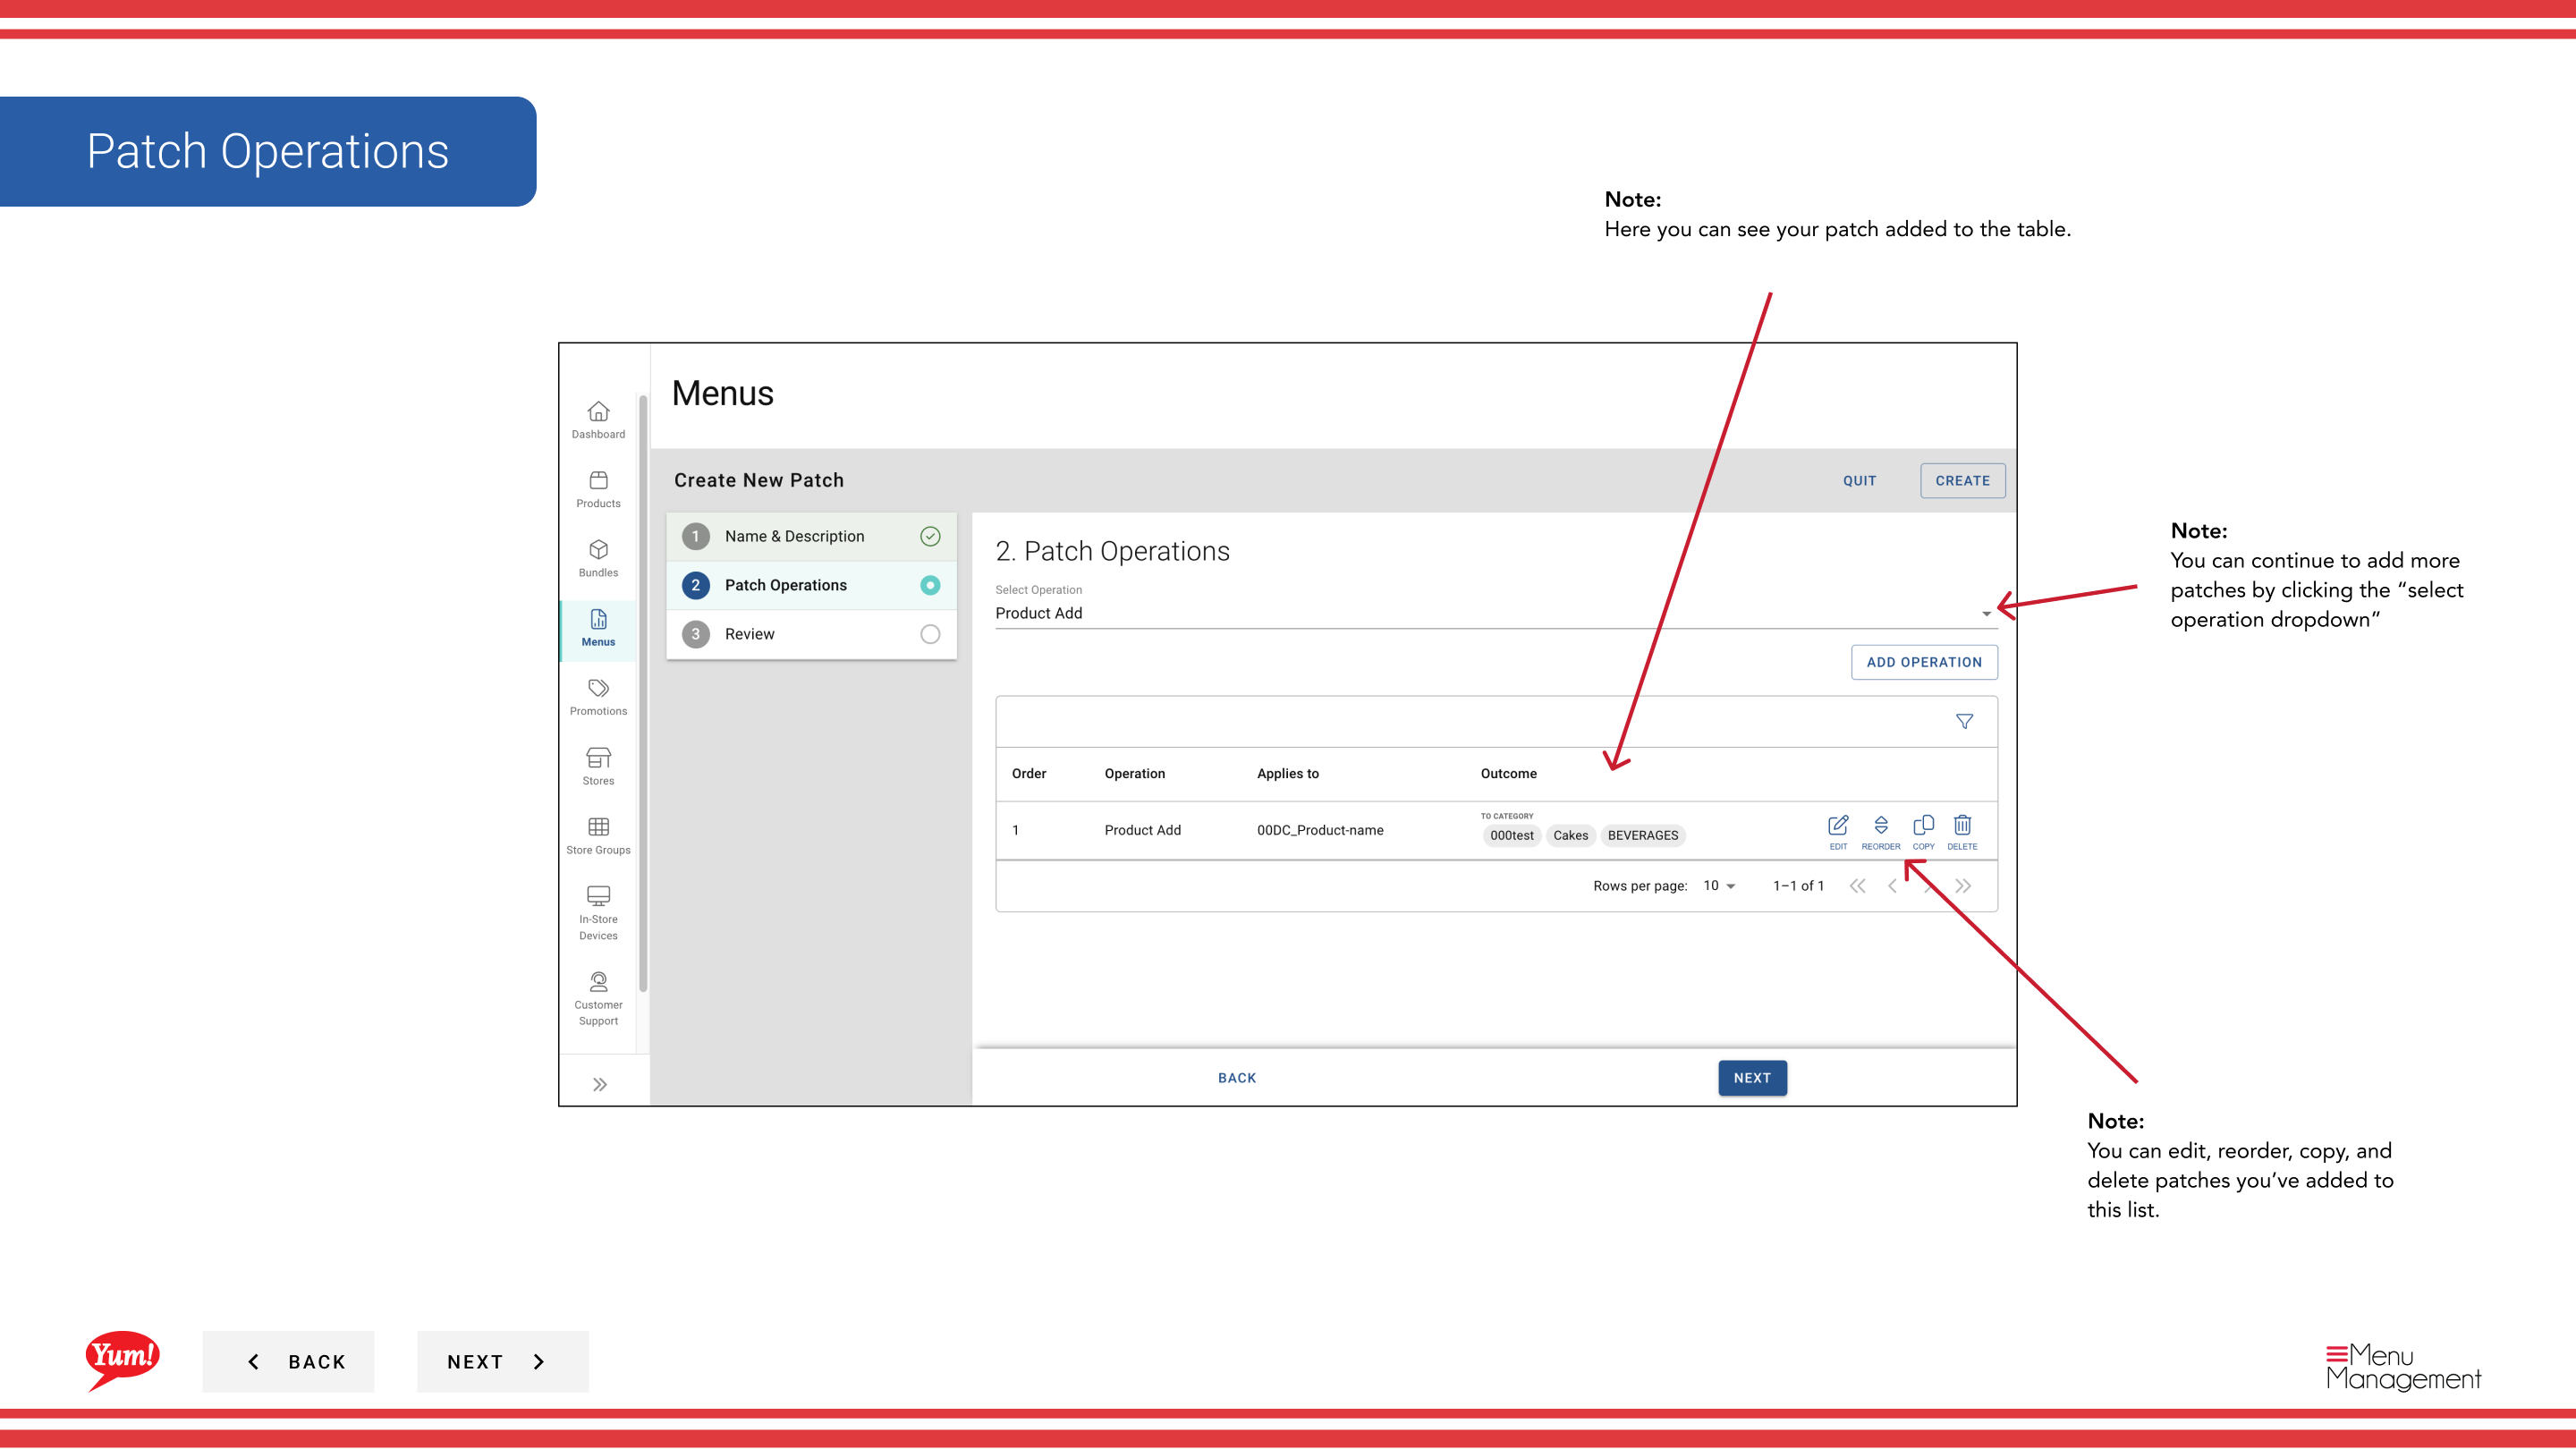
Step 8: You can add more operations to the same patch by repeating Steps 5–7. Each operation allows bundling related changes together.
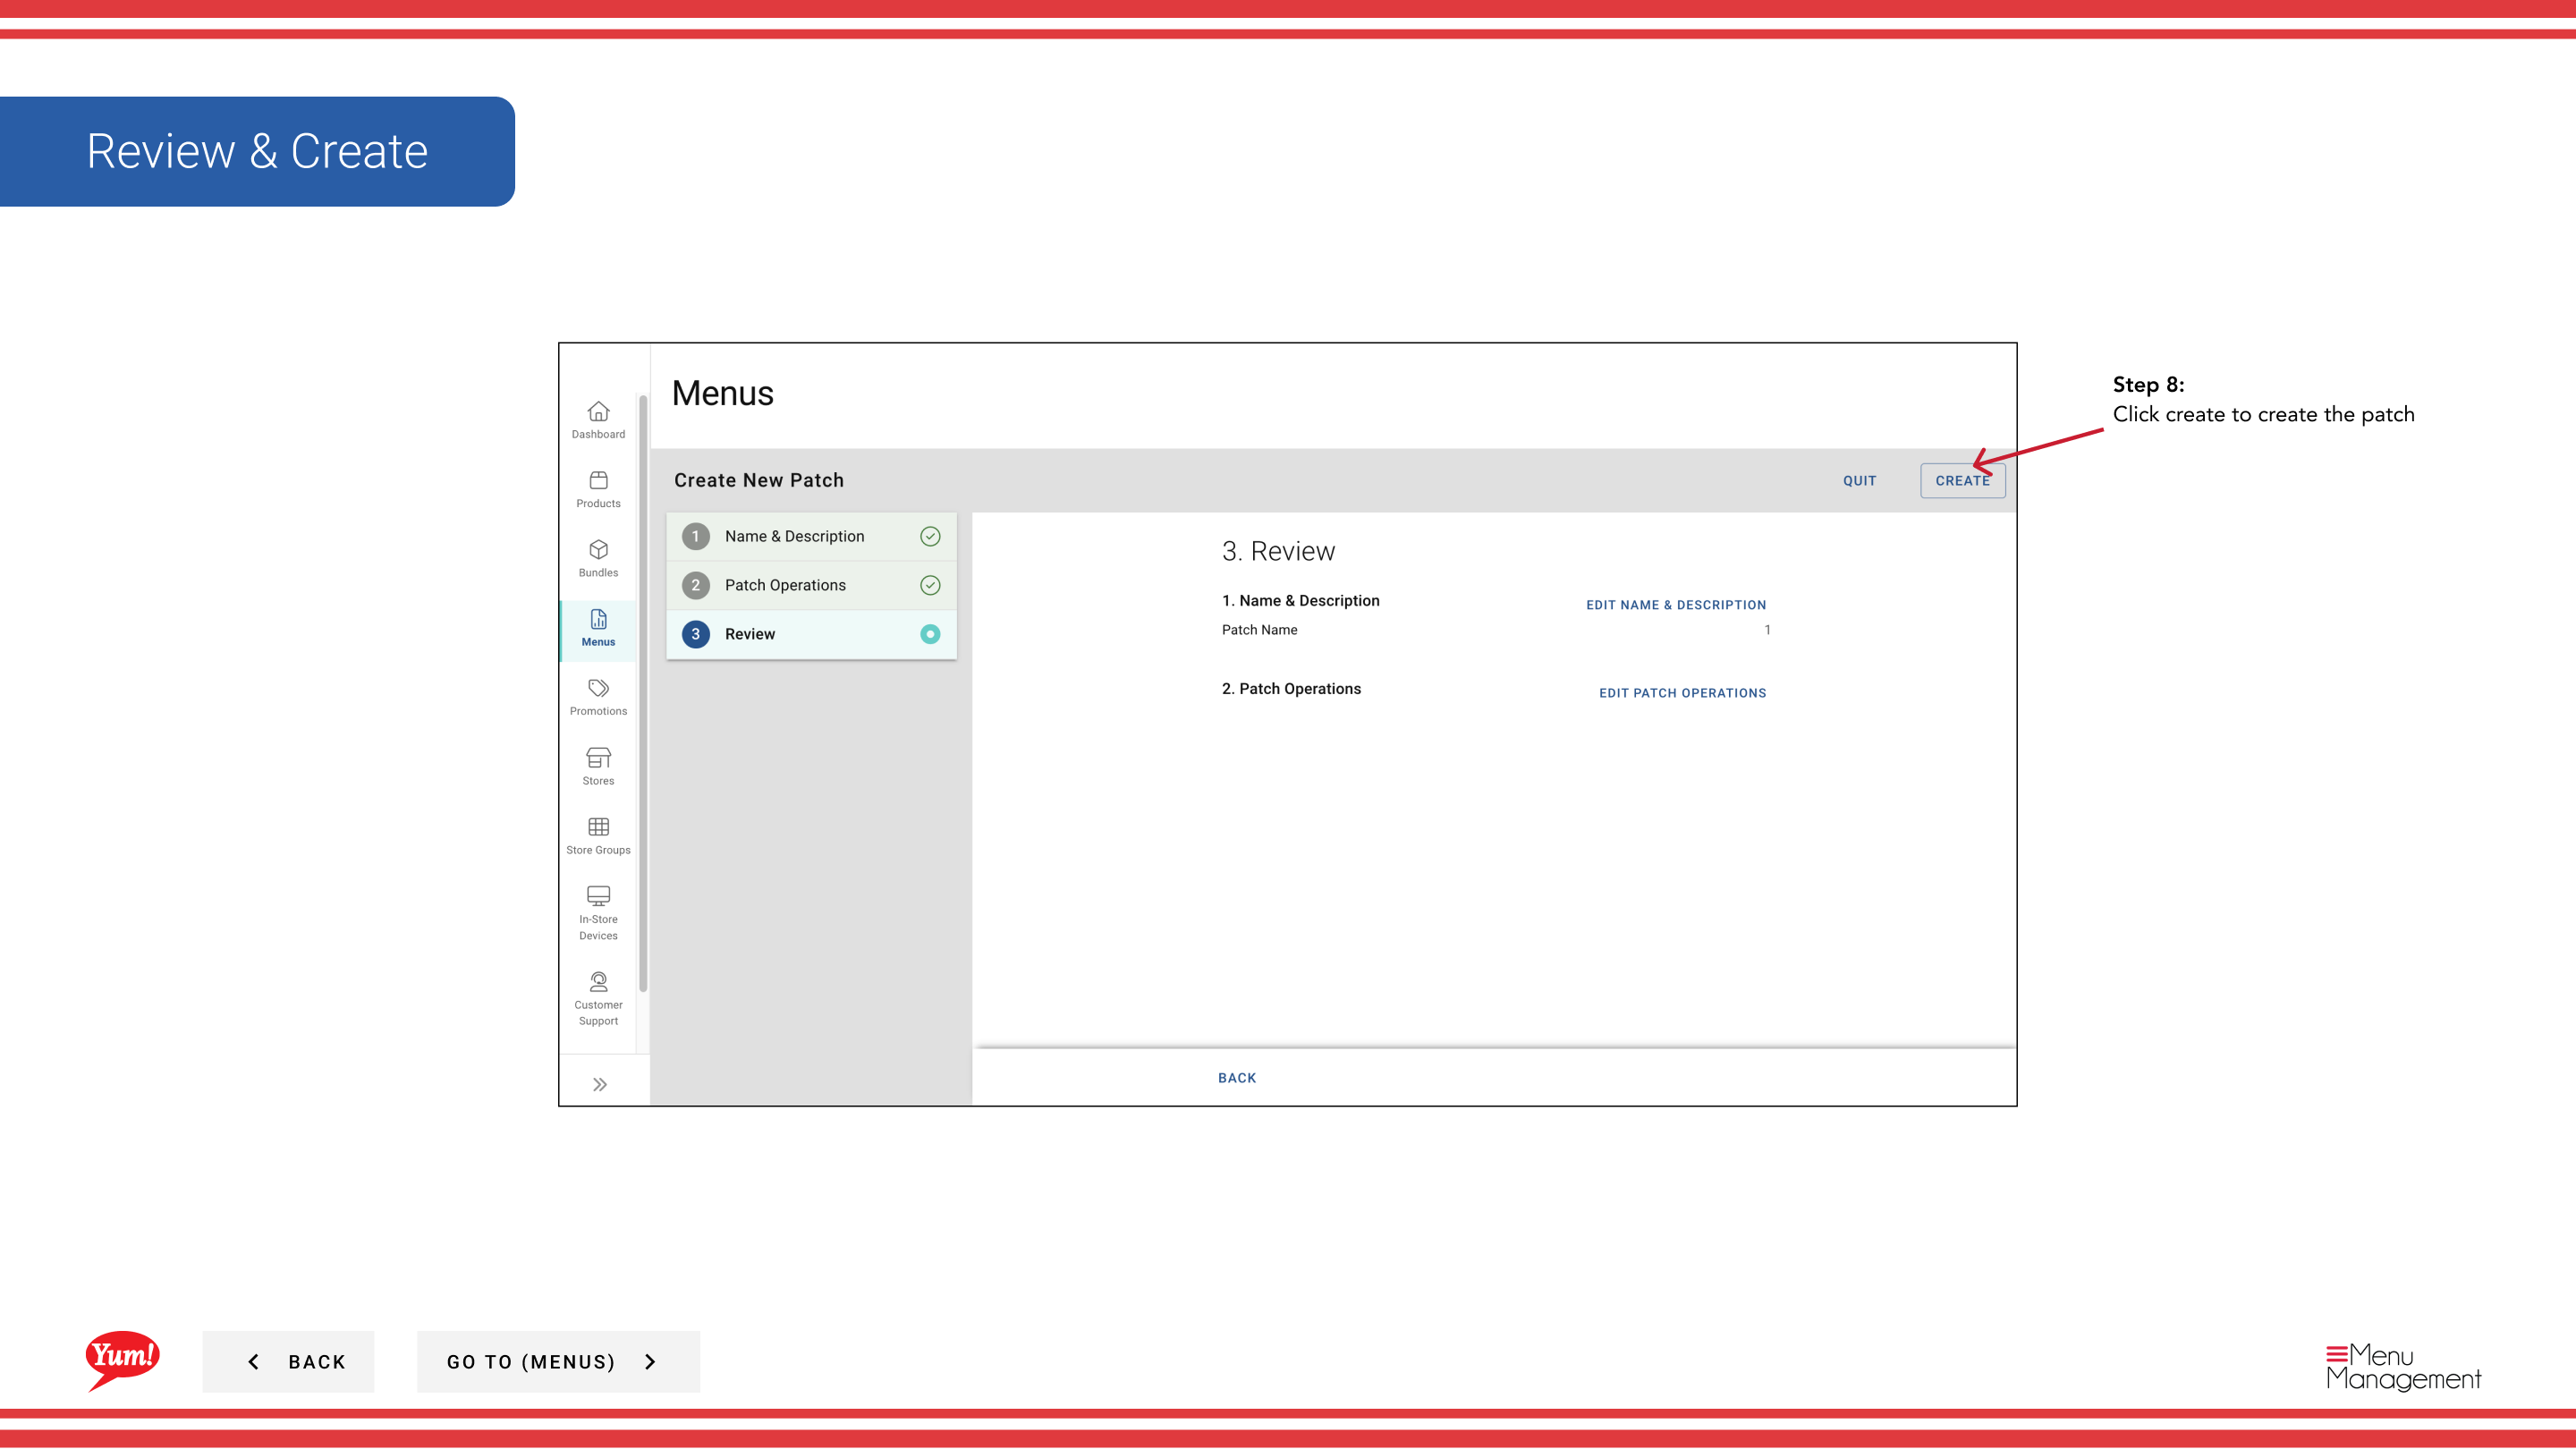
Step 9: Once you have added all operations, click Create to save the patch.
You can add multiple operations to a single patch to bundle related changes. For example, you can create one patch that includes both pricing overrides and availability changes for a regional promotion.
Patches are not yet applied to stores. After creating a patch, you must assign it to stores using the “Assign a Patch” guides.
Related guides
- Edit a Patch — Update a patch’s operations or items
- Copy a Patch — Duplicate a patch as a starting point
- Assign a Patch (Add to Patch List) — Add this patch to a store’s active list
- Delete a Patch — Remove a patch
Part of the Admin Portal Guide · Section: Menus