Create a Named Price
What this guide covers
Defines a reusable price label that can be applied across multiple products or variants, enabling consistent pricing management at scale. Update all products using a named price by editing the price once.
Steps
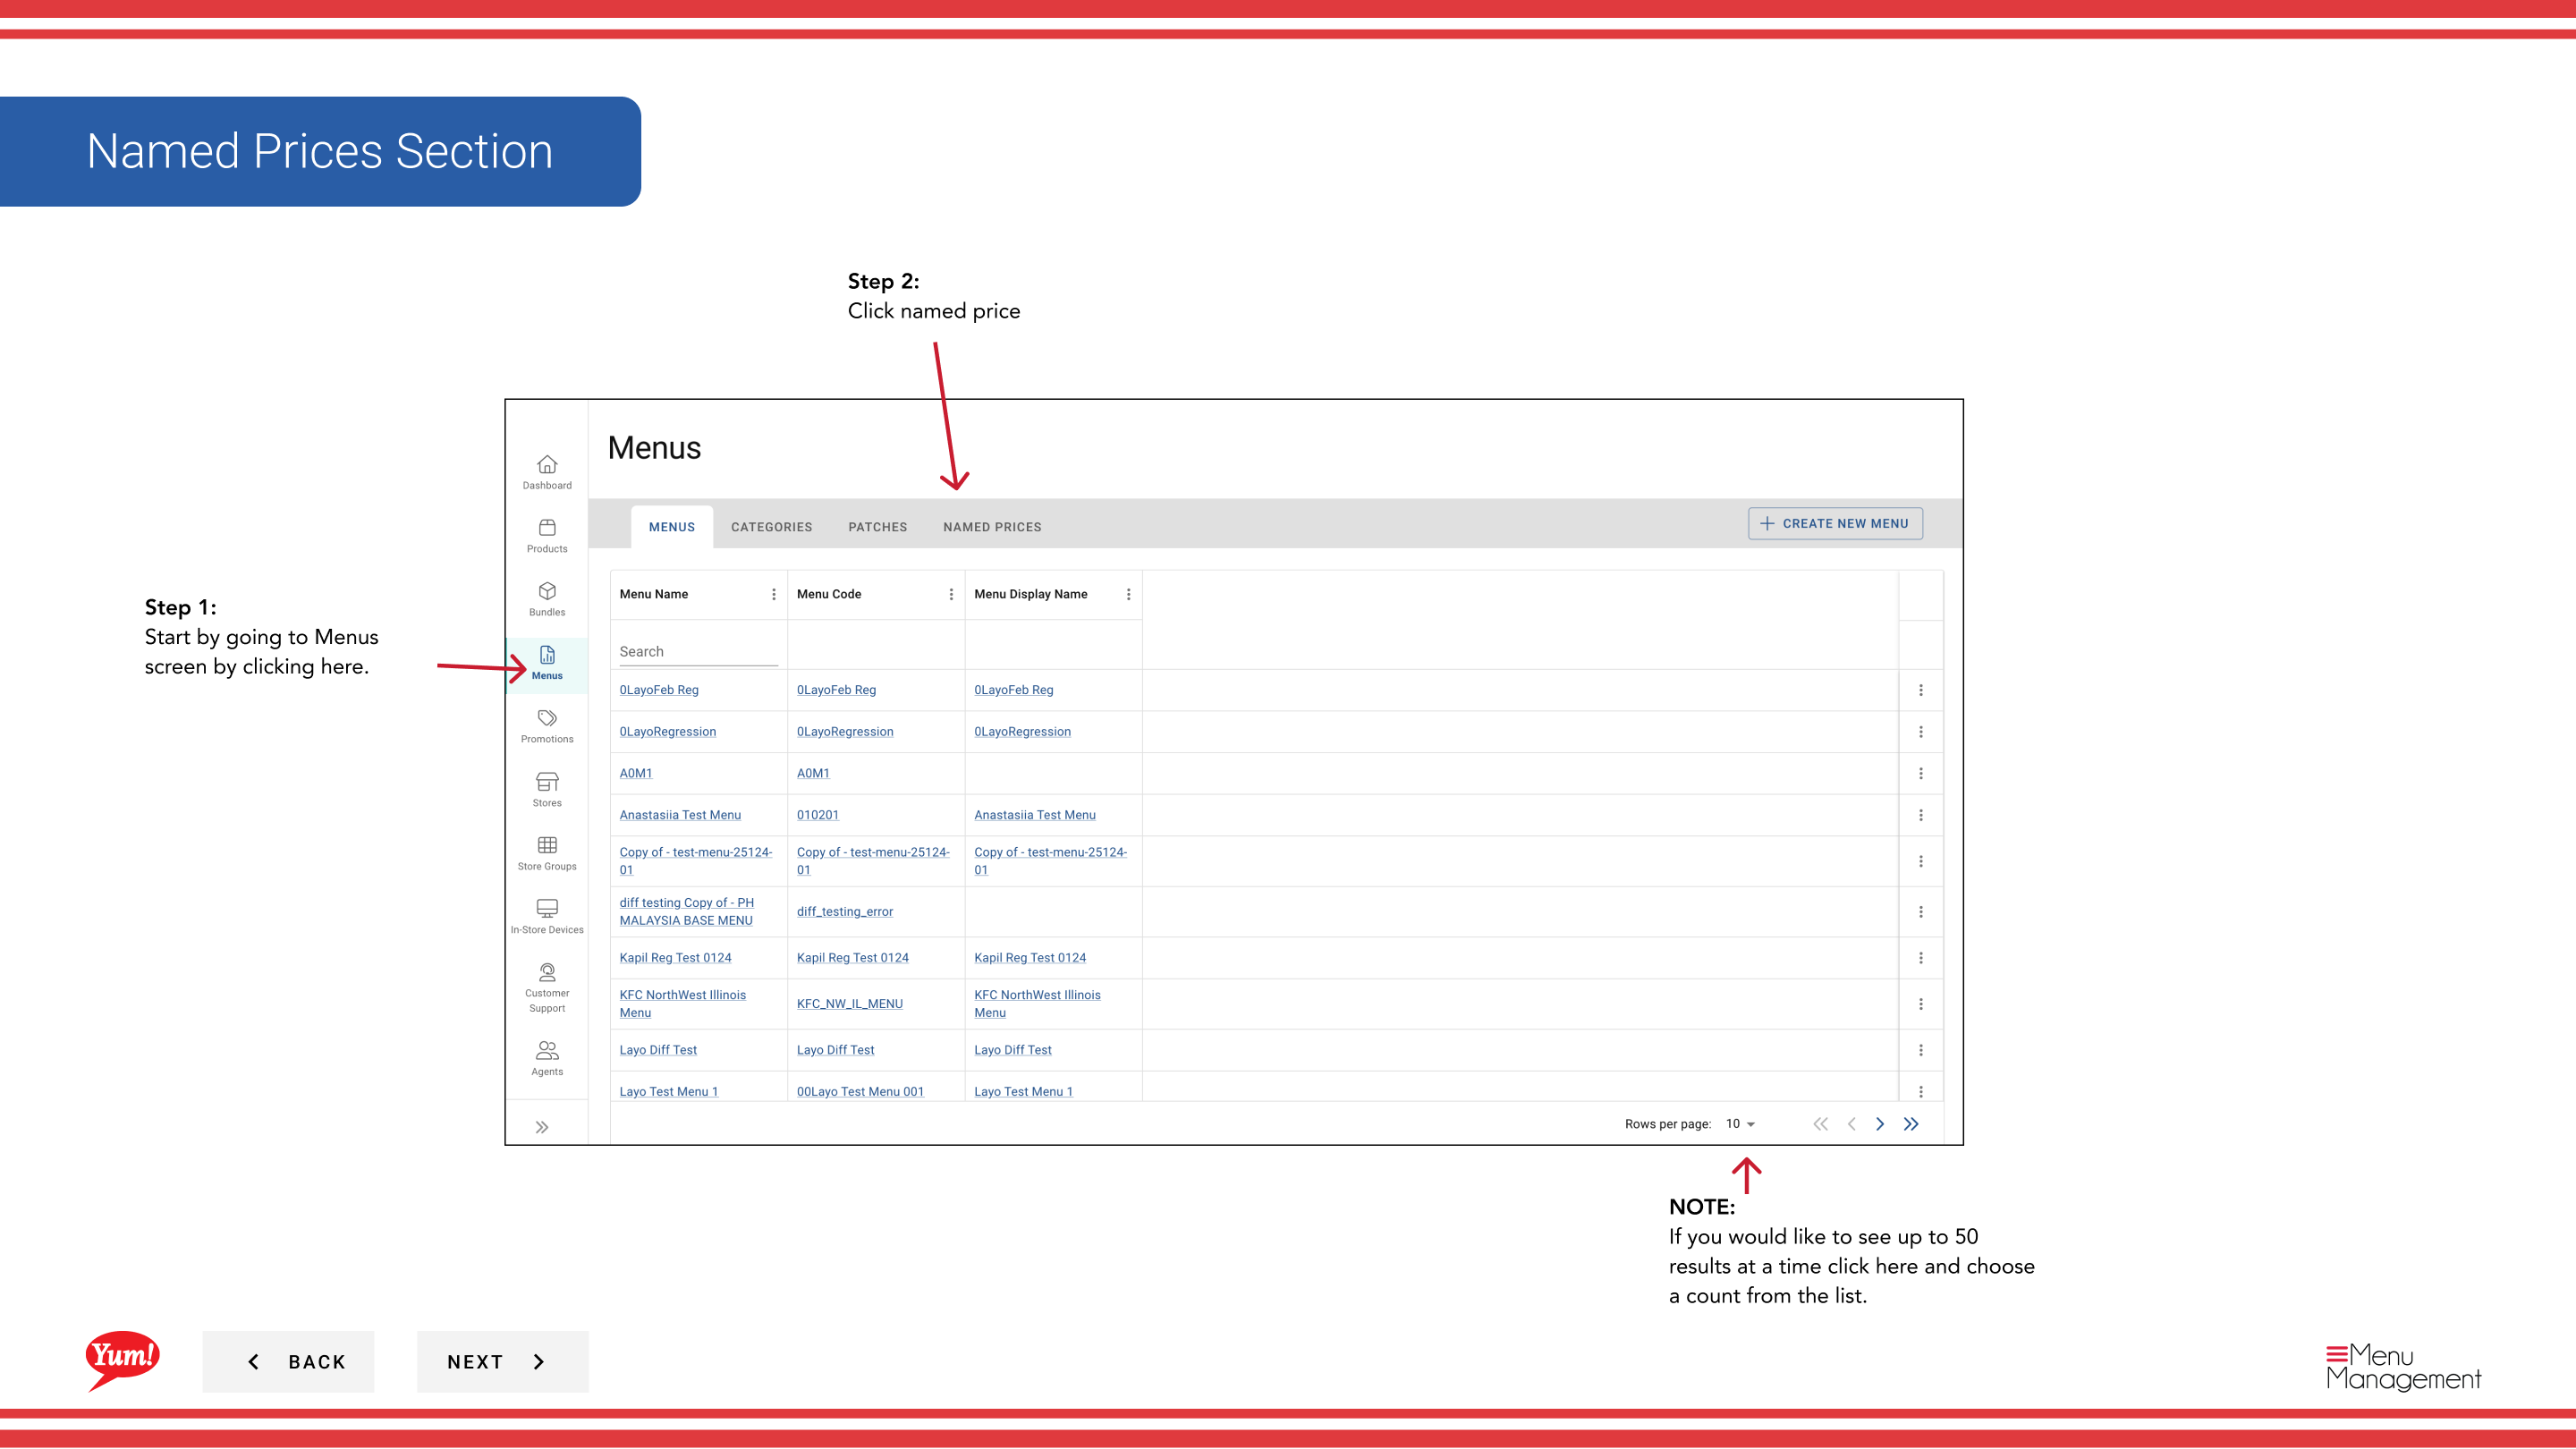
Step 1: Navigate to the Menus section using the left-hand navigation menu.
Step 2: Click the Named Prices tab to view all existing named prices.
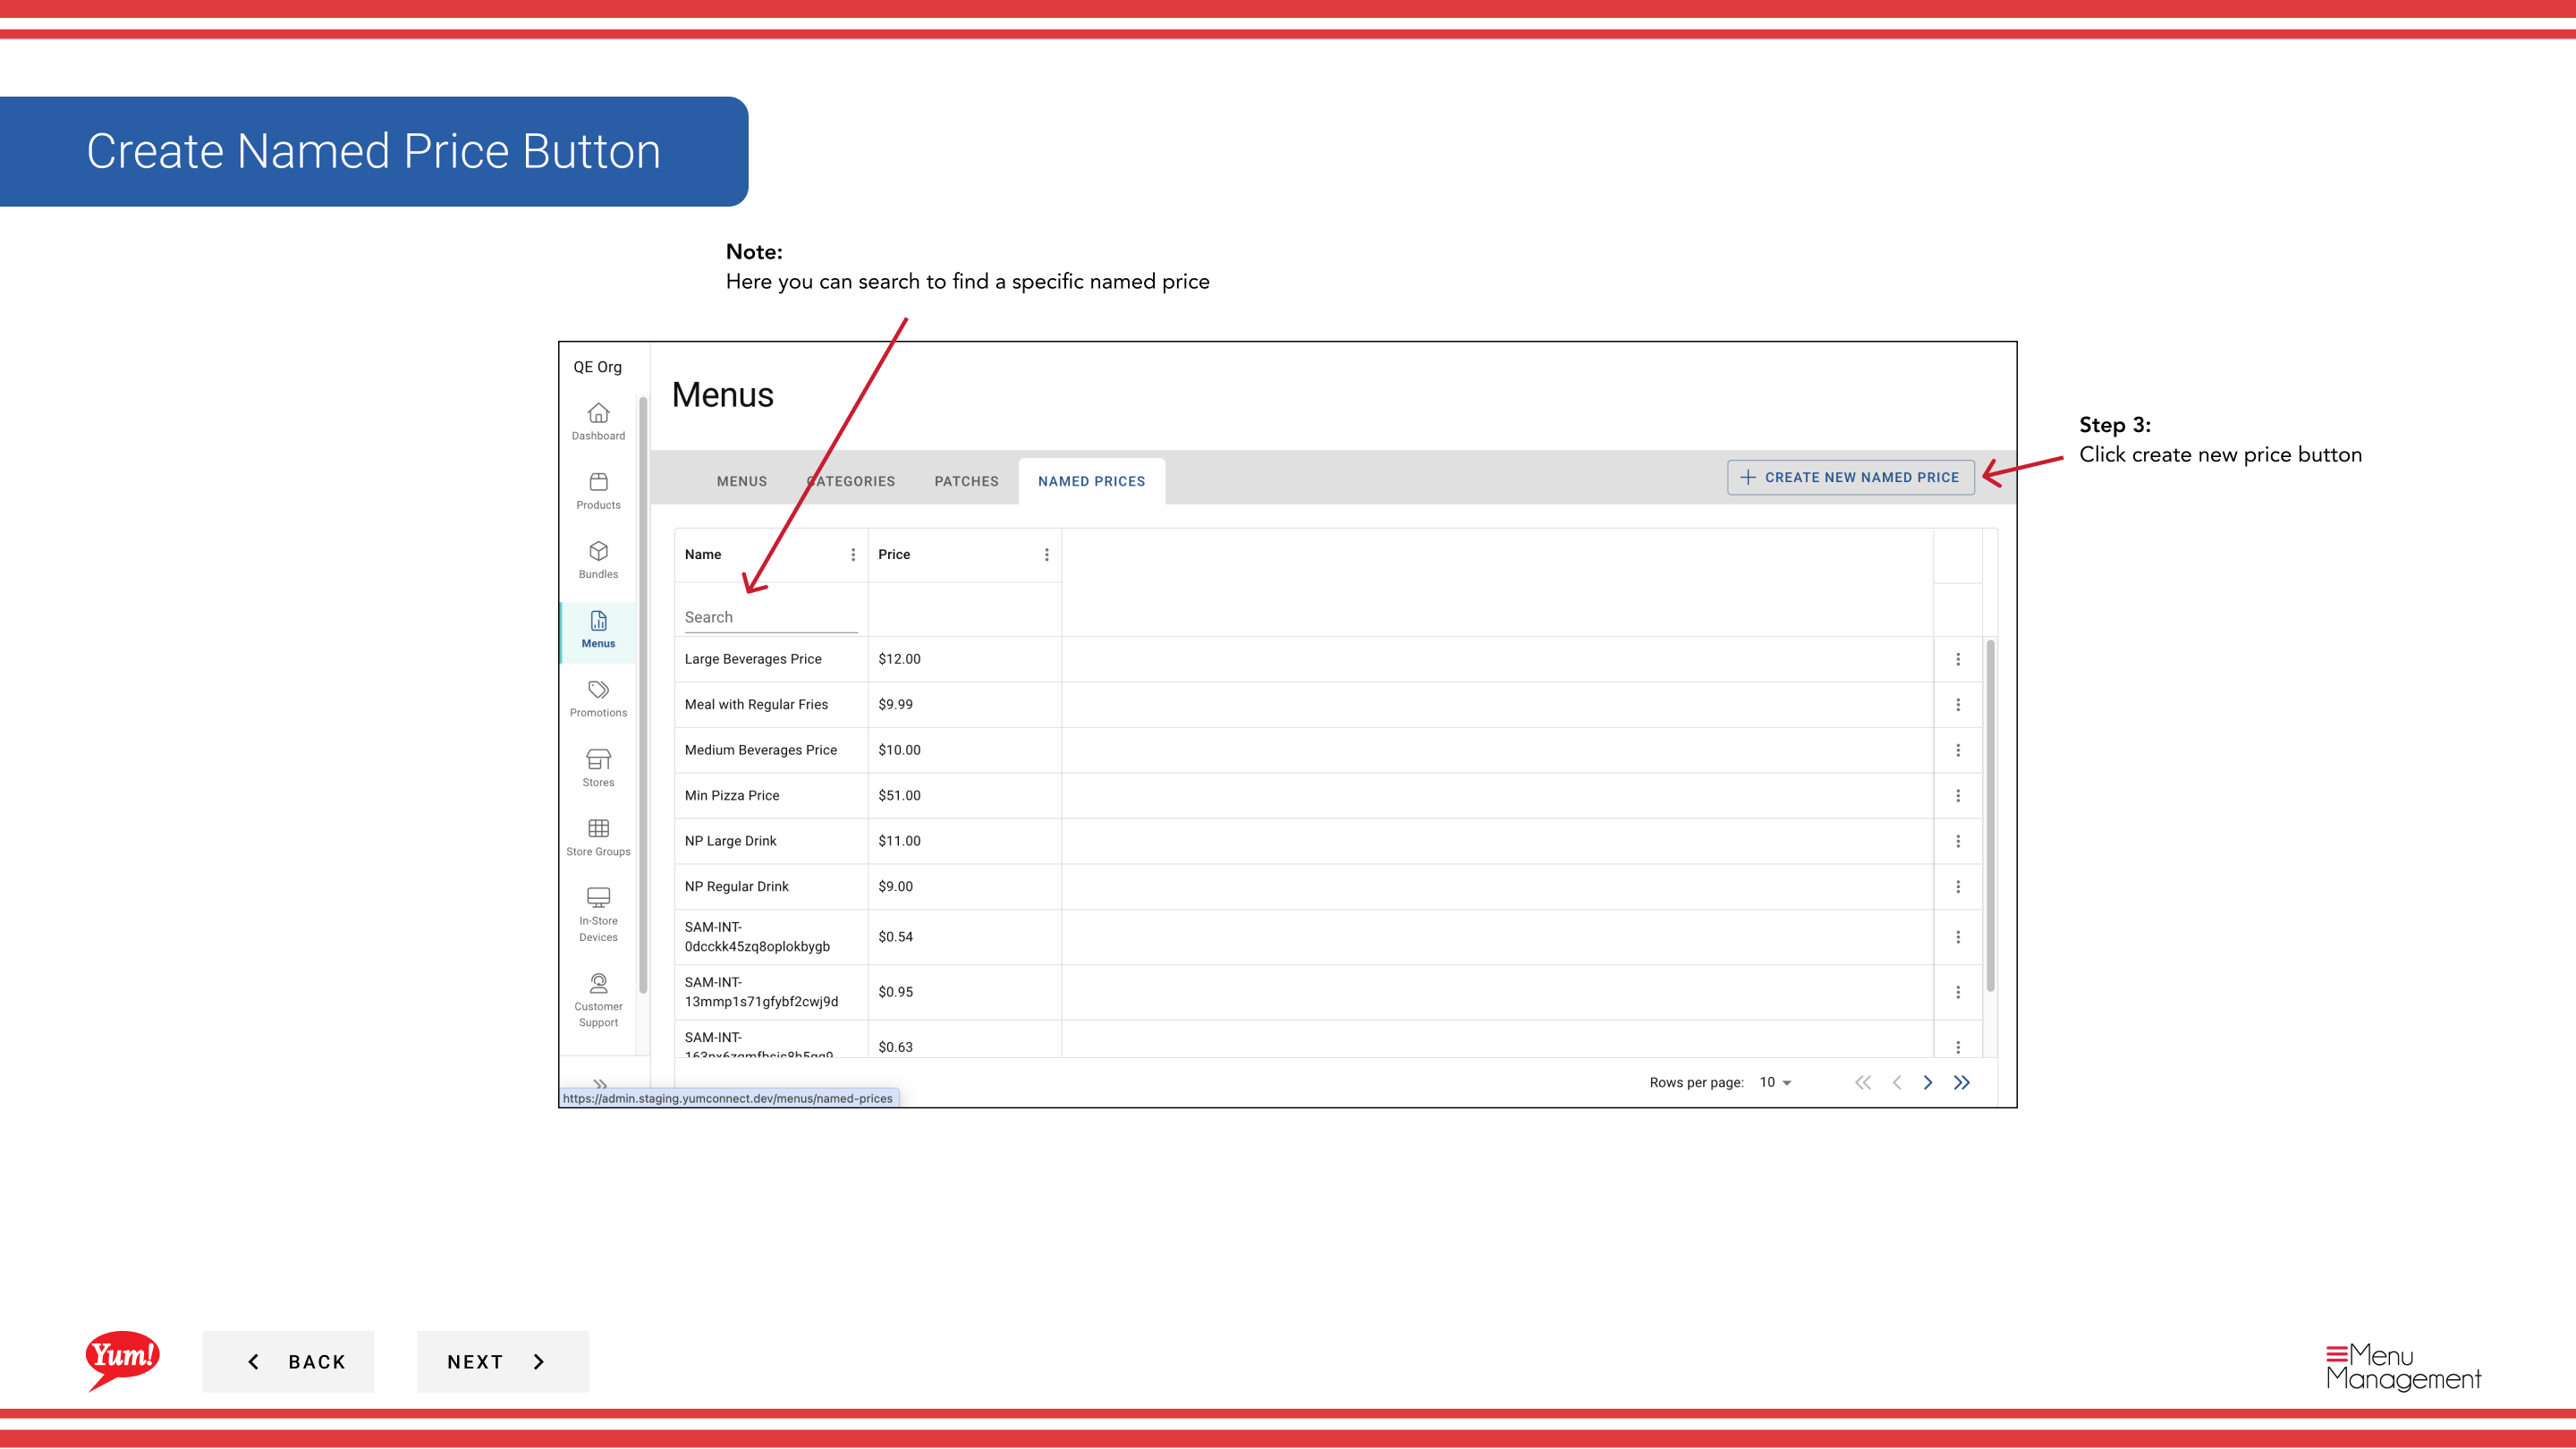
Step 3: Click the Create New Price button.
Step 4: Fill in the named price details. Fields marked with * are required.
| Field | What to enter | Notes |
|---|---|---|
| Name * | A label that identifies this price point | e.g., "Student Lunch Price", "Happy Hour Price", "Premium Item Price". Used internally to identify the price. |
| Price * | The monetary amount in your market's currency | Enter numbers only — e.g., 4.99, 12.50. Do not include currency symbol. The amount customers will pay. |
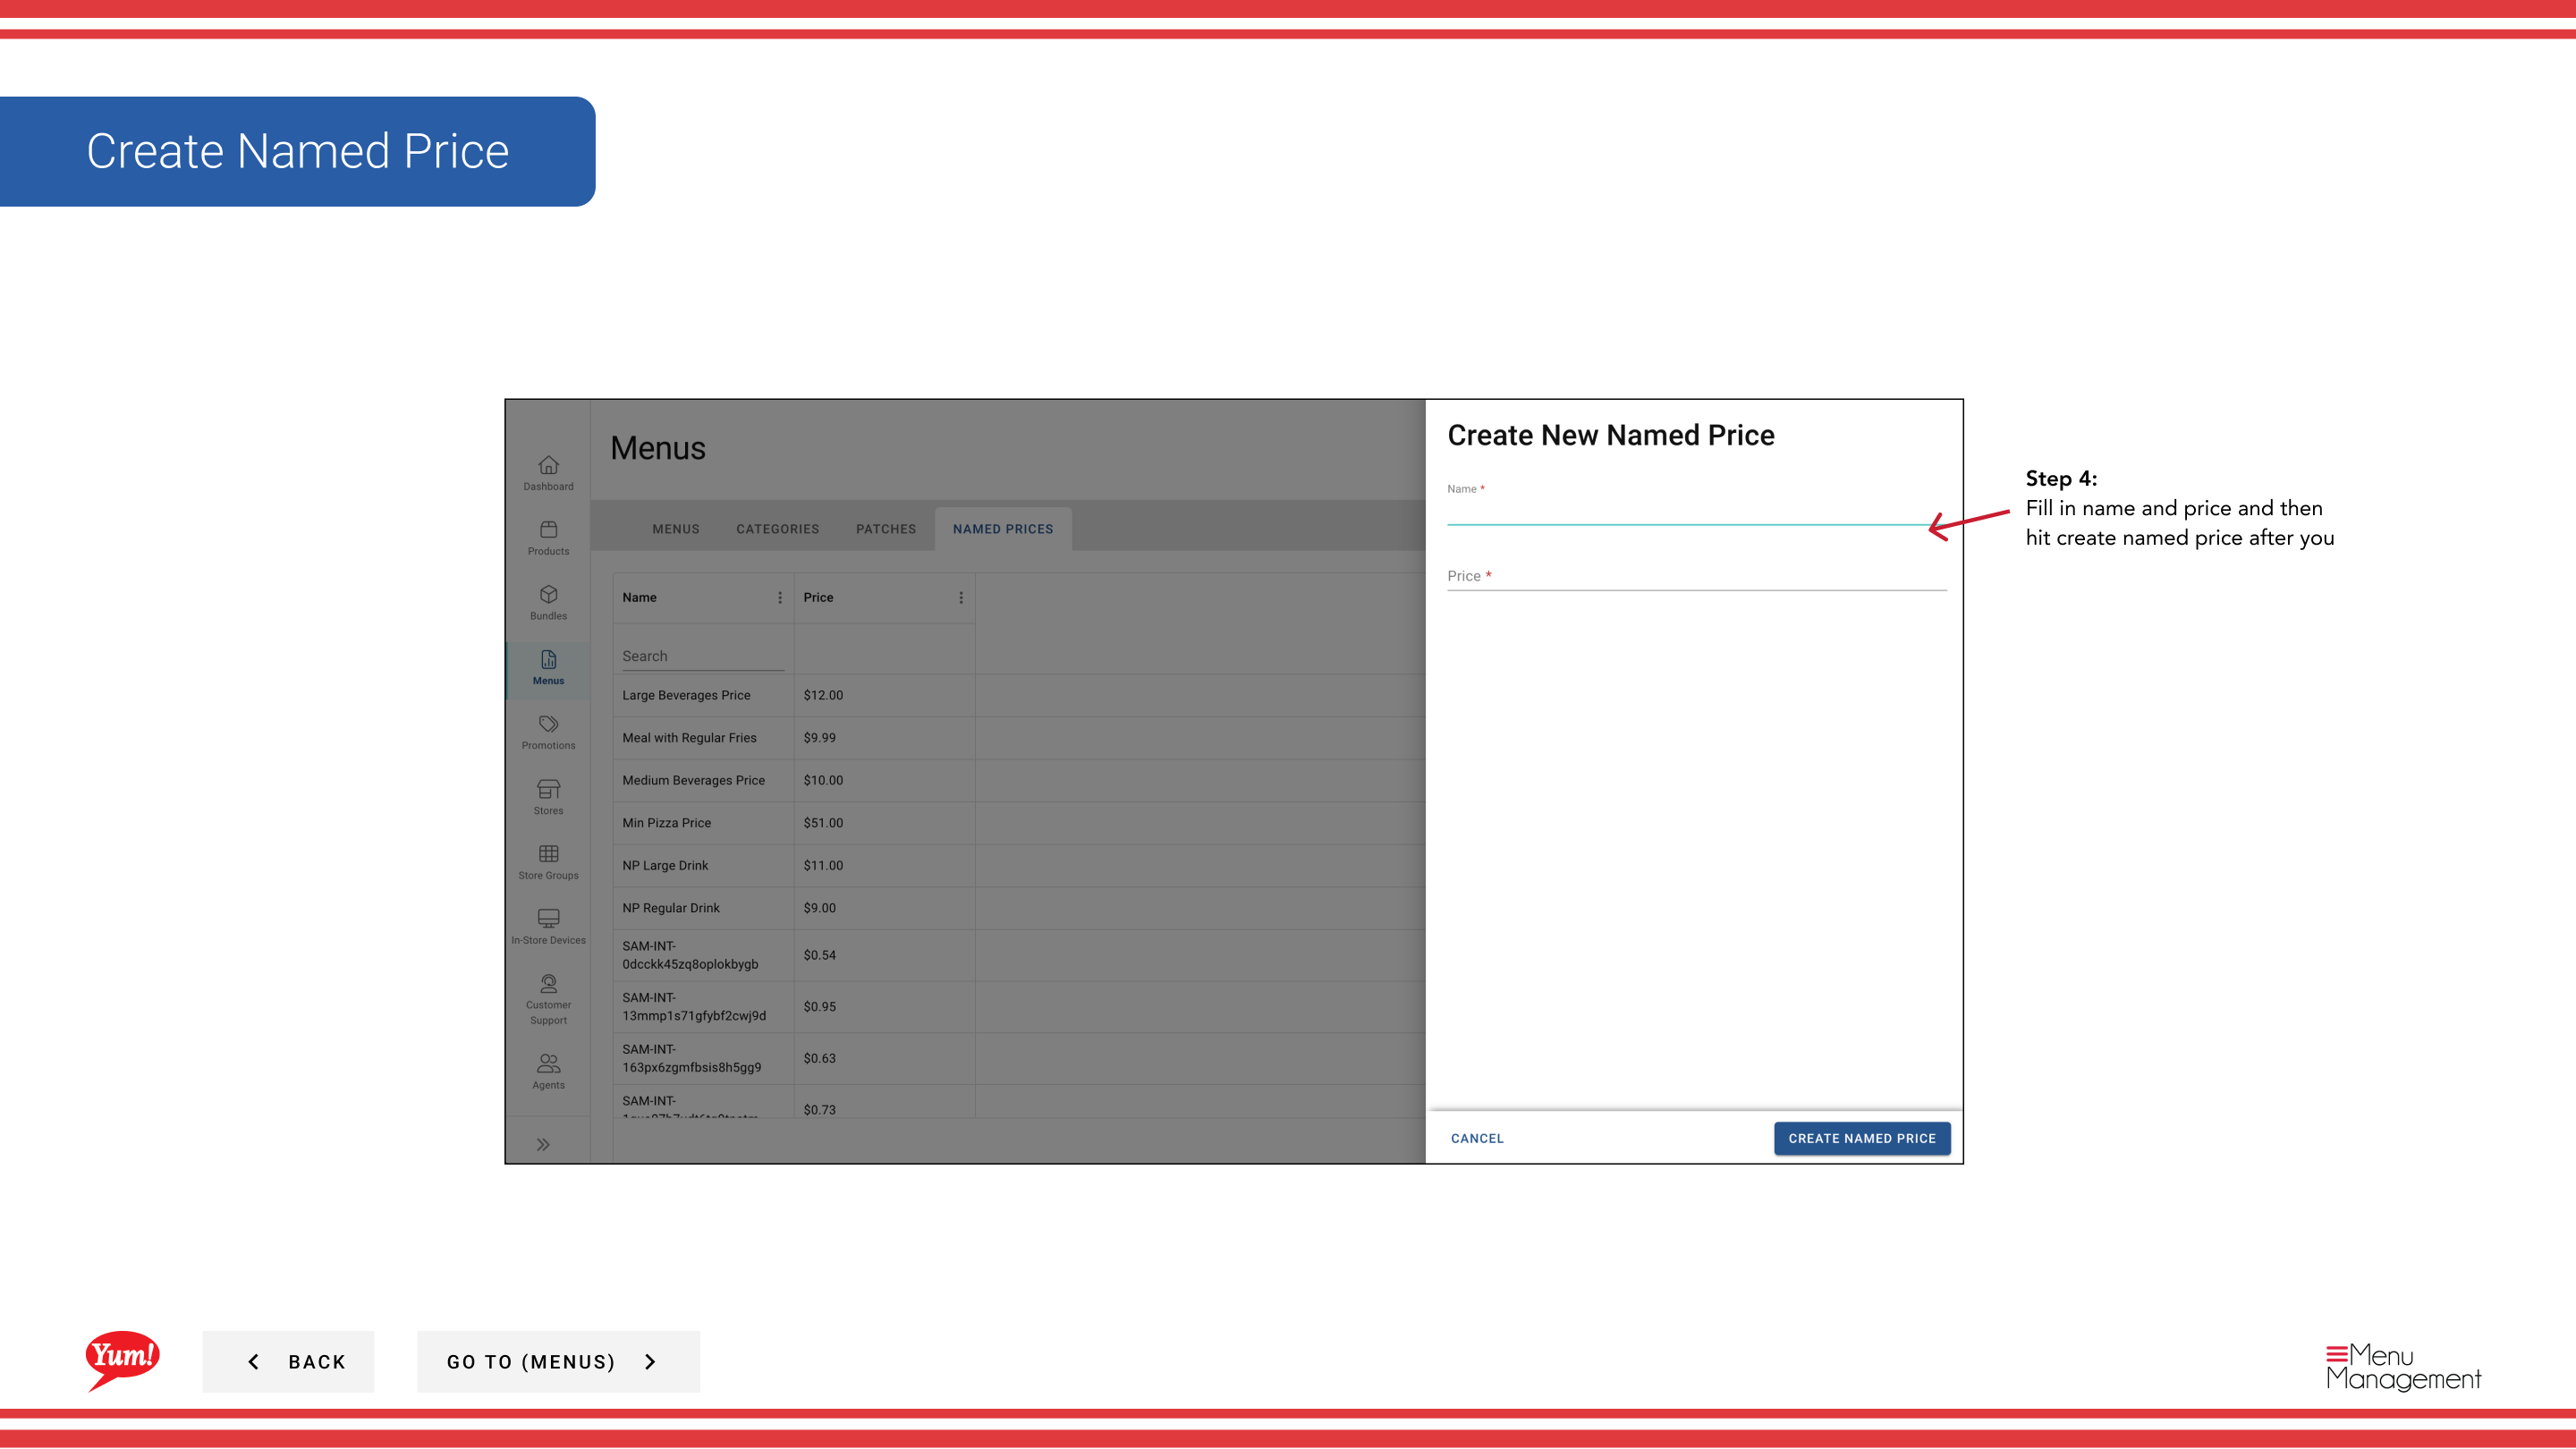
Step 5: Click Create Named Price to save.
Once created, you can apply this named price to multiple products or variants. When you need to change the price, update it once here and all products using it will be updated automatically.
Use the search box at the top to find existing named prices. You can adjust the number of results displayed per page using the results dropdown.
Related guides
- Edit Named Price — Update the price value or name
- Delete Named Price — Remove a named price
Part of the Admin Portal Guide · Section: Menus