Create a Store Group
What this guide covers
Creates a named grouping of stores that share menu, promotion, or tax configurations — a foundational structure for managing multiple locations at scale. (This guide creates a store group from the Promotions section. You can also create one from the Store Groups section in the main navigation.)
Steps
Step 1: Navigate to the Promotions section using the left-hand navigation menu.
Step 2: Click the Store Groups tab.
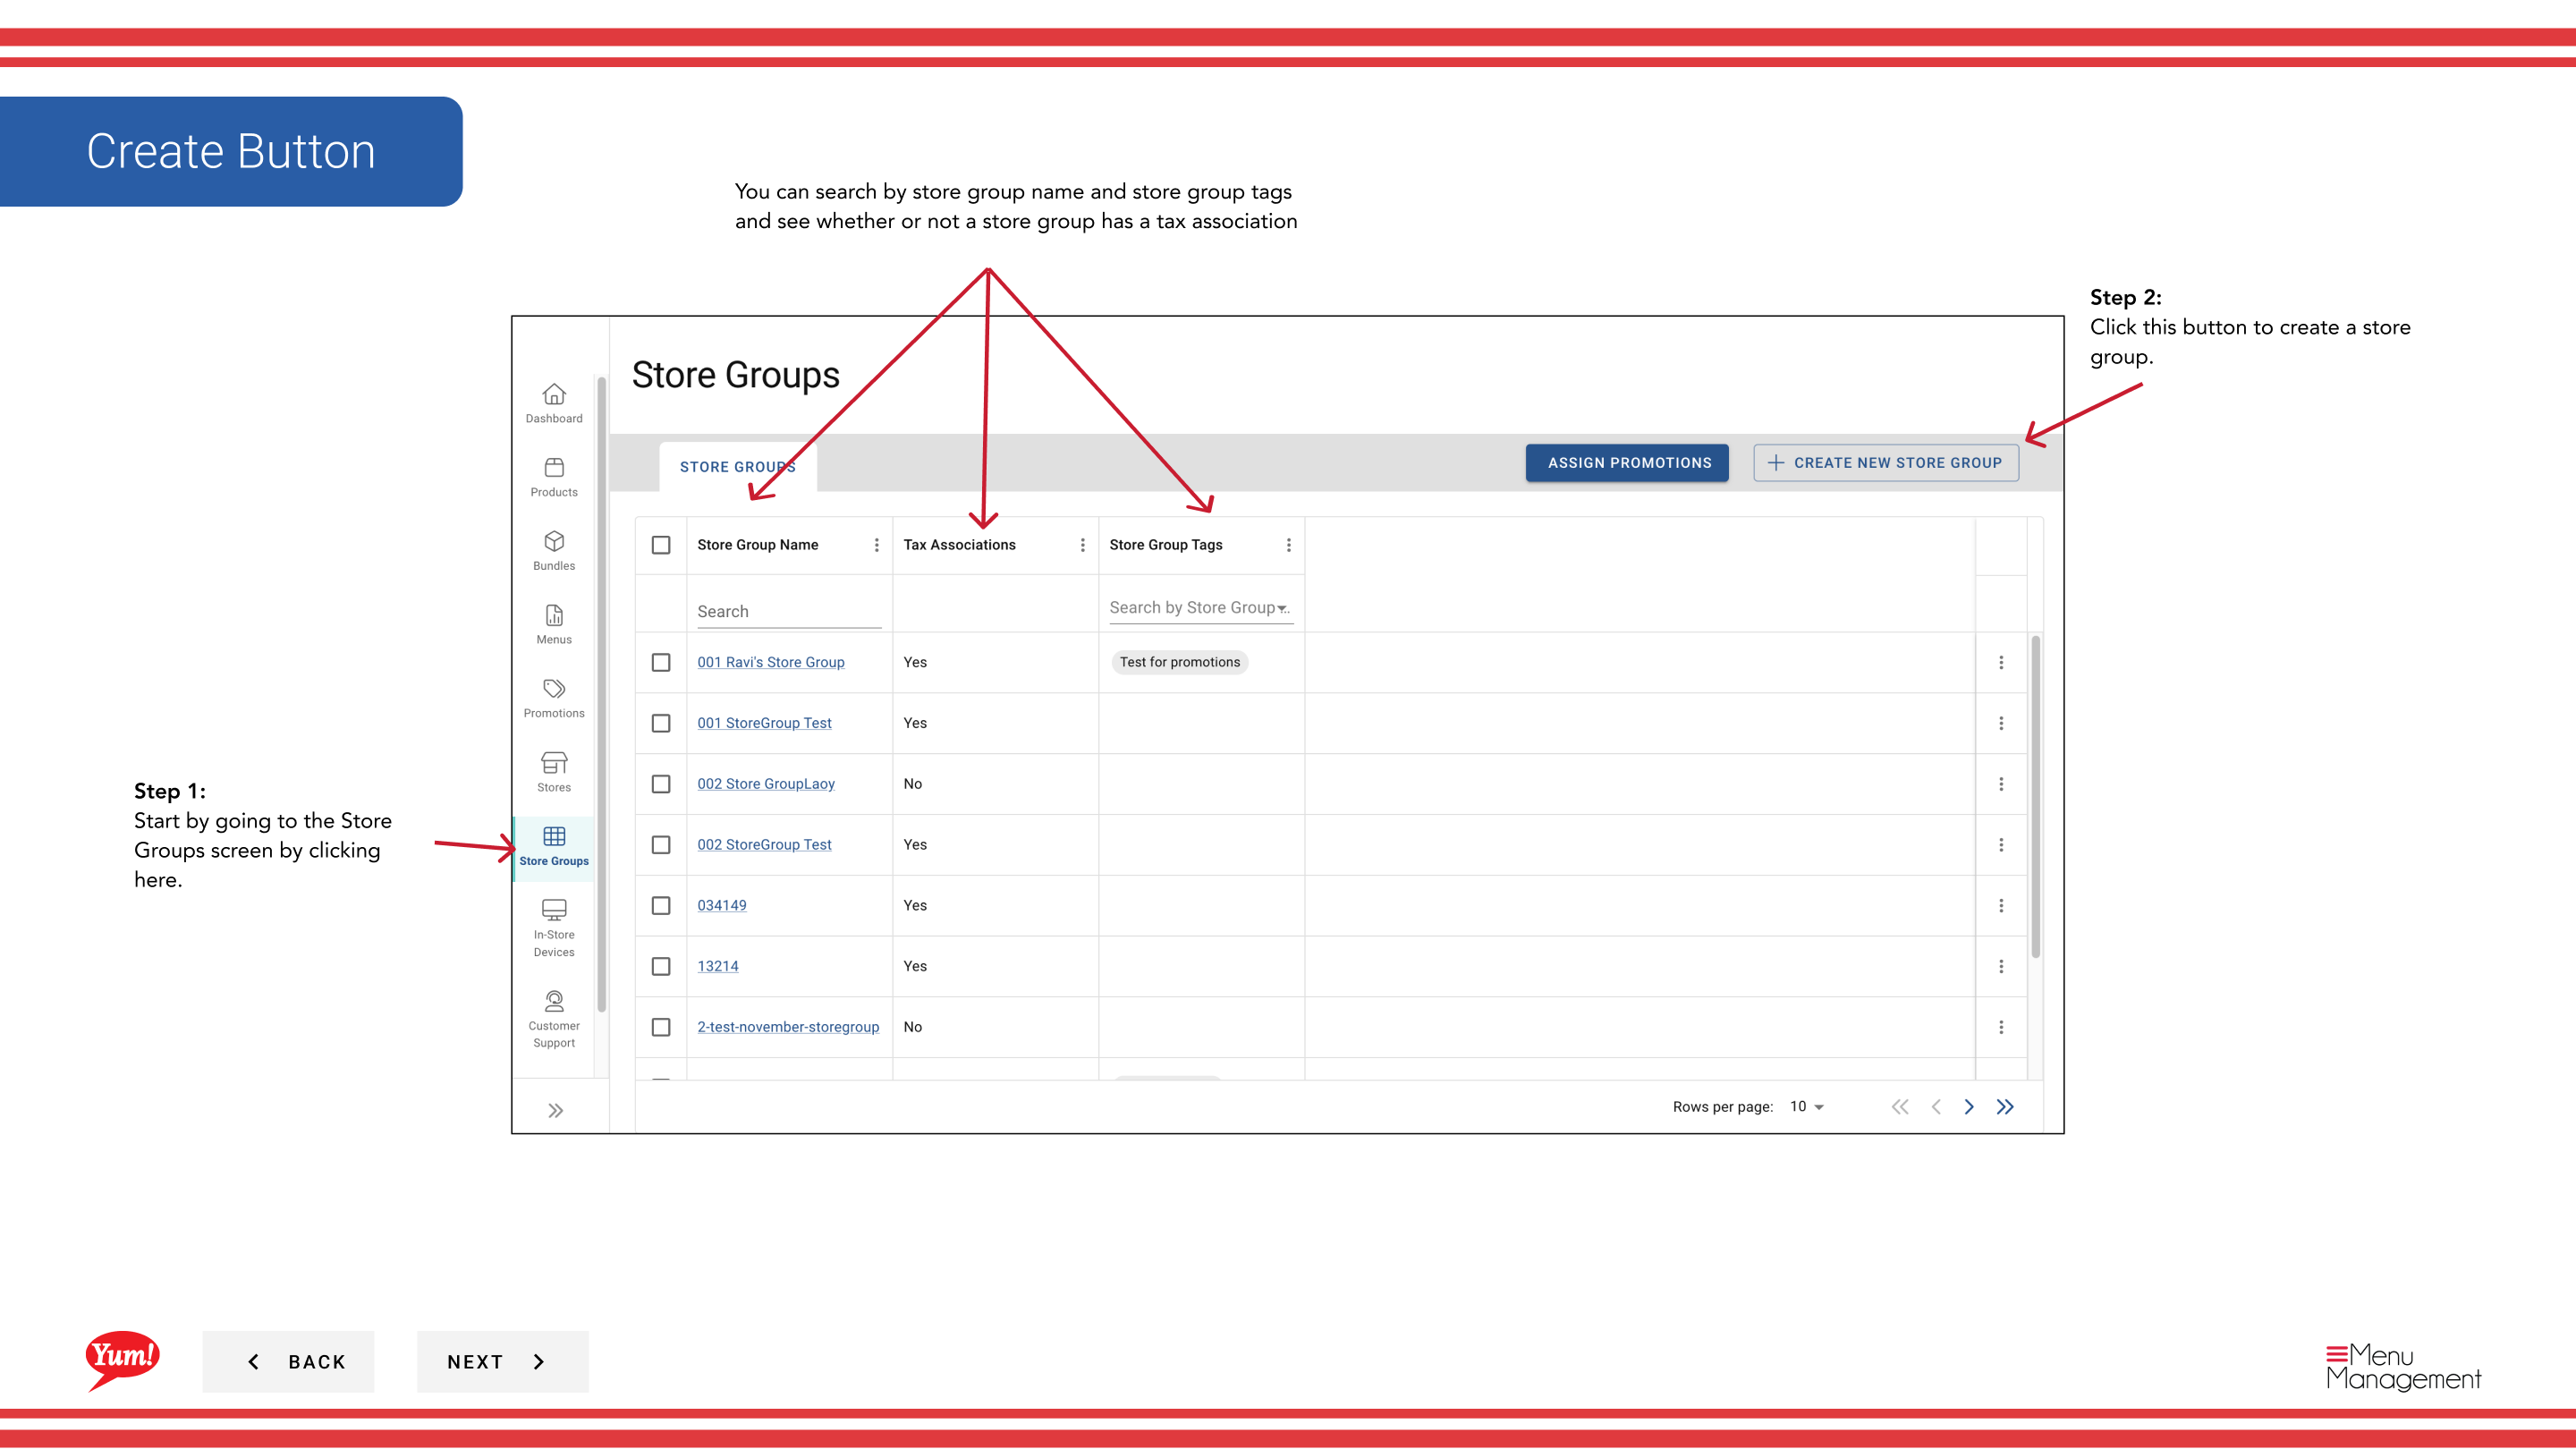
Step 3: Click the + Create New Store Group button.
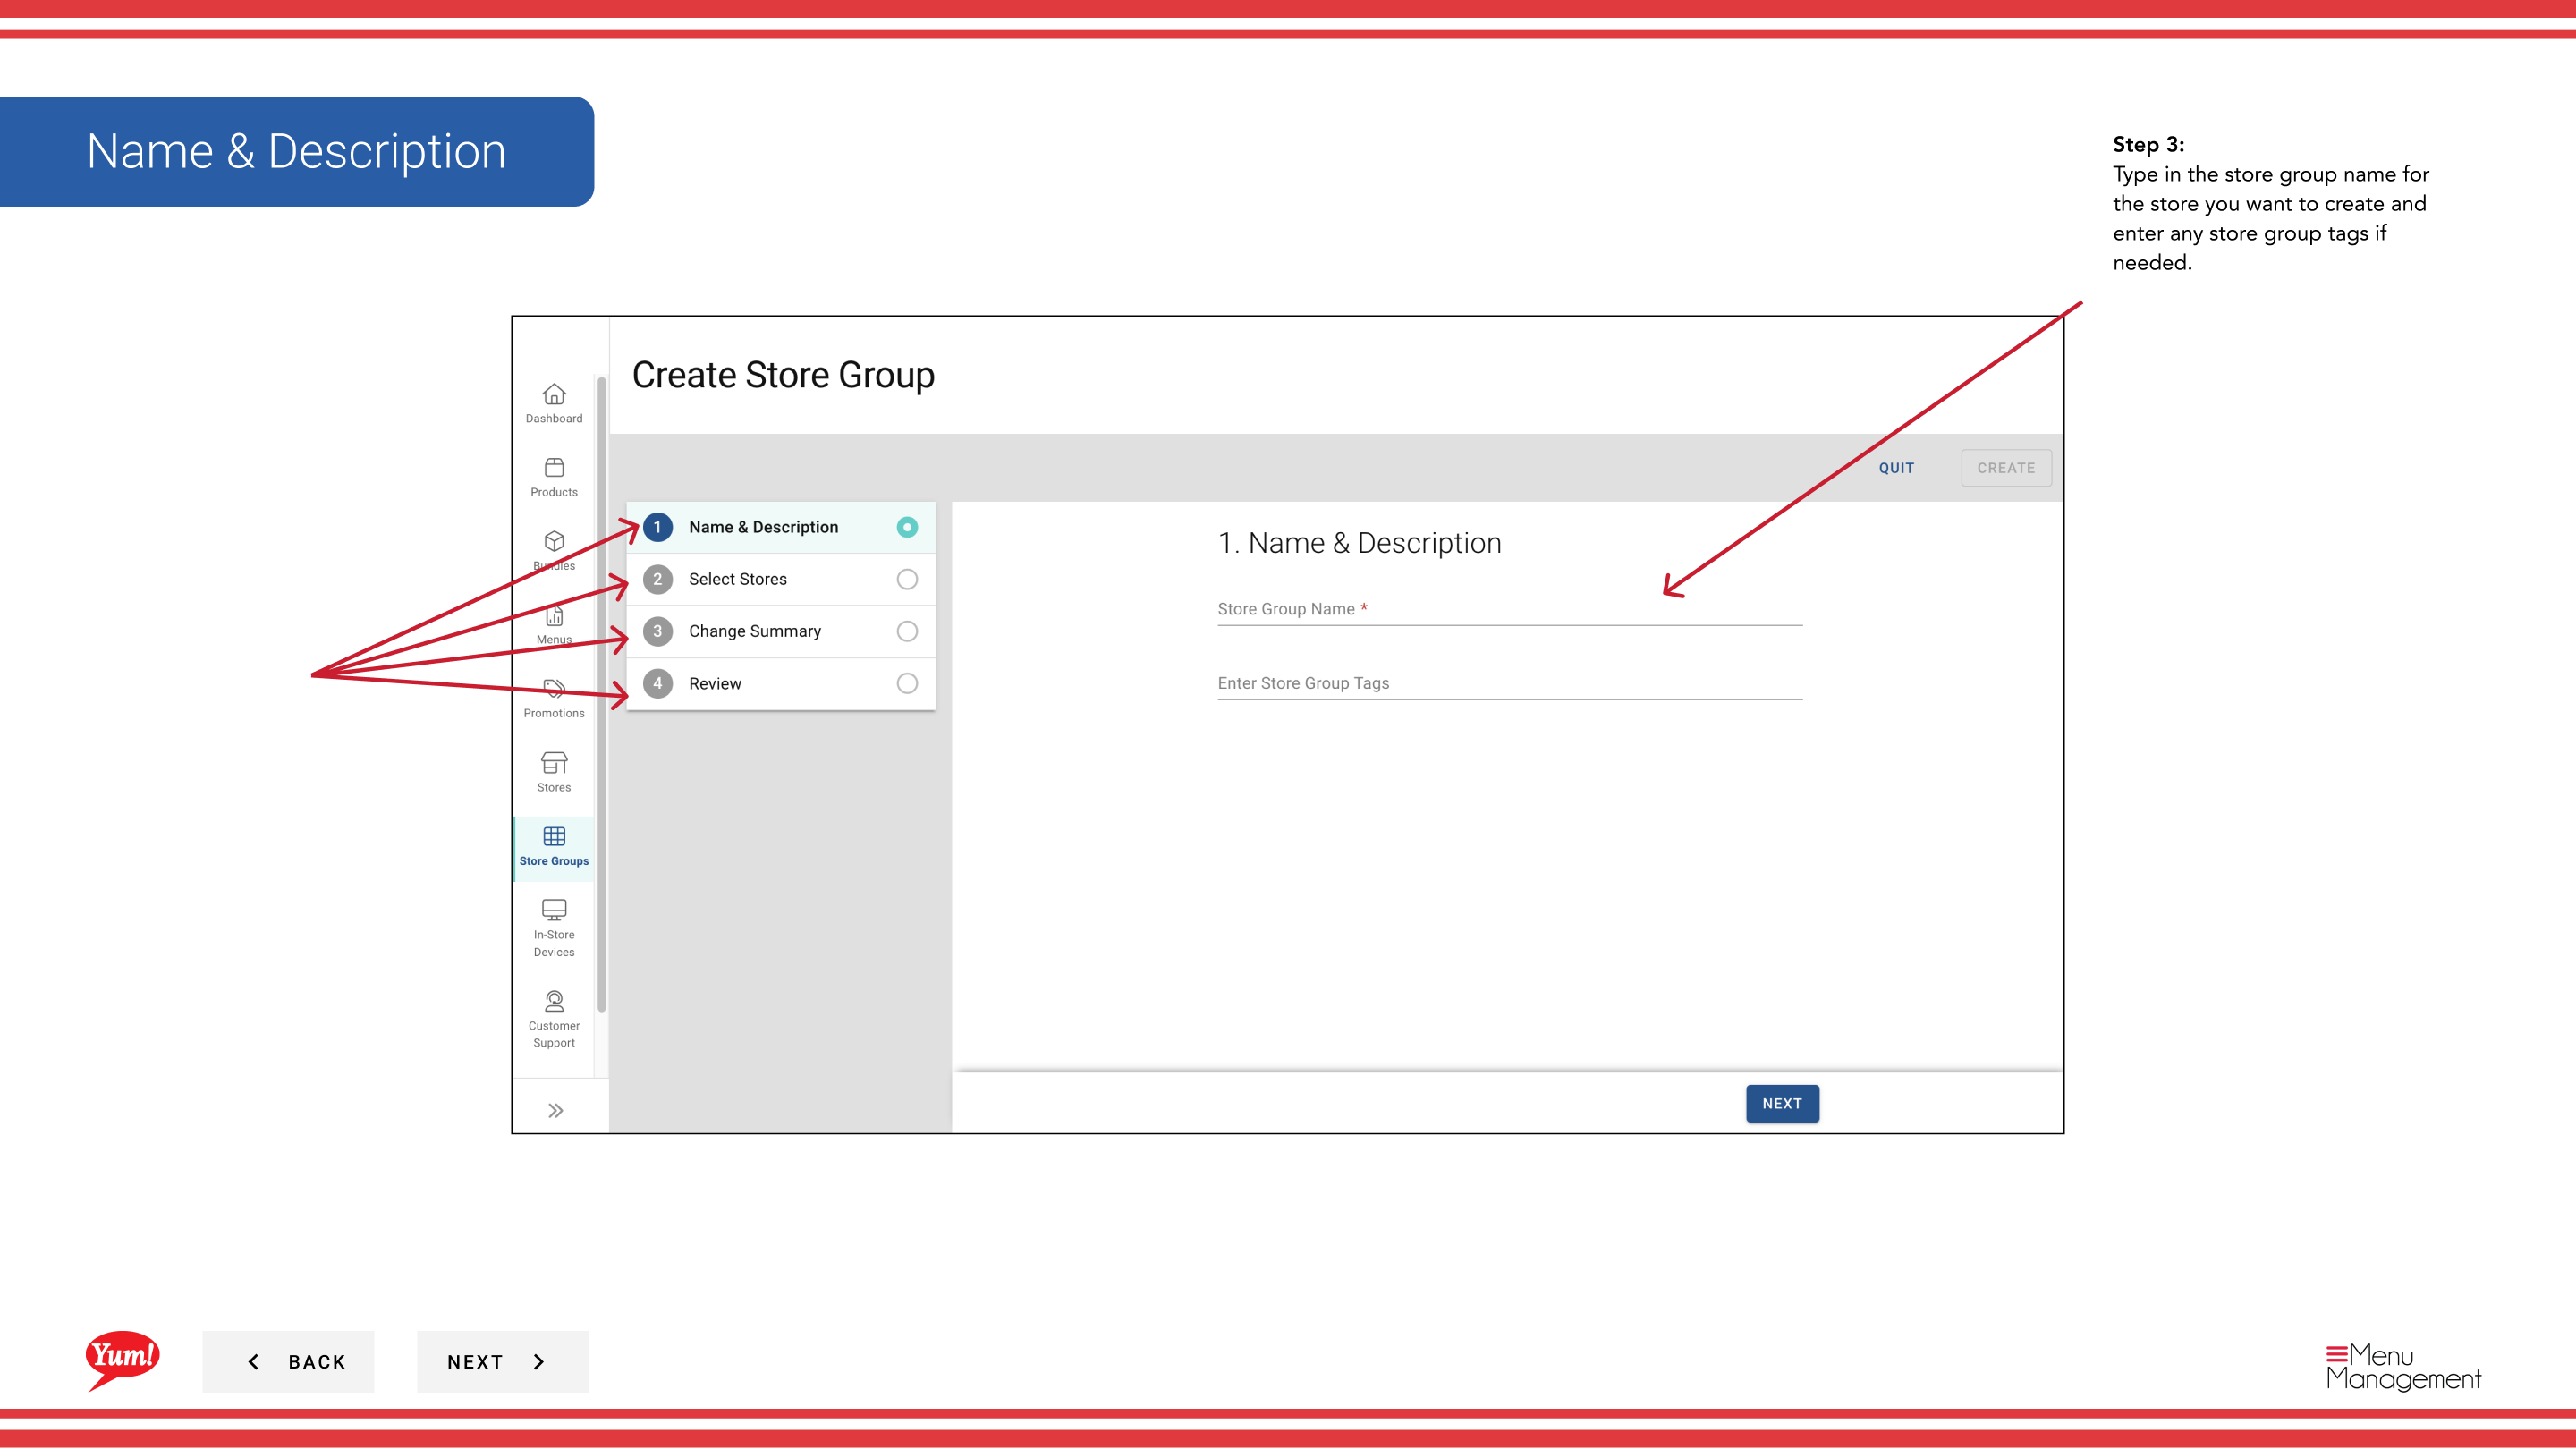
Step 4: Enter the store group details. Fields marked with * are required.
| Field | What to enter | Notes |
|---|---|---|
| Store Group Name * | A descriptive name for this group | e.g., “NSW Franchise Group”, “Corporate Owned Stores”, “Breakfast Pilot 2024”. Should clearly differentiate from other groups. |
| Store Group Tags | Optional labels for filtering and reporting | e.g., “pilot”, “corporate”, “franchise”. You can enter multiple tags. |
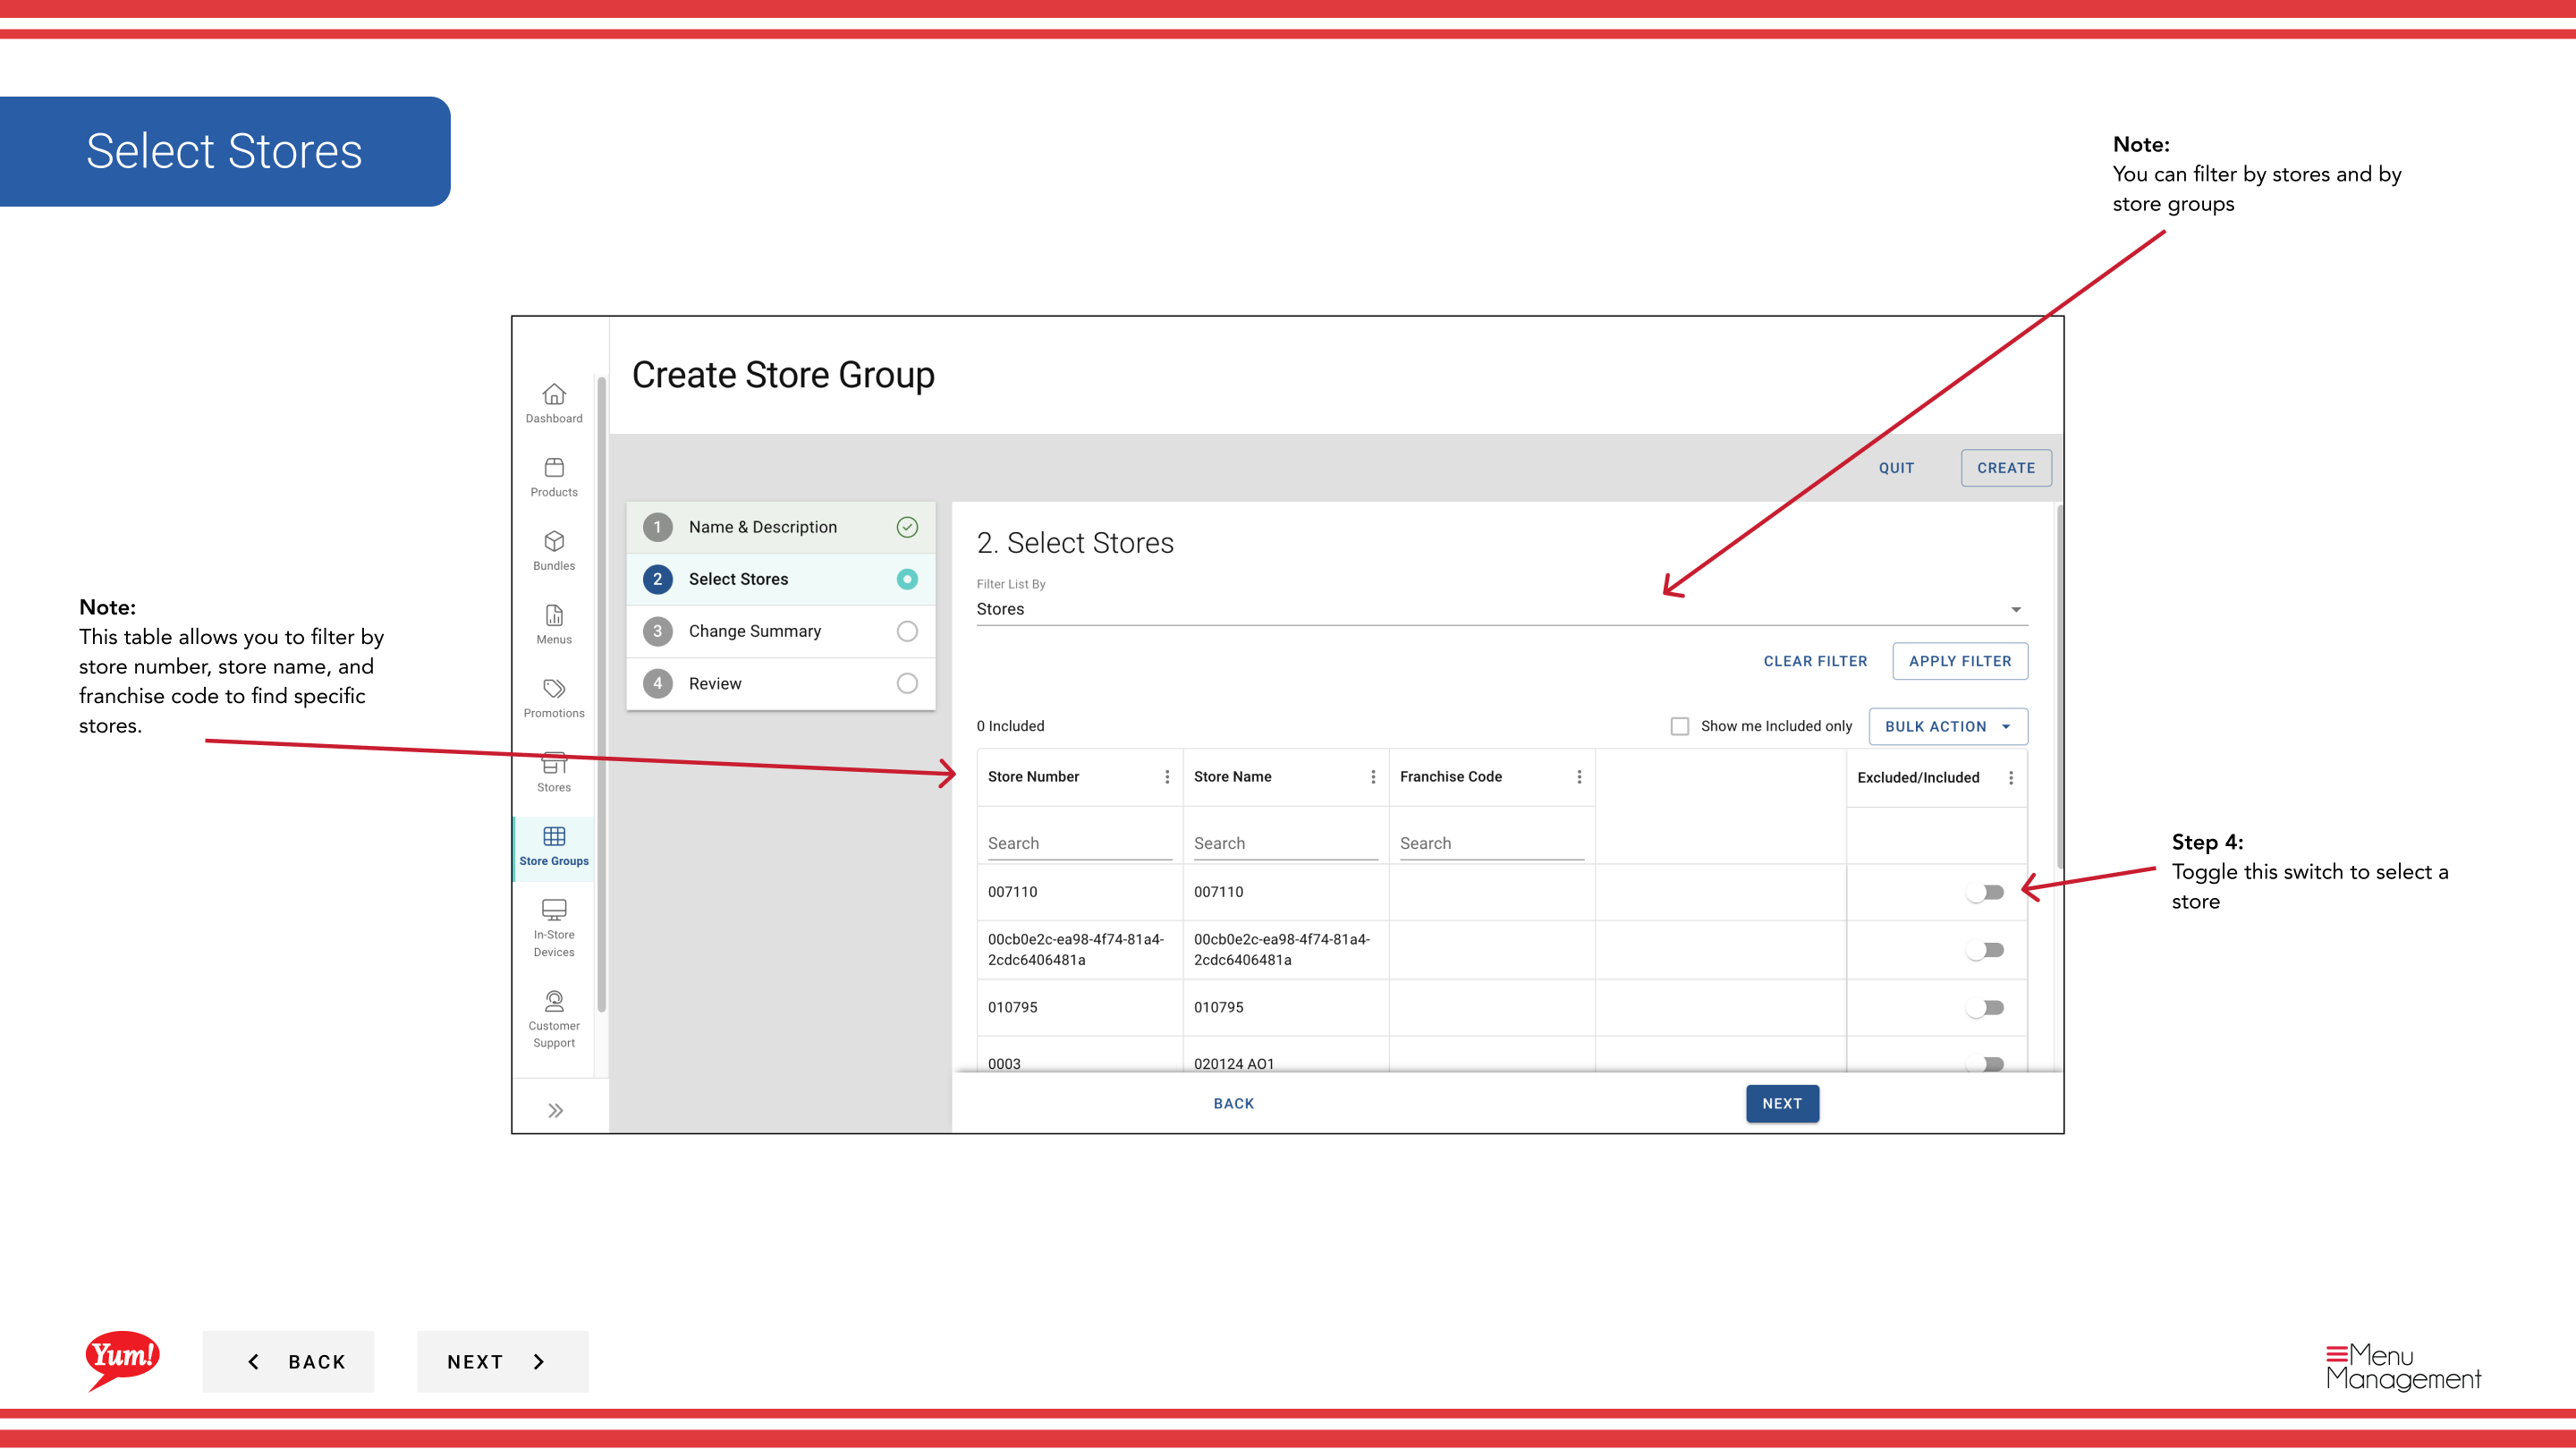
Step 5: Select stores to add to this group. Use the table provided to find and select stores:
- You can filter by Store Number, Store Name, or Franchise Code to quickly find specific stores.
- Toggle the switch next to each store name to add it to the group.
- A store can belong to multiple store groups.
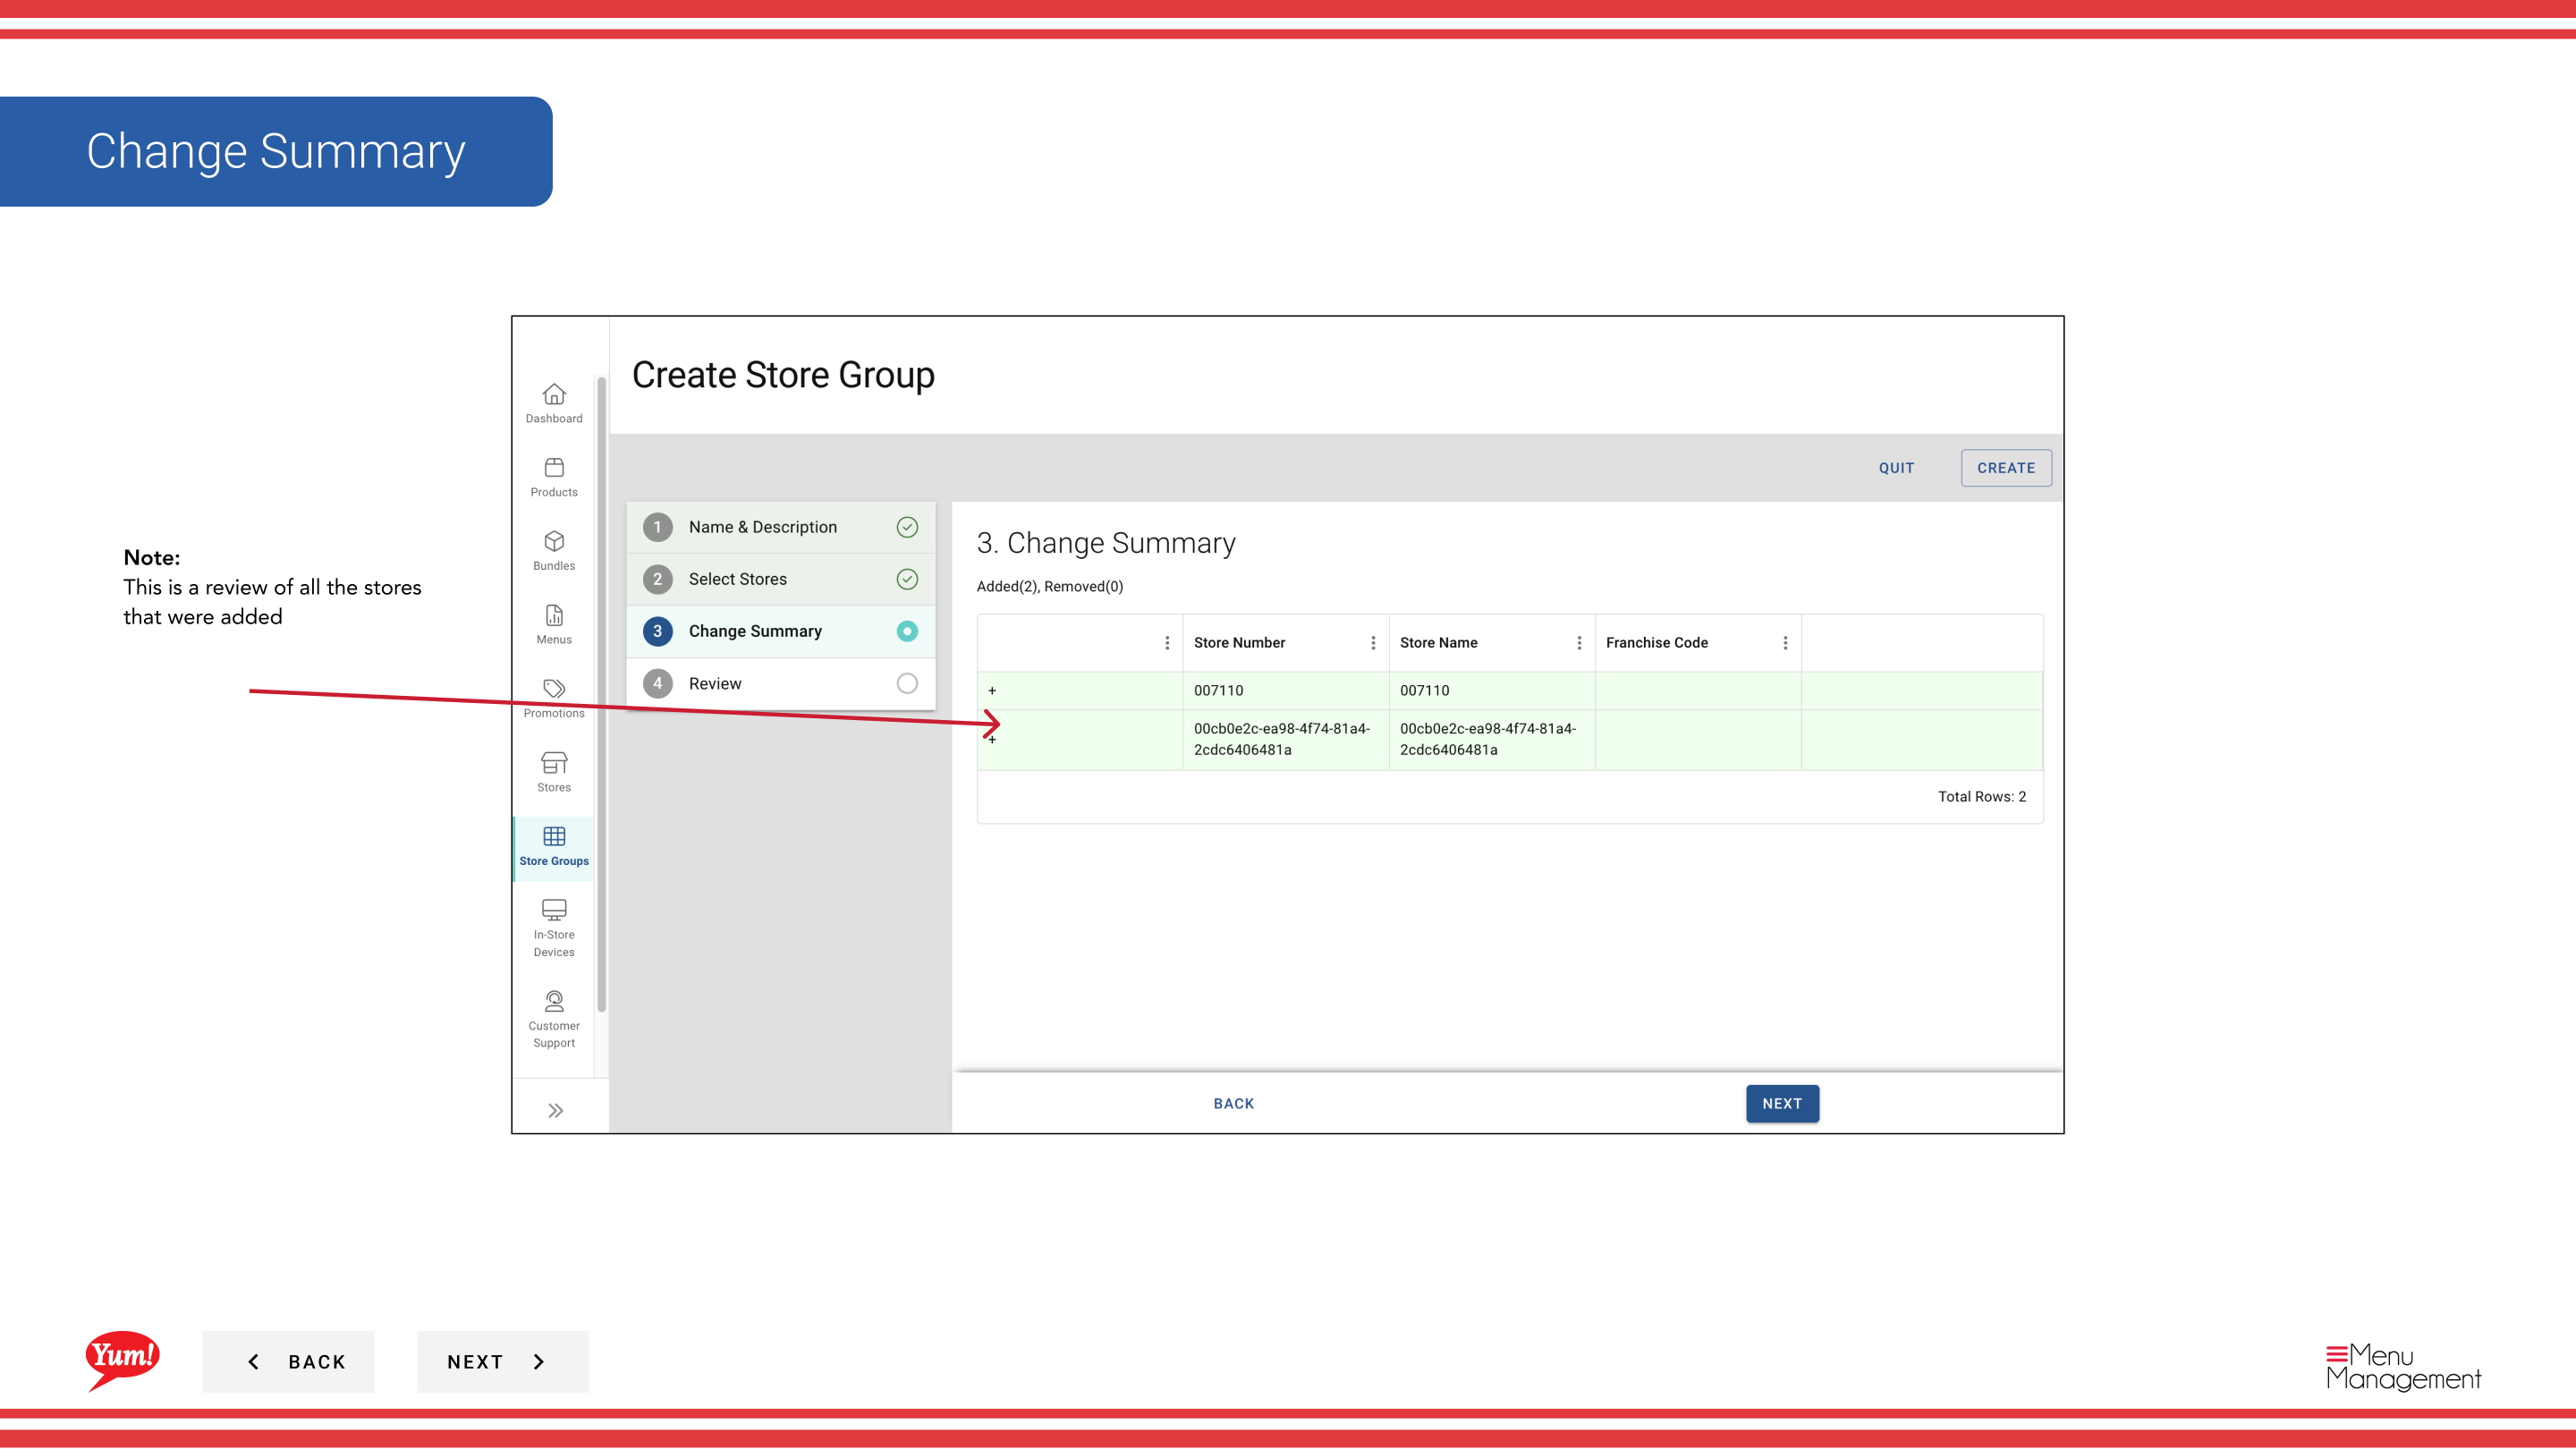
Step 6: Review the summary showing all selected stores and group details. Click Create to save the store group.

A store can belong to multiple store groups. Promotions, tax rules, and menus are all managed at the store group level and apply to all member stores.
Related guides
- Edit a Store Group
- Assign Promotions to Store Groups
- Create a Store Group (from Store Groups section)
Part of the Admin Portal Guide · Section: Promotions