Create a Store Group
What this guide covers
Creates a named grouping of stores that share menu, promotion, or tax configurations — a foundational structure for managing multiple locations at scale.
Steps
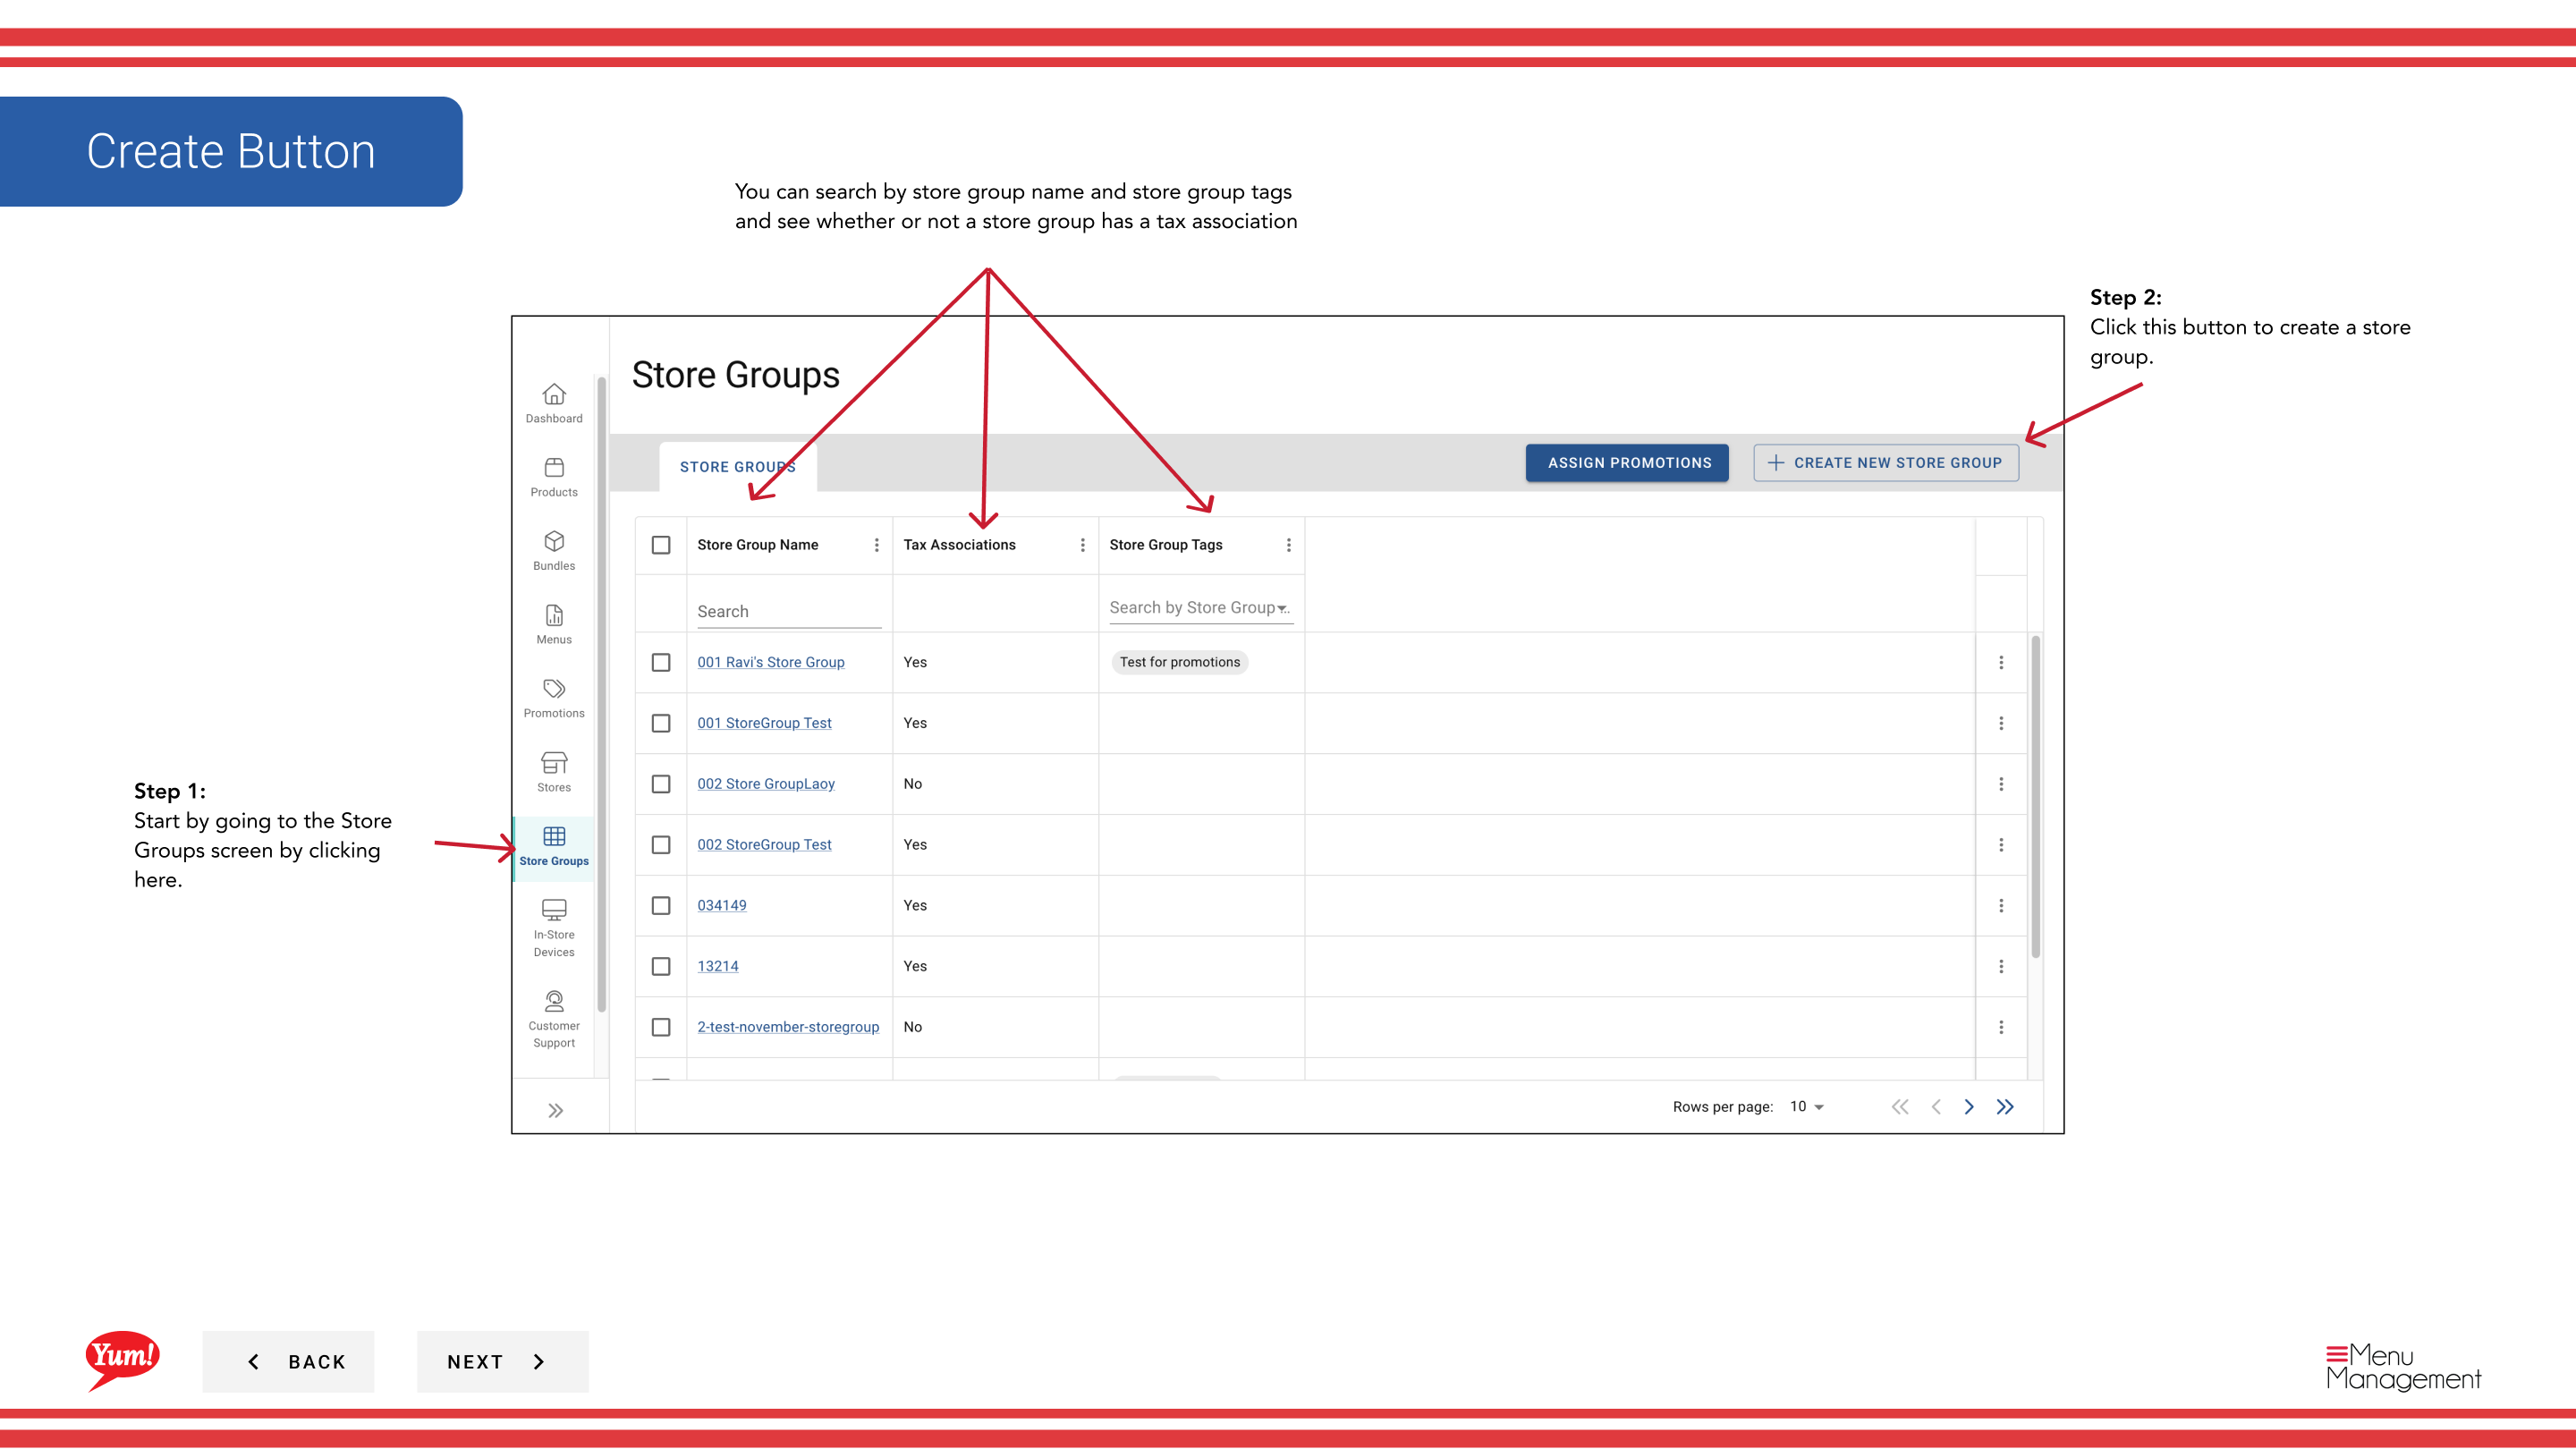
Step 1: Navigate to the Store Groups section using the left-hand navigation menu.
Step 2: Click the + Create New Store Group button.
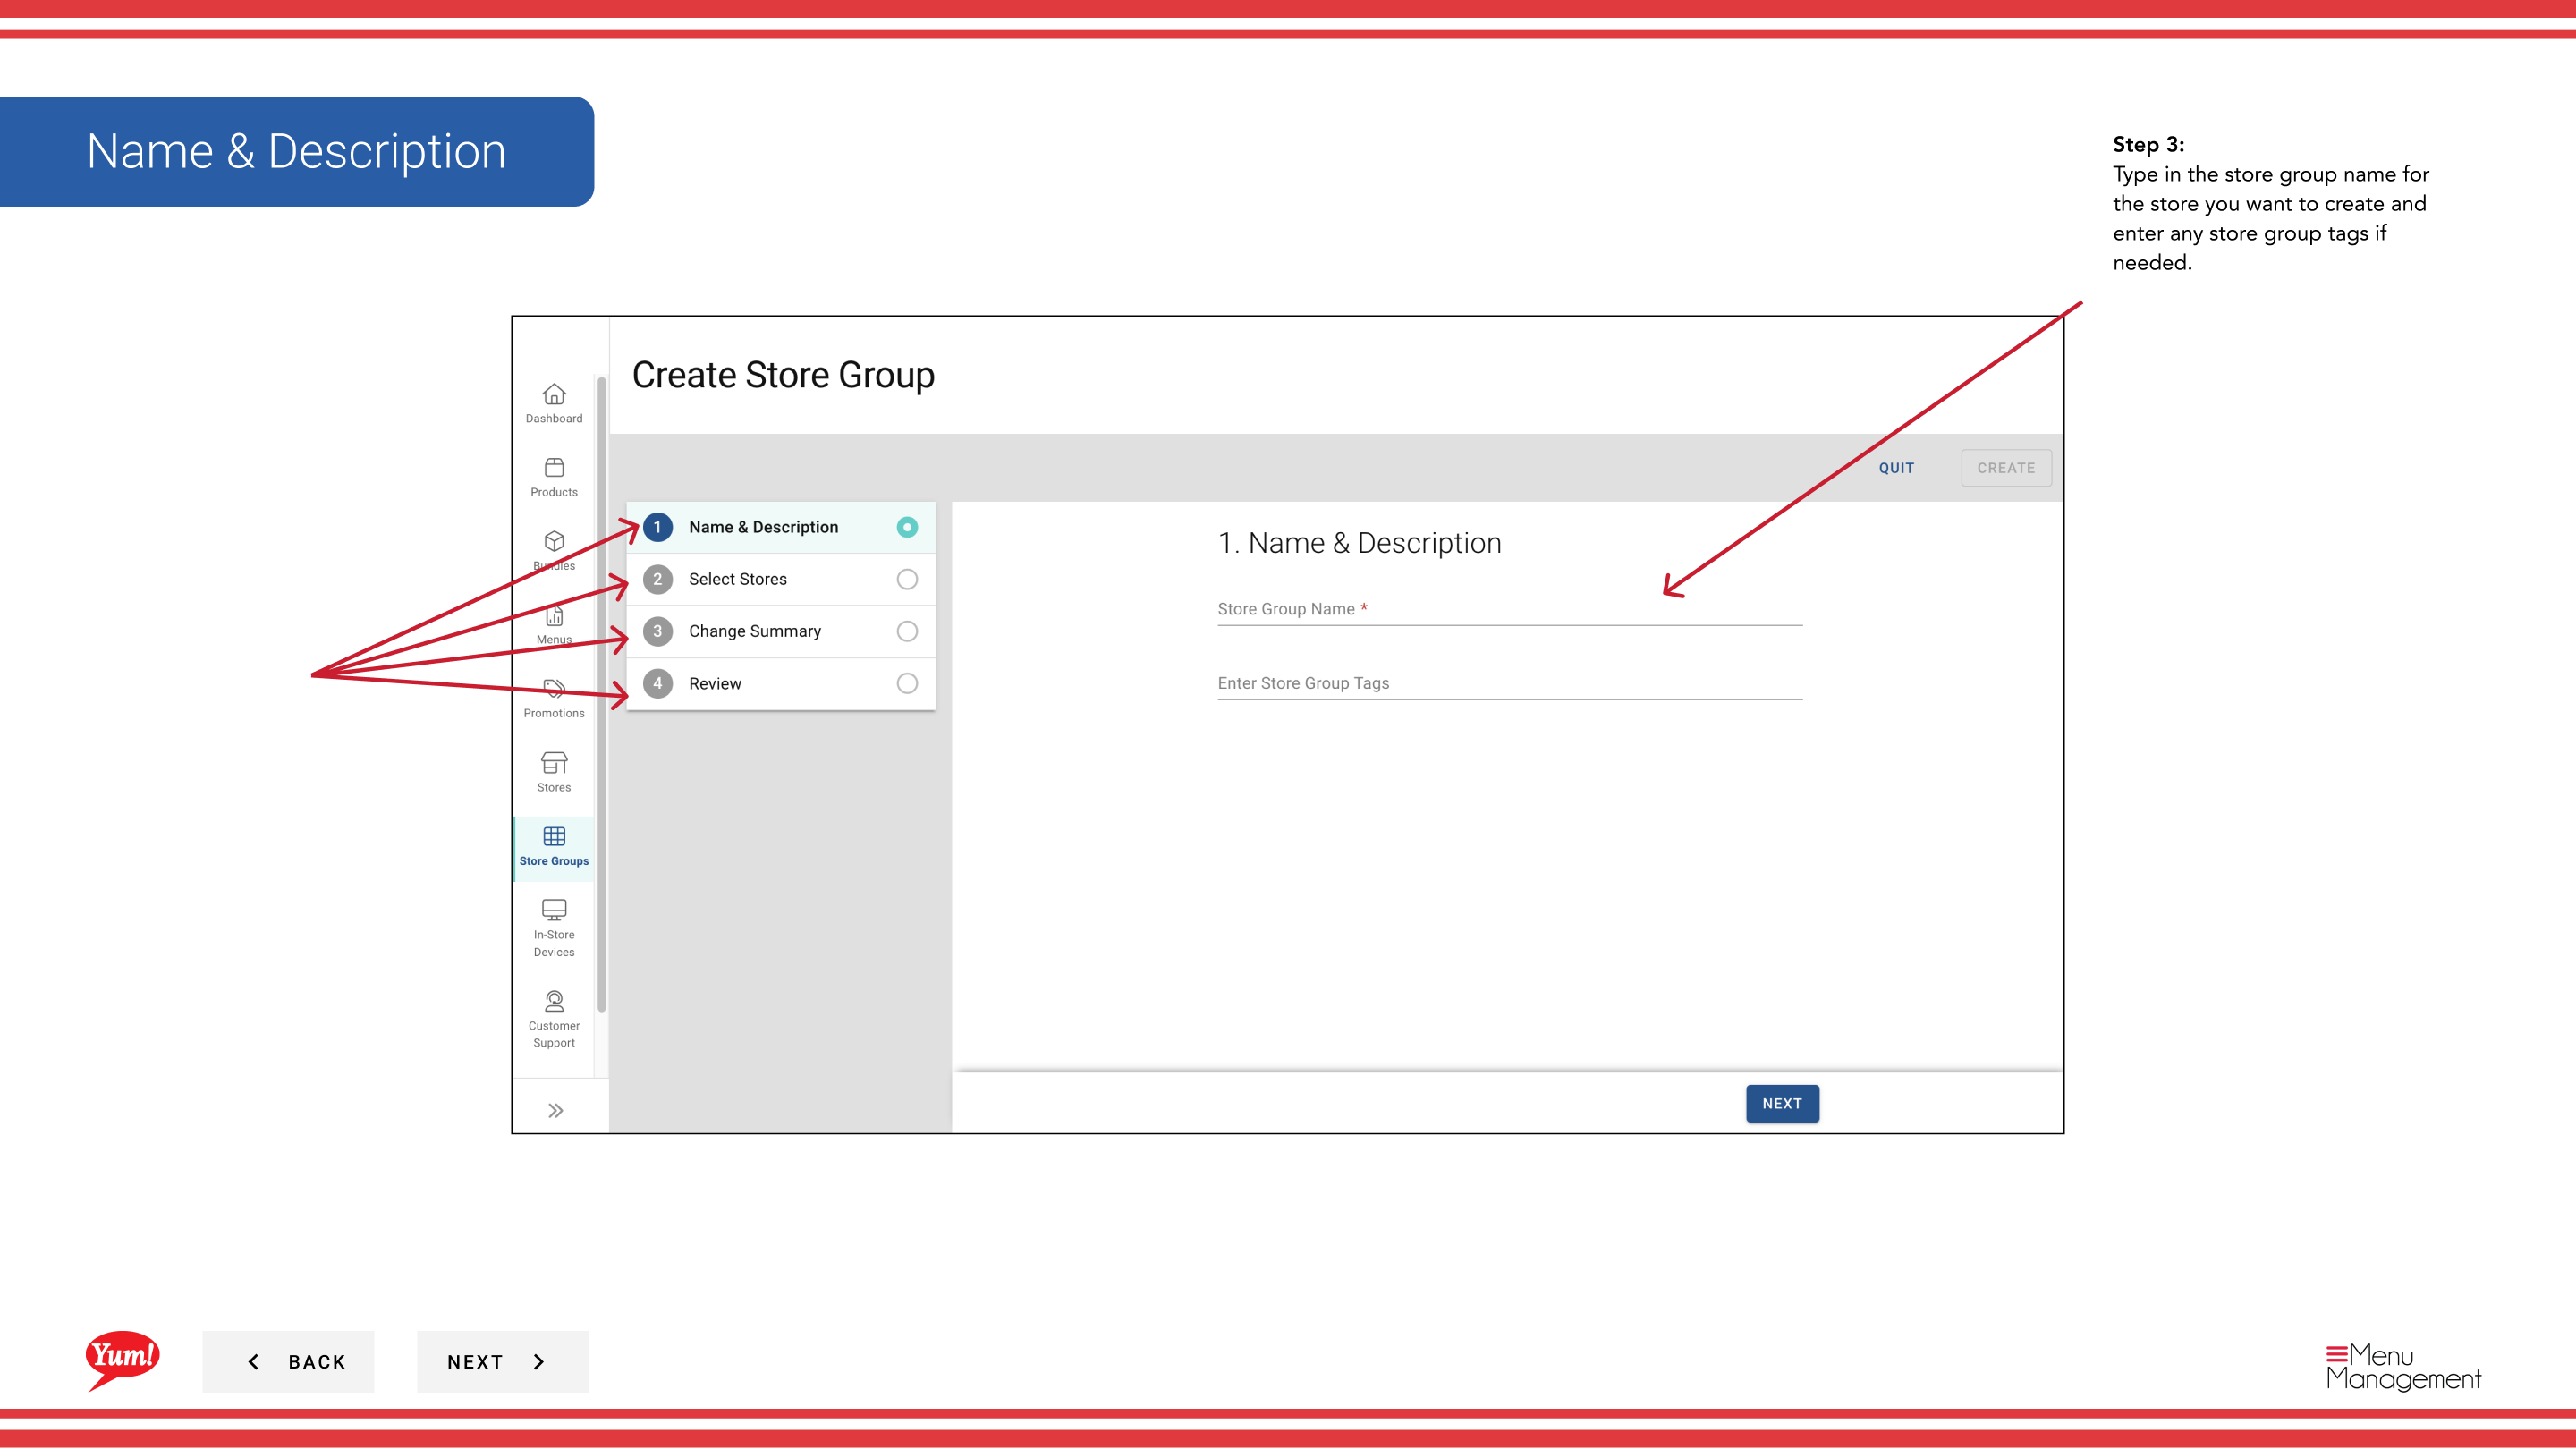
Step 3: Enter the store group details. Fields marked with * are required.
| Field | What to enter | Notes |
|---|---|---|
| Store Group Name * | A descriptive name for this group | e.g., "NSW Franchise Group", "Corporate Owned Stores", "Breakfast Pilot 2024". Should clearly differentiate from other groups. |
| Store Group Tags | Optional labels for filtering and reporting | e.g., "pilot", "corporate", "franchise". Useful for organizing and searching multiple store groups. |
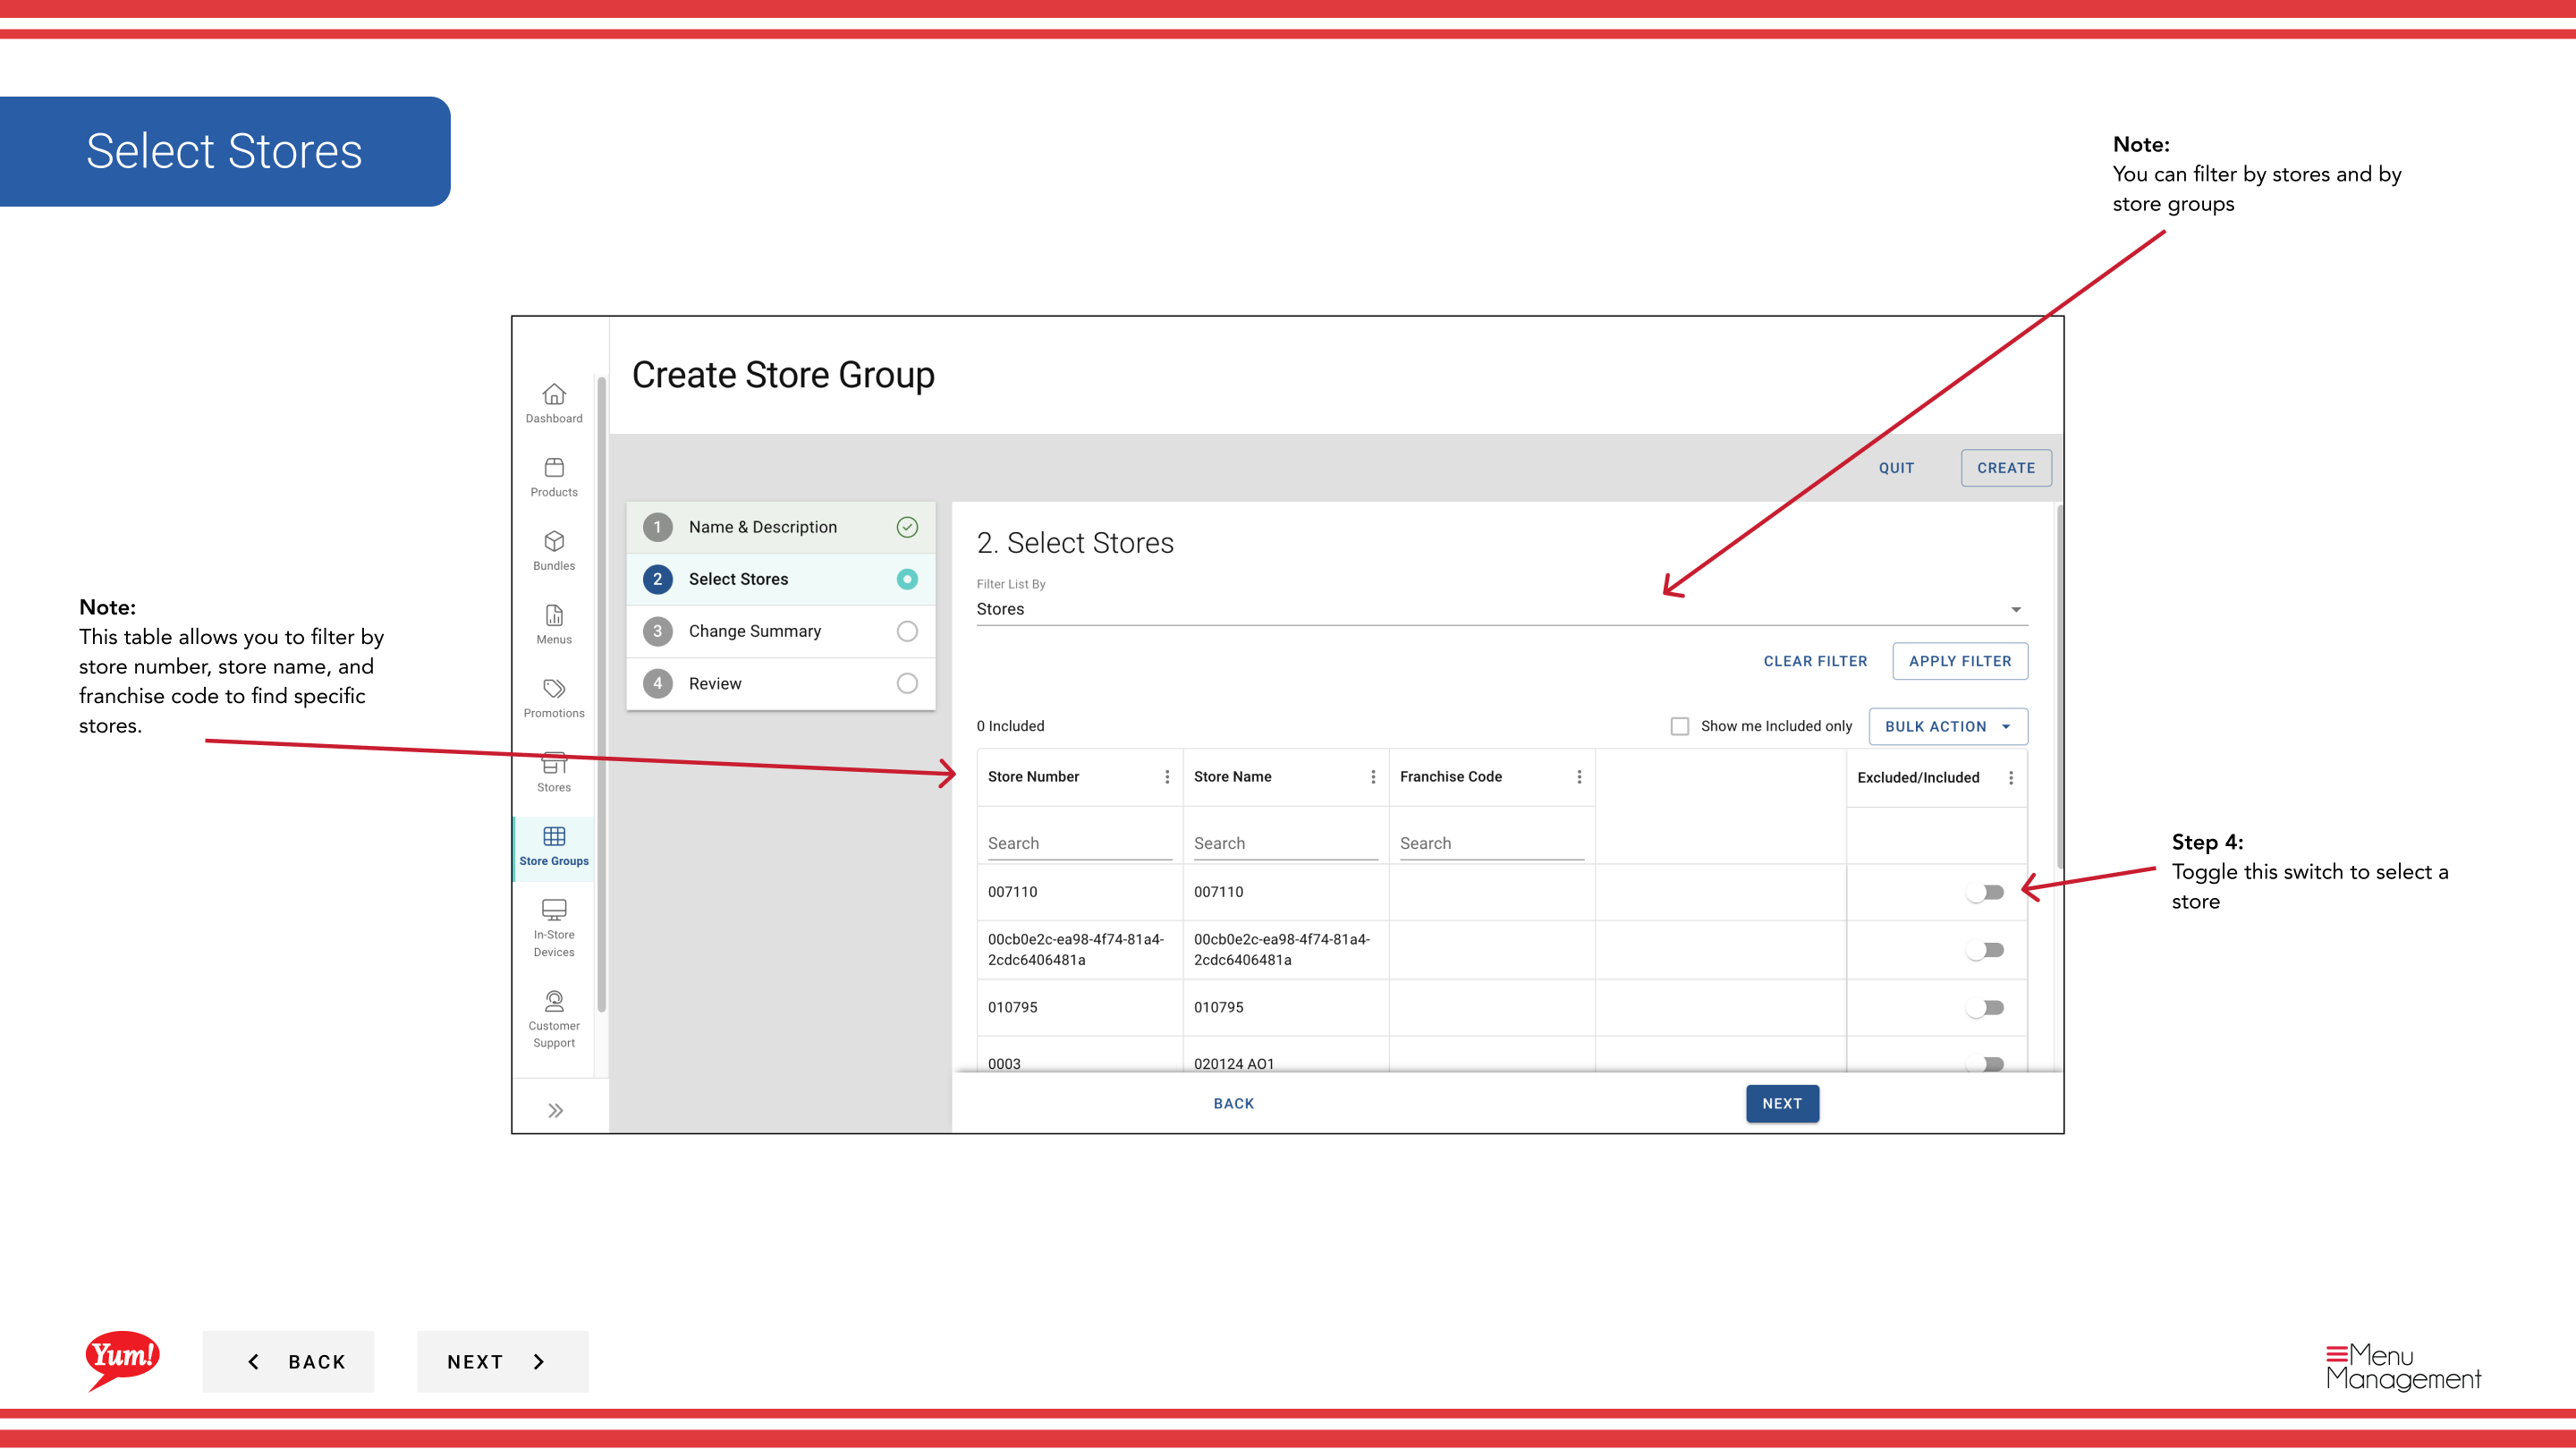
Step 4: Select stores to add to this group using the stores table. You can:
- Filter by Store Number, Store Name, or Franchise Code to quickly find specific stores
- Toggle the switch next to each store name to add or remove stores from the group
- View which stores are already selected by looking for the checked switches
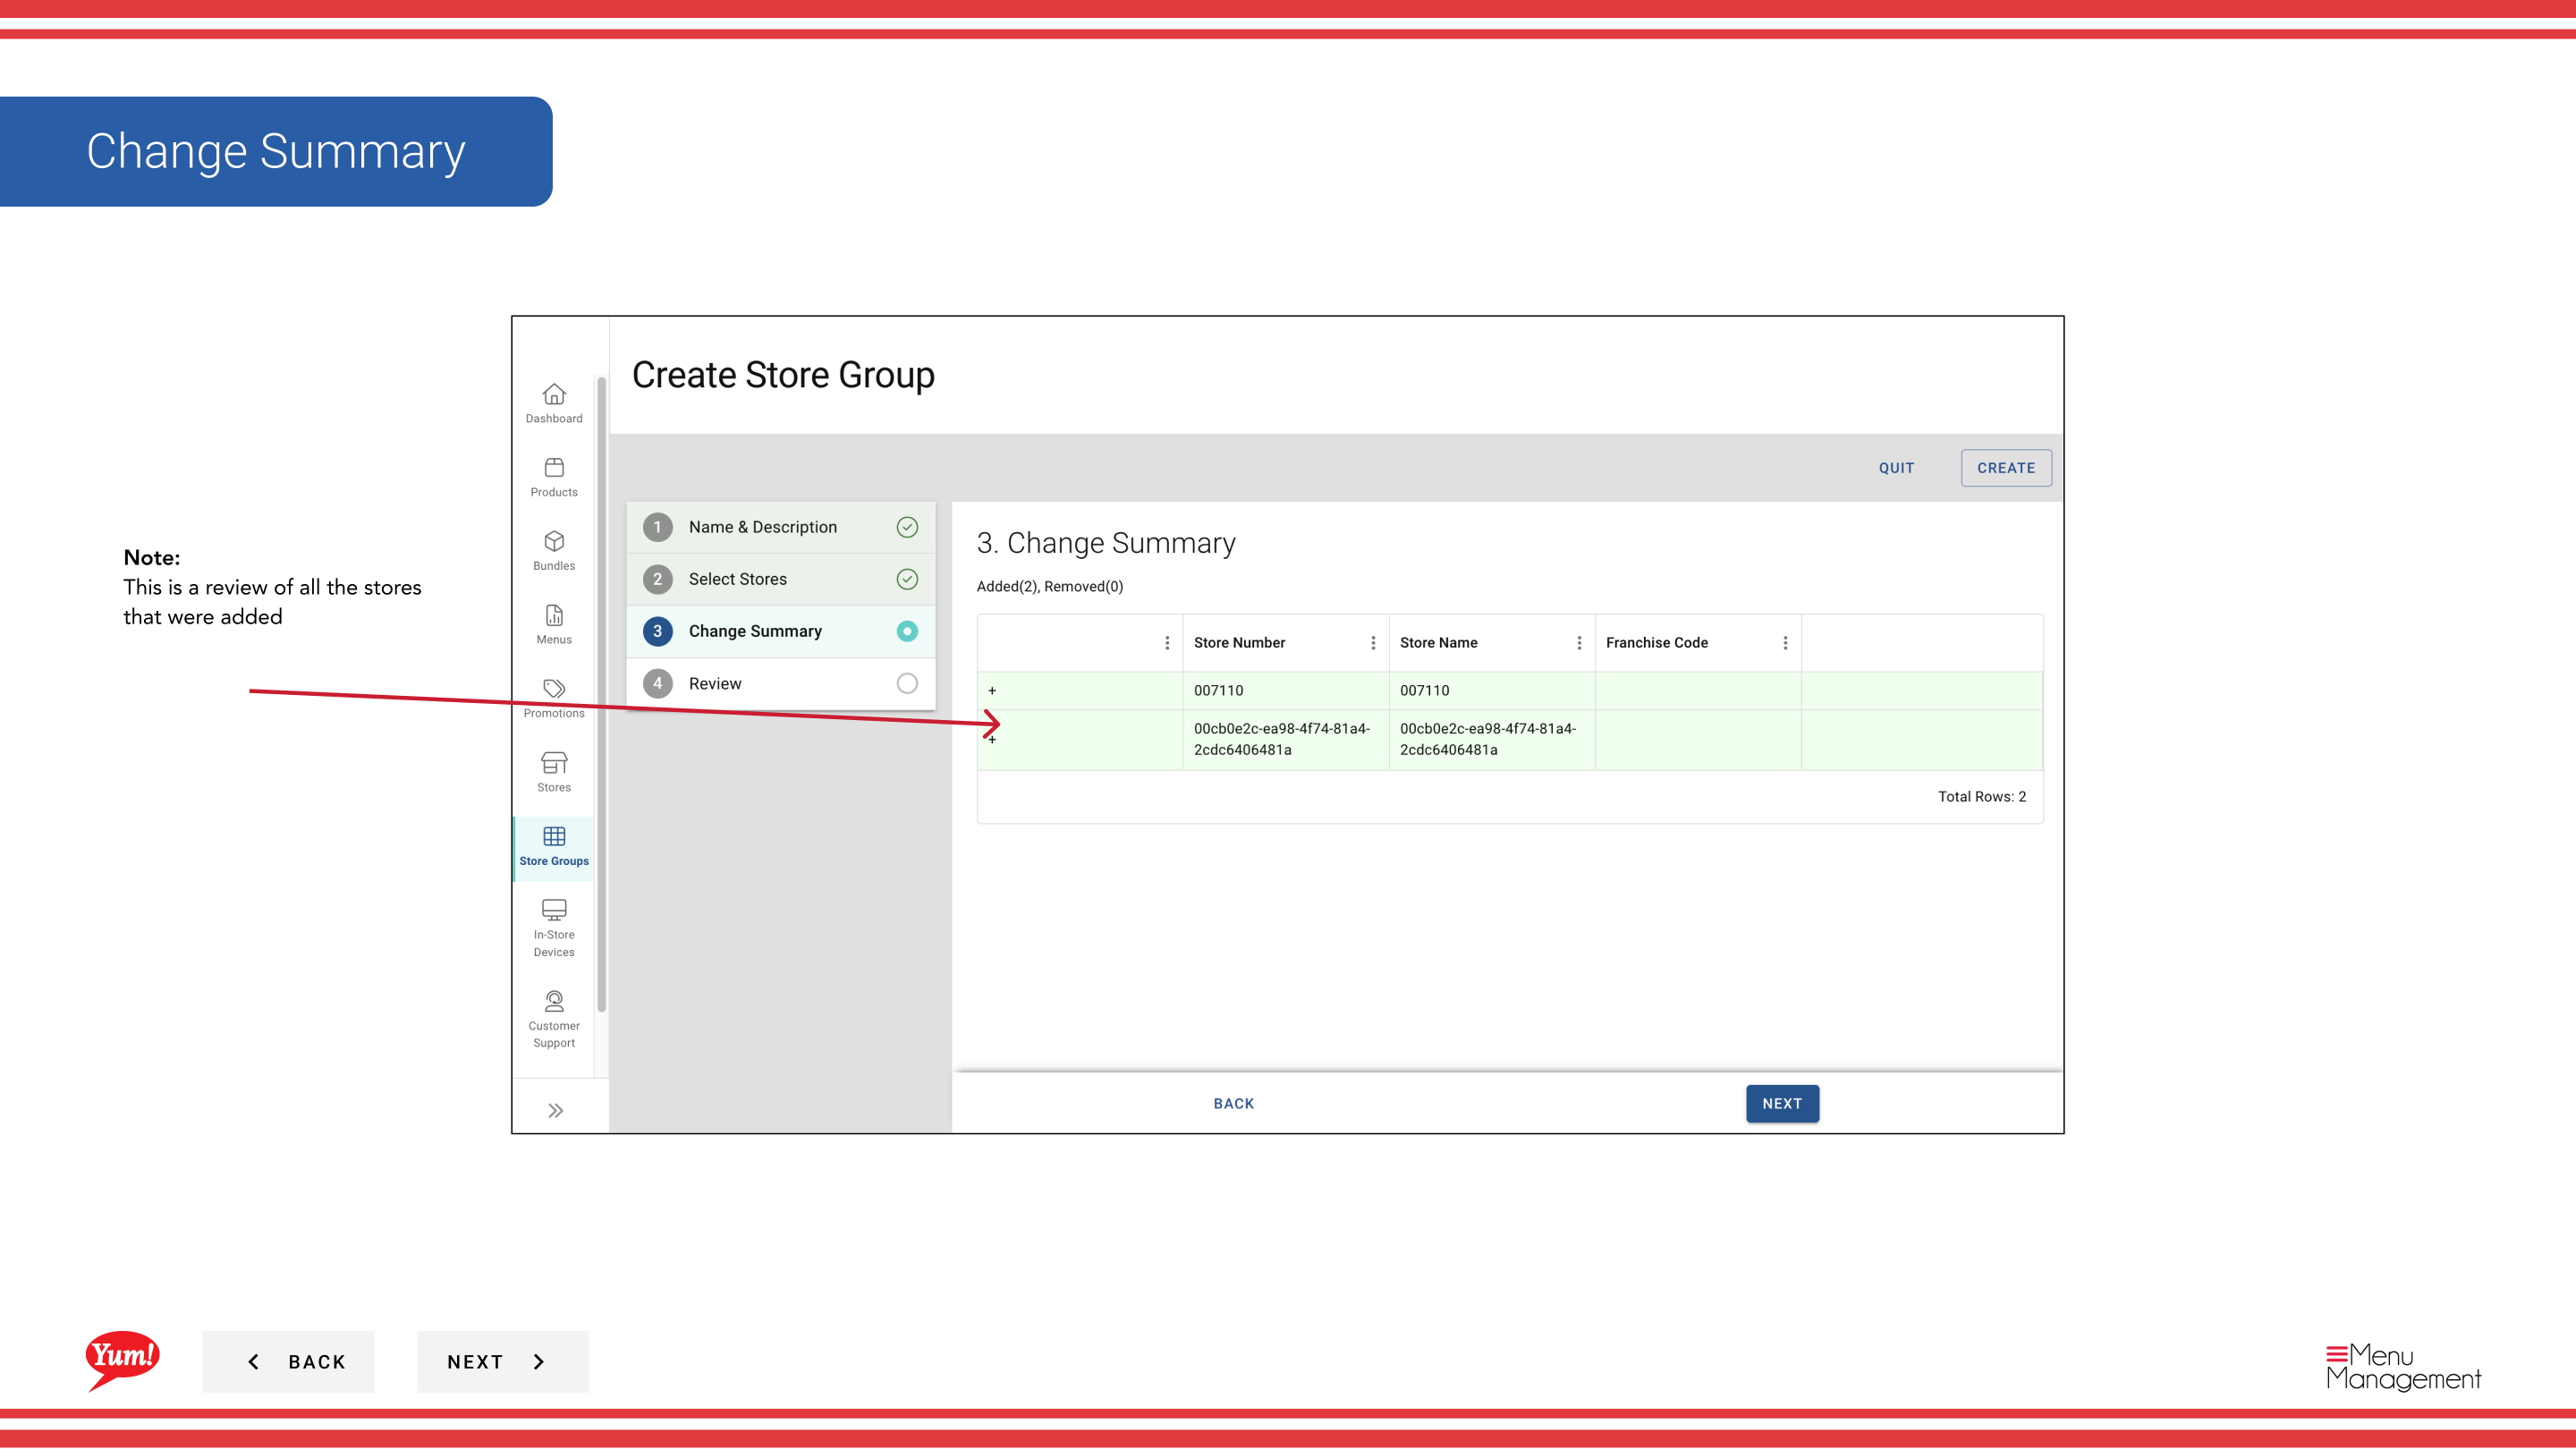
Step 5: Review the summary of stores you’ve selected and other details. Click Create to save the store group.

A store can belong to multiple store groups simultaneously. Promotions, tax rules, and menus are all managed at the store group level and apply to all member stores.
Related guides
Part of the Admin Portal Guide · Section: Store Groups