Edit a Store Group
What this guide covers
Updates a store group’s details, name, store membership, or associated tax rules.
Steps
Step 1: Navigate to the Store Groups section using the left-hand navigation menu.
Step 2: Find the store group you want to edit by browsing the table or using the search bar. Click the action menu button (three dots) next to the store group name.
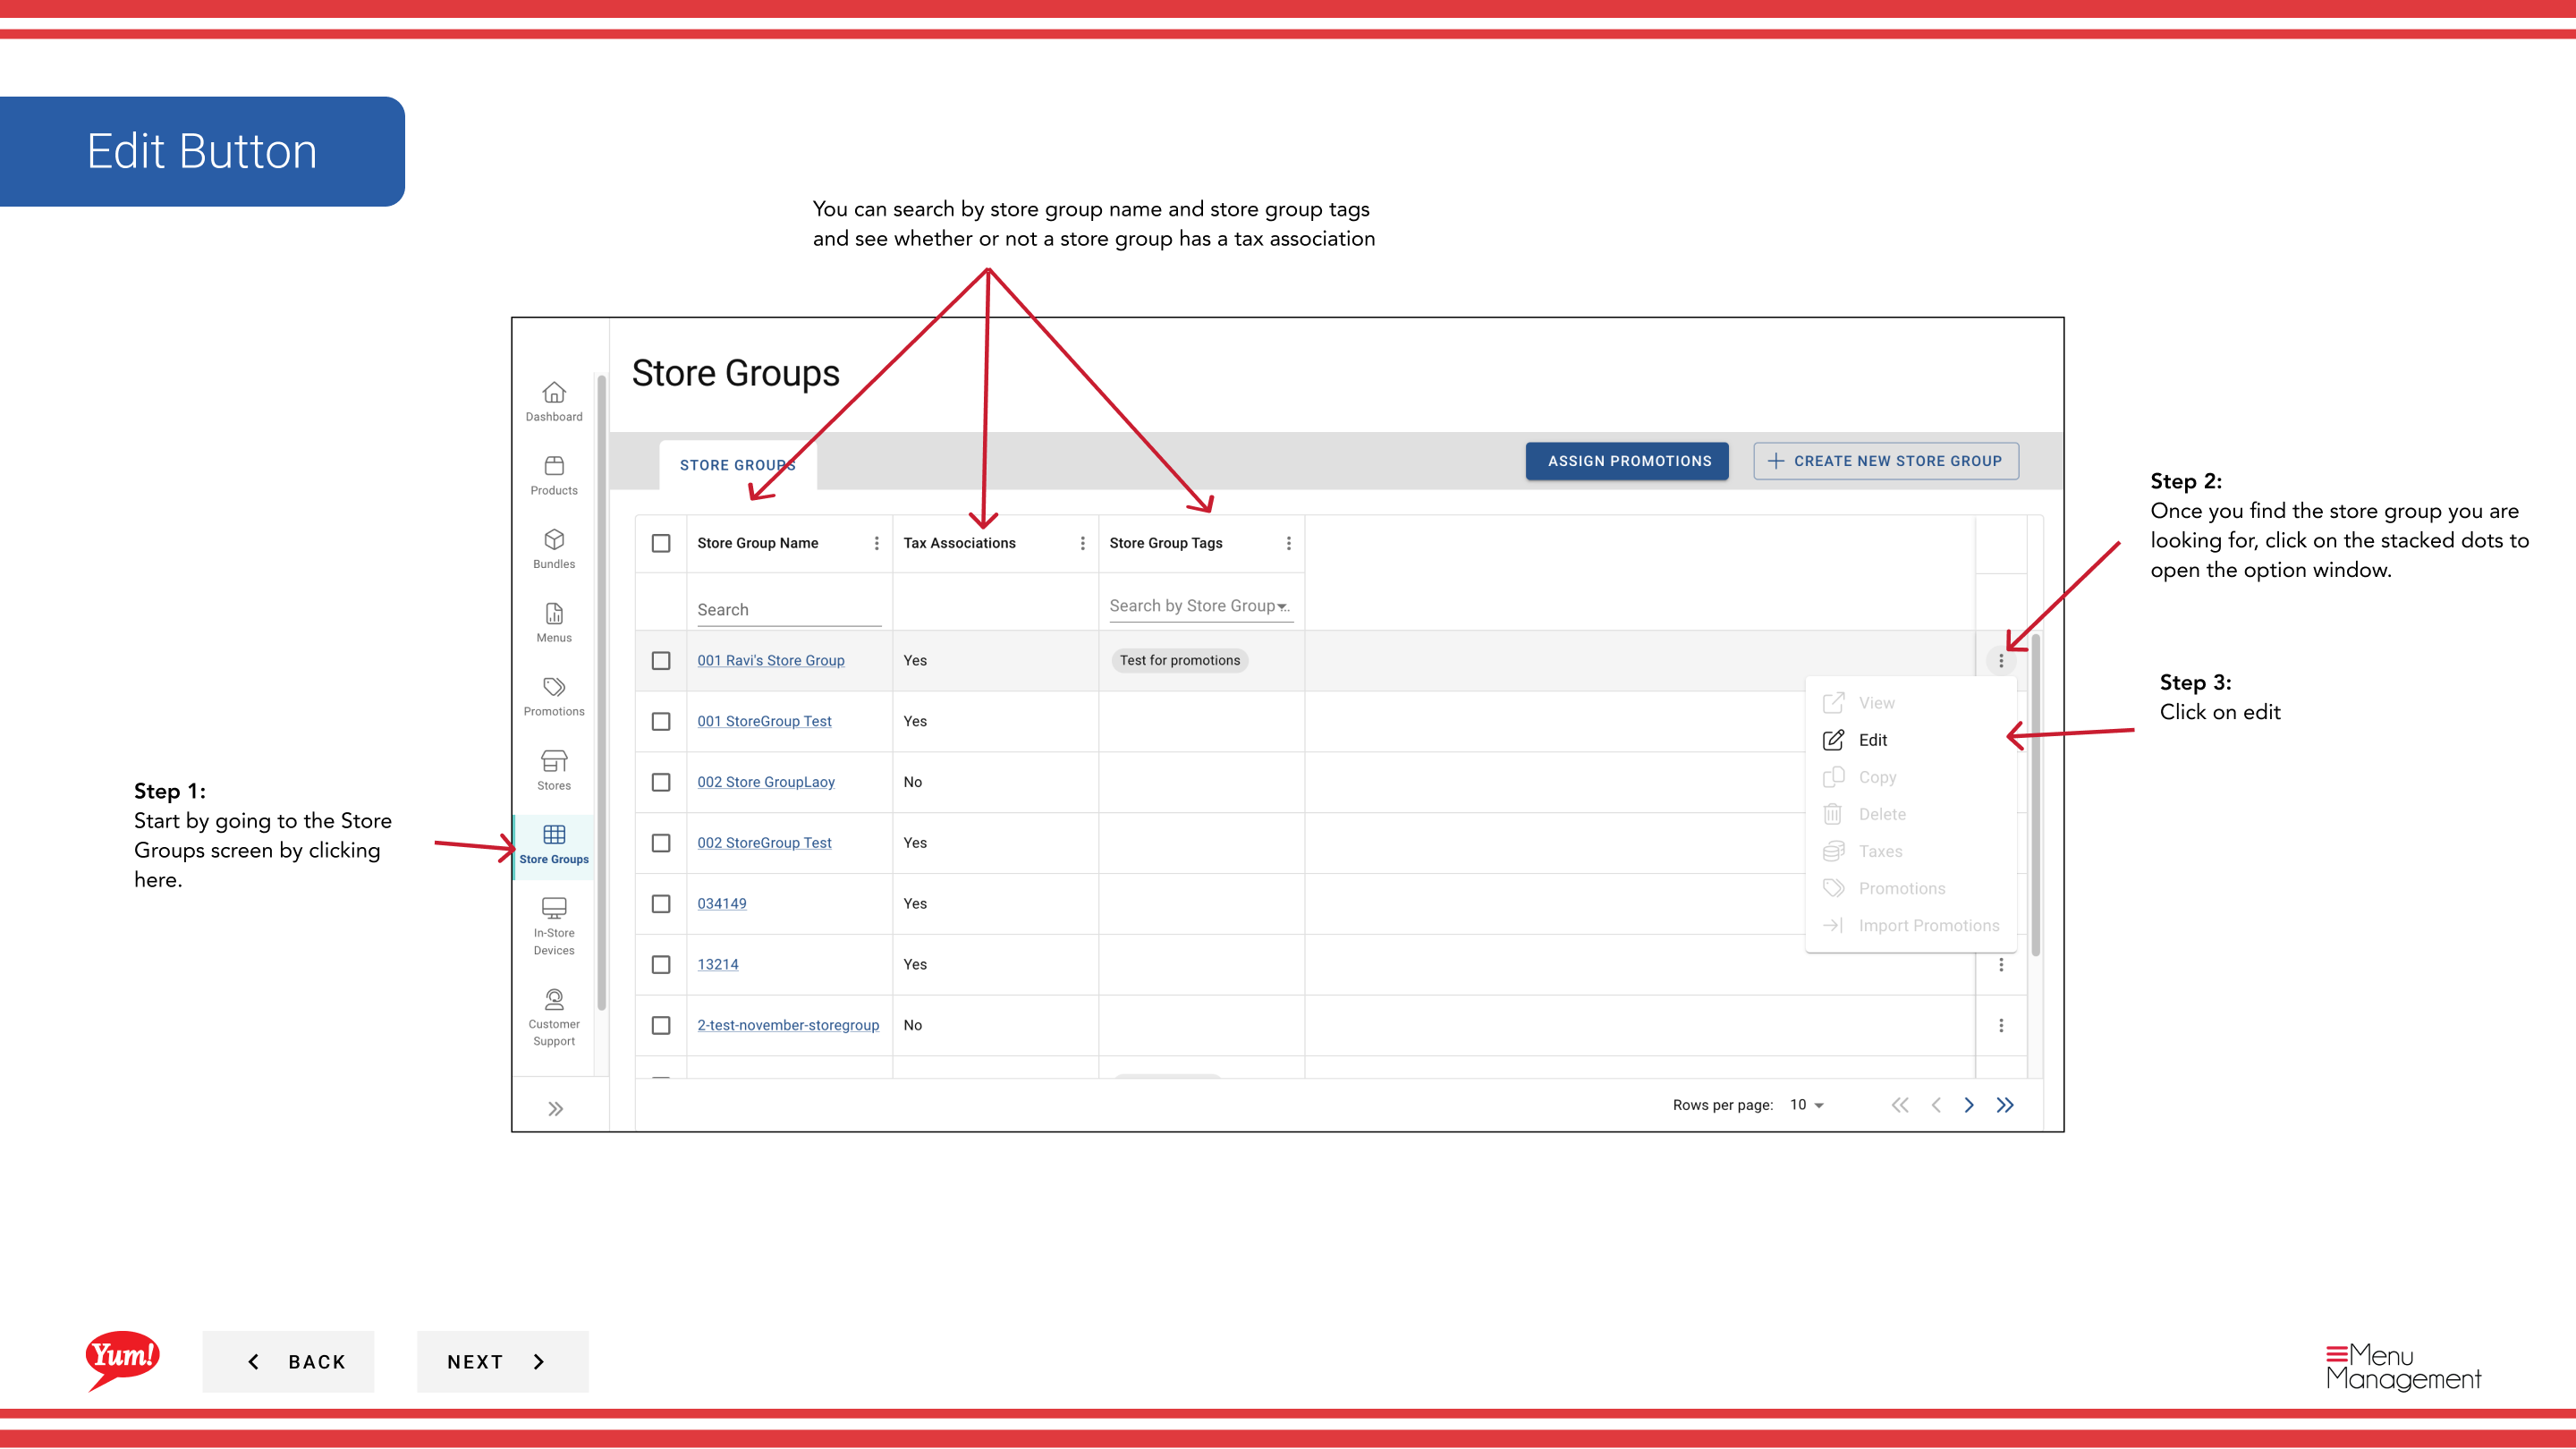
Step 3: Click Edit.
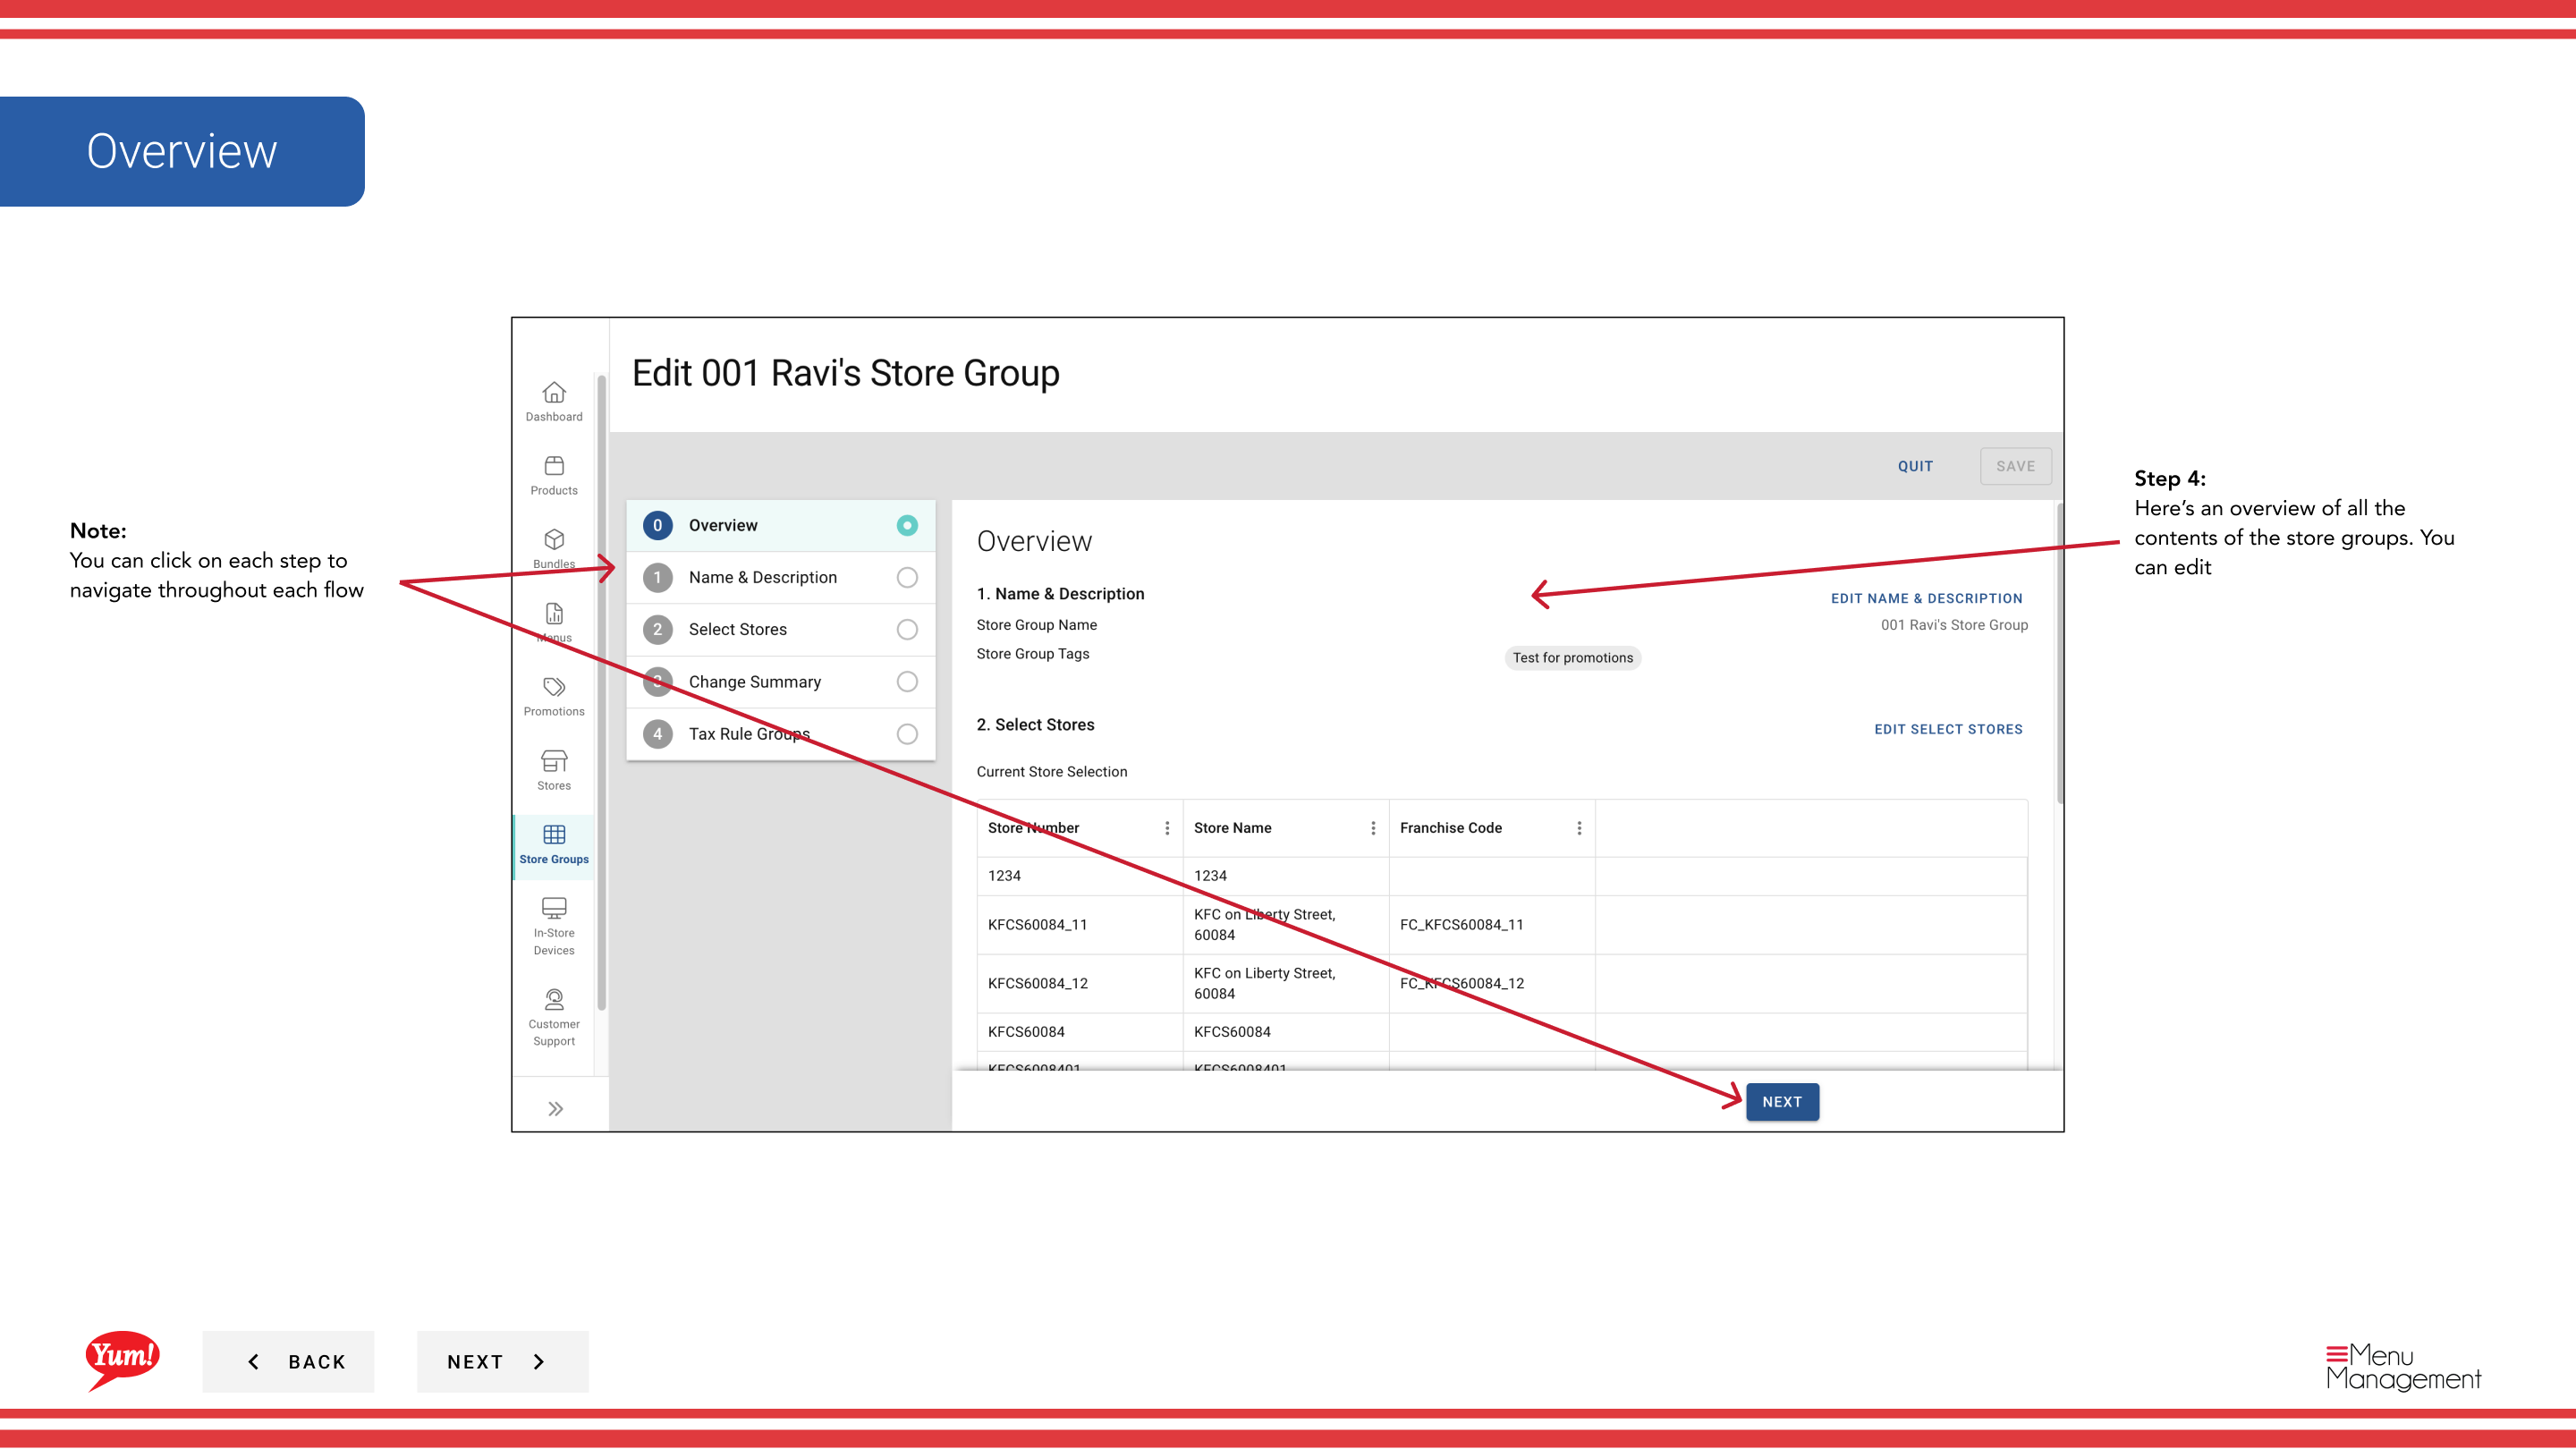
Step 4: You will see the Store Group Editor showing all current details and store membership.
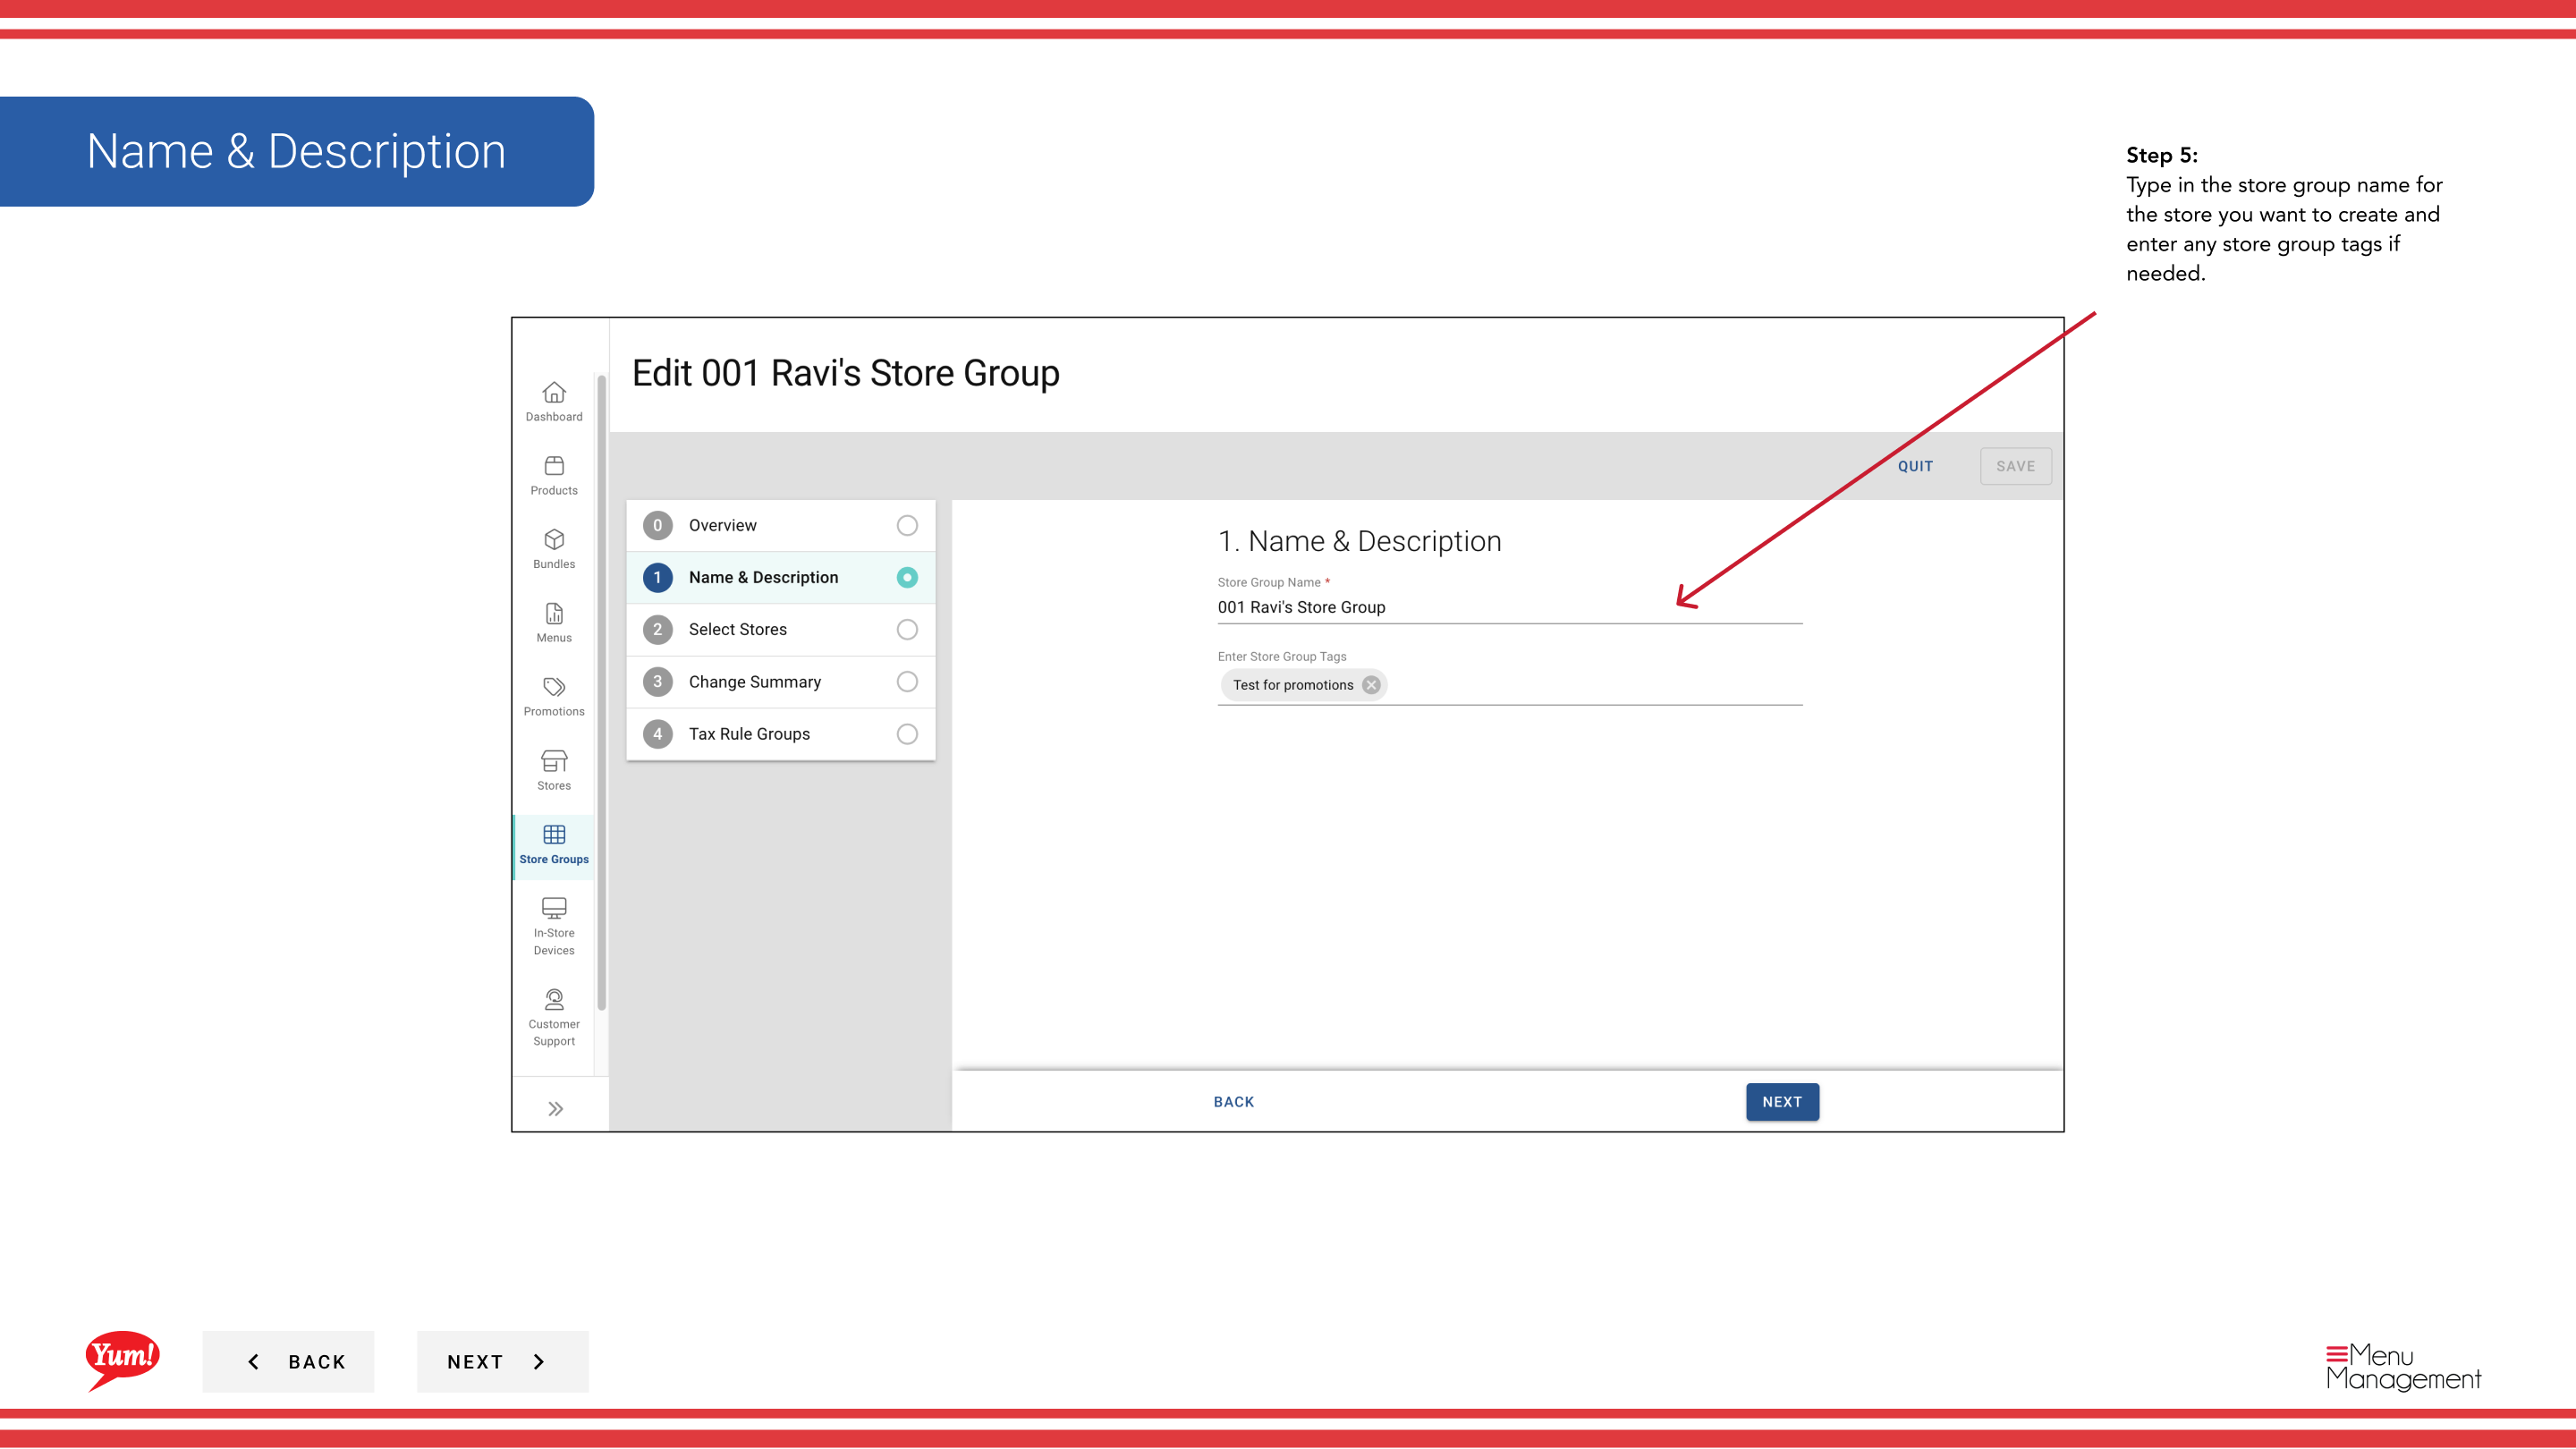
Step 5: Update the store group details as needed:
| Field | What to update | Notes |
|---|---|---|
| Store Group Name | Descriptive name for the group | e.g., "NSW Franchise Group". |
| Store Group Tags | Labels for filtering and reporting | e.g., "pilot", "corporate". |
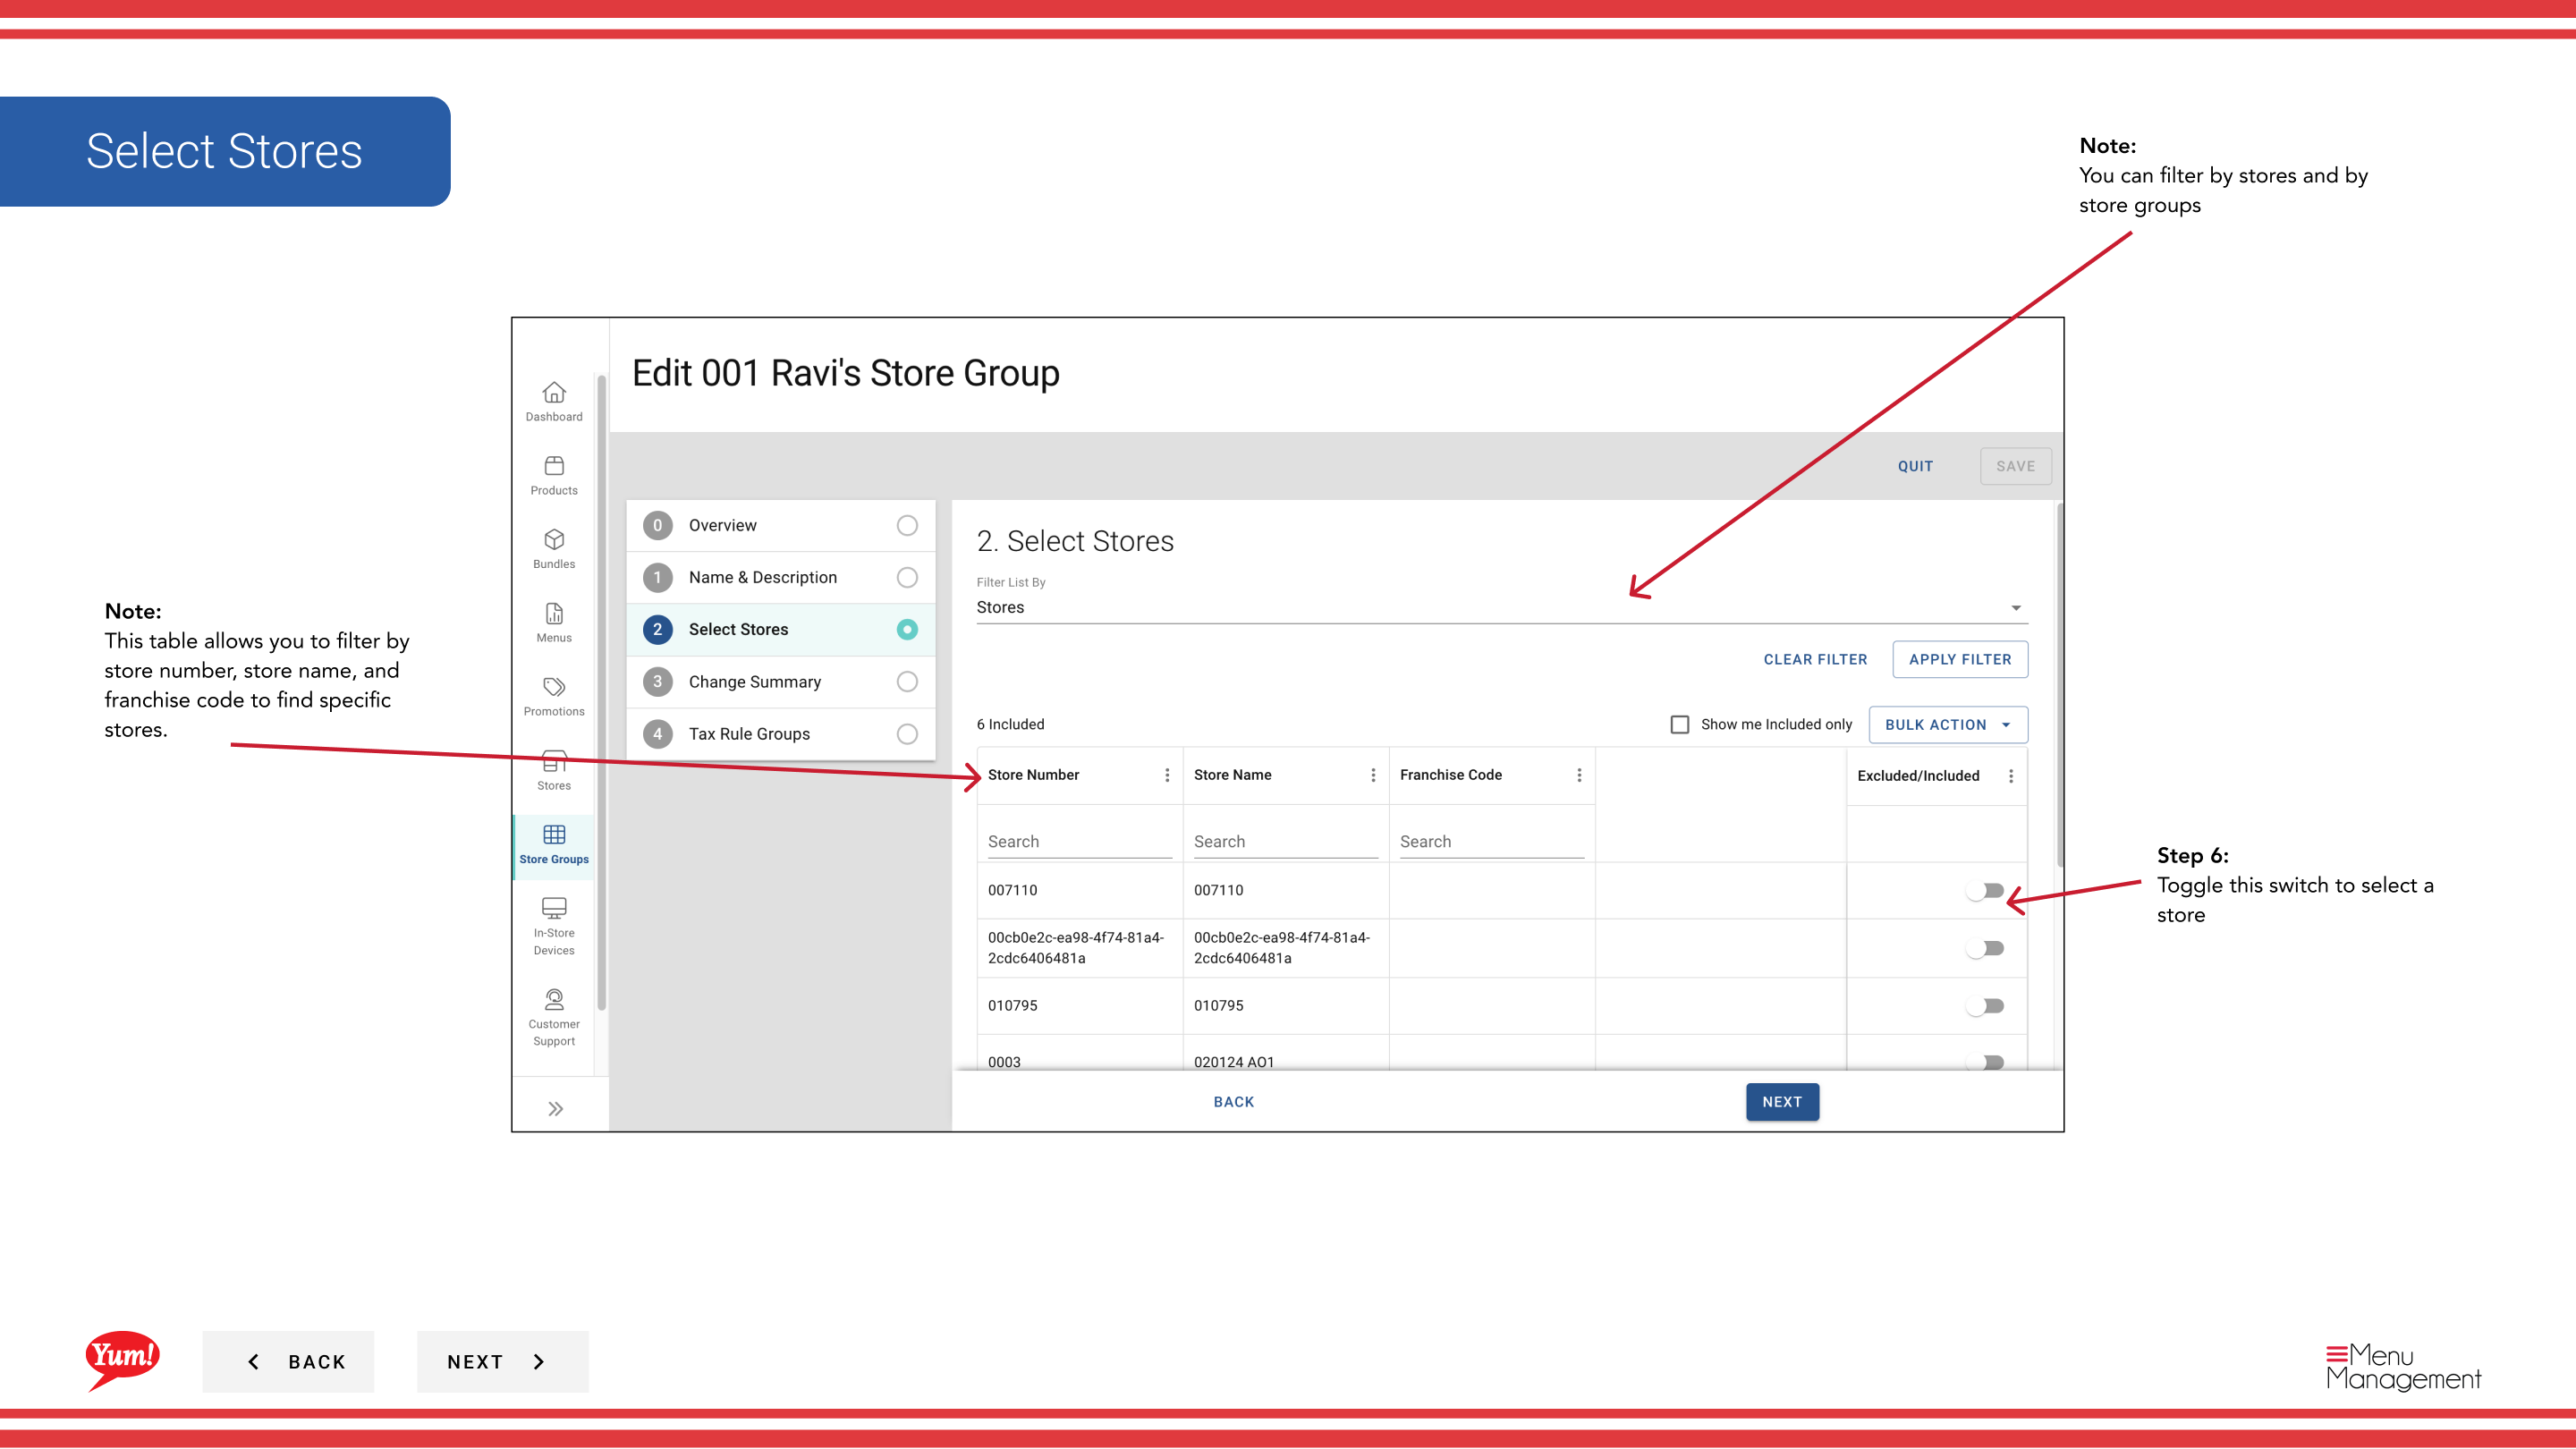
Step 6: Update store membership by toggling switches next to store names:
- Toggle ON to add a store to the group
- Toggle OFF to remove a store from the group
- Filter by Store Number, Store Name, or Franchise Code to find specific stores quickly
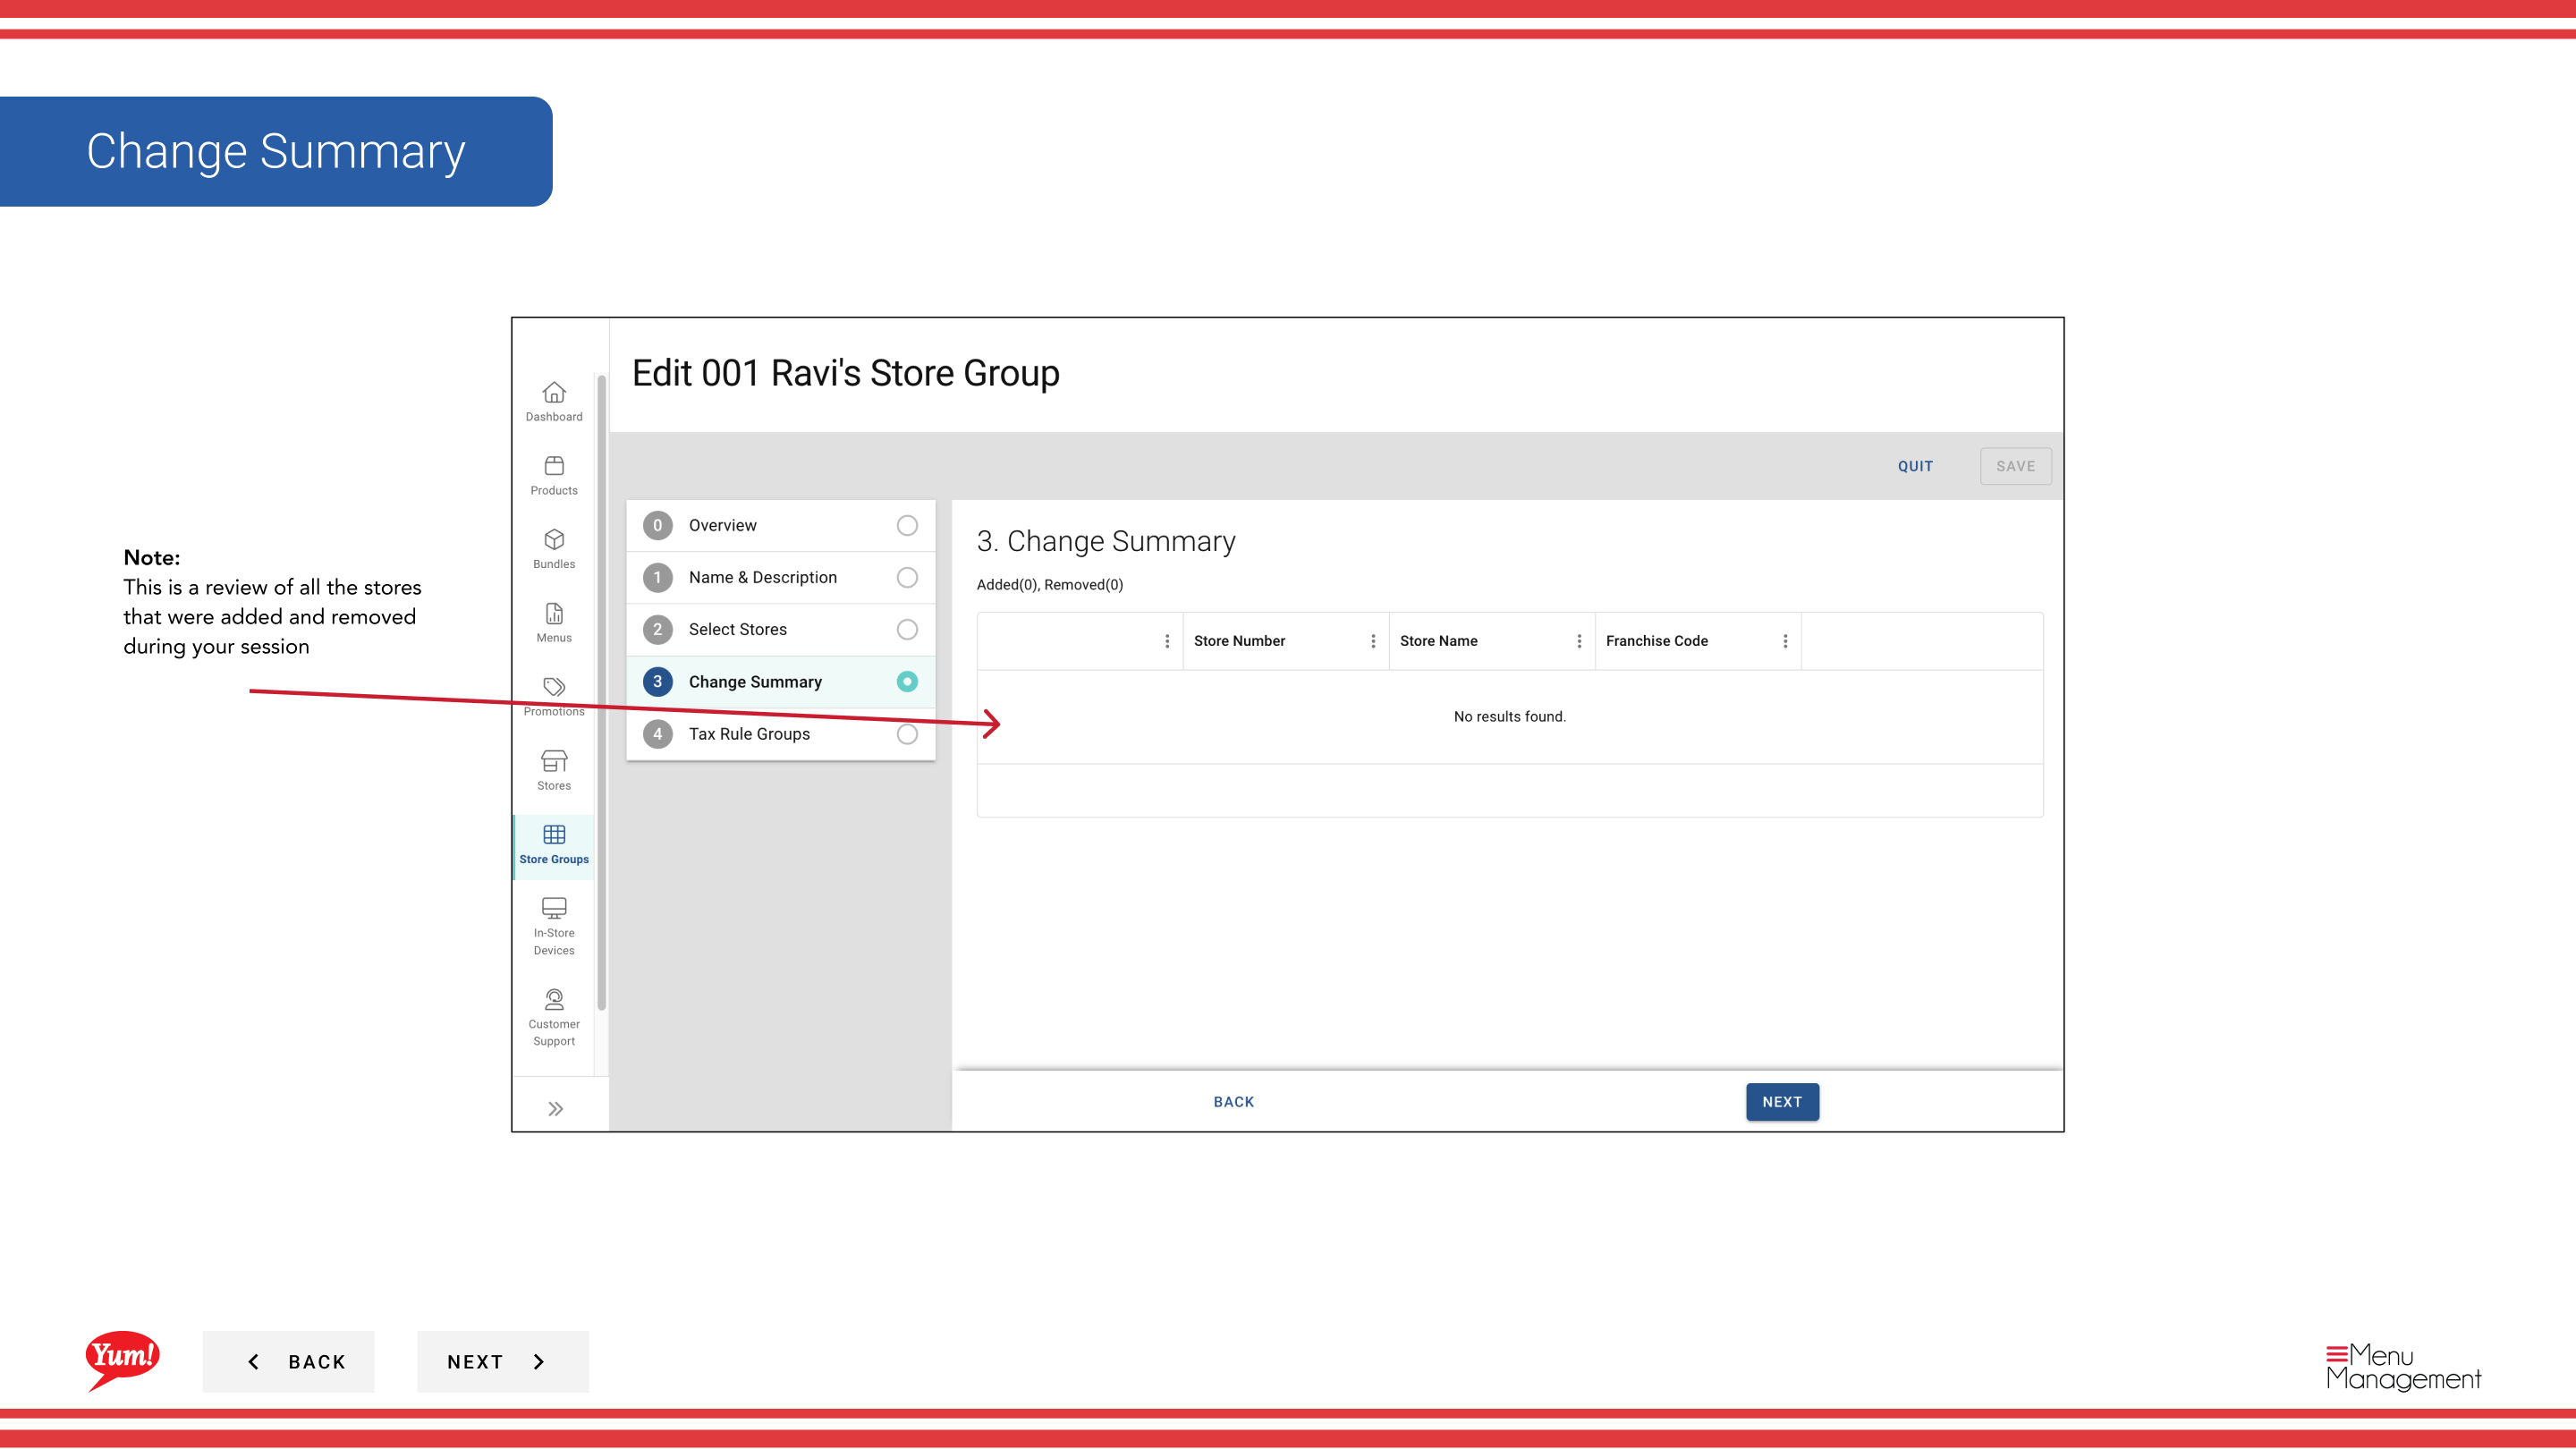
Step 7: Review the summary showing all changes made during this session. Click Save to apply the updates.
You can click on any step number in the wizard to jump to that section without losing your changes.
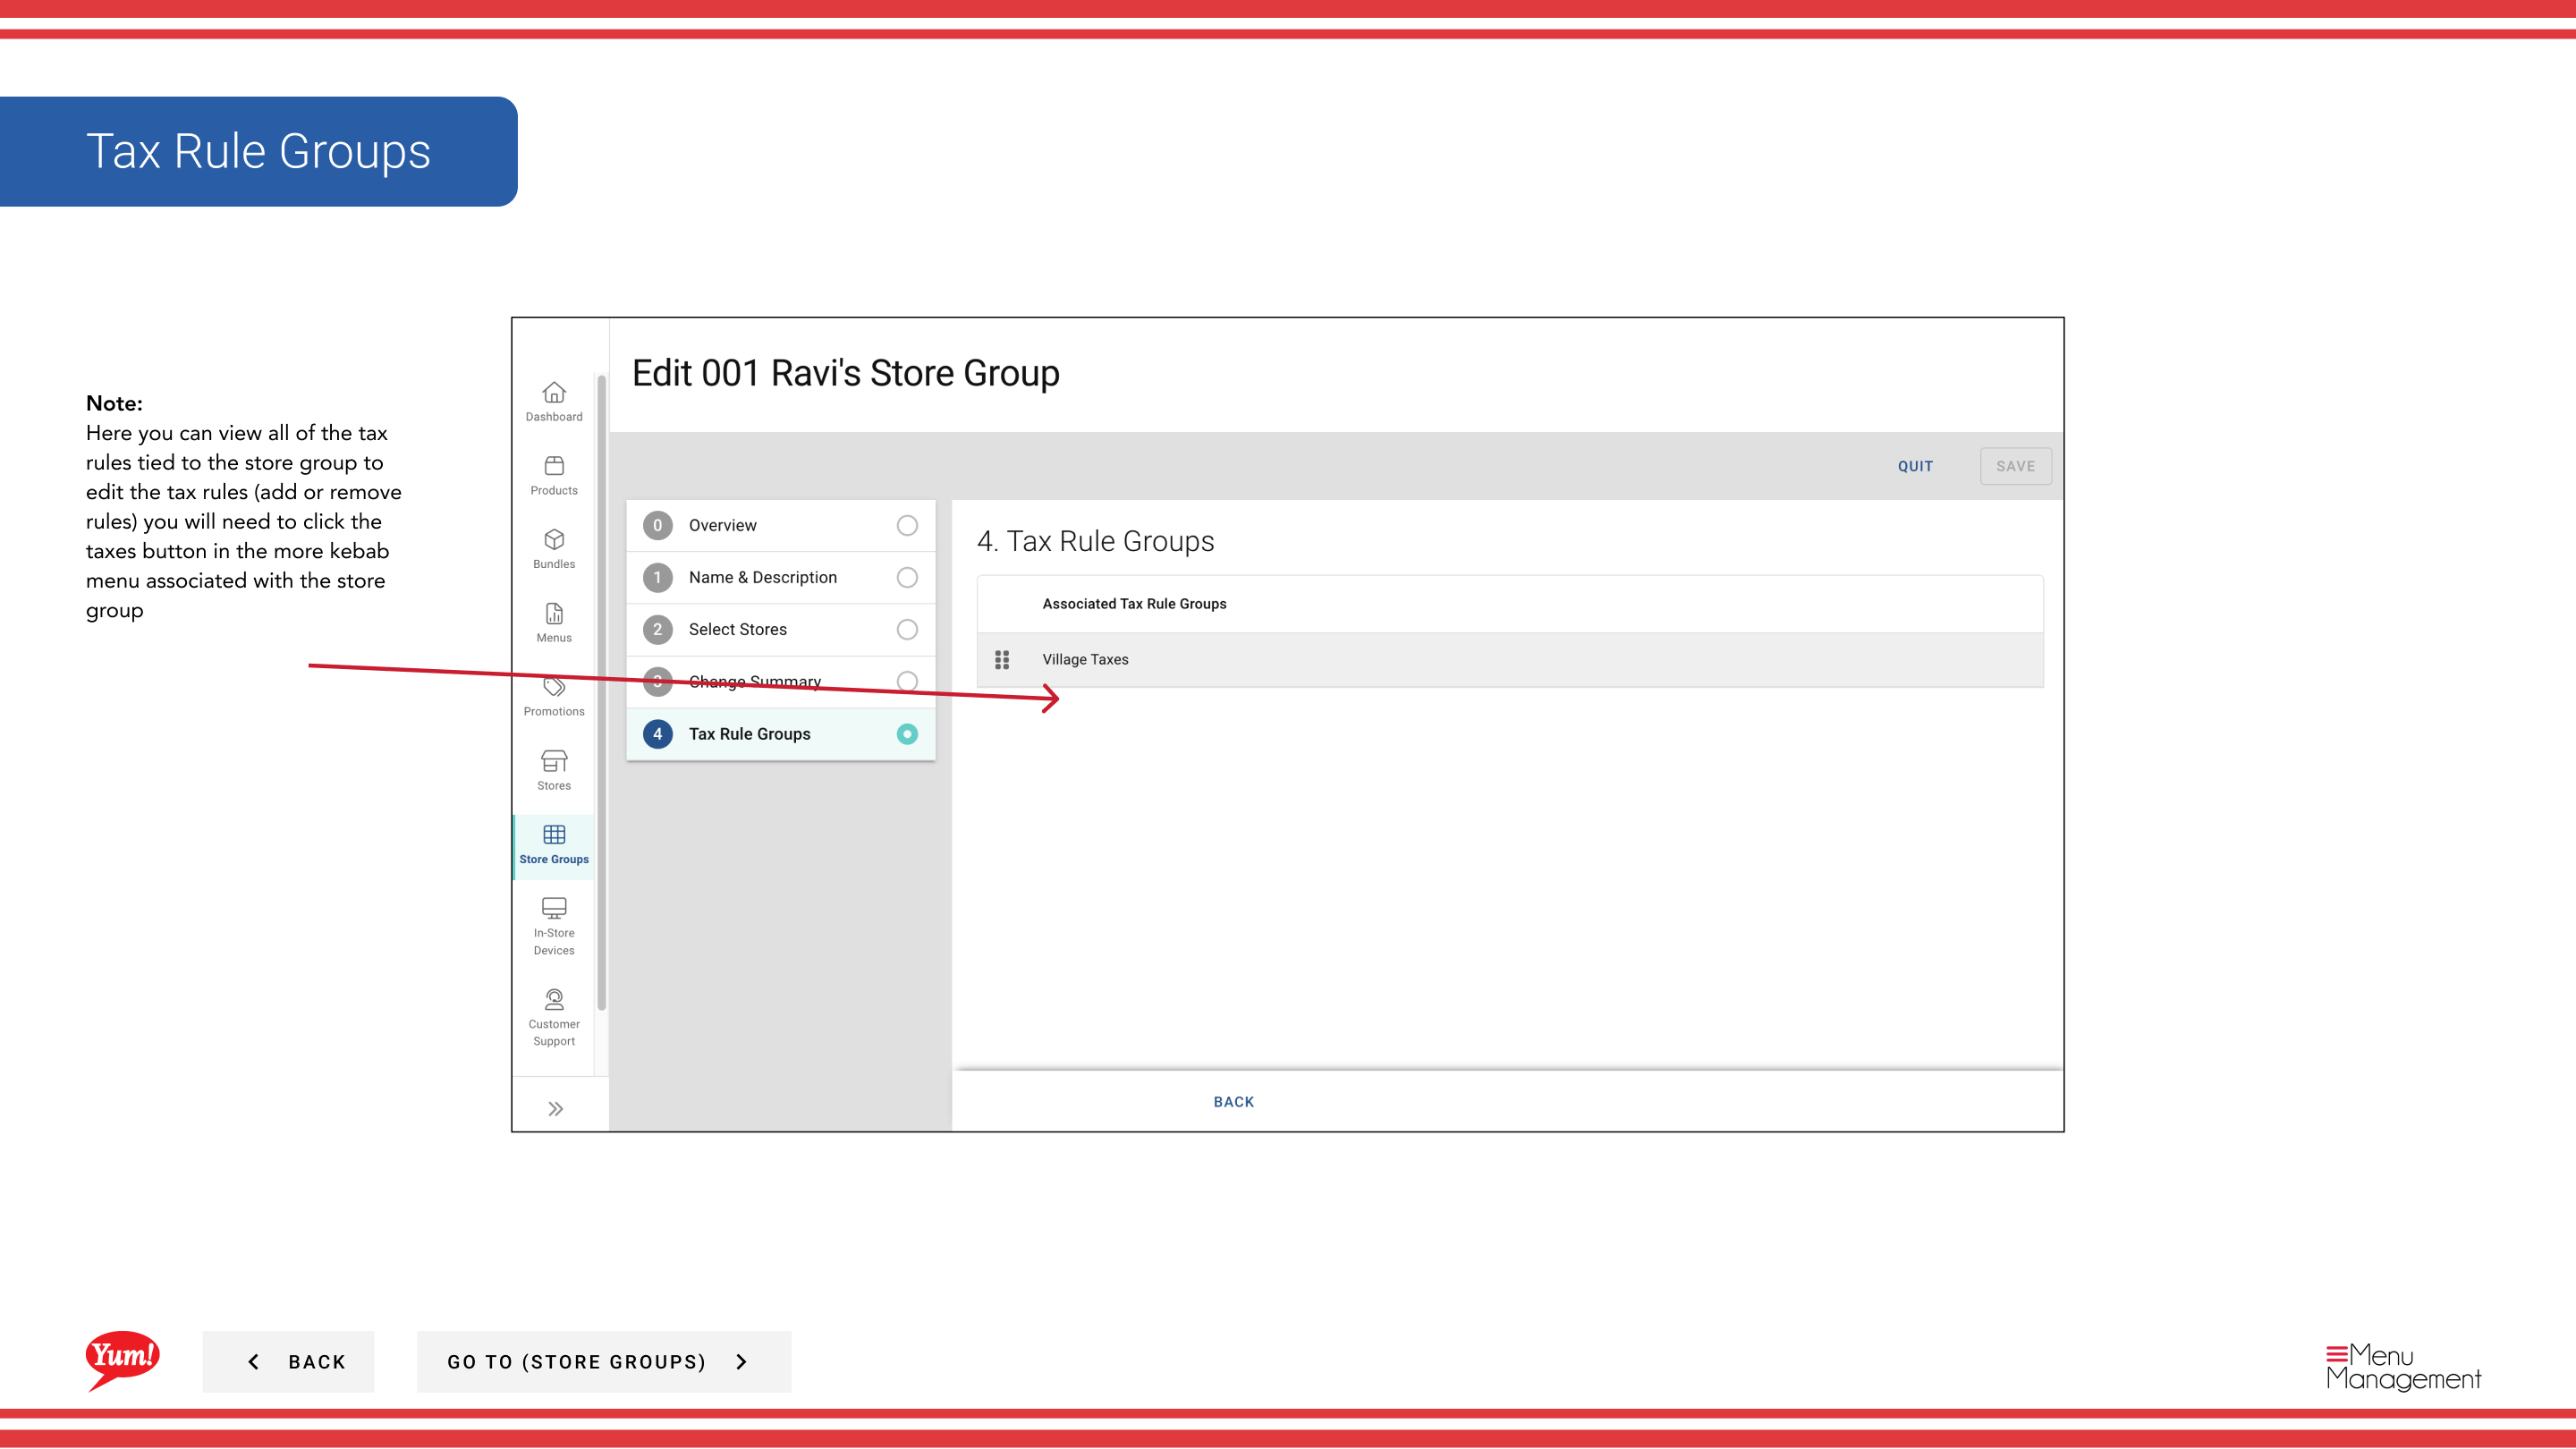
If this store group has tax rules, you can view and edit them by clicking the action menu button and selecting Taxes.
Related guides
- Create a Store Group
- Copy a Store Group
- Delete a Store Group
- View Stores in a Store Group
- Create Tax Rules
Part of the Admin Portal Guide · Section: Store Groups