Assign Promotions
What this guide covers
Assigns one or more promotions to a store group, activating them across all member stores simultaneously.
Steps
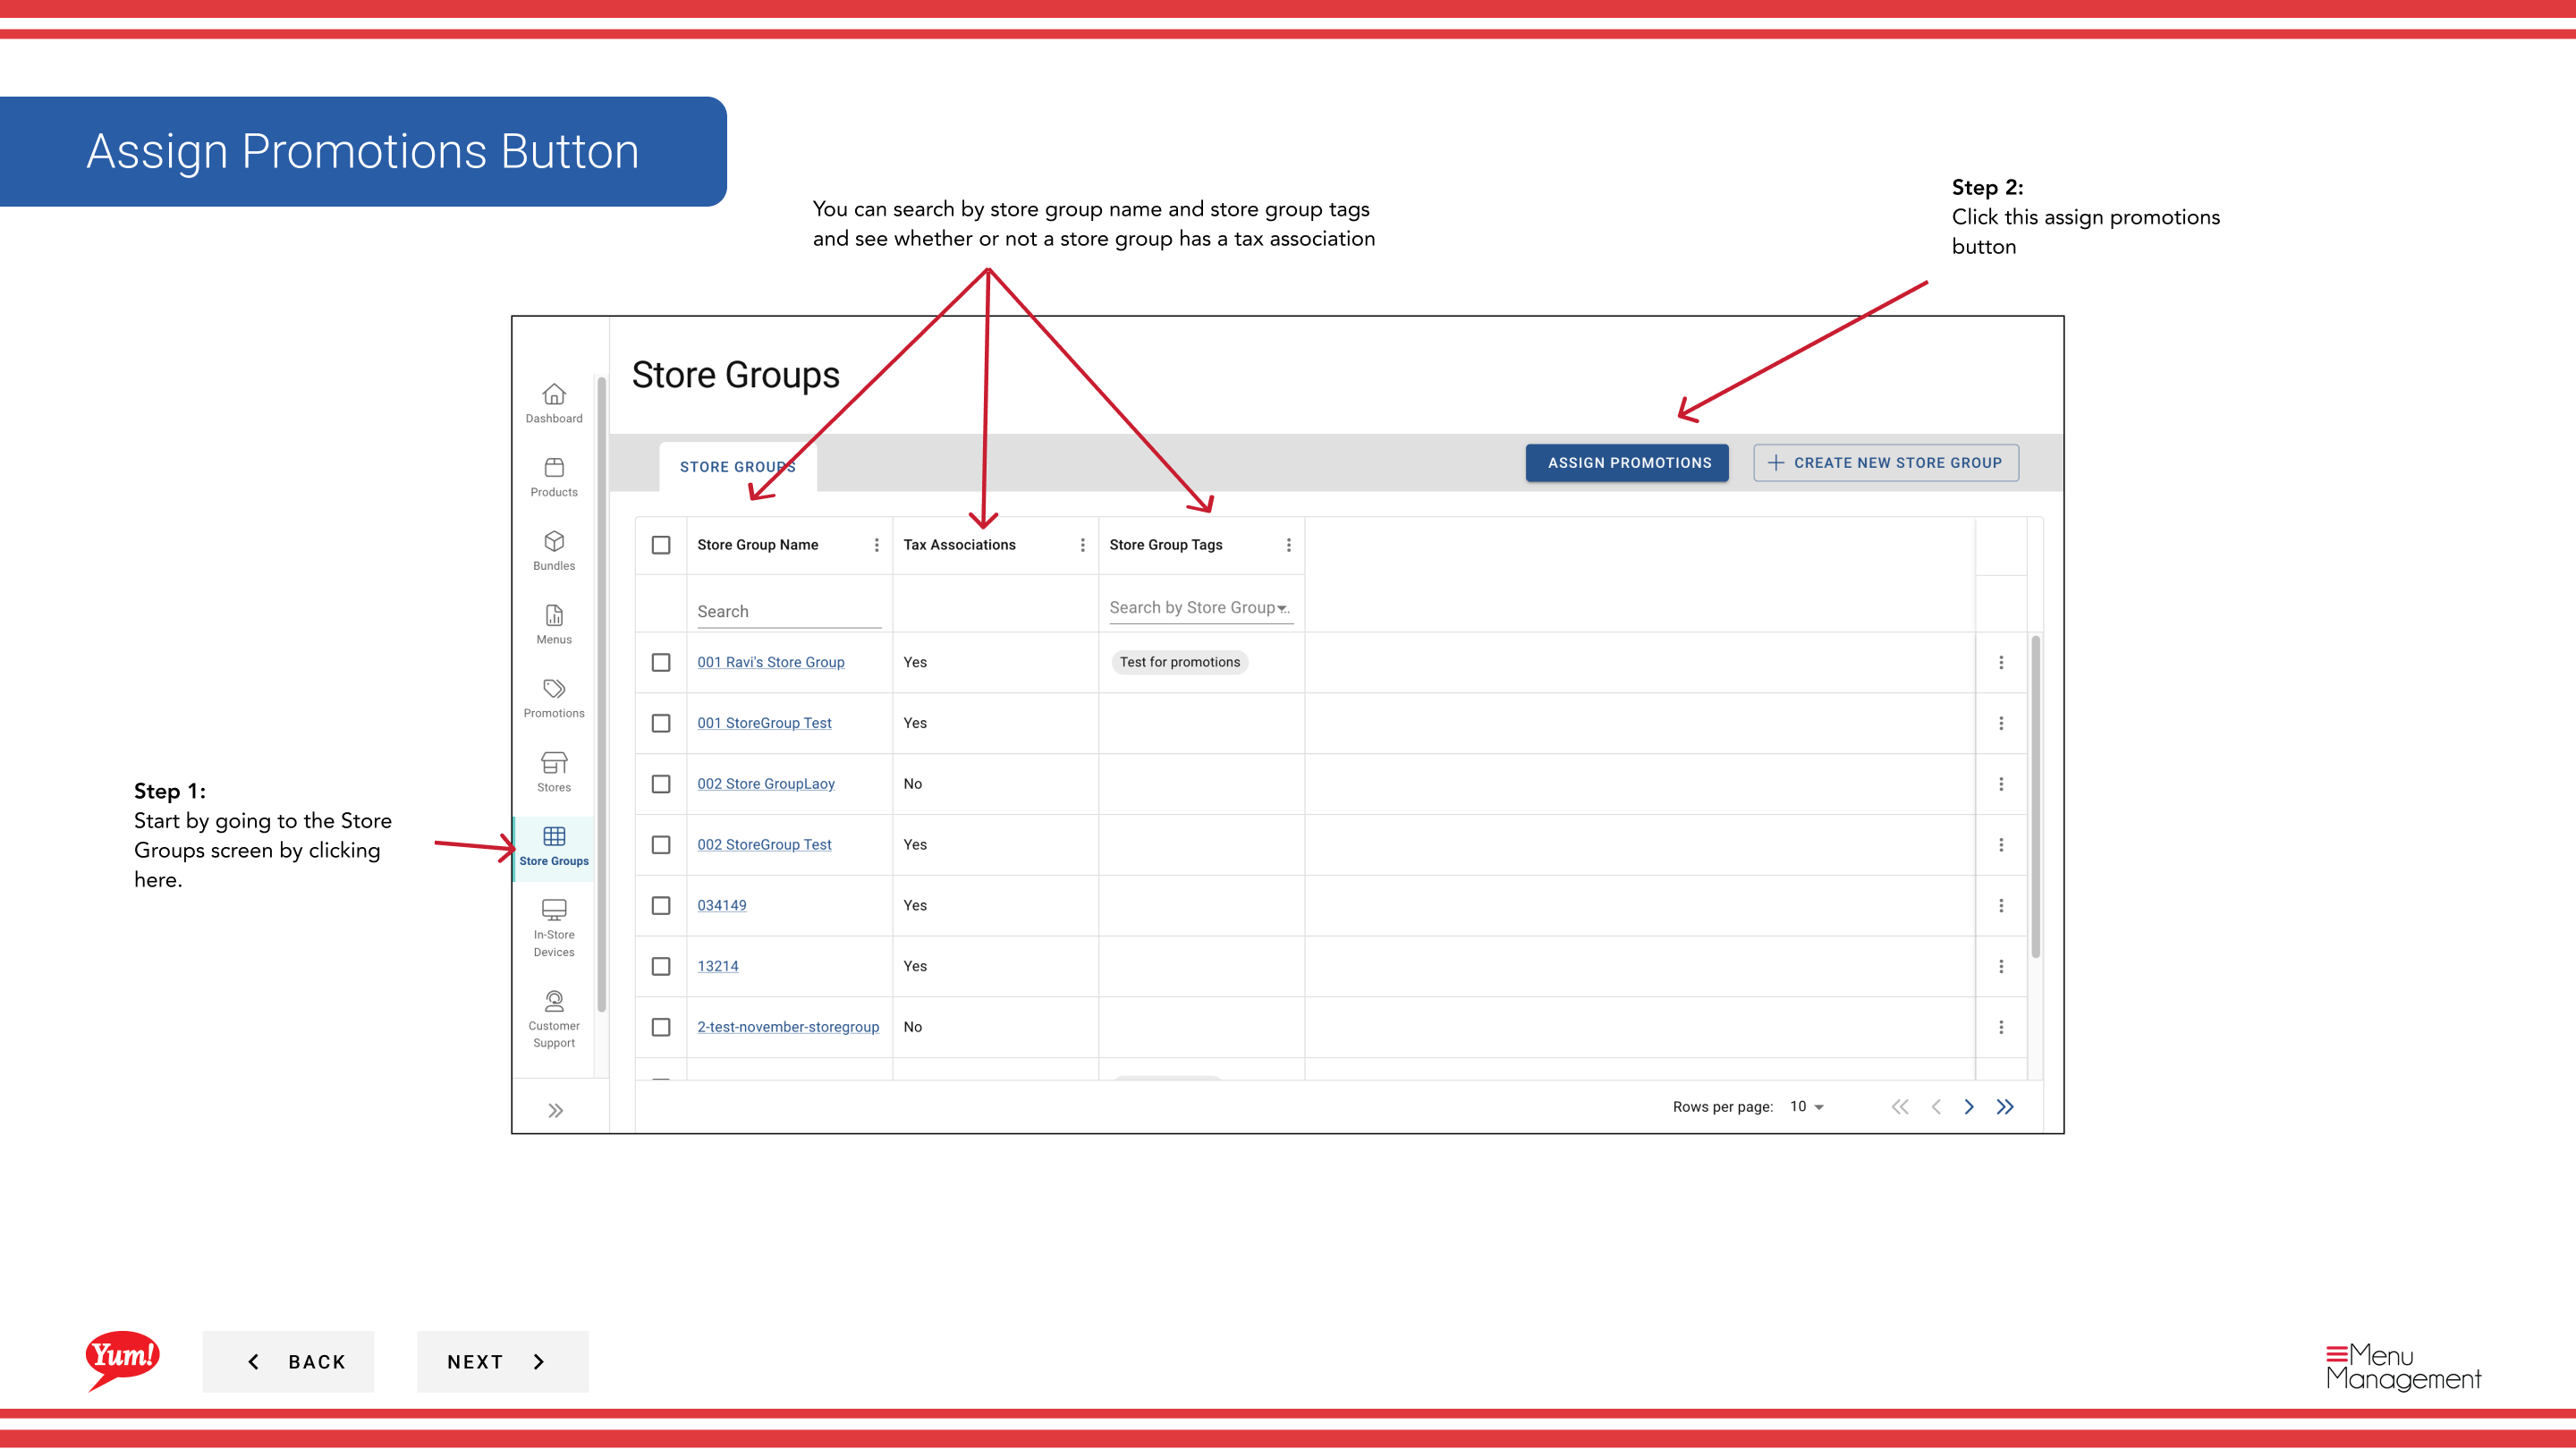
Step 1: Navigate to the Store Groups section using the left-hand navigation menu.
Step 2: Click the Assign Promotions button (usually prominently displayed near the top of the page).
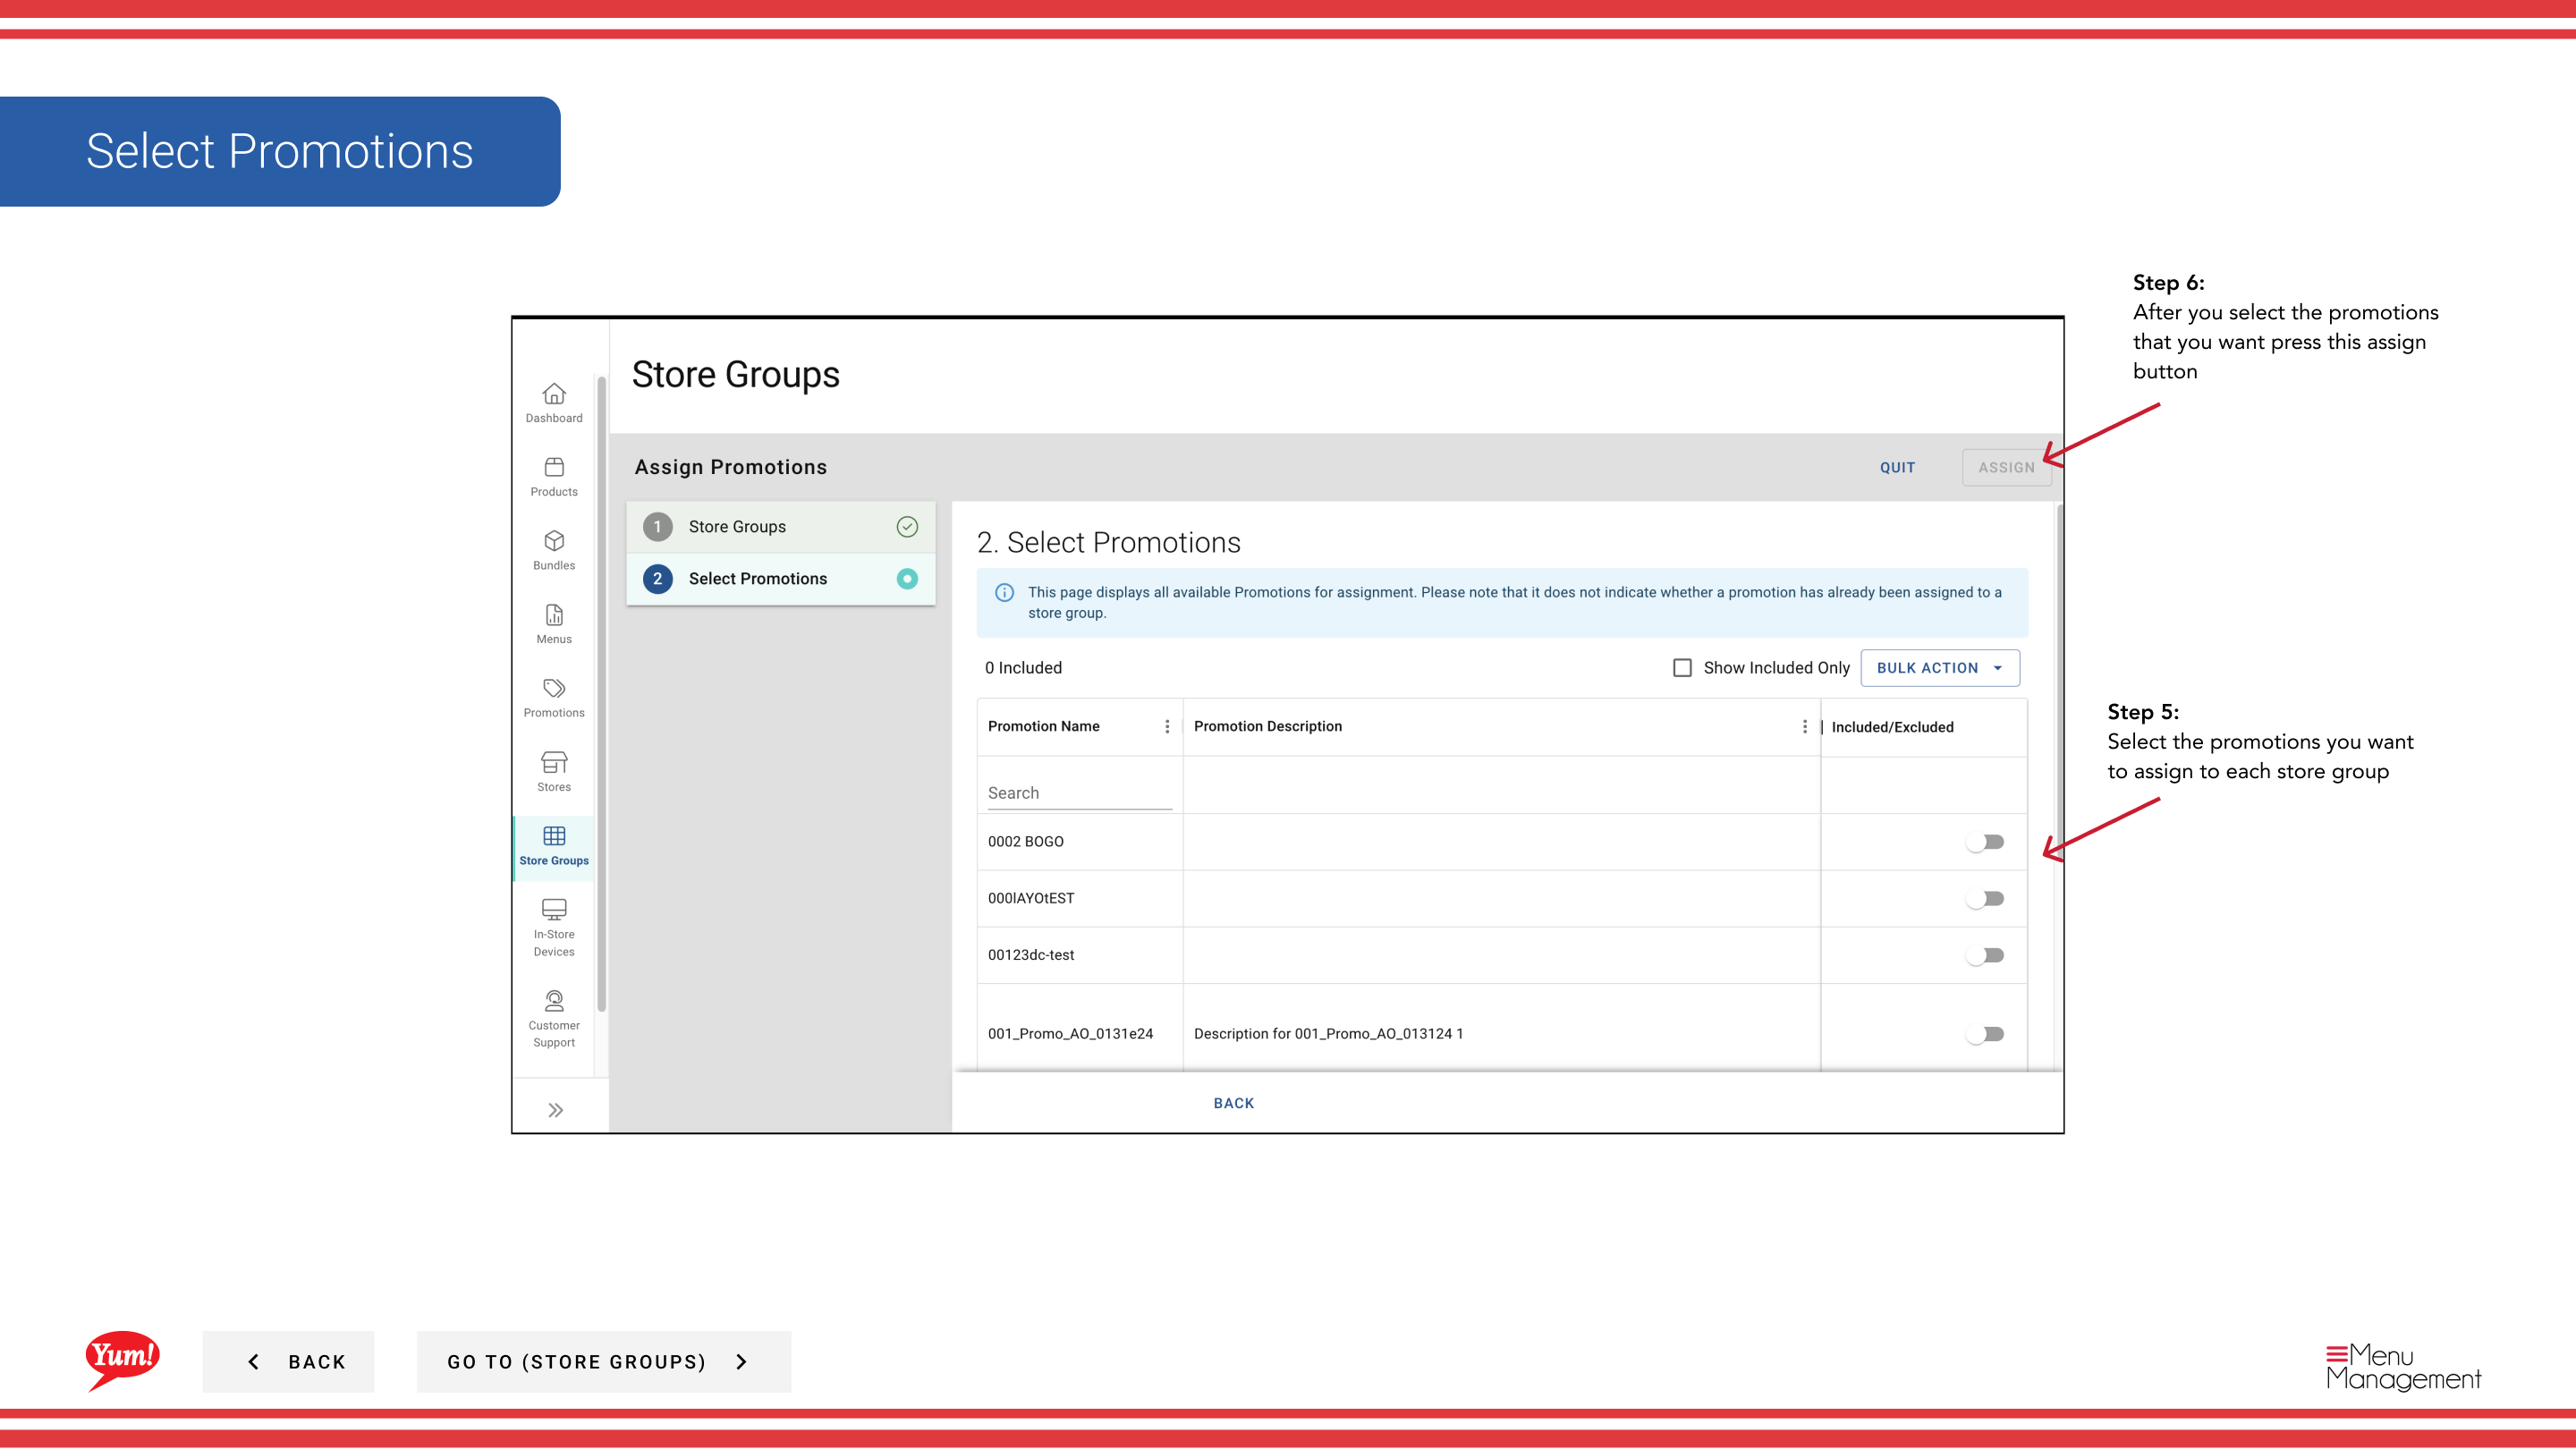
Step 3: Select the promotion(s) you want to assign. You can:
- Check the checkbox next to each promotion name to select it
- Use "Select All" to select all visible promotions (or "Deselect All" to clear selections)
- Search for specific promotions using the search bar
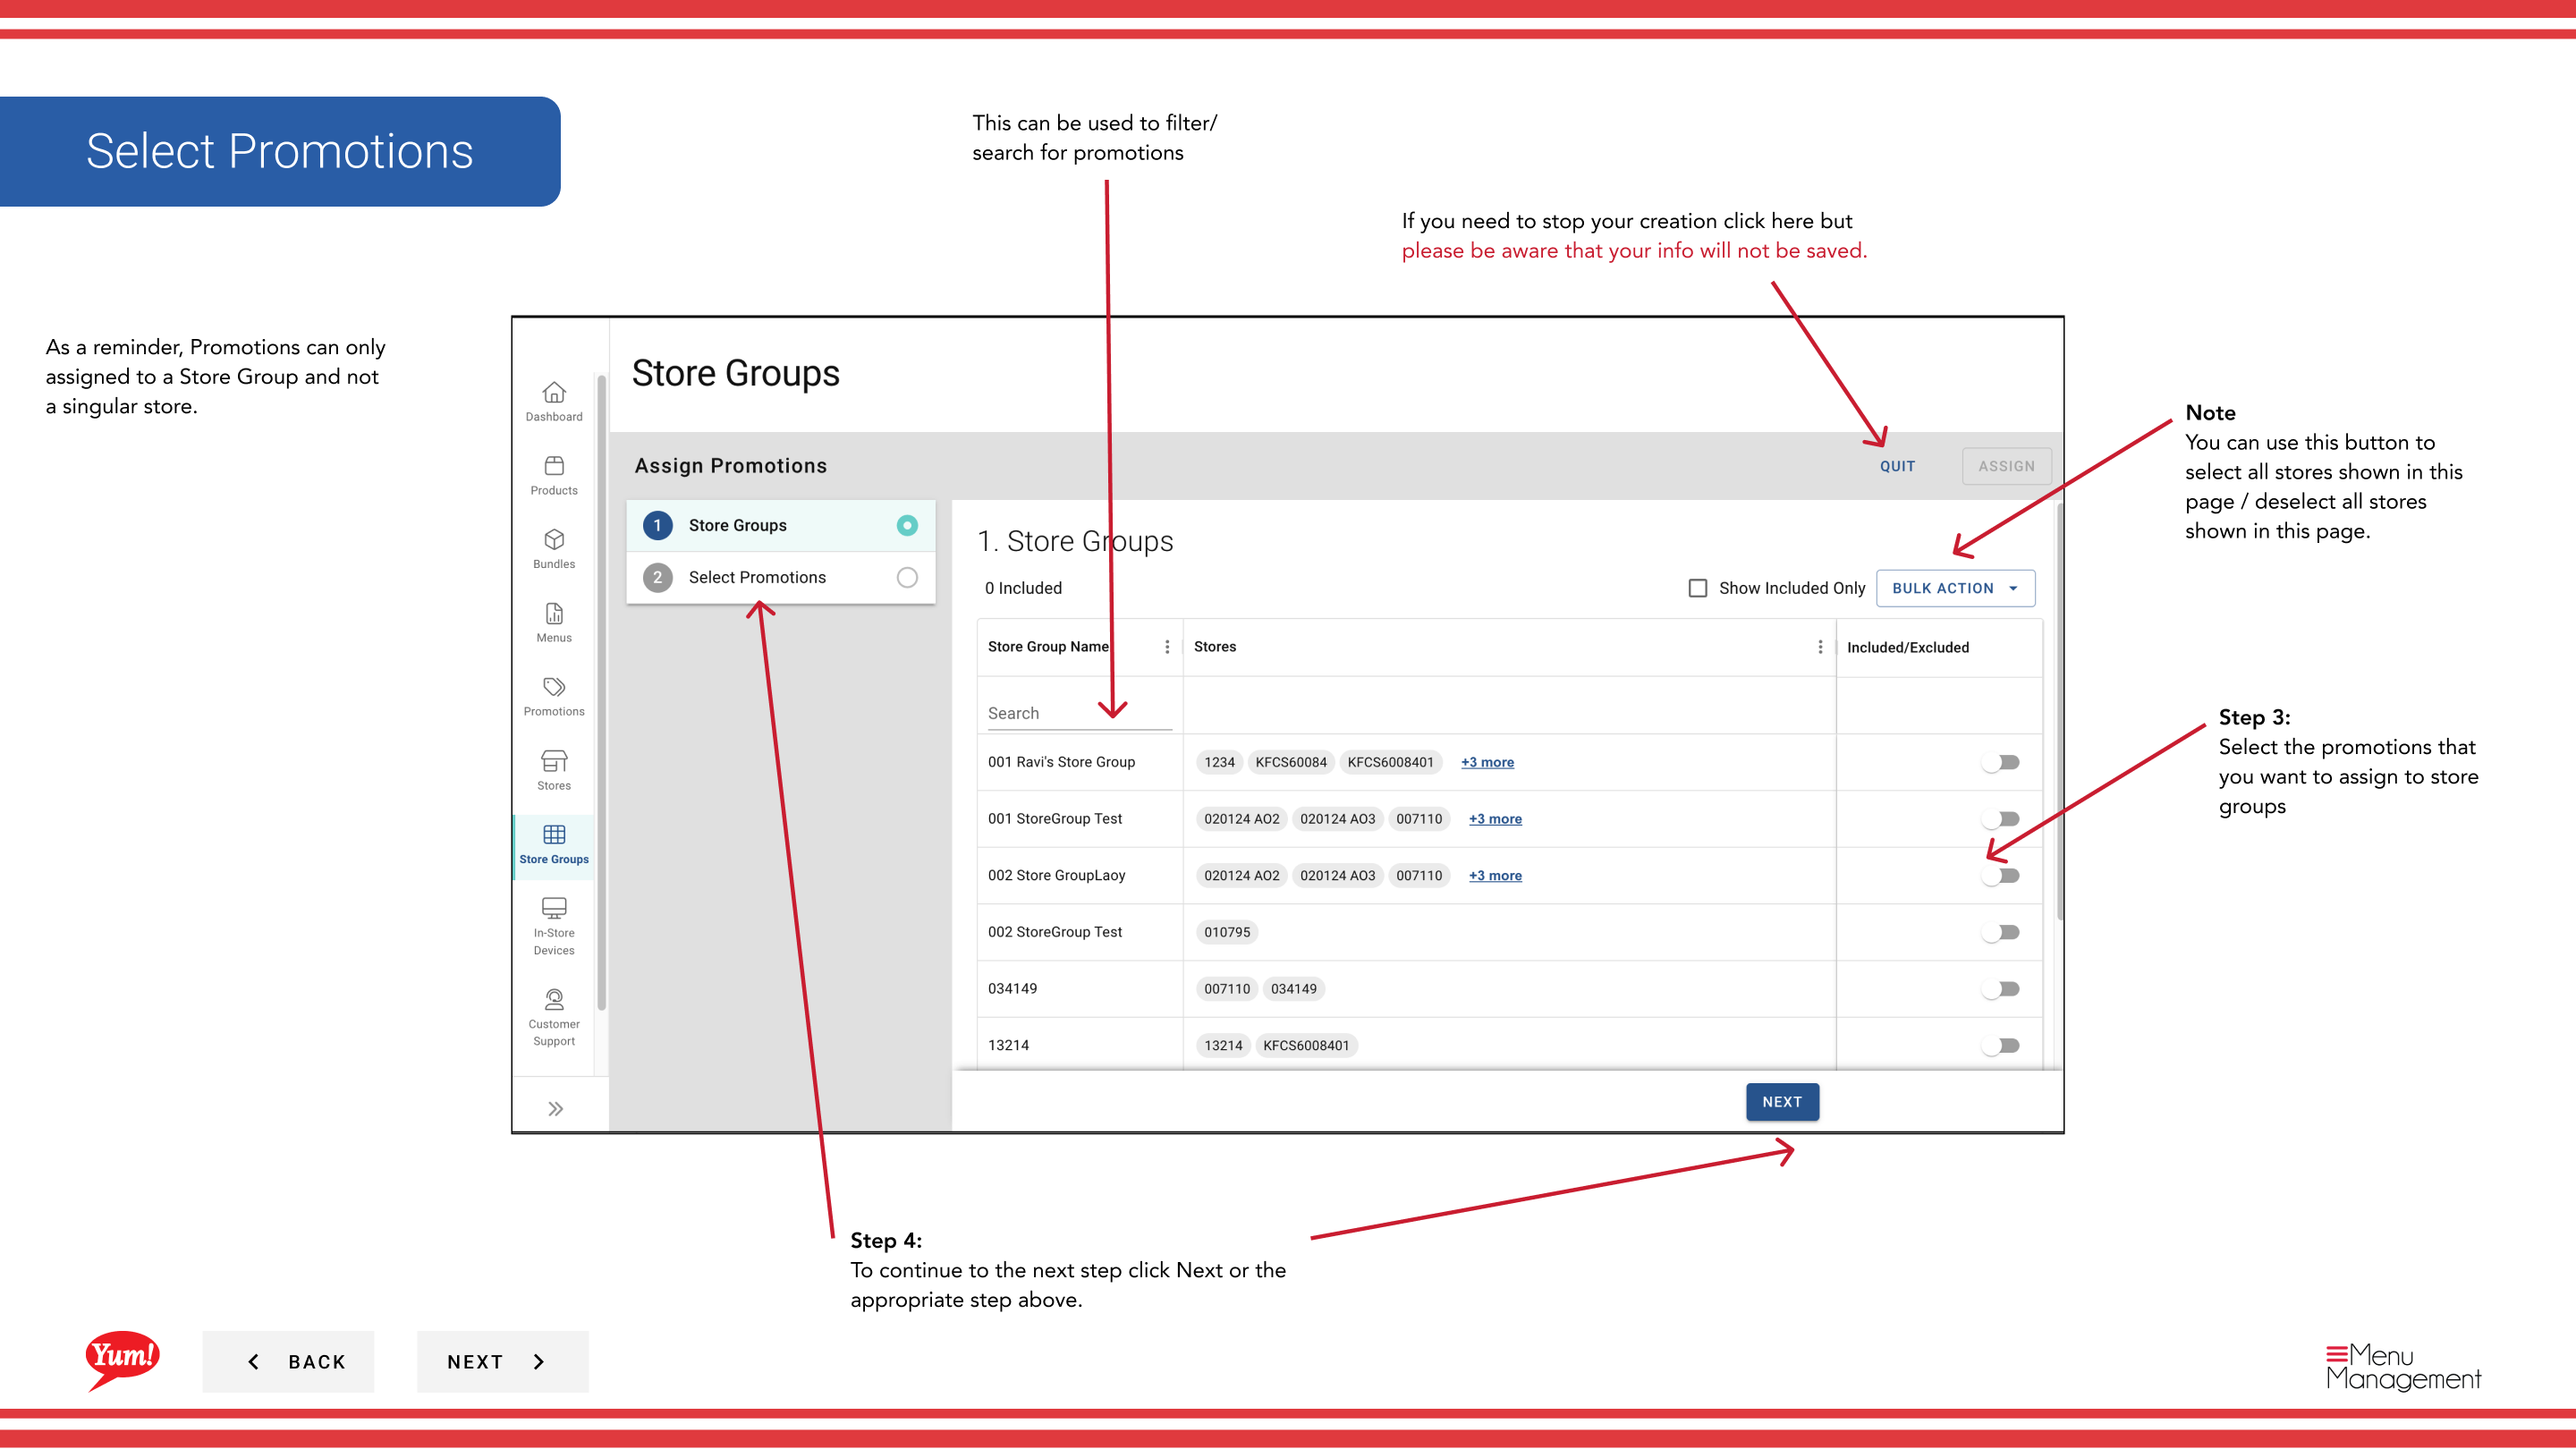
Step 4: Once you've selected your promotions, click the Next button or click on the next step indicator to proceed.
Step 5: Select the store group(s) that should receive these promotions. You can:
- Check the checkbox next to each store group name
- Search for specific store groups by name or tag
Step 6: Review your selections and click the Assign button to apply the promotions to the selected store groups.
Once assigned, the promotions become active immediately for all stores in the selected store groups and are displayed on their digital ordering channels.
You can also assign promotions from the Promotions section. See Assign Promotions to Store Groups for that workflow.
Related guides
- Create a Promotion
- Edit Promotions
- Unassign Promotions from Store Group
- Import Promotions for a Store Group
Part of the Admin Portal Guide · Section: Store Groups