Create a Promotion
What this guide covers
Builds a new promotional rule in Atlas — defining the discount type, conditions, validity period, and applicable store groups — so it can be surfaced to customers through digital ordering channels.
Steps
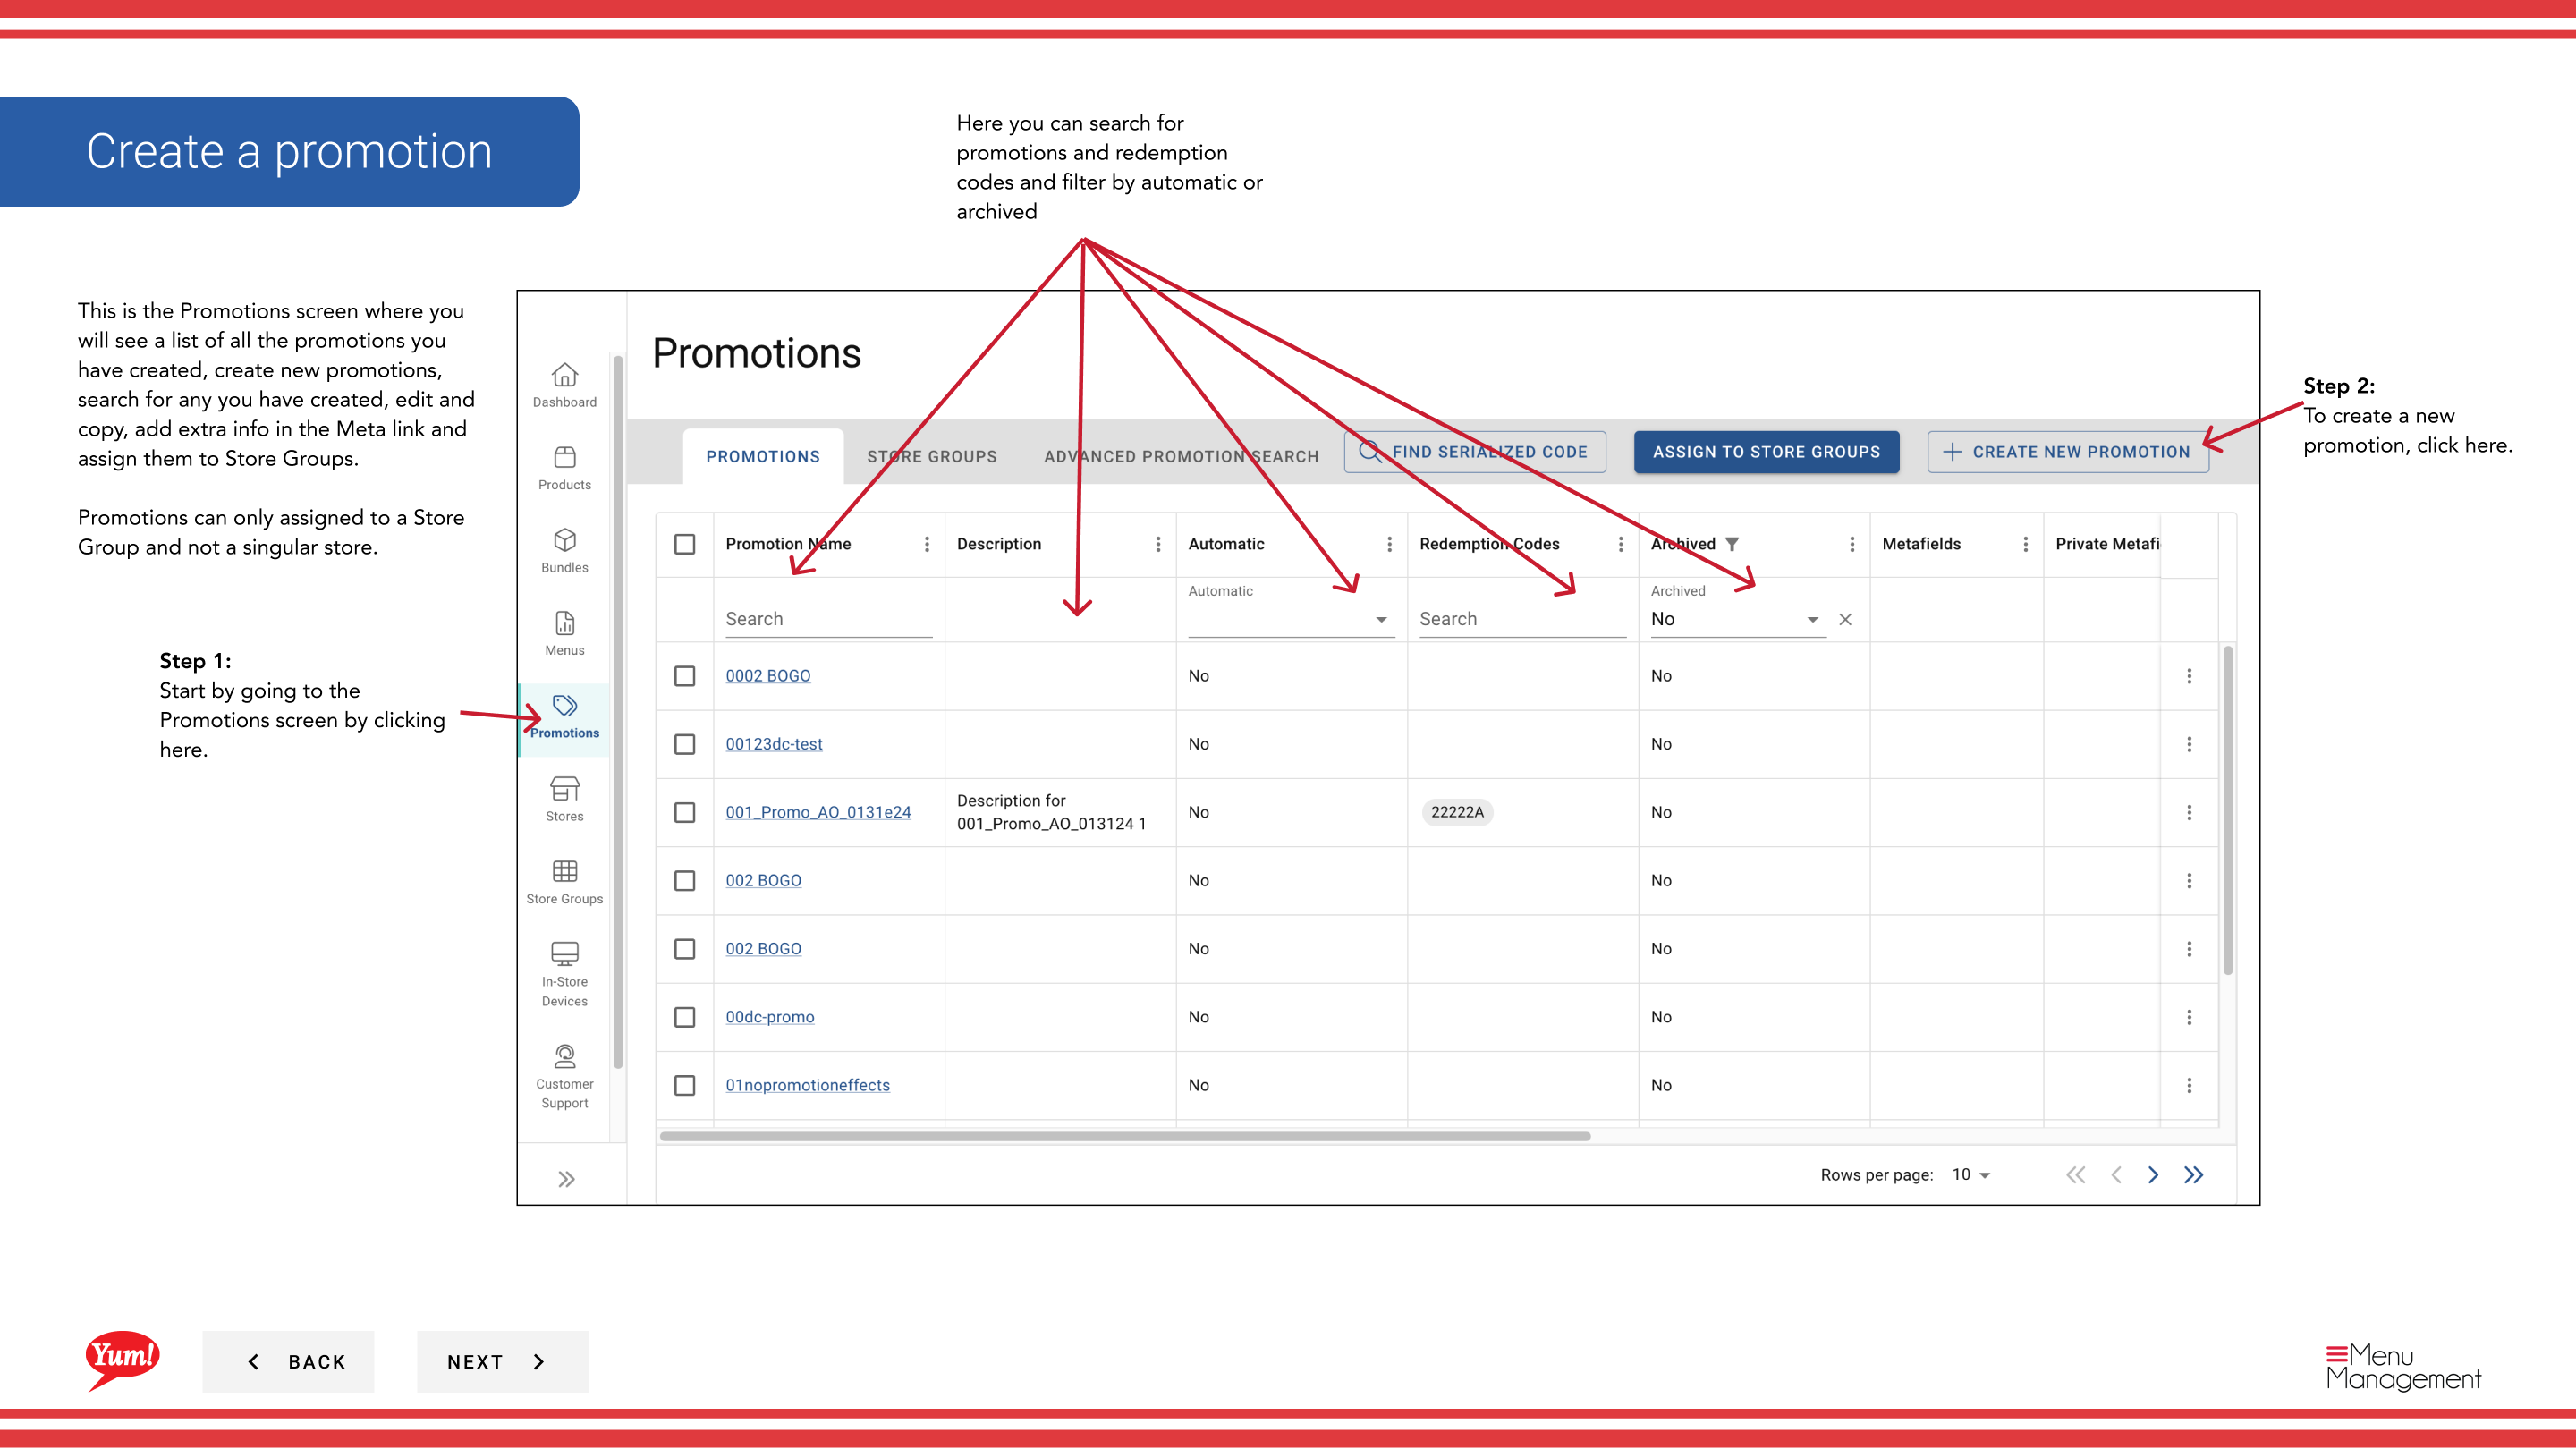
Step 1: Navigate to the Promotions section using the left-hand navigation menu.
Step 2: Click the + Create New Promotion button.
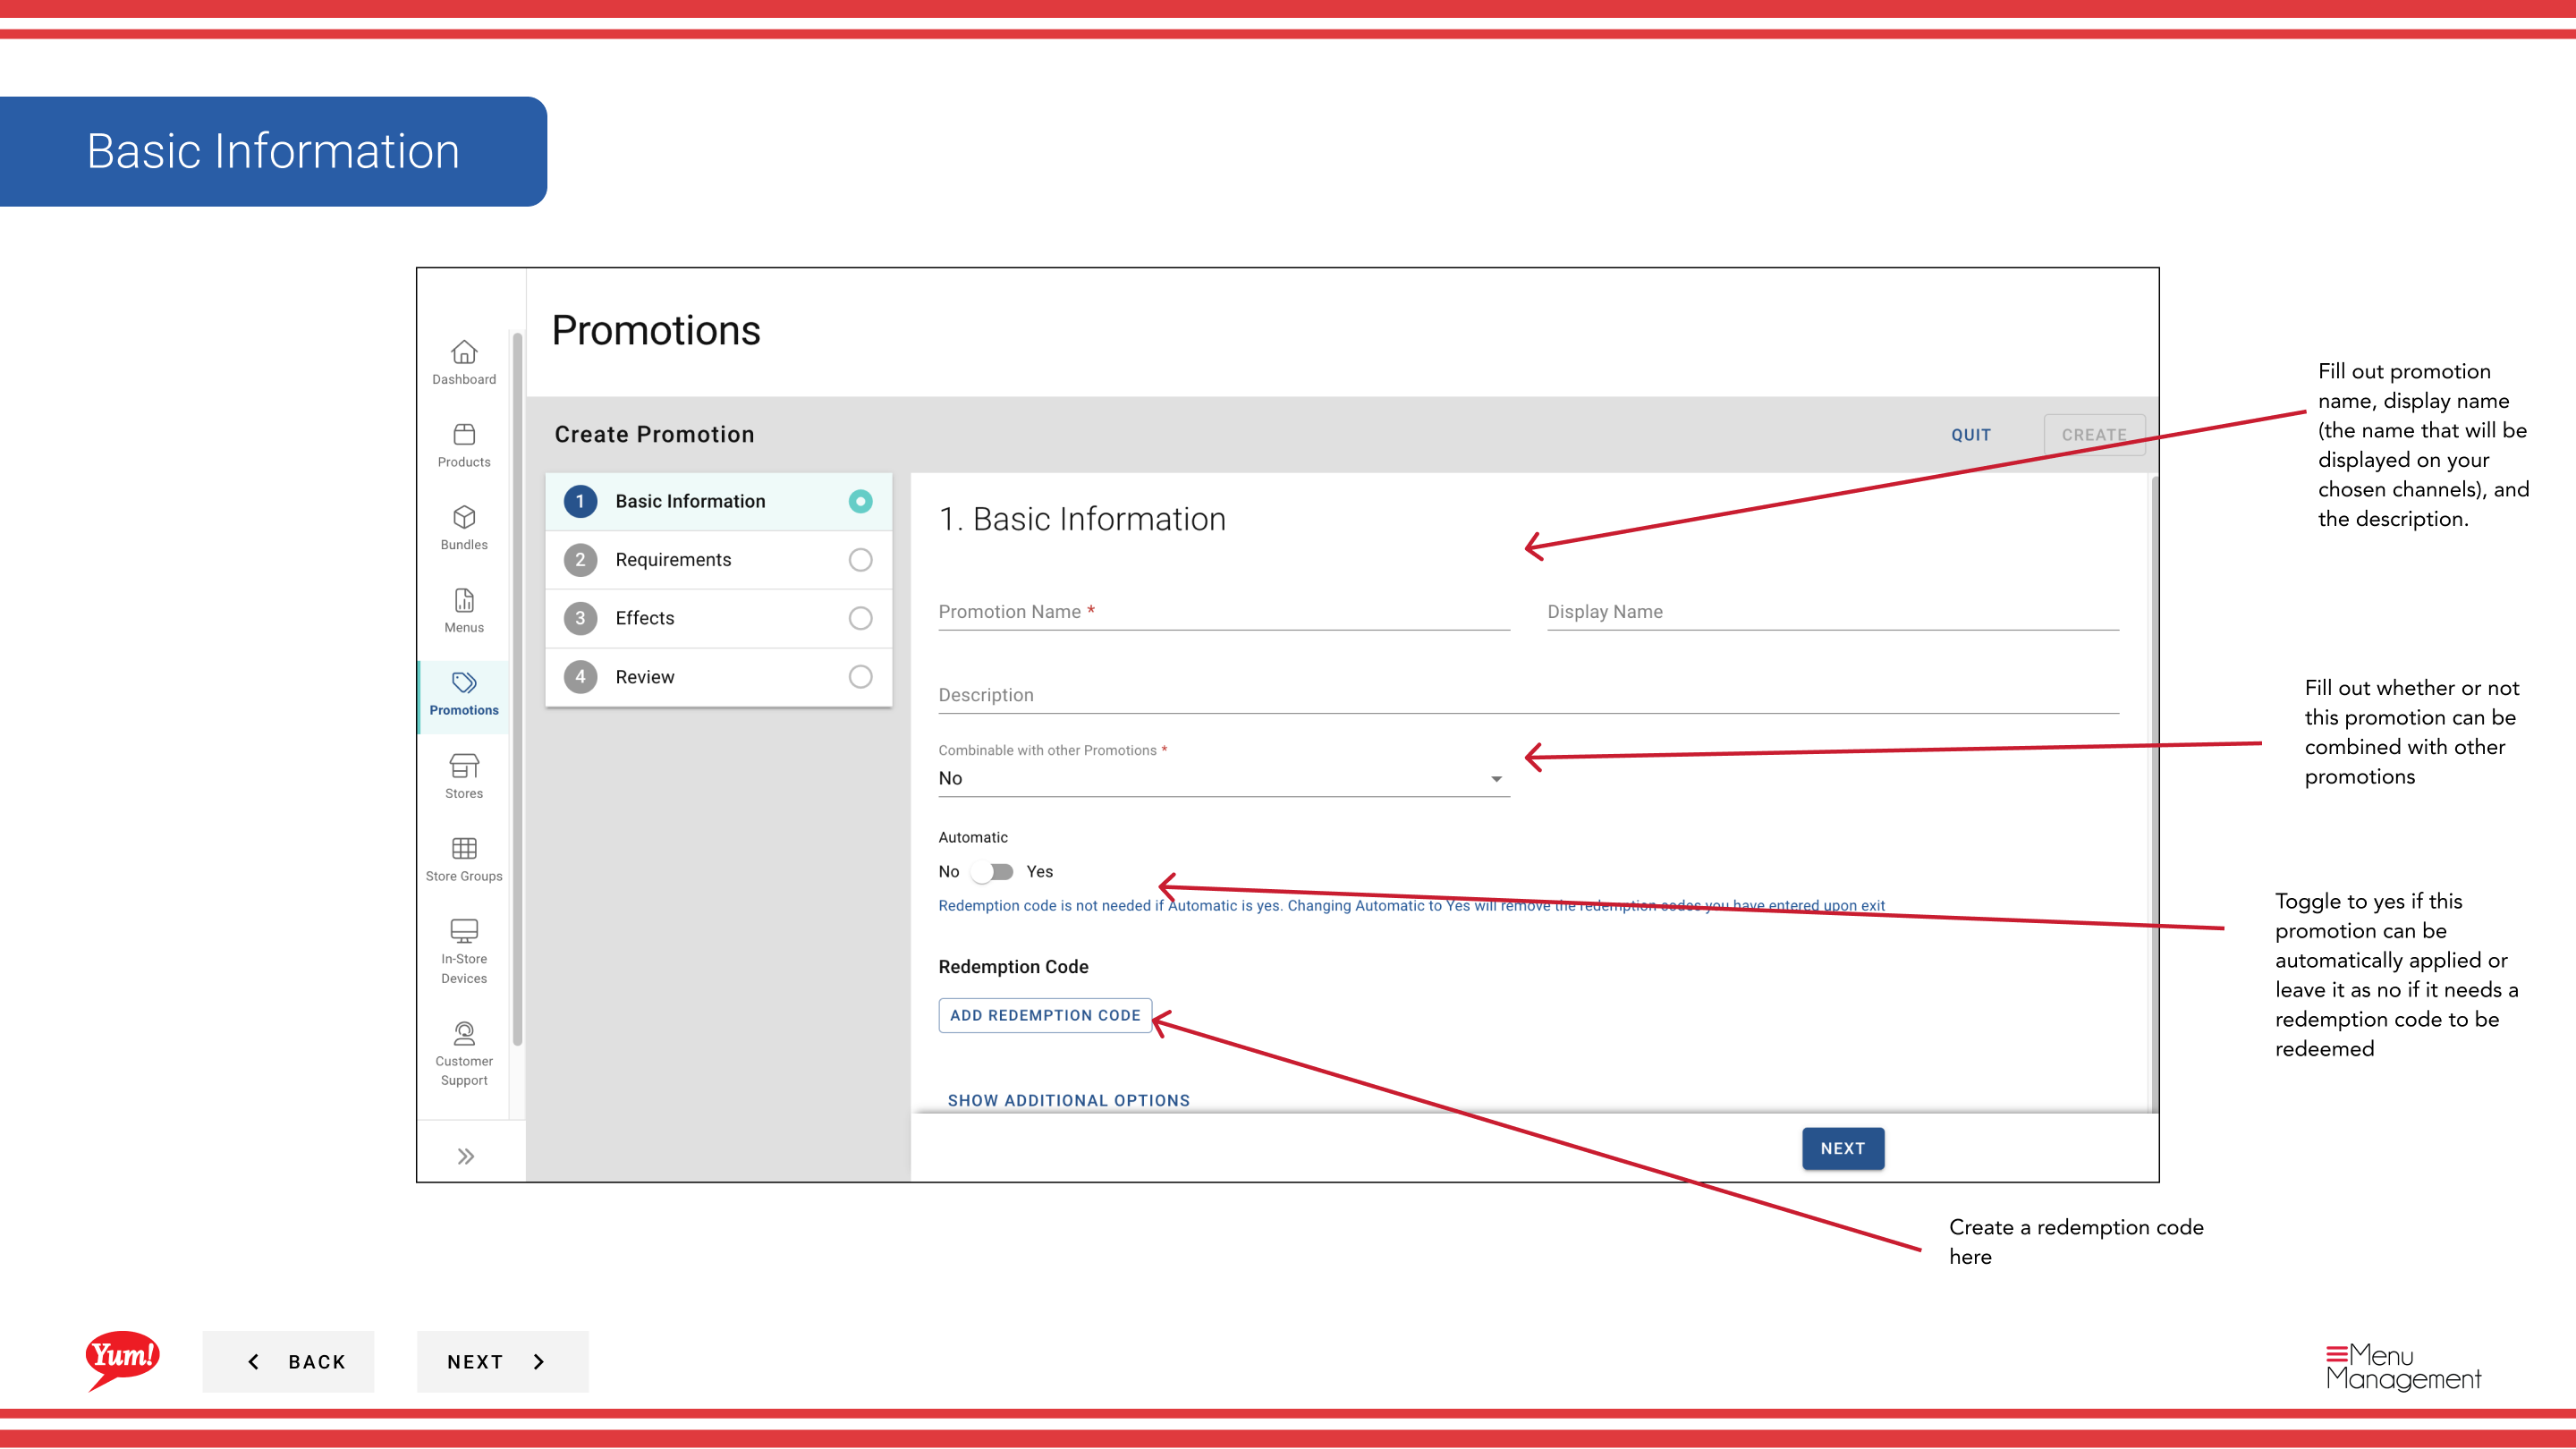
Step 3: Fill in the promotion details. Fields marked with * are required.
| Field | What to enter | Notes |
|---|---|---|
| Promotion Name * | Internal name for this promotion | e.g., "BOGO Zinger May 2024". Visible to operators only. |
| Display Name * | Customer-facing name shown on ordering channels | e.g., "Buy 1 Get 1 Free Zinger". Keep it short and compelling. |
| Description | Explains the promotion to customers | Shown on the ordering interface. |
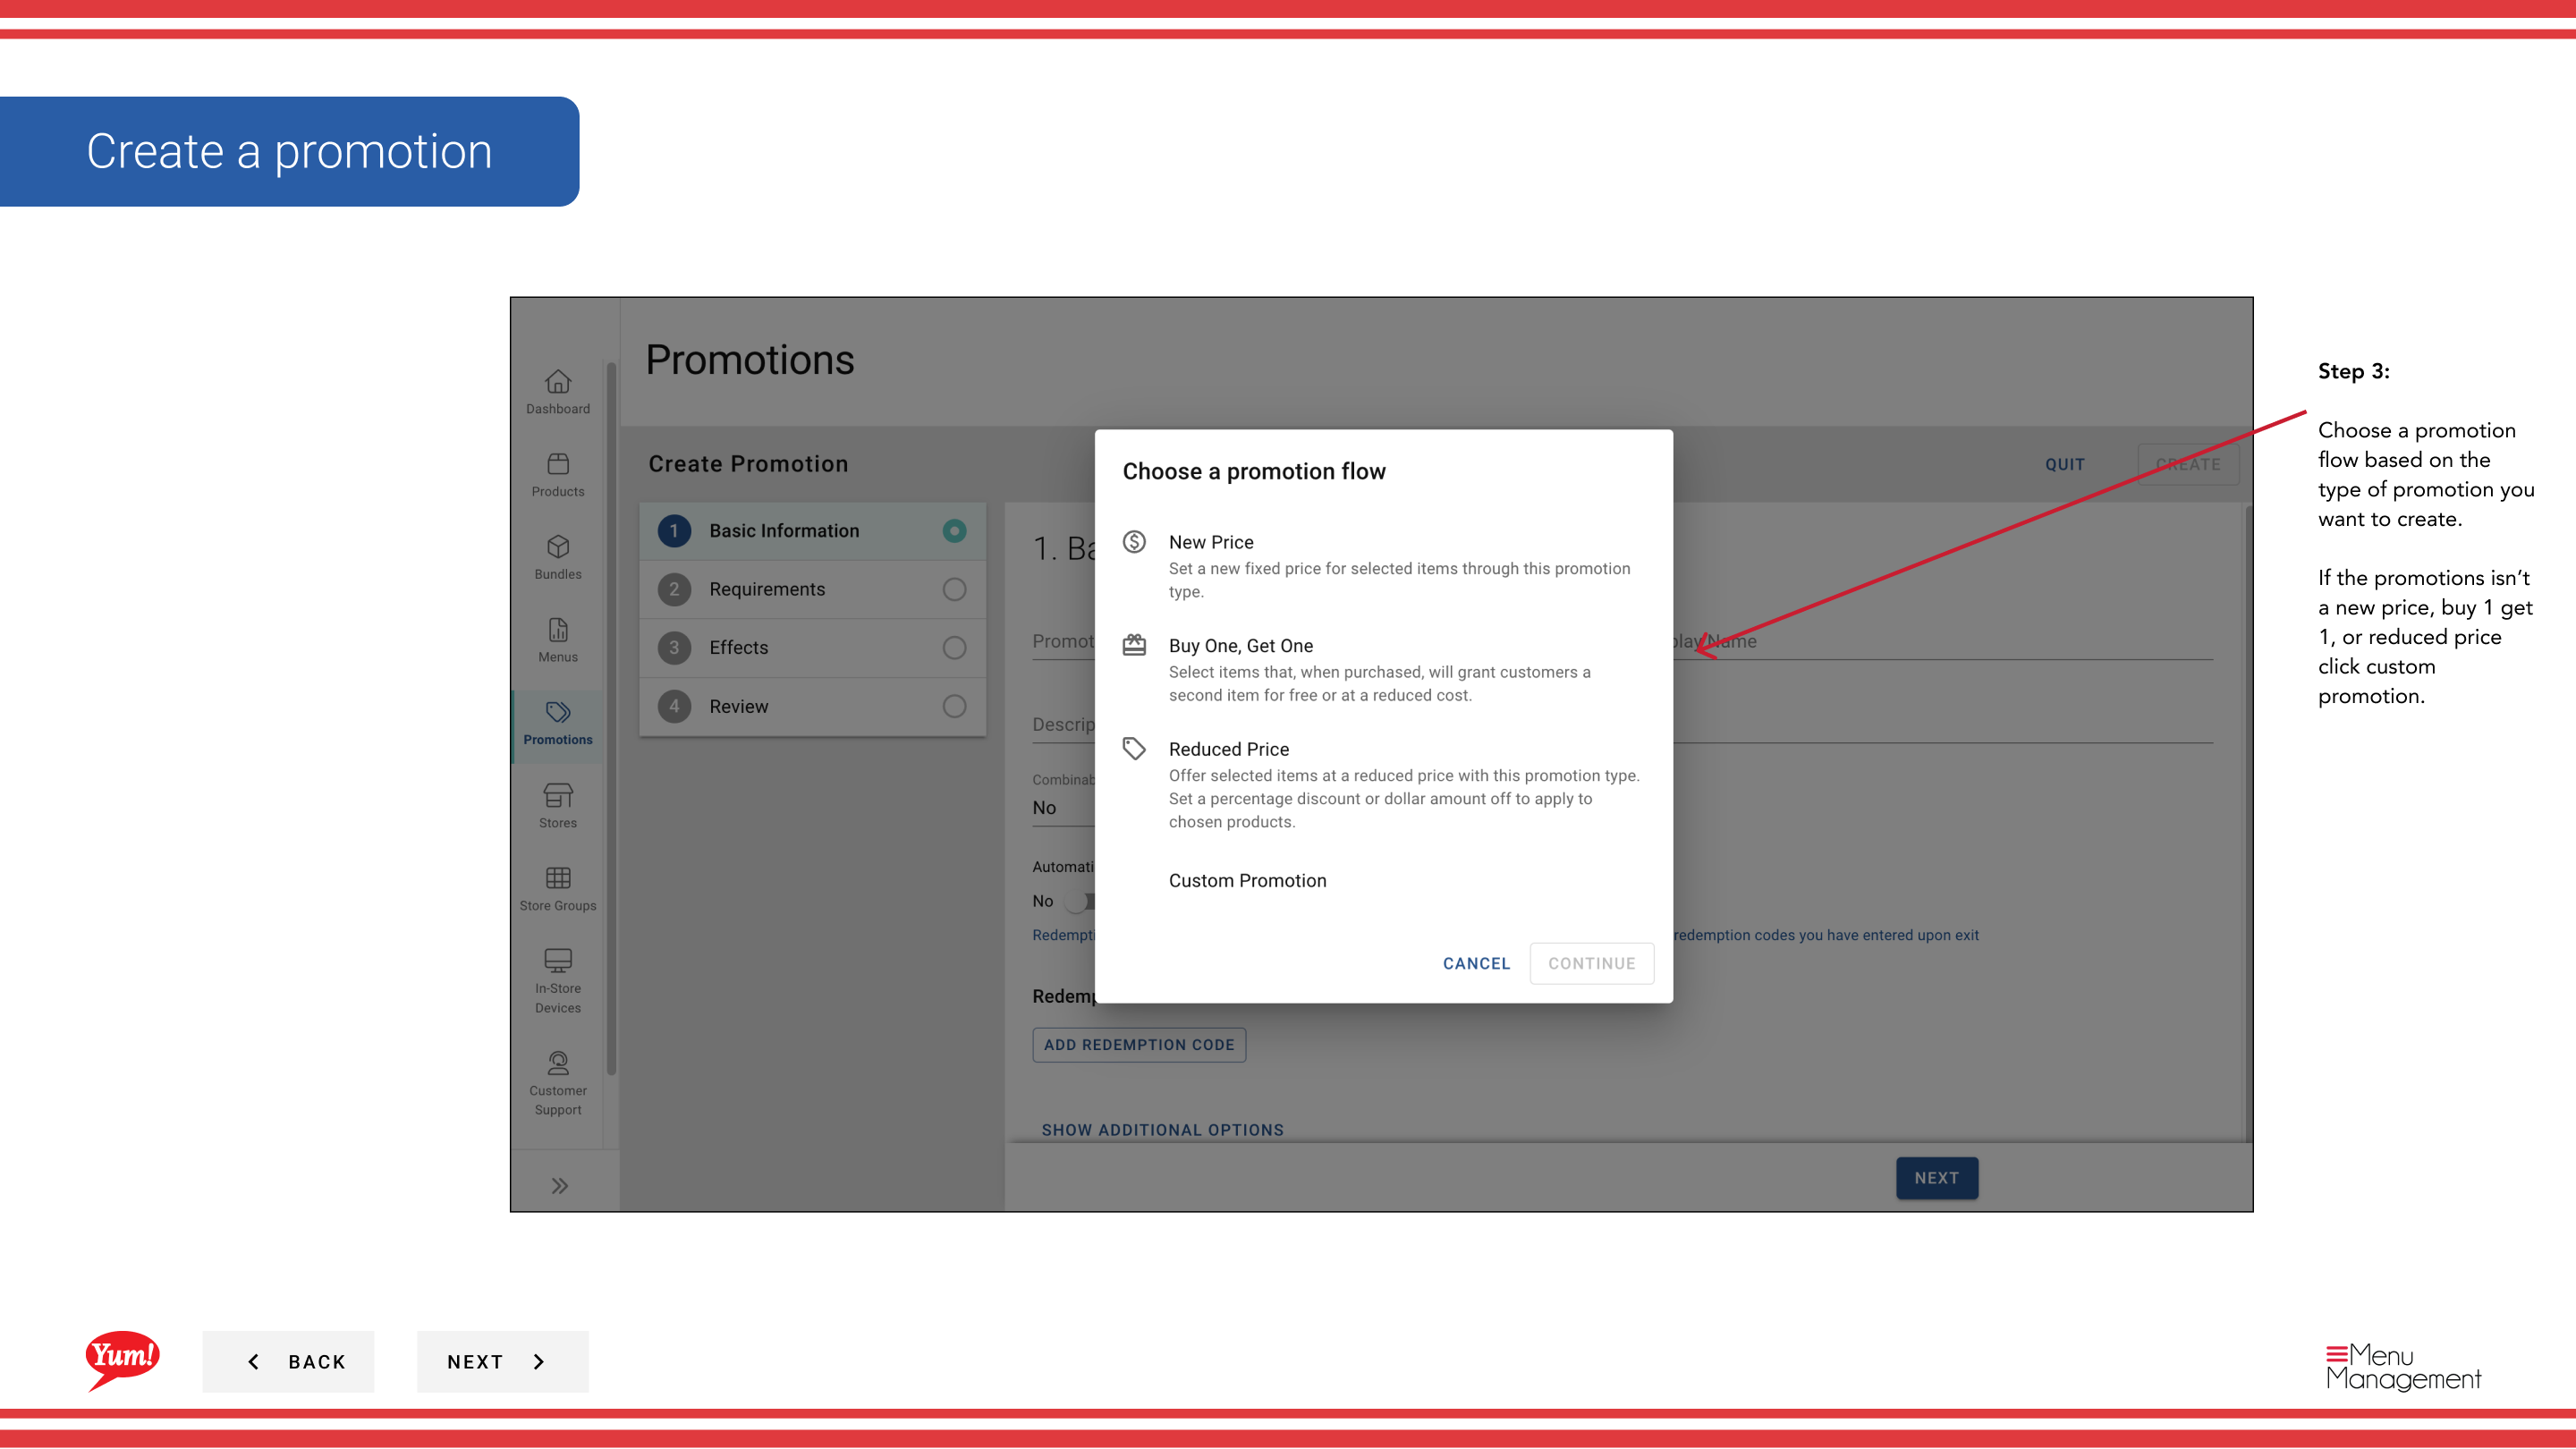
Step 4: Select a Promotion Flow based on the type of promotion you are creating.
| Flow | Use when... |
|---|---|
| New Price | You want to set a new fixed price for a qualifying item |
| Buy 1 Get 1 | Customer buys one item and receives another free or discounted |
| Reduced Price | You want to apply a percentage or fixed reduction |
| Custom Promotion | The promotion doesn’t fit any of the above flows |
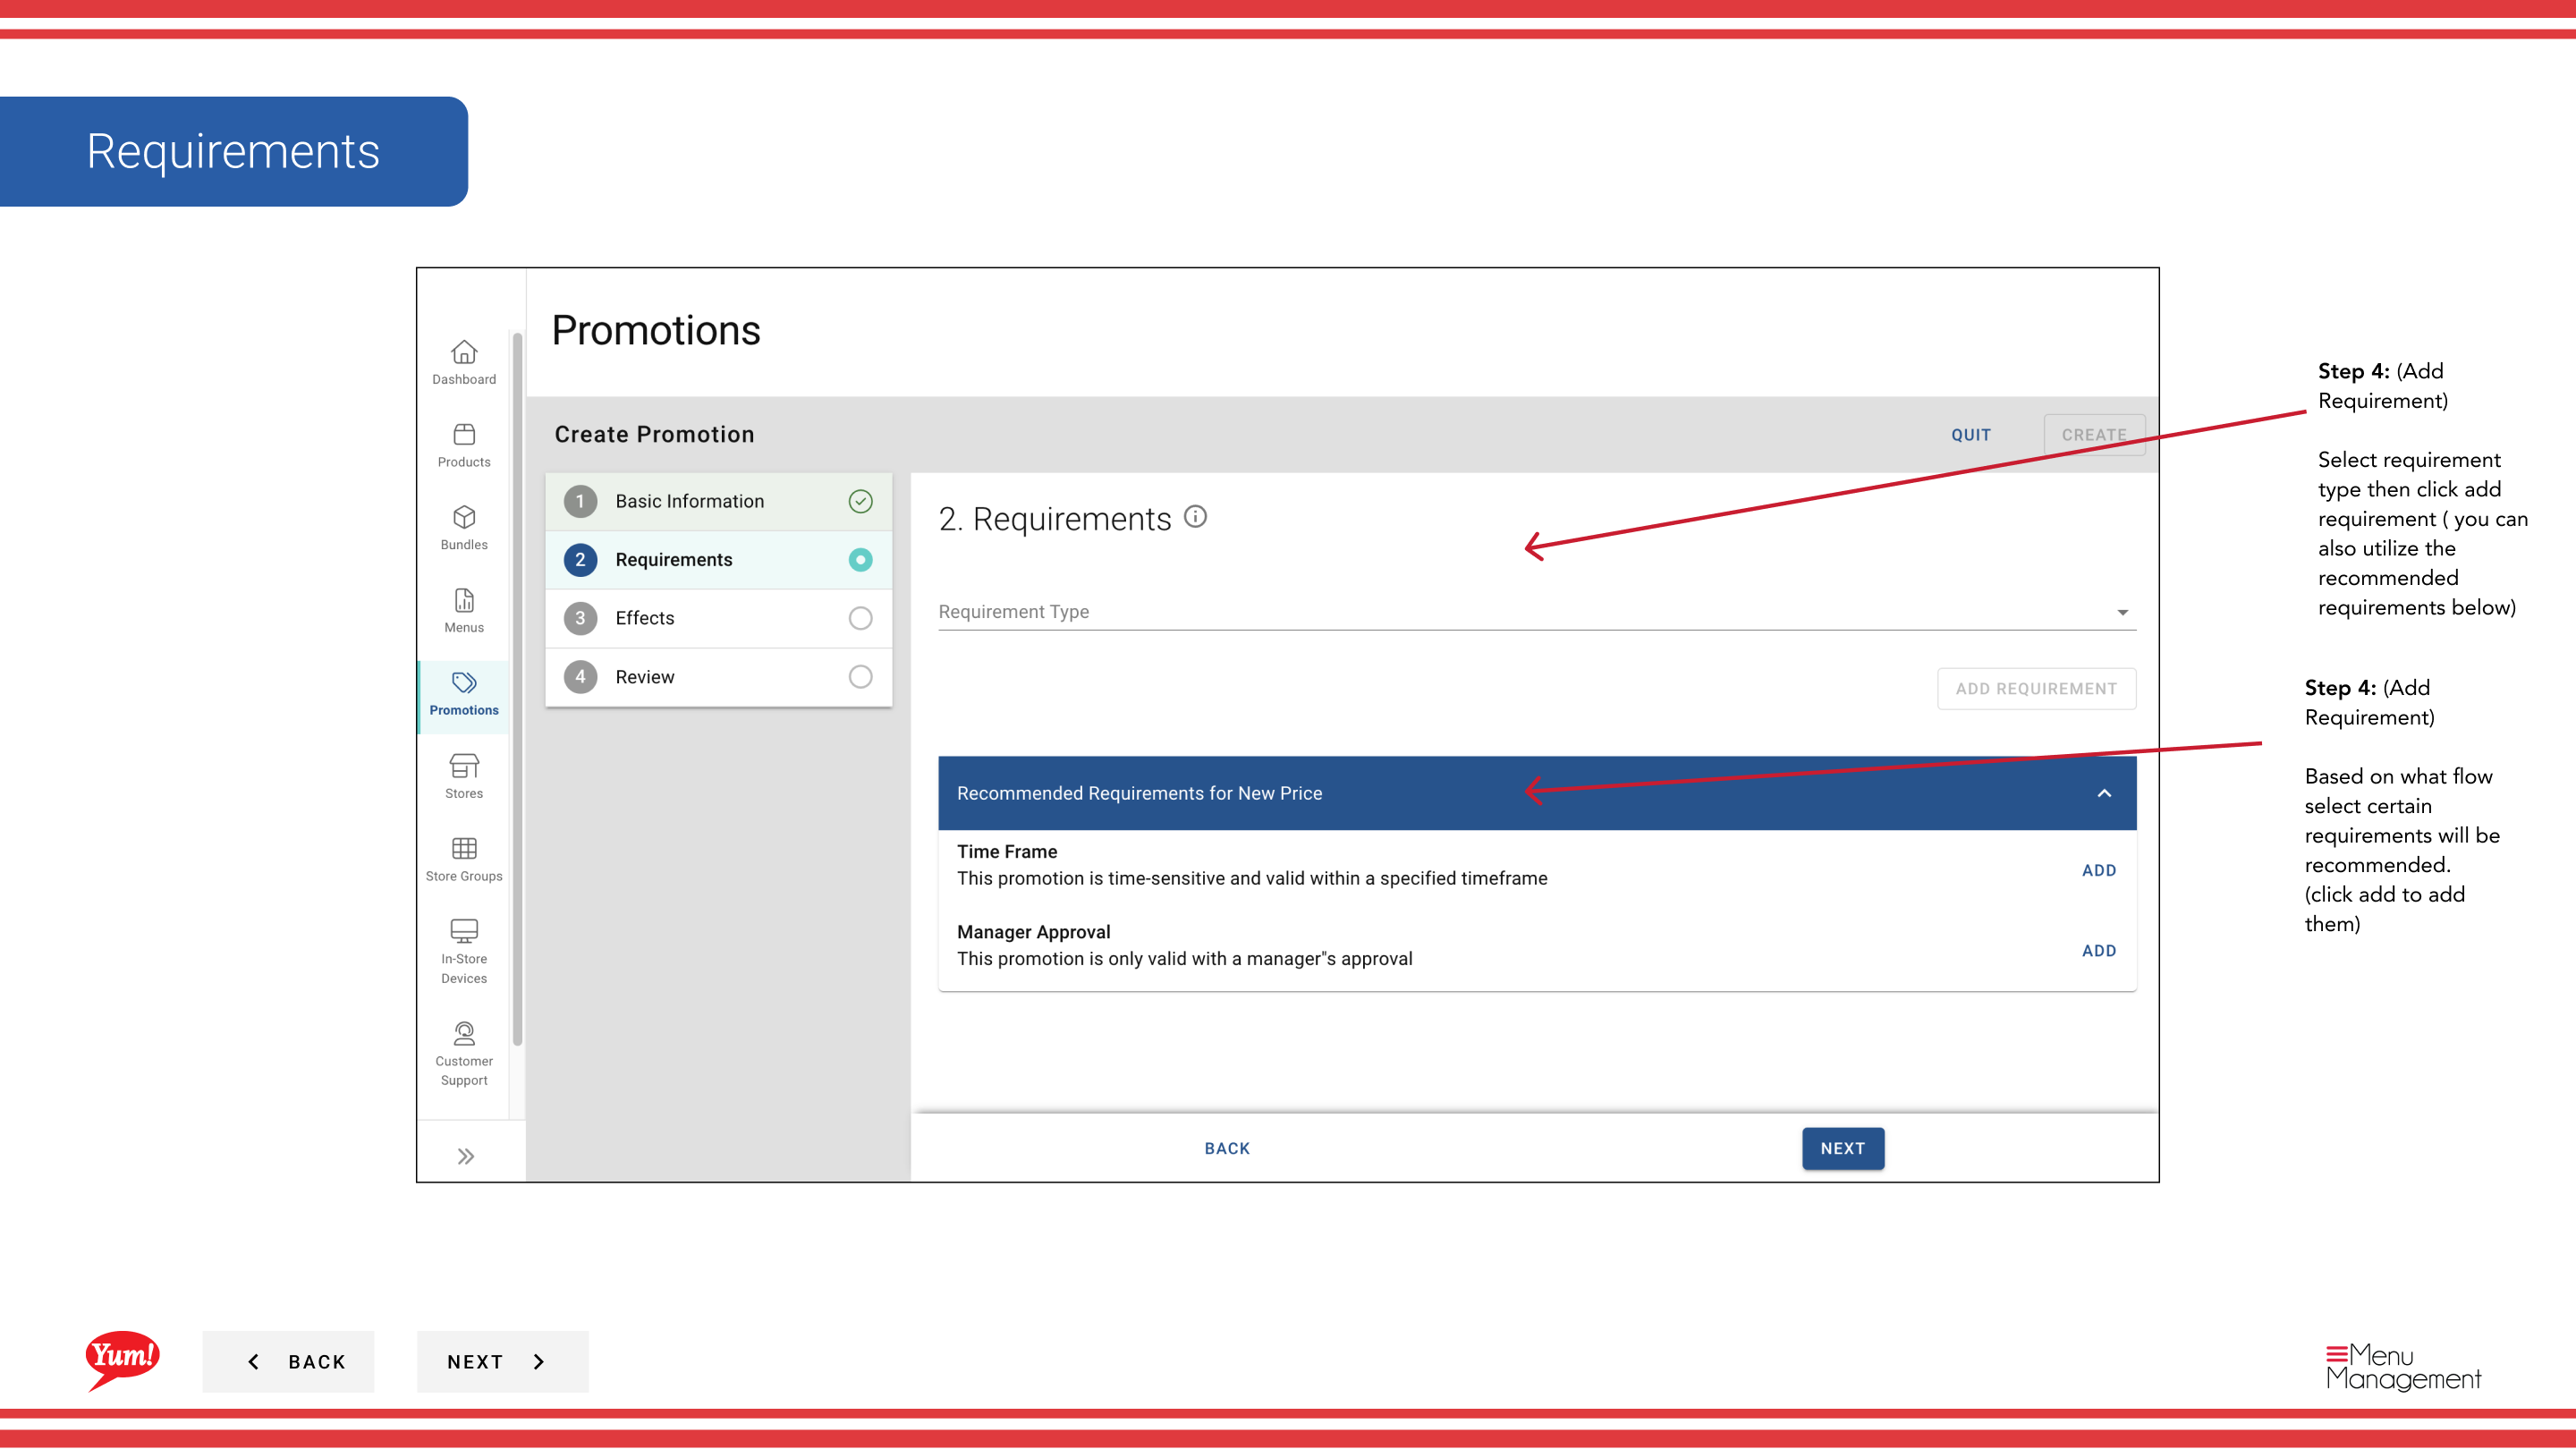
Step 5: Add Requirements — the conditions a customer must meet to trigger the promotion. Based on your selected flow, recommended requirements will appear below the requirement selector. Click Add to include a recommended requirement, or select a requirement type from the dropdown and click Add Requirement to build a custom condition.
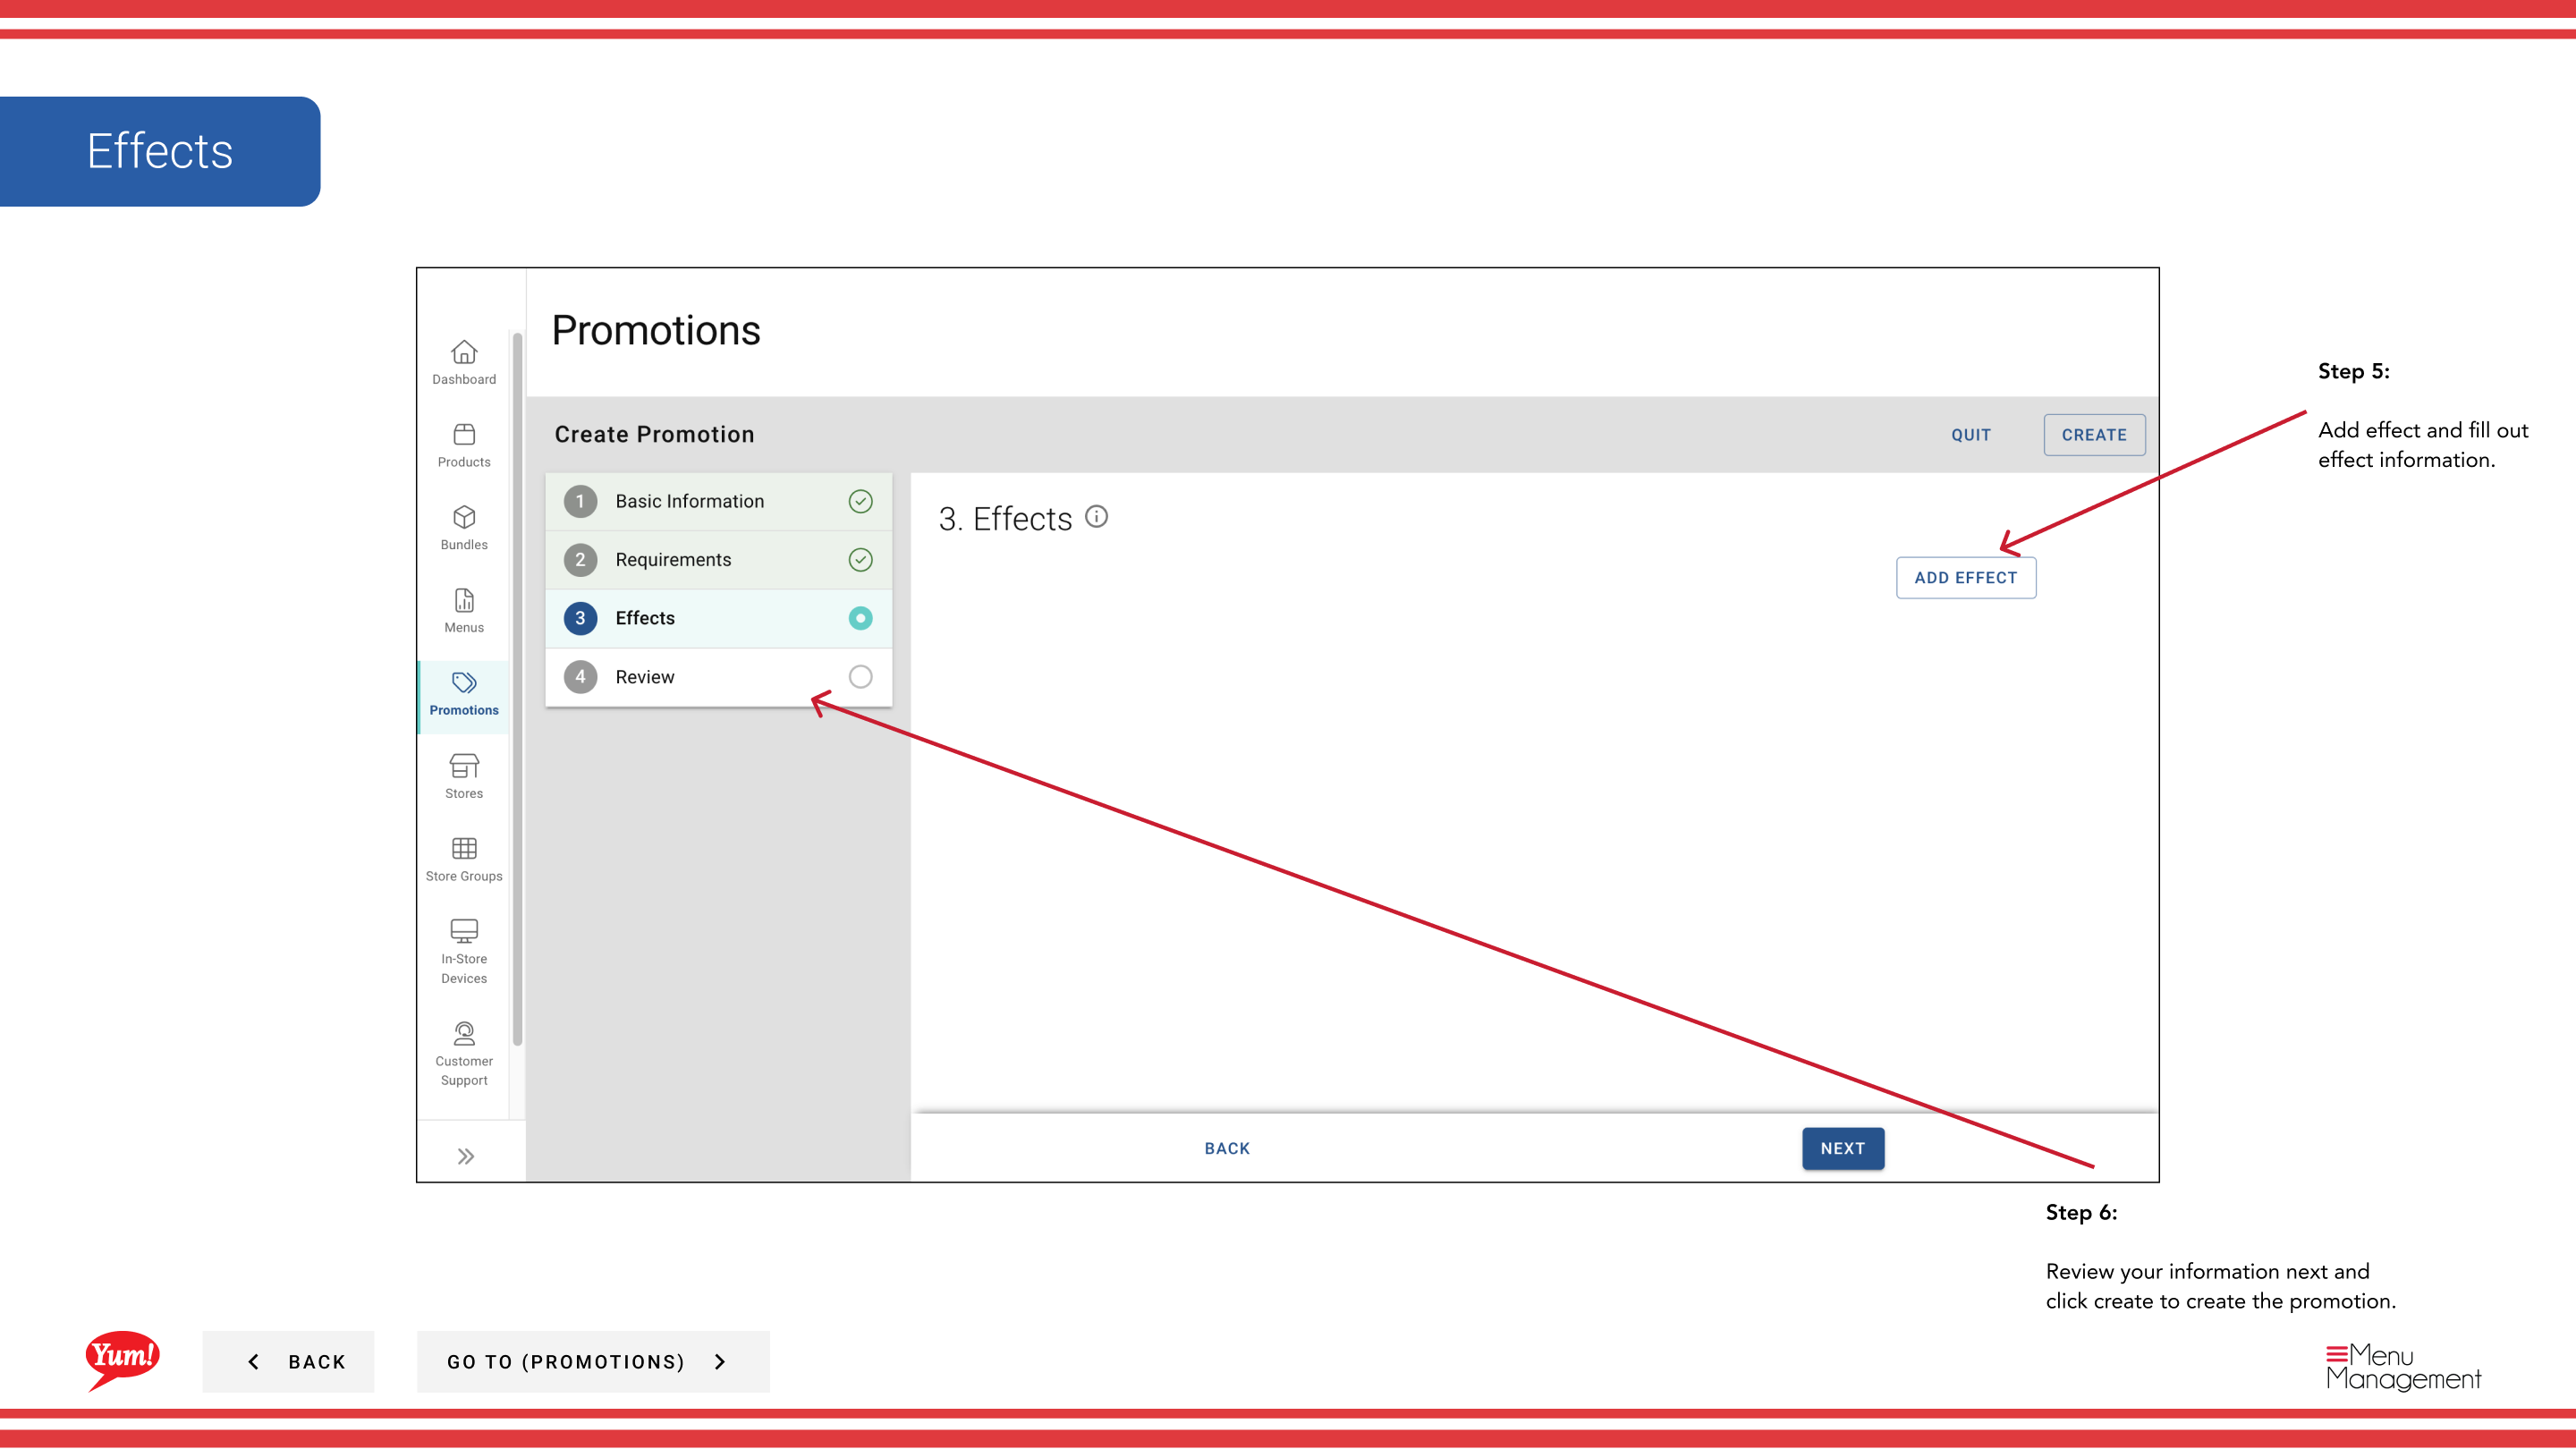
Step 6: Add an Effect and fill in the effect details. The effect defines what discount or reward the customer receives when the requirements are met.
Step 7: Review all entered information and click Create to save the promotion.
Promotions can only be assigned to a Store Group, not to an individual store. See Assign Promotions to Store Groups after creating your promotion.
Related guides
Part of the Admin Portal Guide · Section: Promotions