Create a Beneficiary
What this guide covers
Sets up a charitable beneficiary linked to specific stores, enabling donation collection or charity campaign functionality at those locations.
Steps
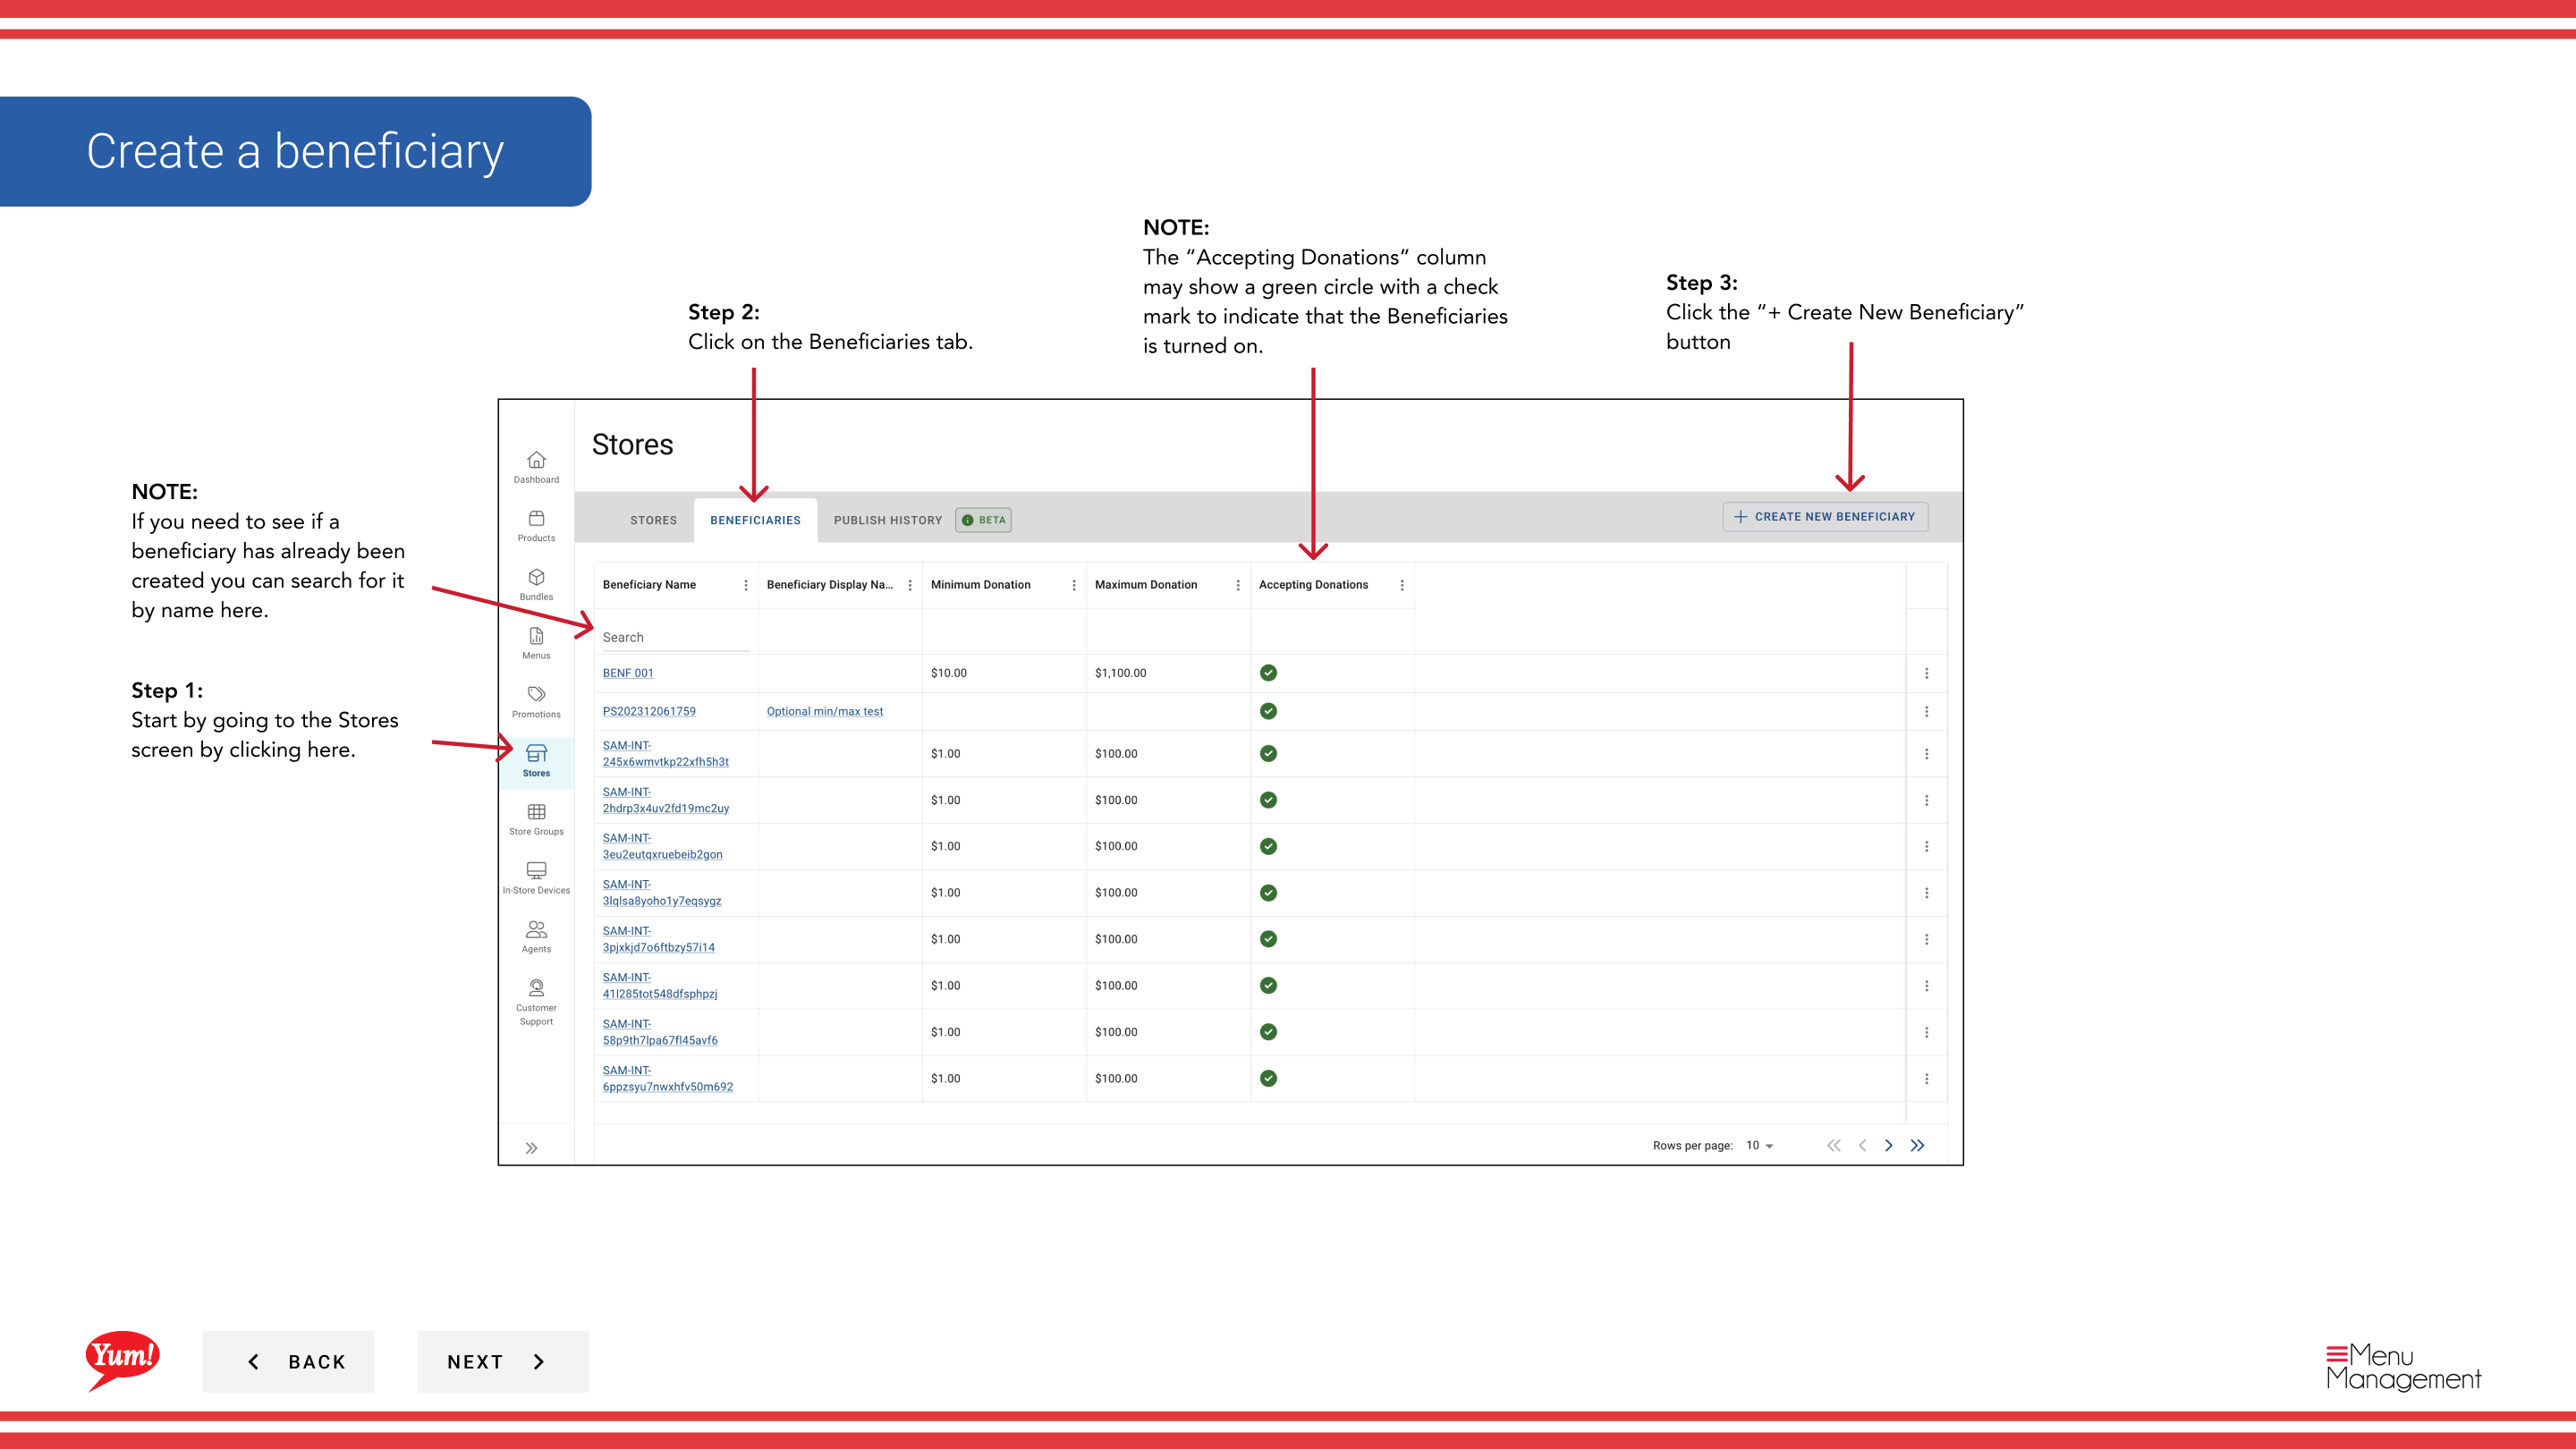
Step 1: Navigate to the Stores section using the left-hand navigation menu.
Step 2: Click the Beneficiaries tab at the top of the Stores page.
Step 3: Click the + Create New Beneficiary button.
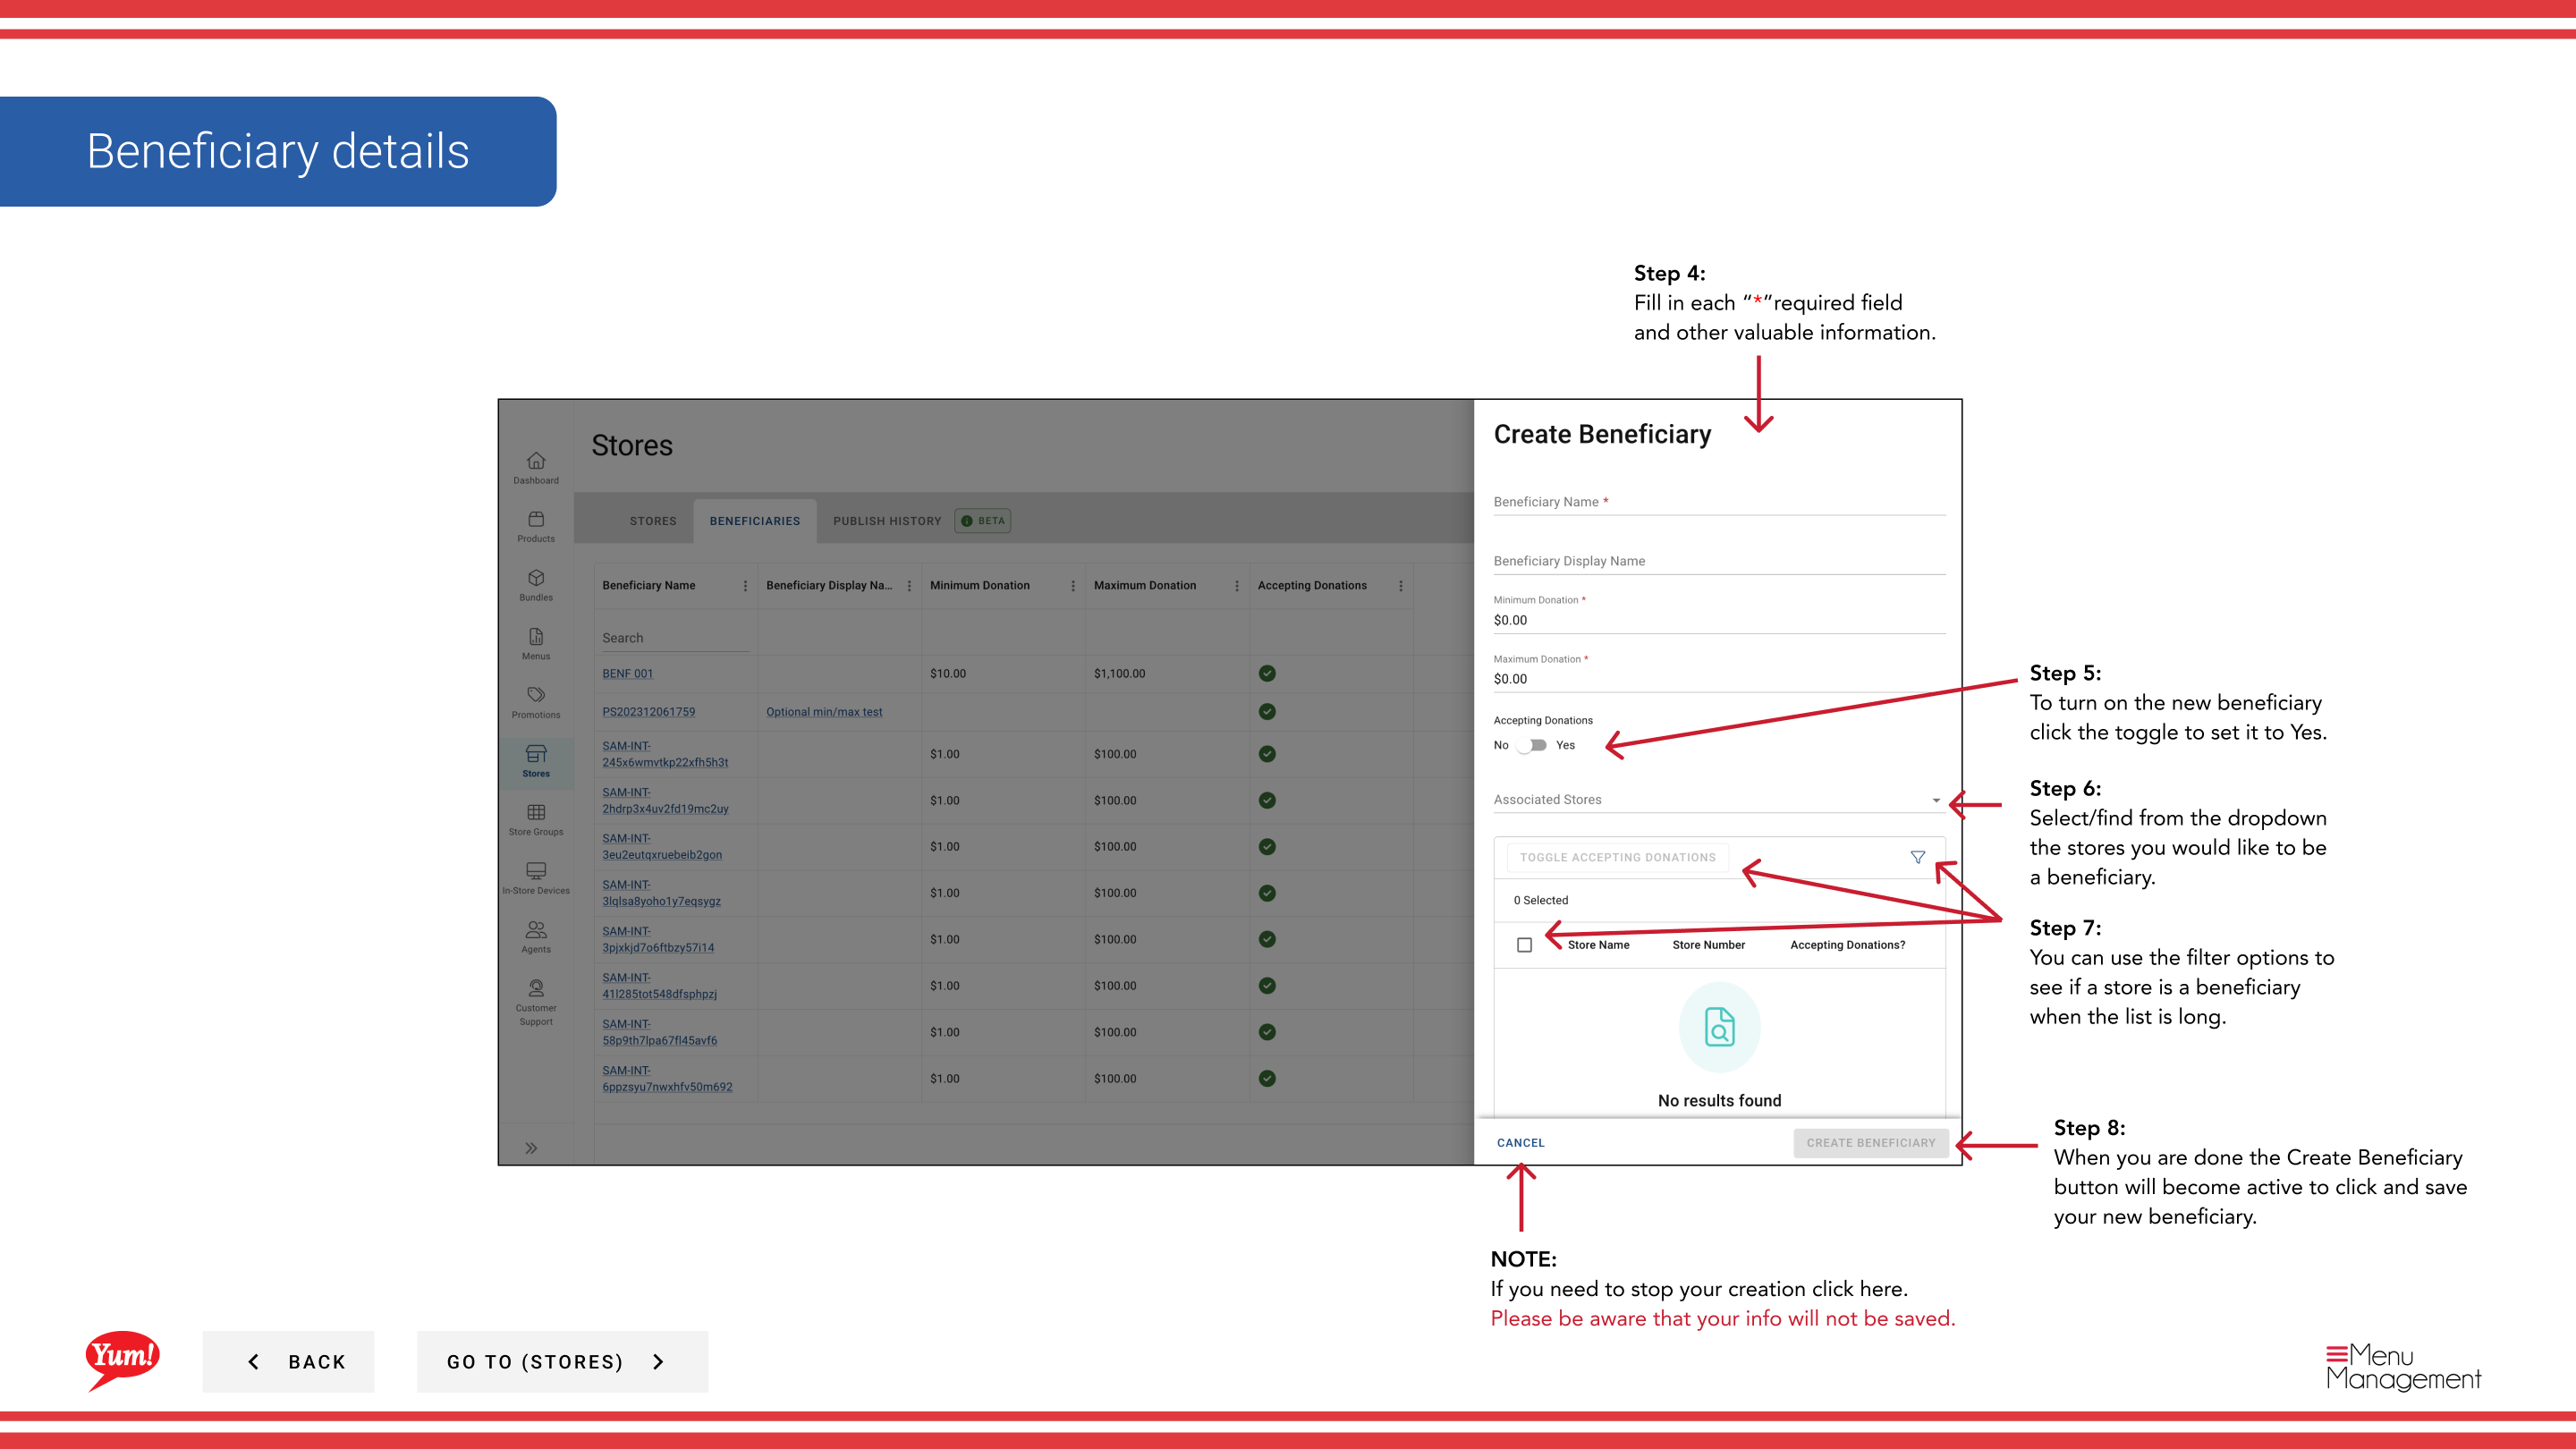
Step 4: Fill in the beneficiary form using the field descriptions below. Fields marked with * are required.
| Field | What to enter | Notes |
|---|---|---|
| Beneficiary Name * | Name of the charity or cause | e.g., “KFC Youth Foundation” |
| Accepting Donations | Toggle: Yes or No | Set to Yes to activate donation collection at selected stores |
| Stores * | Search and select stores to associate with this beneficiary | Use the search box to find stores by name, number, or code |
Step 5: To activate donation collection for this beneficiary, toggle Accepting Donations to Yes.
Step 6: Use the Stores field to search for and select the stores where this beneficiary should be available. You can use the filter options to narrow the store list by store group or other criteria.
Step 7: Once all required fields are completed, the Create Beneficiary button becomes active. Click Create Beneficiary to save the new beneficiary.
Before creating a new beneficiary, use the search box to confirm a beneficiary with the same name doesn't already exist. A green checkmark in the “Accepting Donations” column indicates a beneficiary is active.
Clicking Cancel at any time discards all unsaved information.
Related guides
- View a Store's Beneficiaries — See all beneficiaries linked to a store
- Edit/Delete a Beneficiary — Update or remove a beneficiary
Part of the Admin Portal Guide · Section: Stores