Create a Store
What this guide covers
Registers a new store location in Atlas with its required details, making it available for menu assignment and digital ordering.
Steps
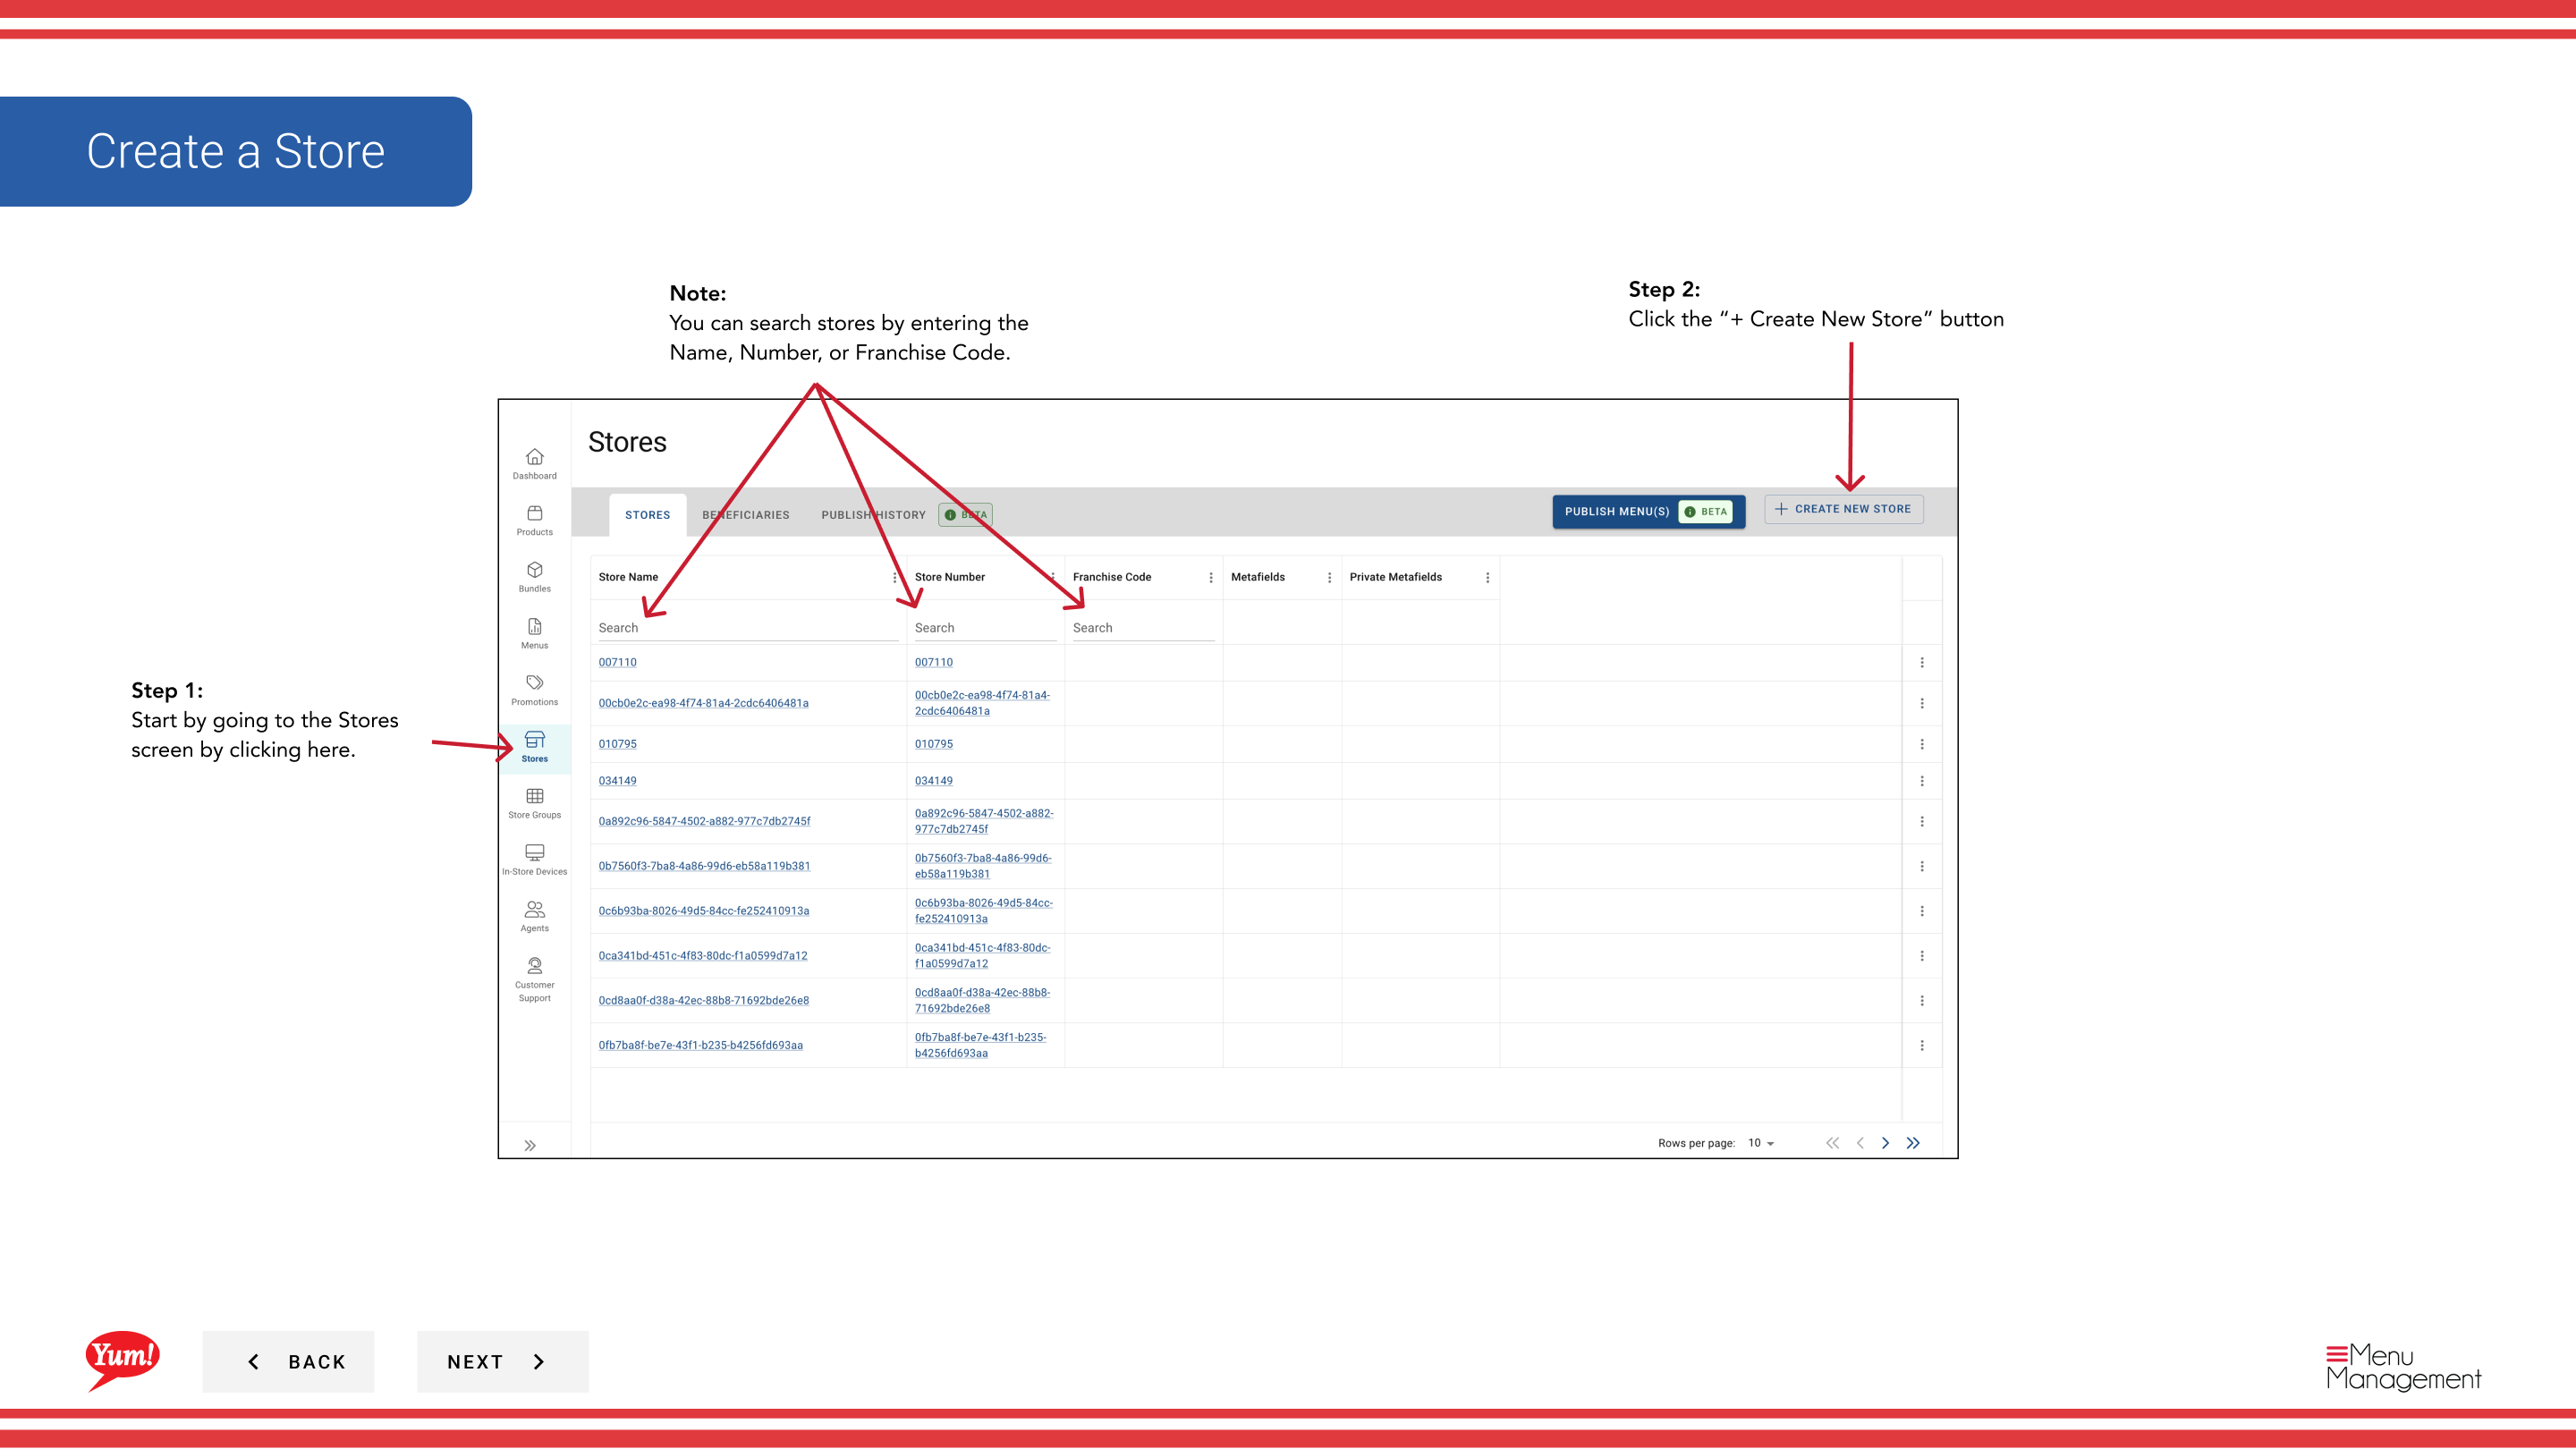
Step 1: Navigate to the Stores section using the left-hand navigation menu.
Step 2: Click the + Create New Store button in the top-right corner of the screen.
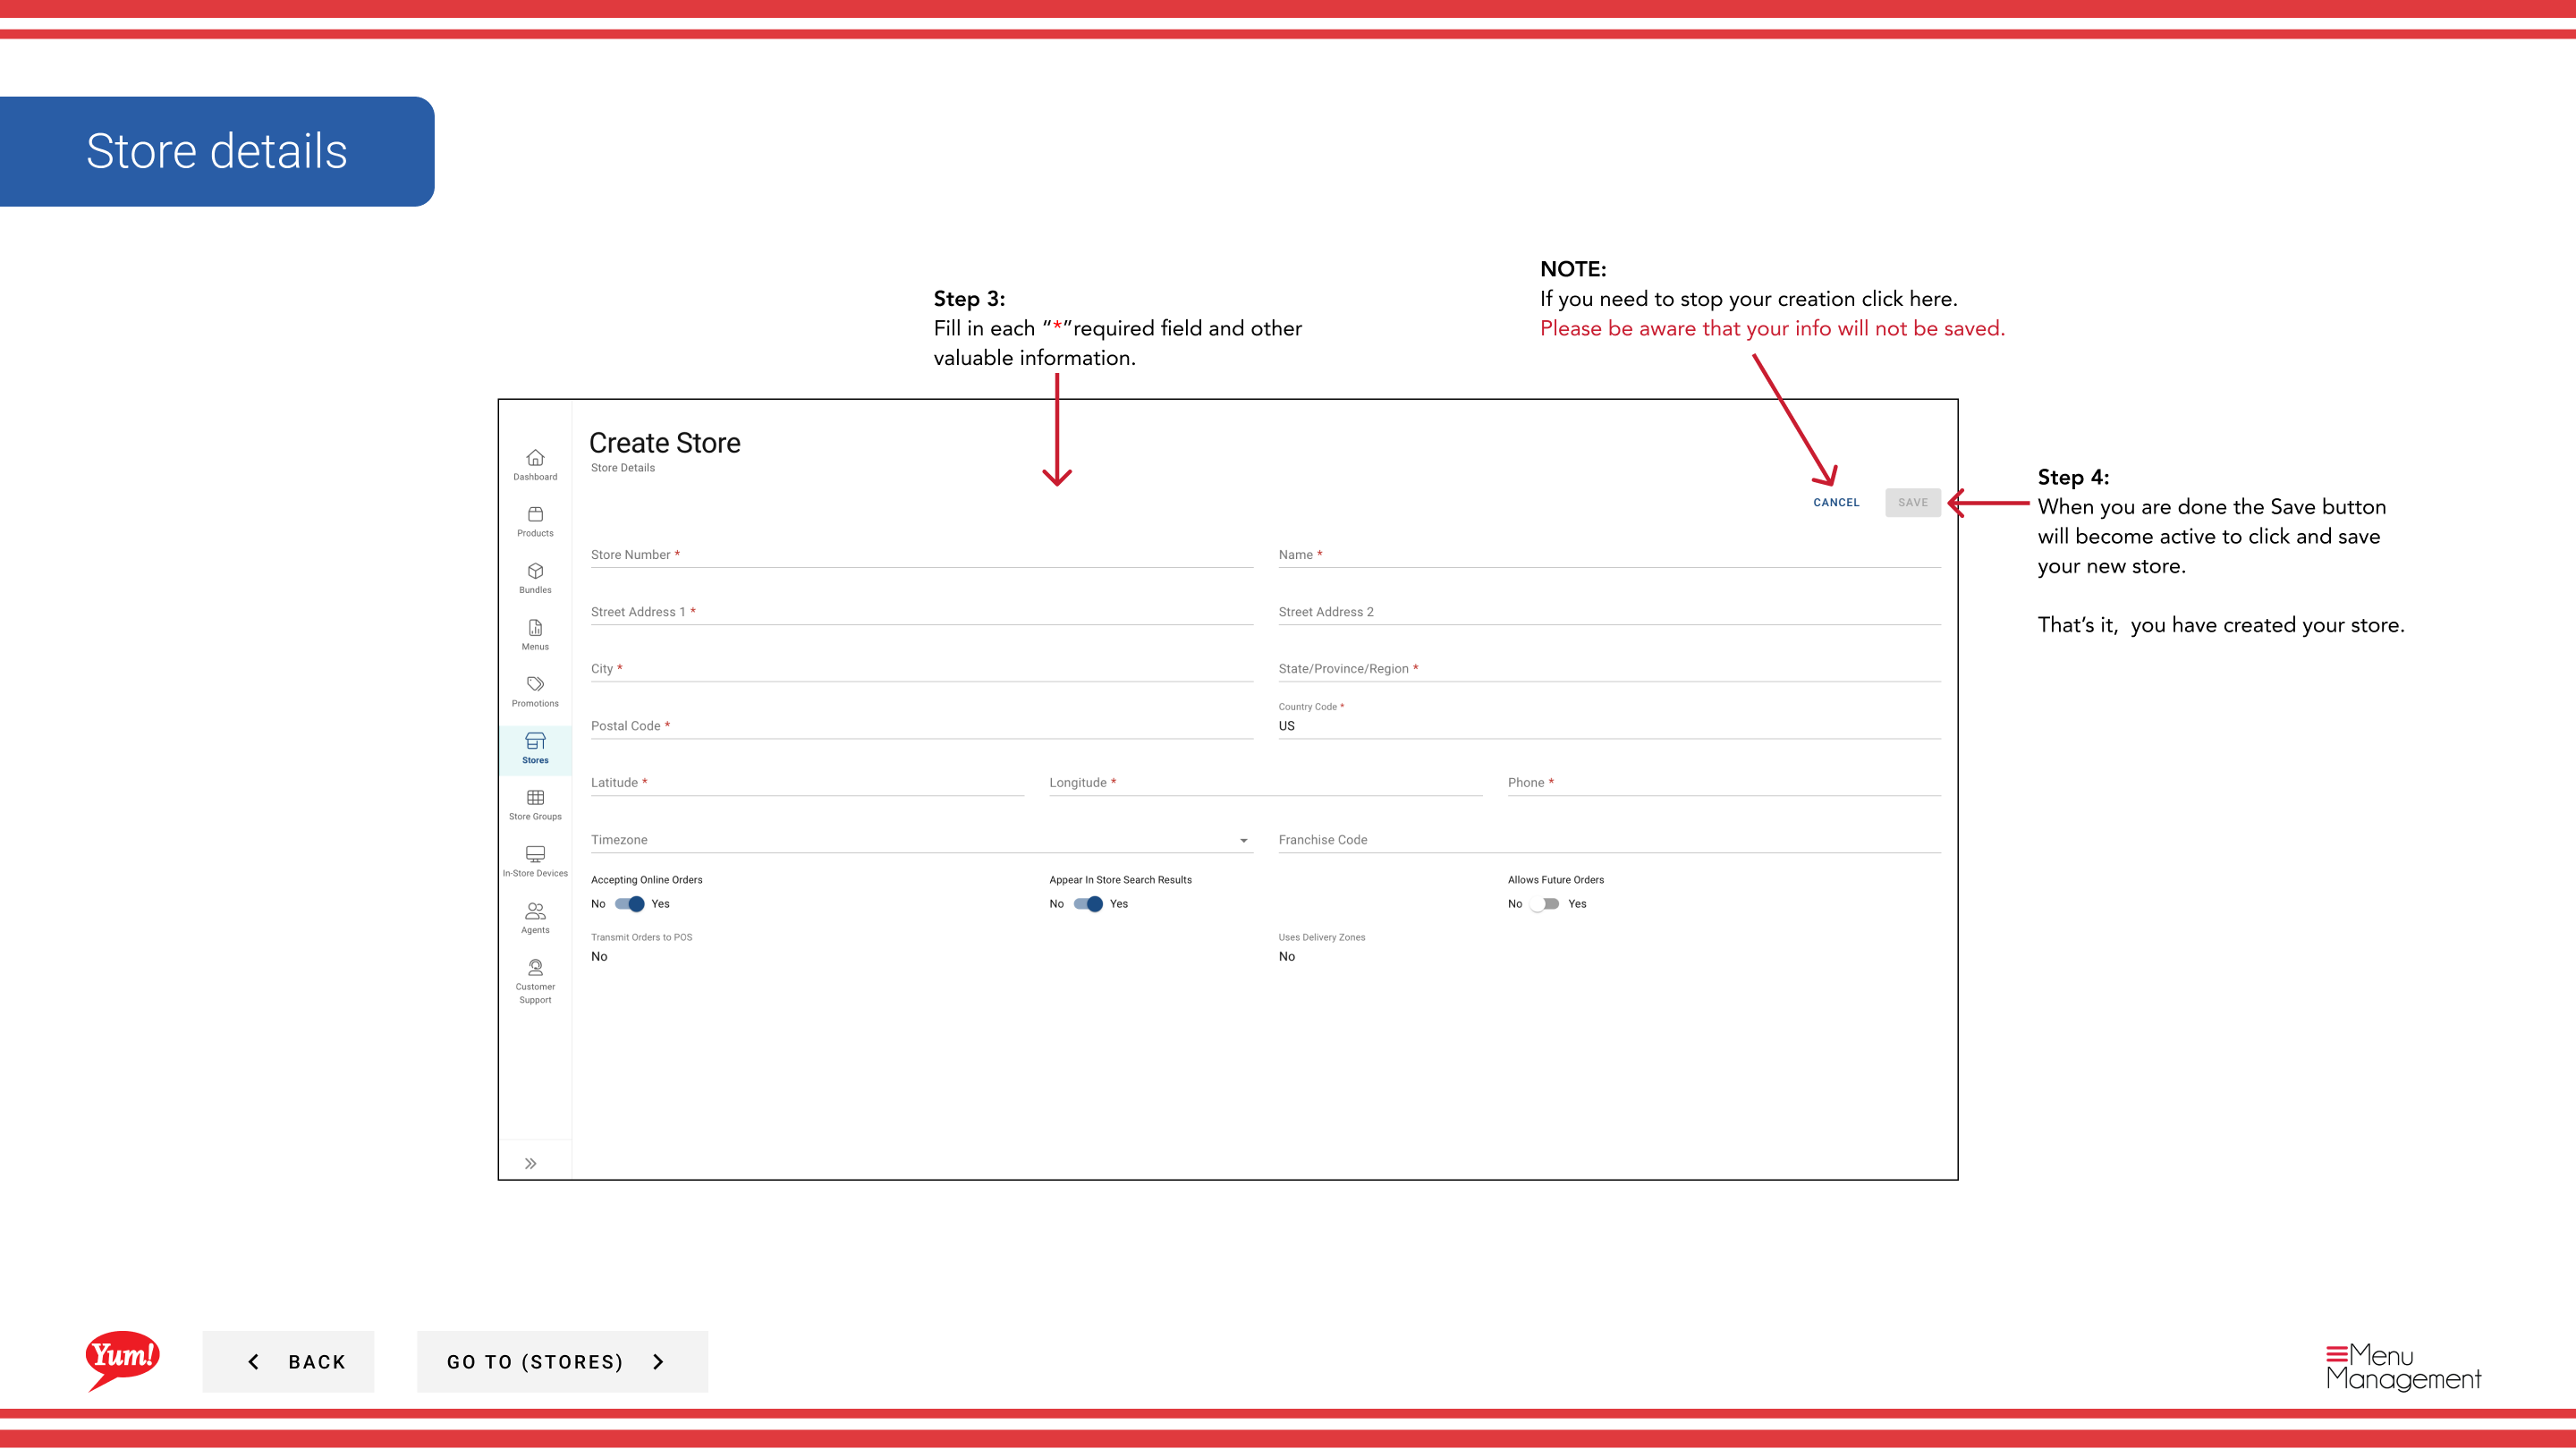
Step 3: Fill in the store details form. Fields marked with * are required.
| Field | What to enter | Notes |
|---|---|---|
| Store Name * | Full display name of the store | e.g., “KFC George Street Sydney” |
| Store Number * | Unique numeric identifier assigned by market operations | Must match the Byte POS-assigned store number, or the mapped store identifier used through Byte Connect for non-Byte POS markets |
| Franchise Code * | Alphanumeric code identifying the franchisee | Provided by your regional manager |
| Time Zone | The store’s local time zone | Required for item snooze and future order accuracy |
Step 4: Once all required fields are completed, the Save button becomes active. Click Save to create the store.
Before creating a new store, search the Stores list by Name, Number, or Franchise Code to confirm it doesn’t already exist.
If the market does not use Byte POS, do not assume Byte Commerce will connect directly to the market POS from the store record alone. Byte Connect must be onboarded as part of Byte Commerce onboarding.
Clicking Cancel at any time discards all unsaved information.
Related guides
- Edit Store Details — Update the store after creation
- Assign New Menu — Link a menu to the new store
Part of the Admin Portal Guide · Section: Stores