POS
What this guide covers
Shows a store's connected point-of-sale devices, their status, and allows operators to update device settings or generate one-time passwords for device authentication.
This page describes the Admin Portal flow for Byte POS-connected device management.
If the market is not using Byte POS, Byte Commerce does not talk directly to that market POS. Byte Connect must be onboarded as the bridge, and the exact operational flow may differ from the device-level steps shown here.
Steps
Step 1: Navigate to the Stores section using the left-hand navigation menu.
Step 2: Search for the store by Name, Store Number, or Franchise Code using the search box.
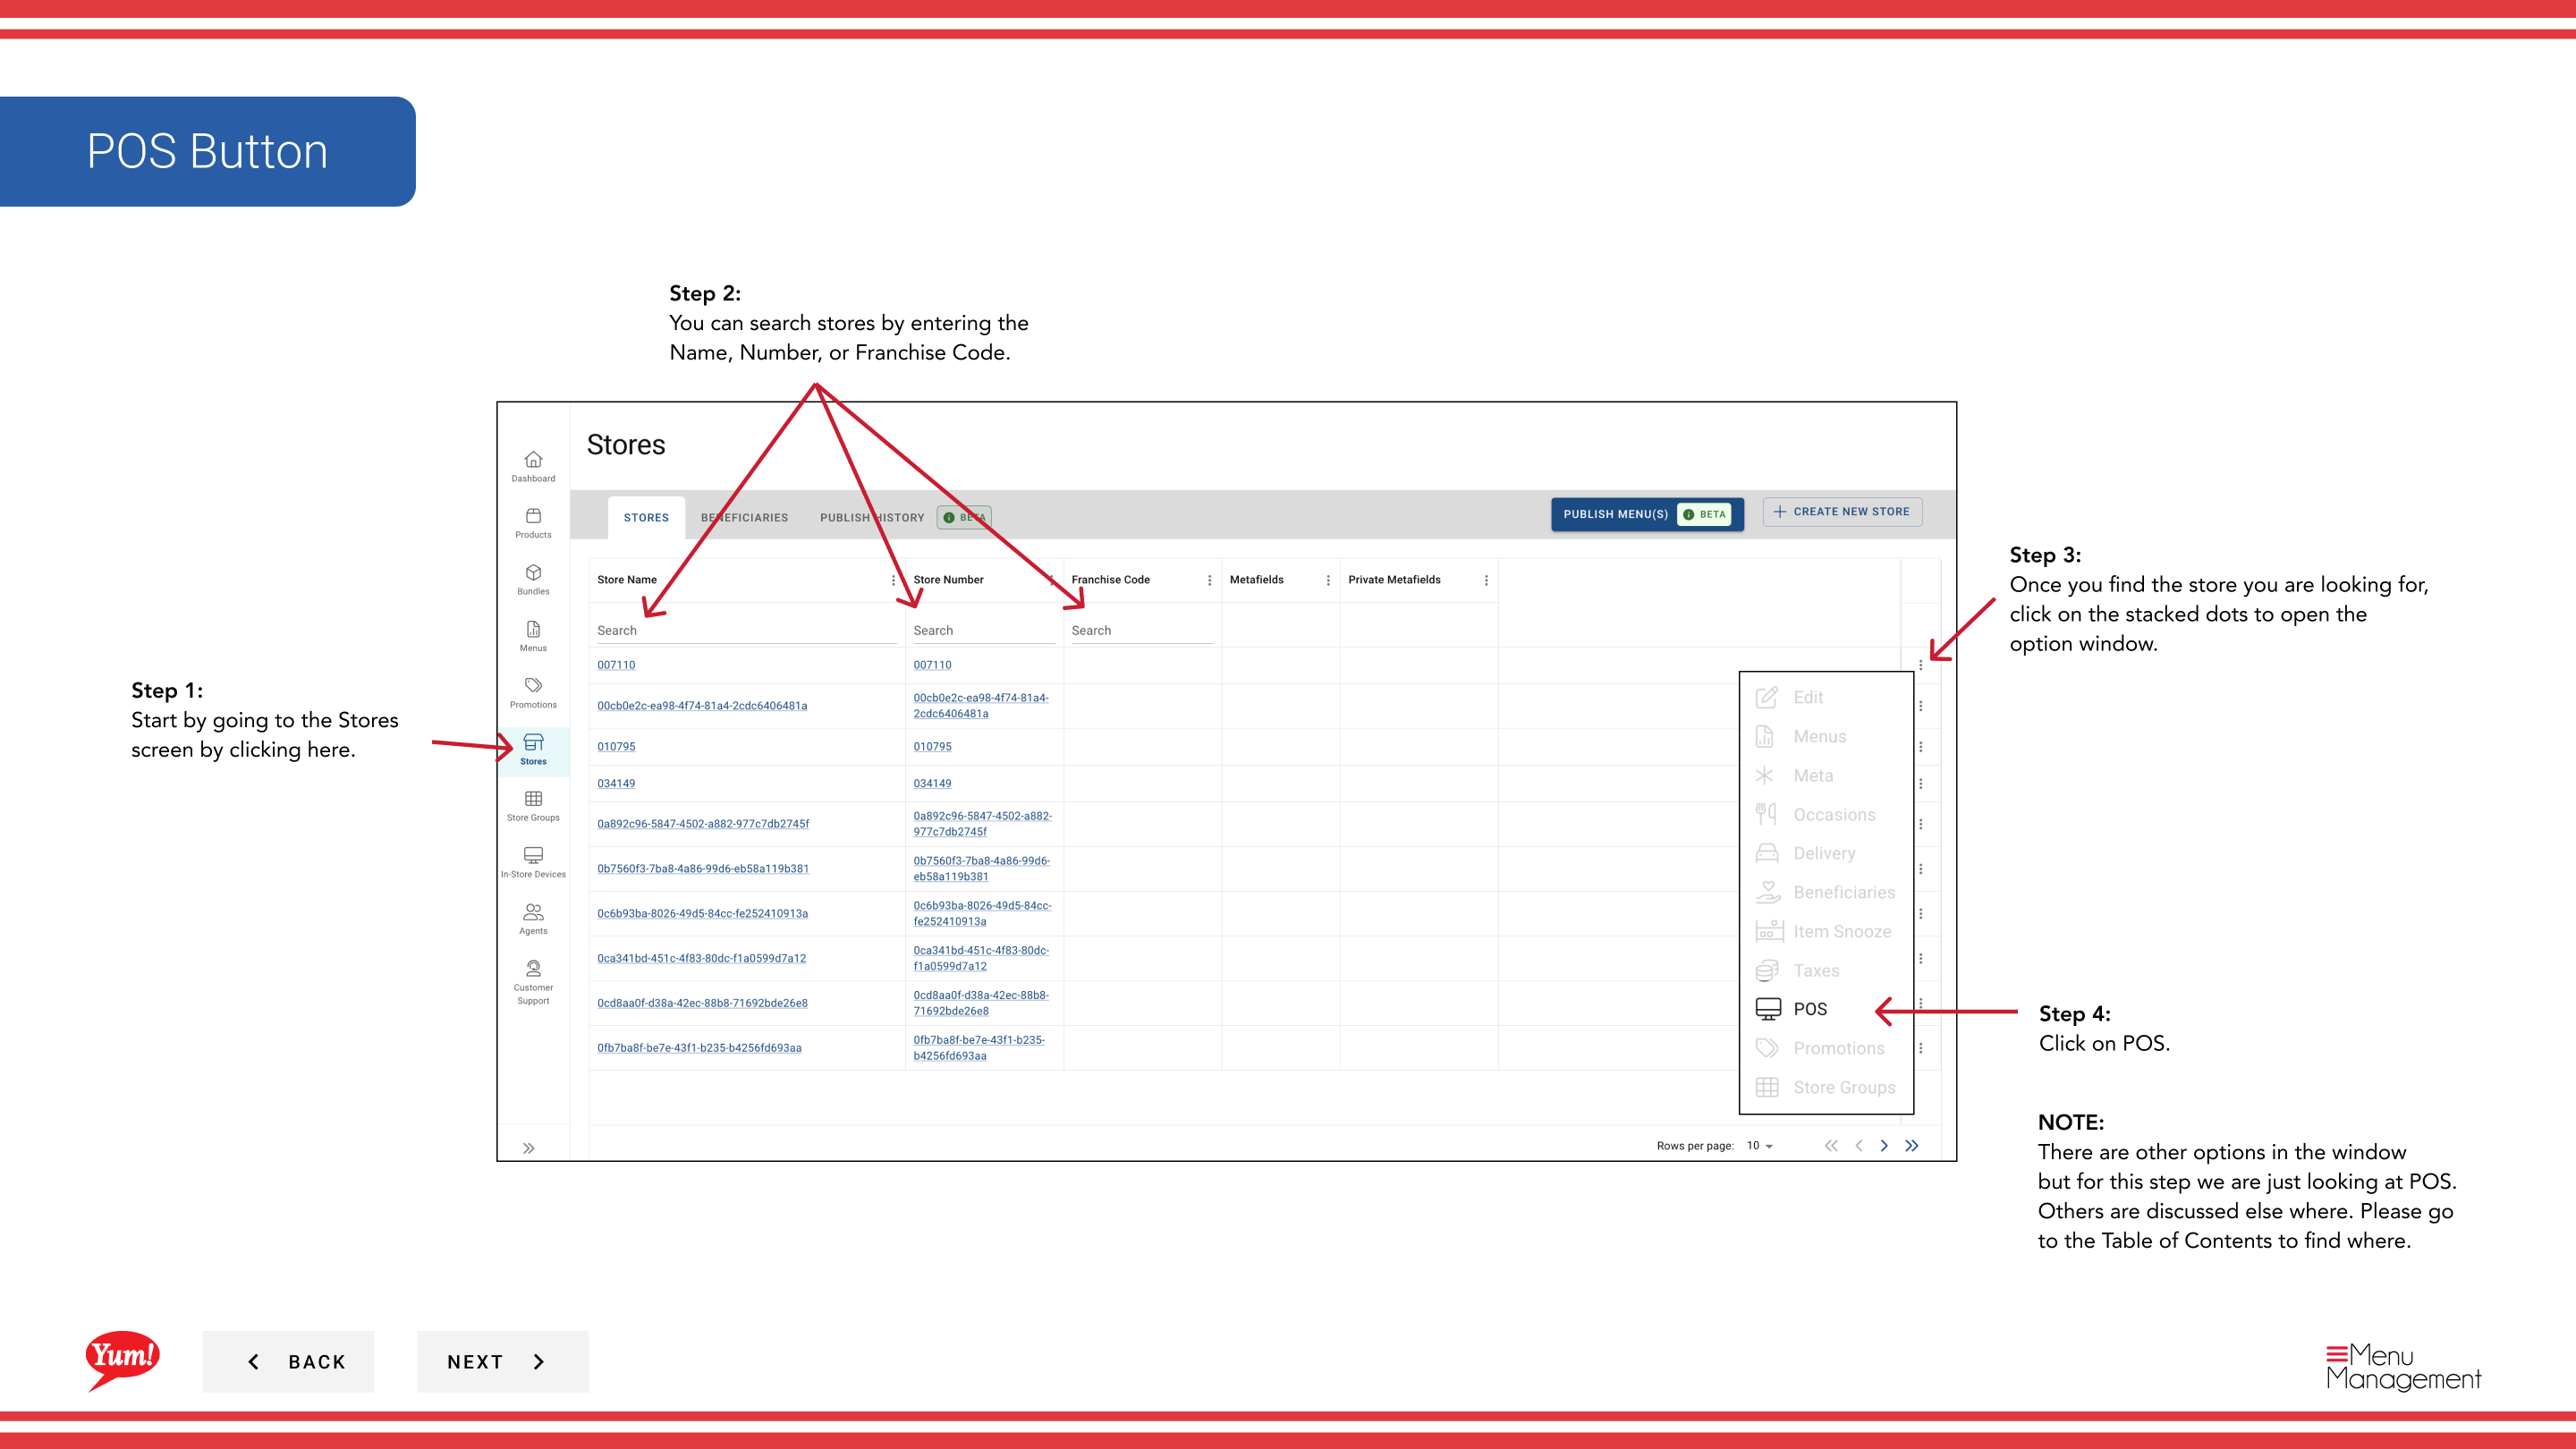
Step 3: Once you find the store, click the three-dot menu (•••) icon to open the options menu.
Step 4: Click POS from the dropdown menu. This displays all point-of-sale devices linked to the selected store.
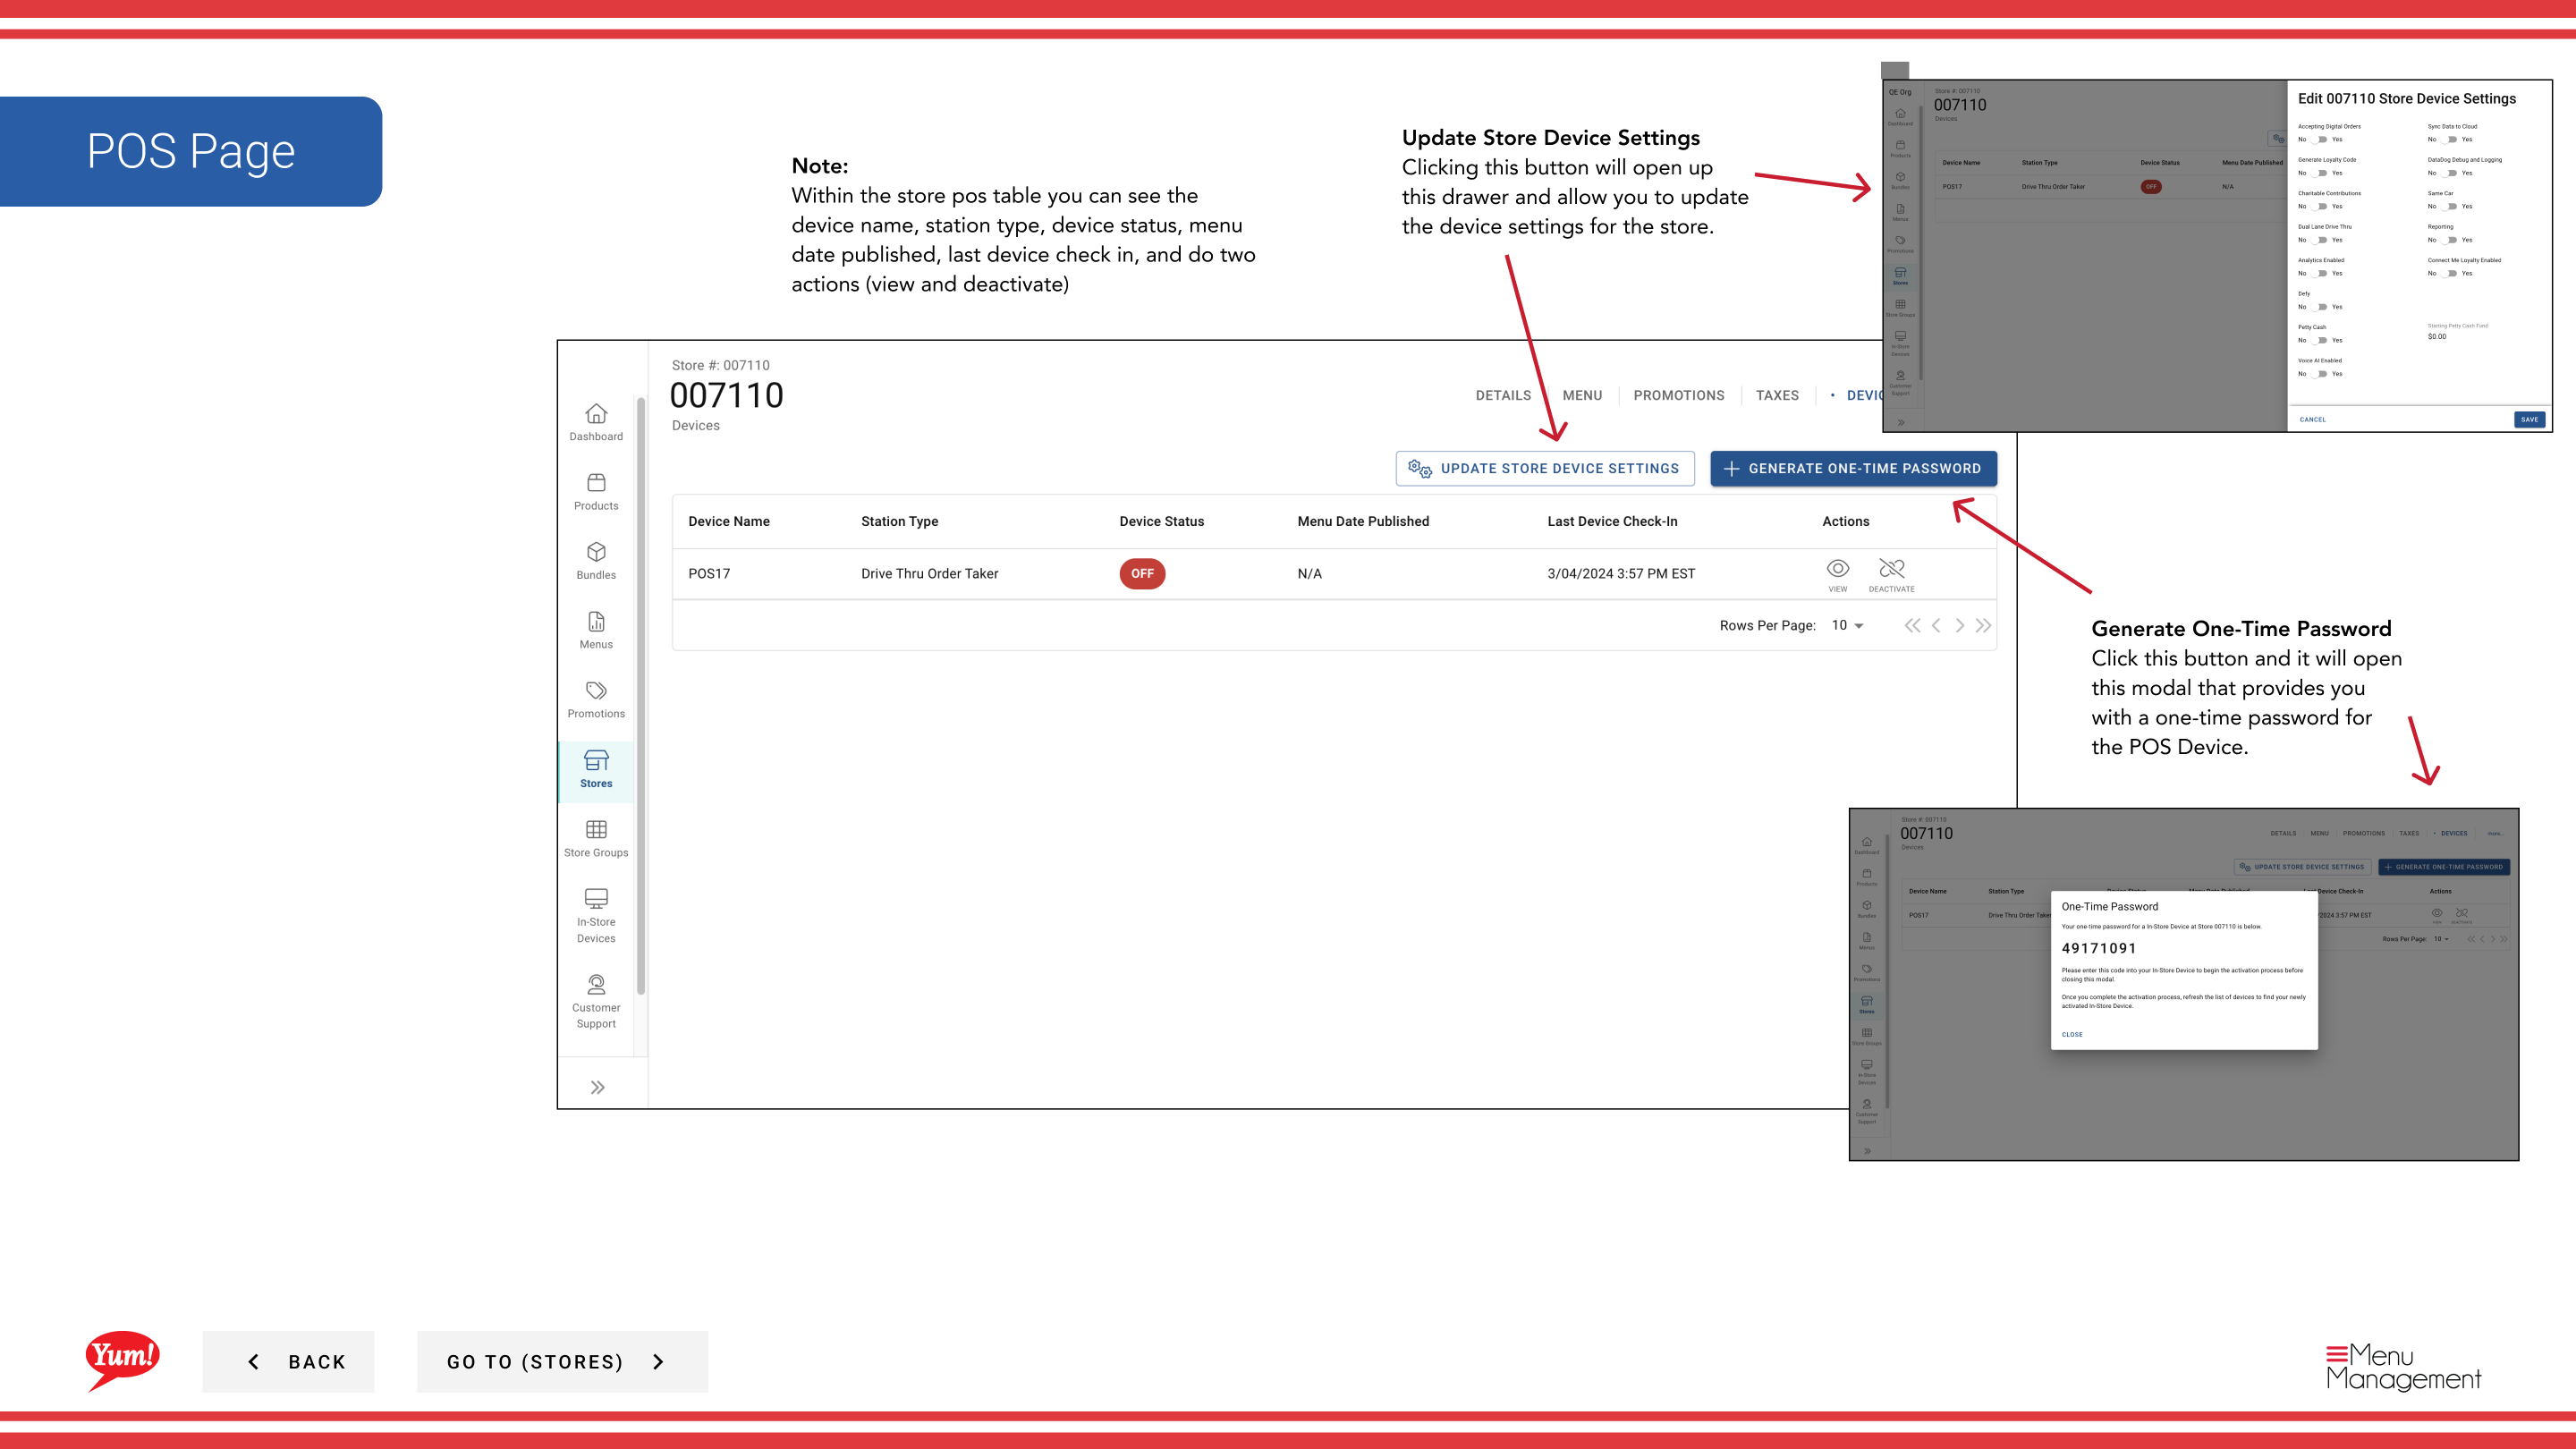
Step 5: Review the POS devices table, which shows:
| Column | What it means |
|---|---|
| Device Name | Display name of the POS device |
| Station Type | Type of POS station (e.g., Register, Kitchen, Counter) |
| Device Status | Current status (Online, Offline, Inactive, etc.) |
| Menu Published | Date the menu was last published to this device |
| Last Check-in | Date and time the device last communicated with Atlas |
Step 6: Use the action buttons to manage devices:
- Click Update Store Device Settings to modify device configuration (name, settings, etc.)
- Click Generate One-Time Password to create a temporary password for device authentication
Use Last Check-in to verify that POS devices are actively communicating with Atlas. If a device hasn't checked in recently, it may be offline or disconnected.
Devices that are offline or not checking in should be investigated to ensure menu updates are delivered properly.
Related guides
- Edit Store Details — View other store information
- Byte Connect — Understand when non-Byte POS markets require Byte Connect
Part of the Admin Portal Guide · Section: Stores