Edit Store Details
What this guide covers
Updates an existing store's information such as name, settings, or operational fields.
Steps
Step 1: Navigate to the Stores section using the left-hand navigation menu.
Step 2: Search for the store by Name, Store Number, or Franchise Code using the search box.
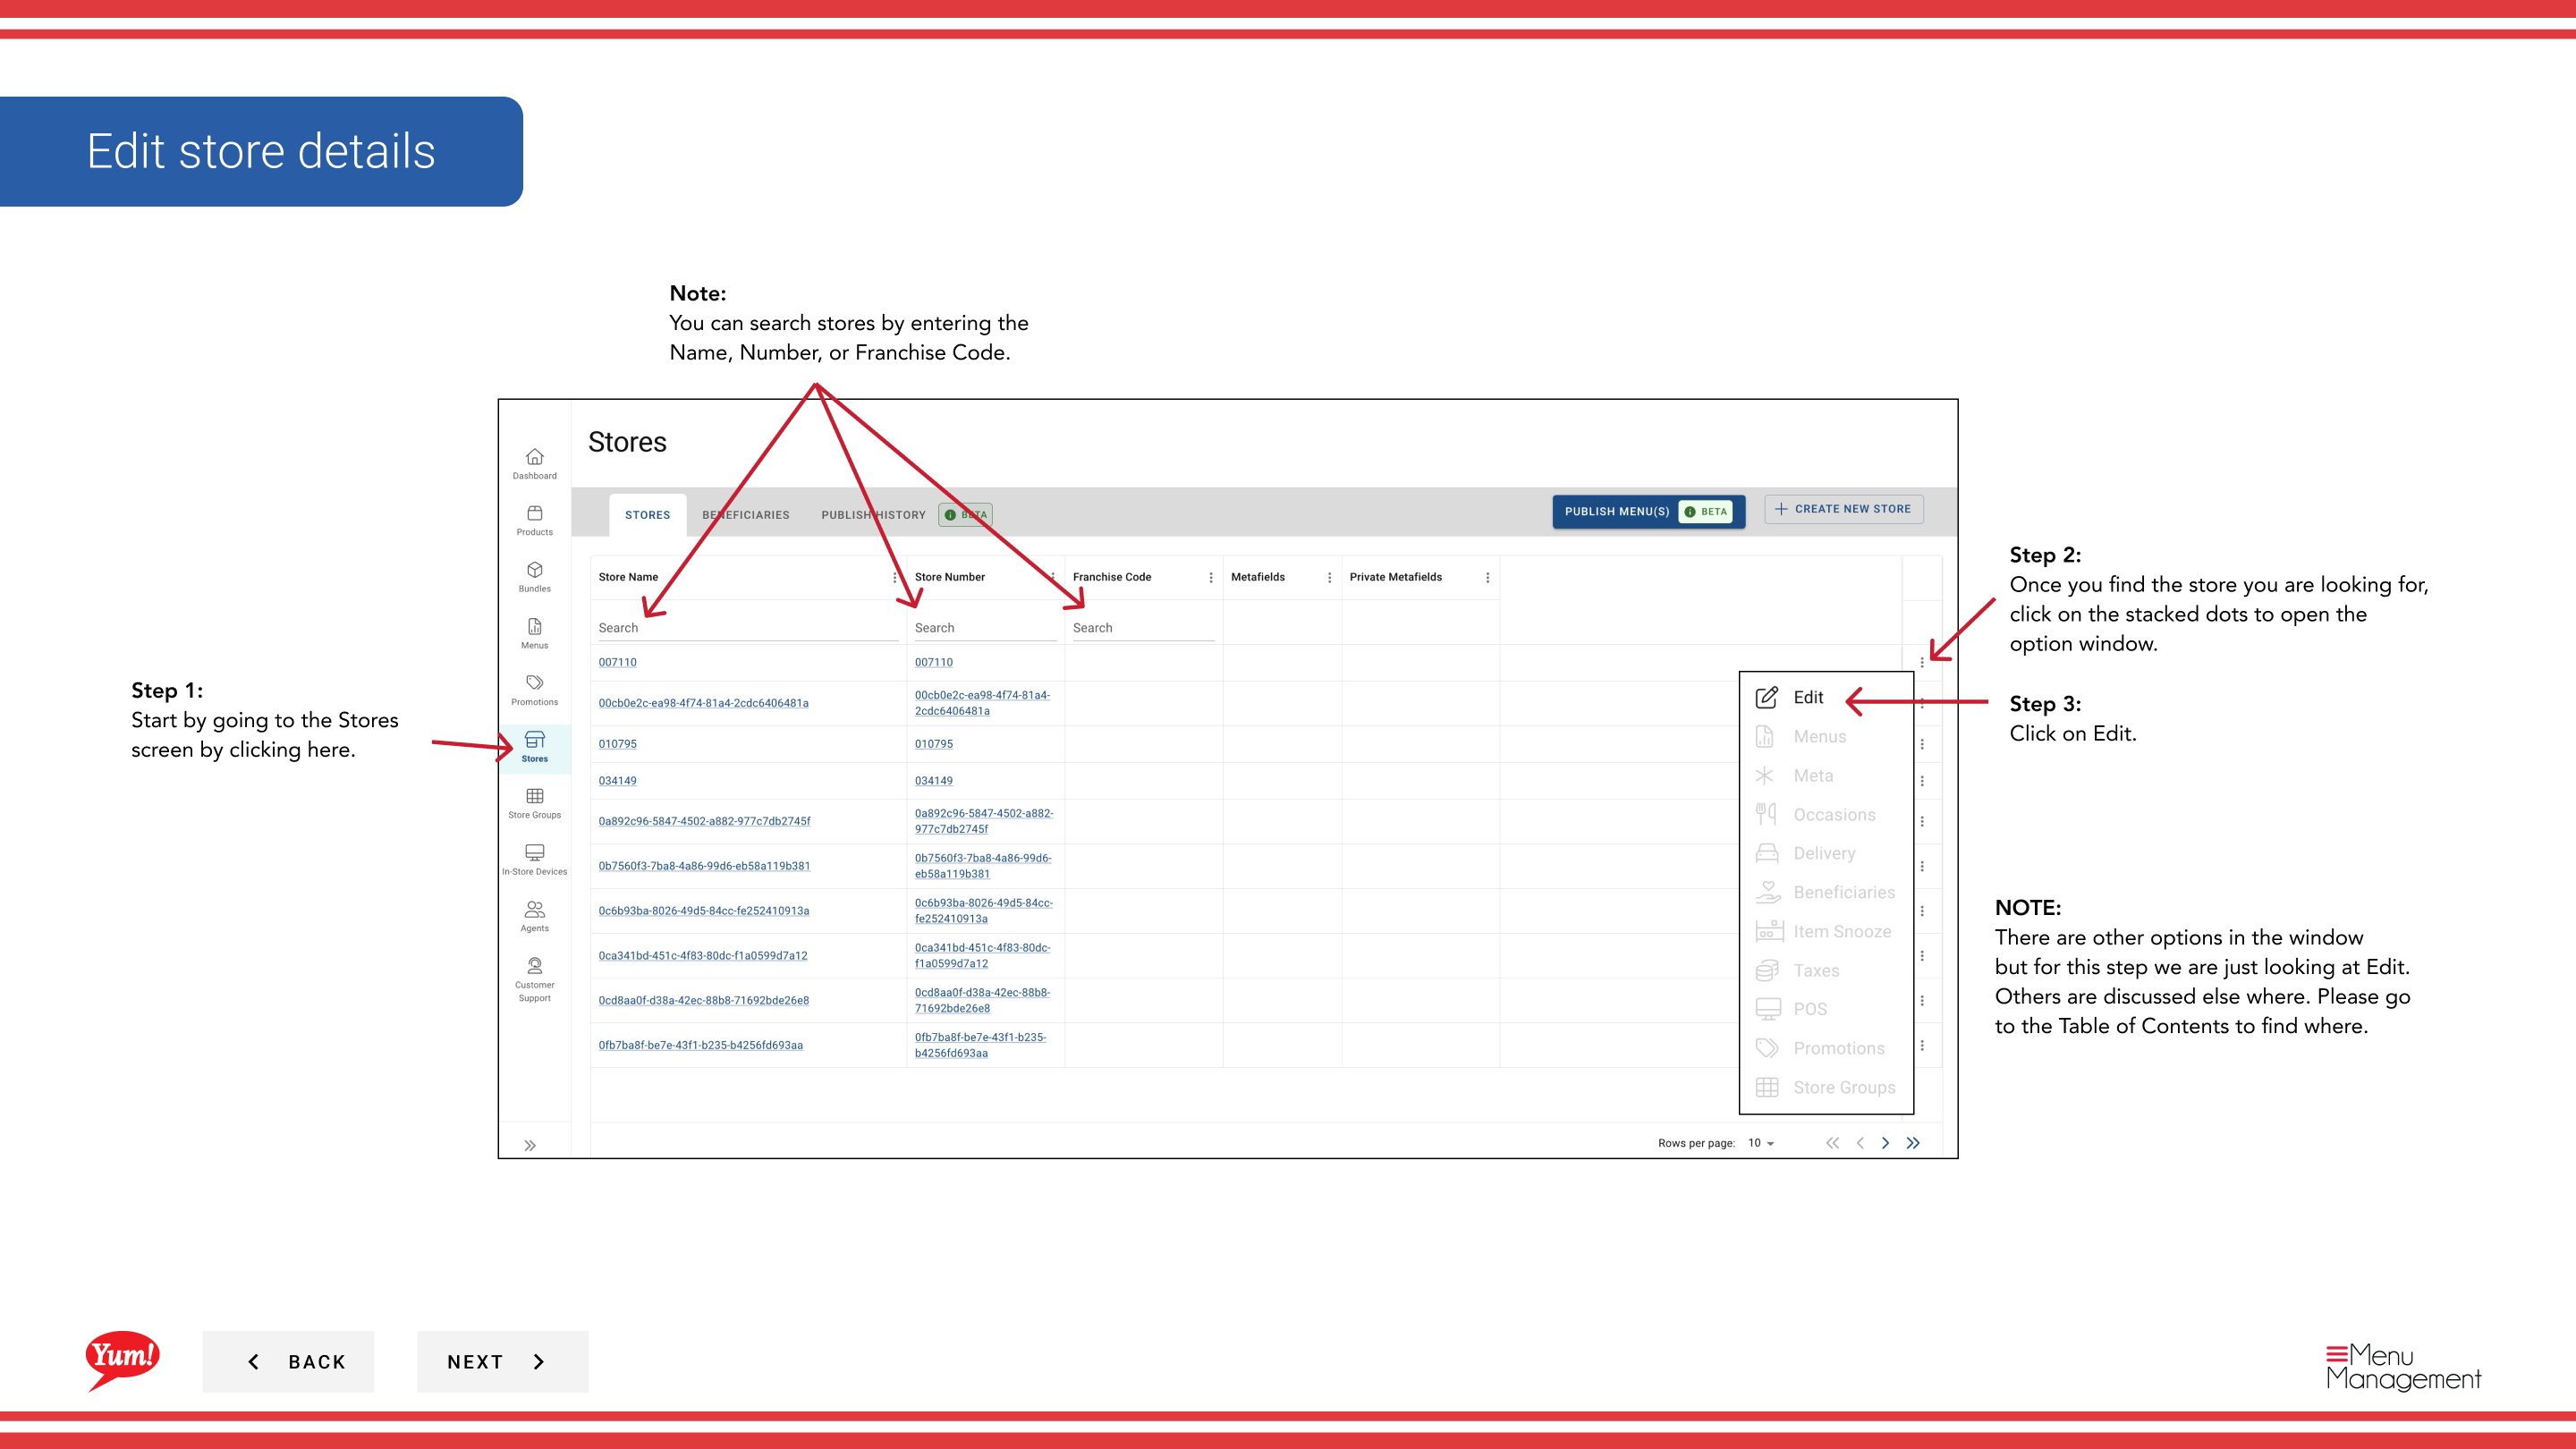
Step 3: Once you find the store, click the three-dot menu (•••) icon on the store's row to open the options menu.
Step 4: Click Edit from the dropdown menu.
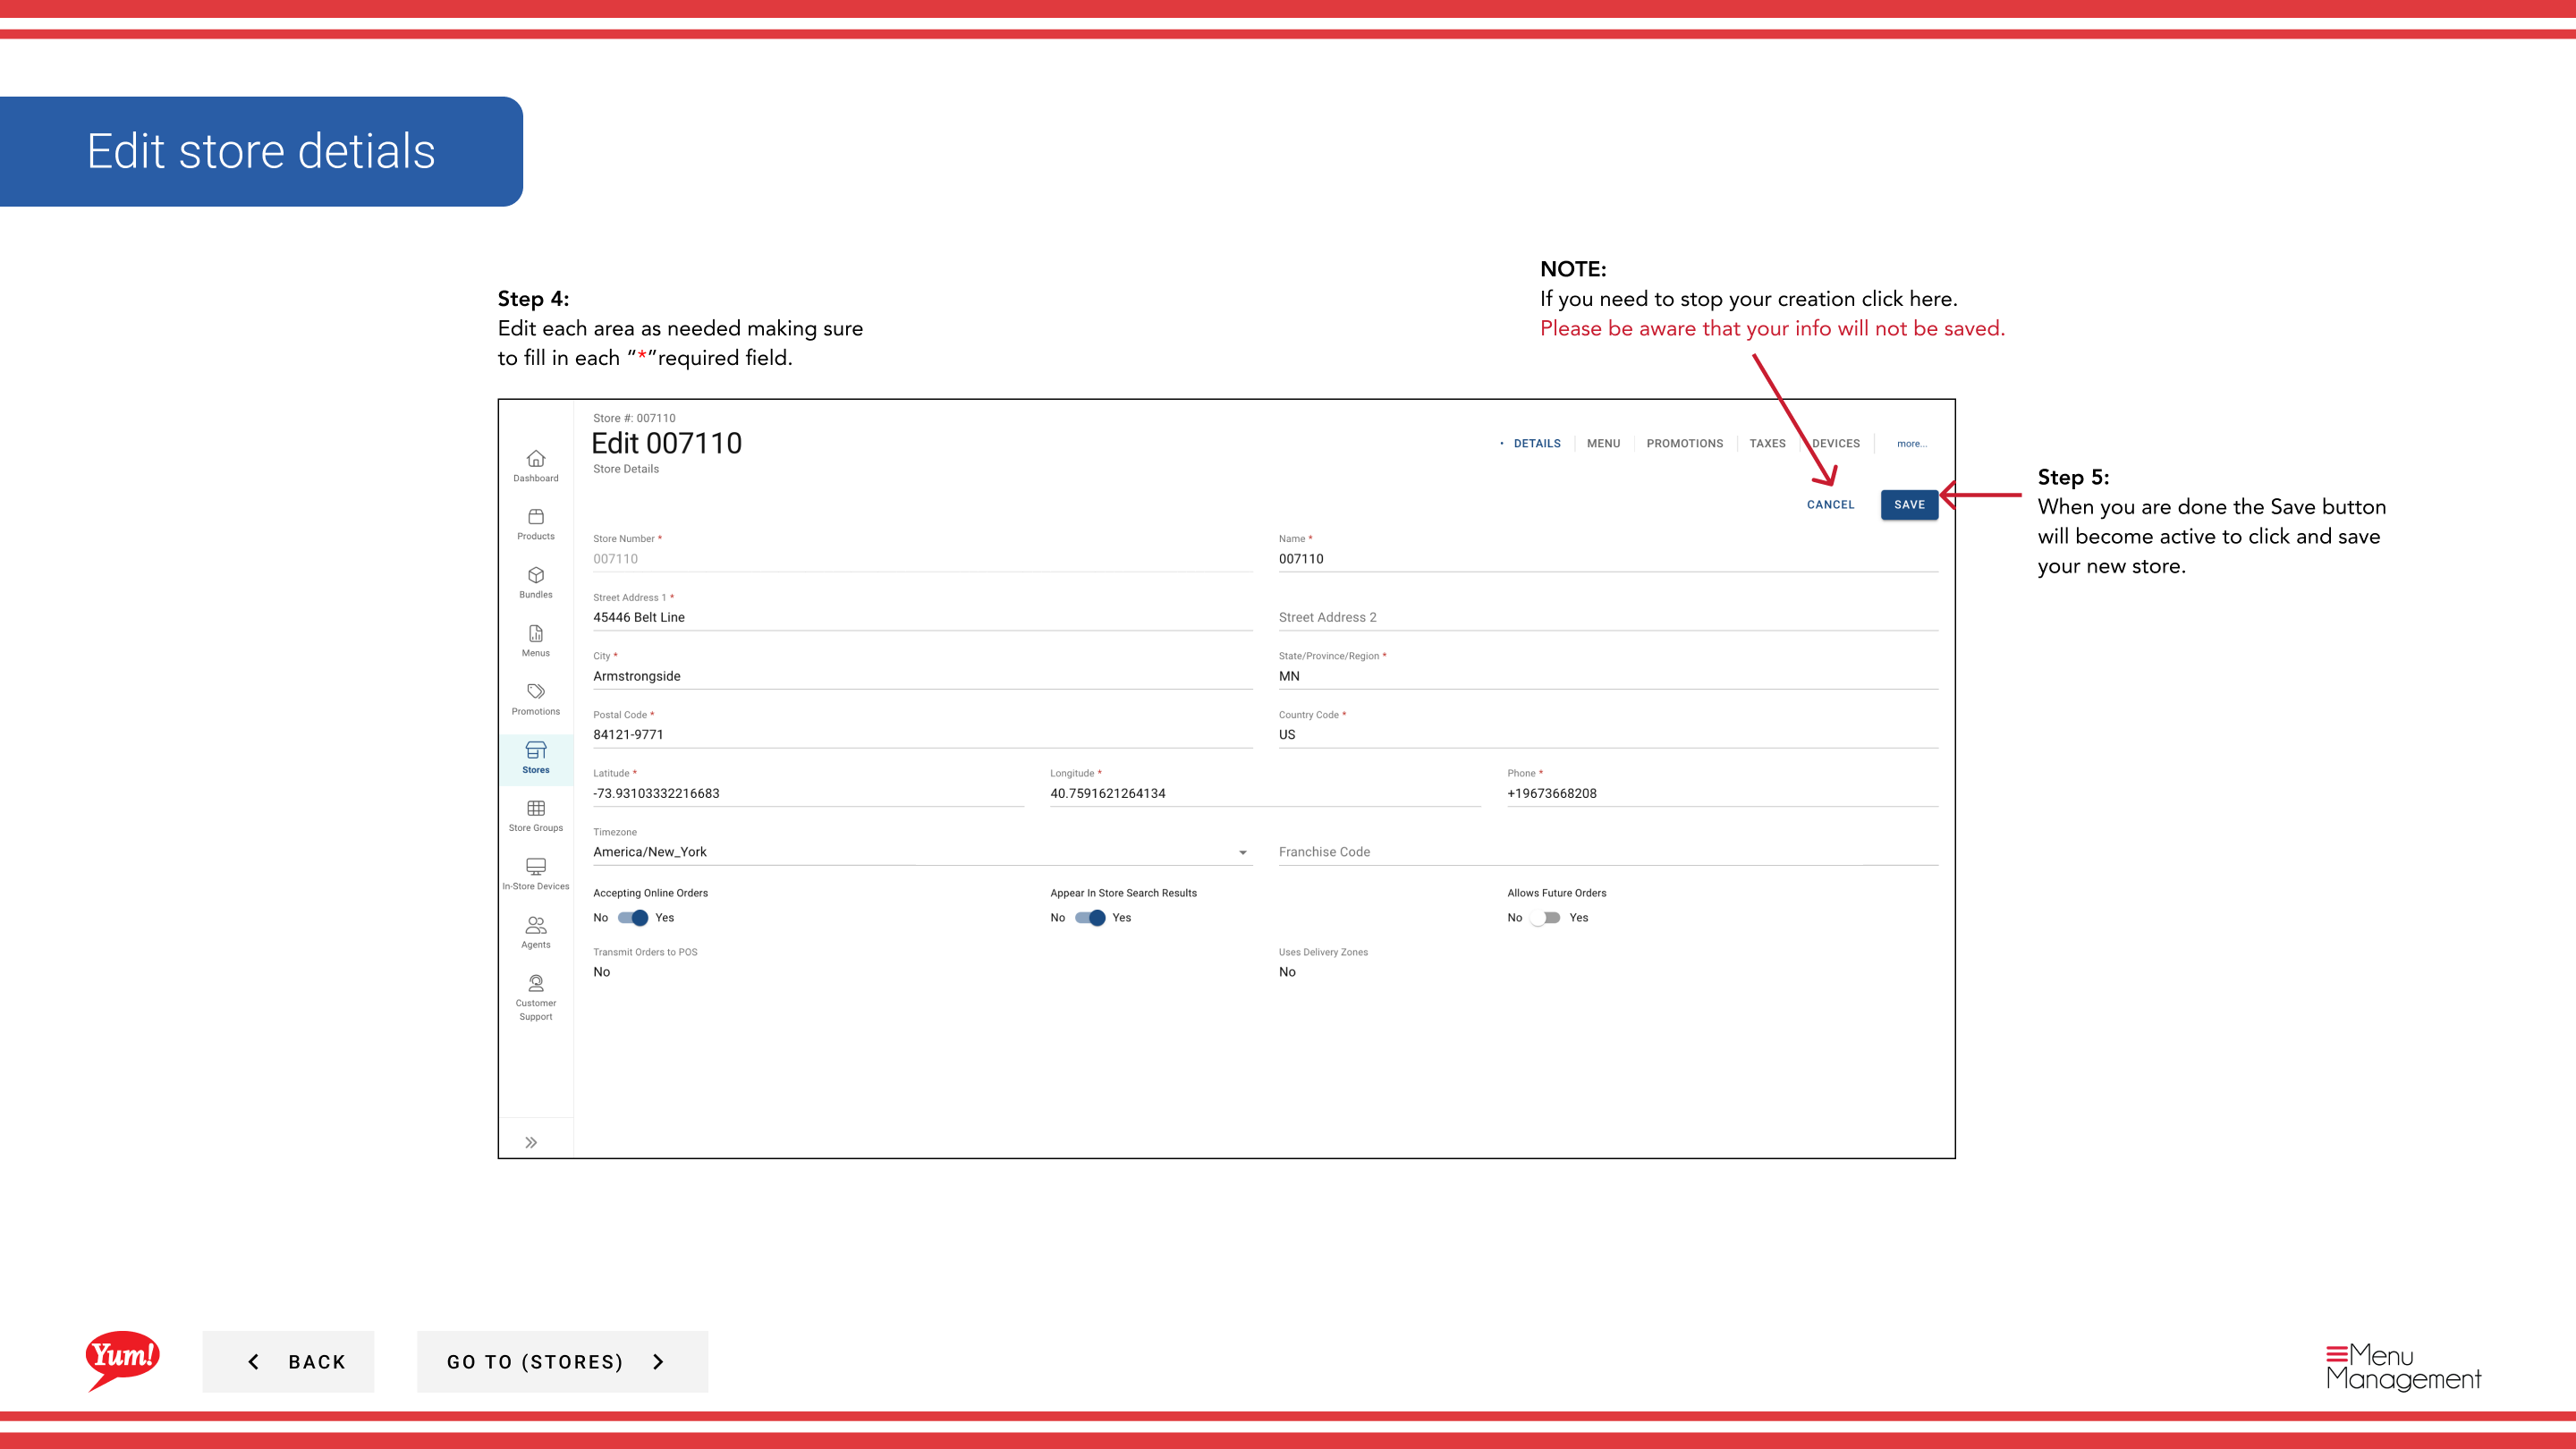
Step 5: Update the store fields as needed. Refer to the field descriptions below. All fields marked with * are required.
| Field | What to enter | Notes |
|---|---|---|
| Store Name * | Full display name of the store | e.g., “KFC George Street Sydney” |
| Store Number * | Unique numeric identifier assigned by market operations | Must match the Byte POS-assigned store number, or the mapped store identifier used through Byte Connect for non-Byte POS markets |
| Franchise Code * | Alphanumeric code identifying the franchisee | Provided by your regional manager |
| Time Zone | The store's local time zone | Required for item snooze and future order accuracy |
| Accepting Online Orders | Toggle: Yes or No | Set to No during closures or operational issues |
| Appear in Store Search Results | Toggle: Yes or No | Set to No to hide a location without deleting it |
| Allows Future Orders | Toggle: Yes or No | Enables customers to place advance orders; requires a supported channel |
Step 6: Once all changes are complete, the Save button becomes active. Click Save to update the store.
Updating store details does not by itself create direct connectivity from Byte Commerce to a non-Byte POS. If the market is not on Byte POS, Byte Connect is the required bridge.
Clicking Cancel at any time discards all unsaved changes.
Related guides
- Create a Store — Register a new store
- Accept Online Orders (Turn On or Off) — Toggle order acceptance separately
Part of the Admin Portal Guide · Section: Stores