Transfer Patch List
What this guide covers
Copies a store's patch list configuration to one or more other stores, streamlining patch management across multiple locations with the same overrides.
Steps
Step 1: Navigate to the Stores section using the left-hand navigation menu.
Step 2: Search for the source store (the store whose patches you want to copy) by Name, Store Number, or Franchise Code.
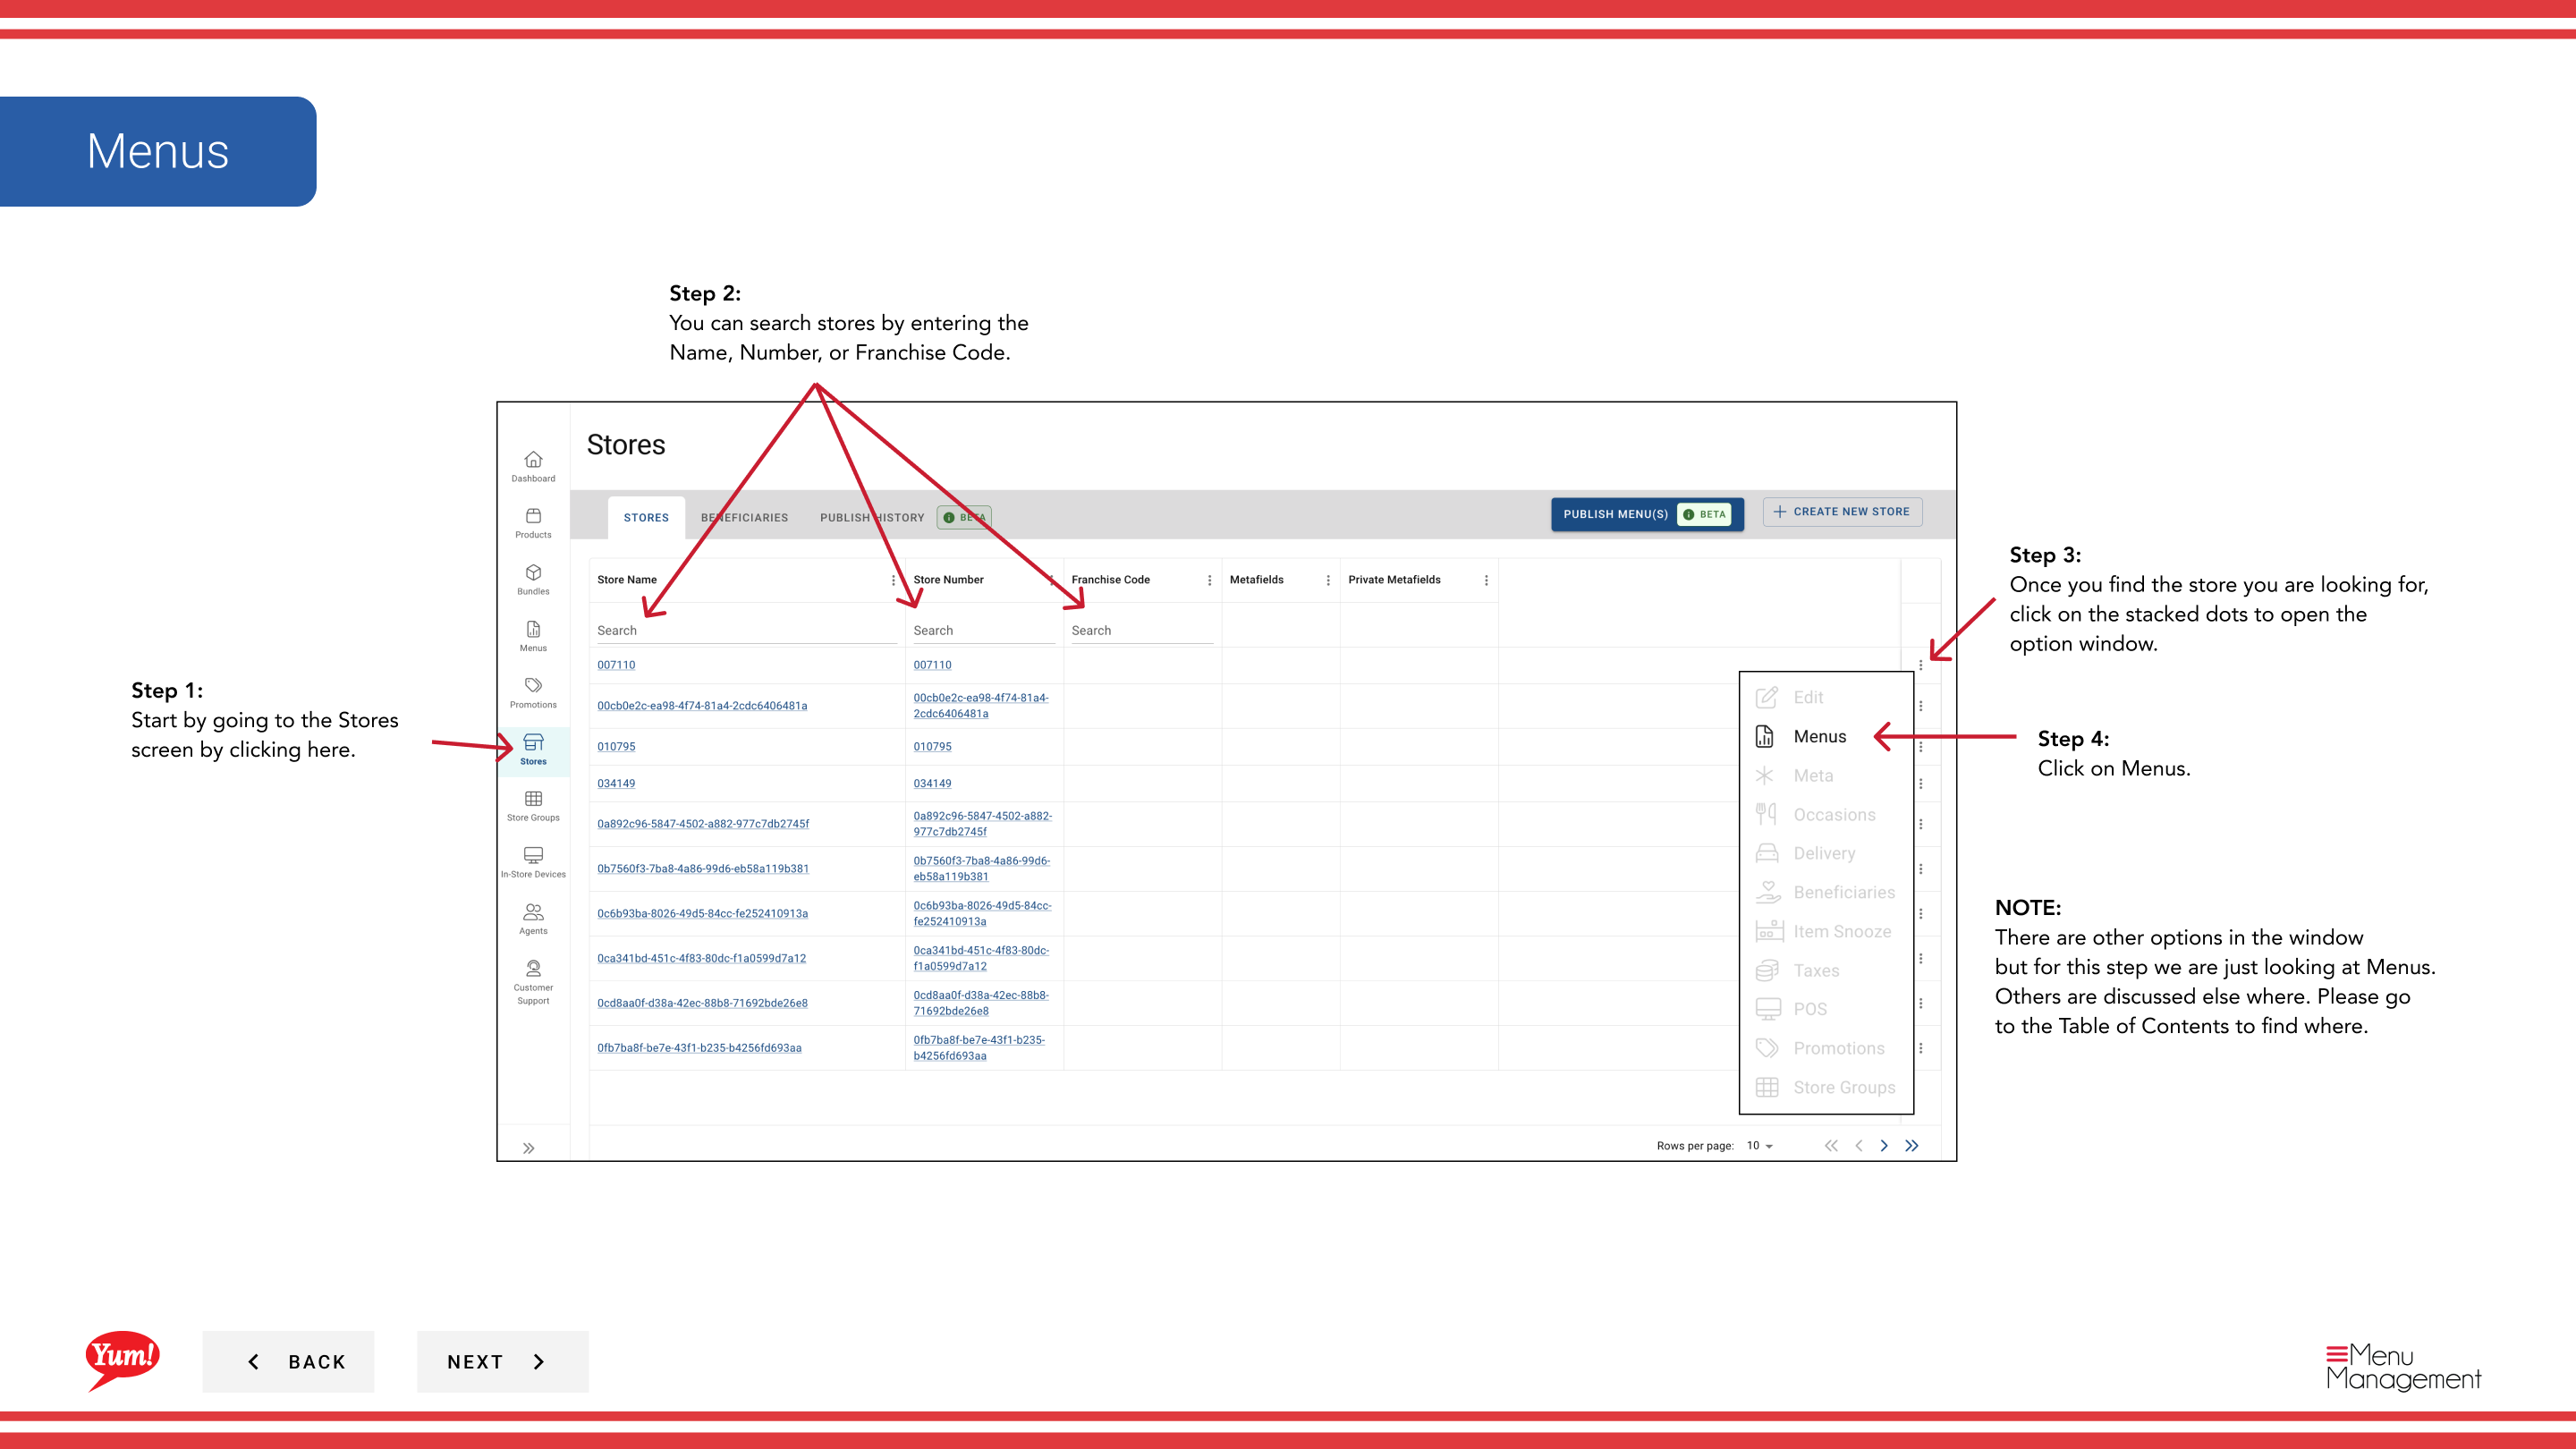
Step 3: Once you find the store, click the three-dot menu (•••) icon to open the options menu.
Step 4: Click Menus from the dropdown menu.
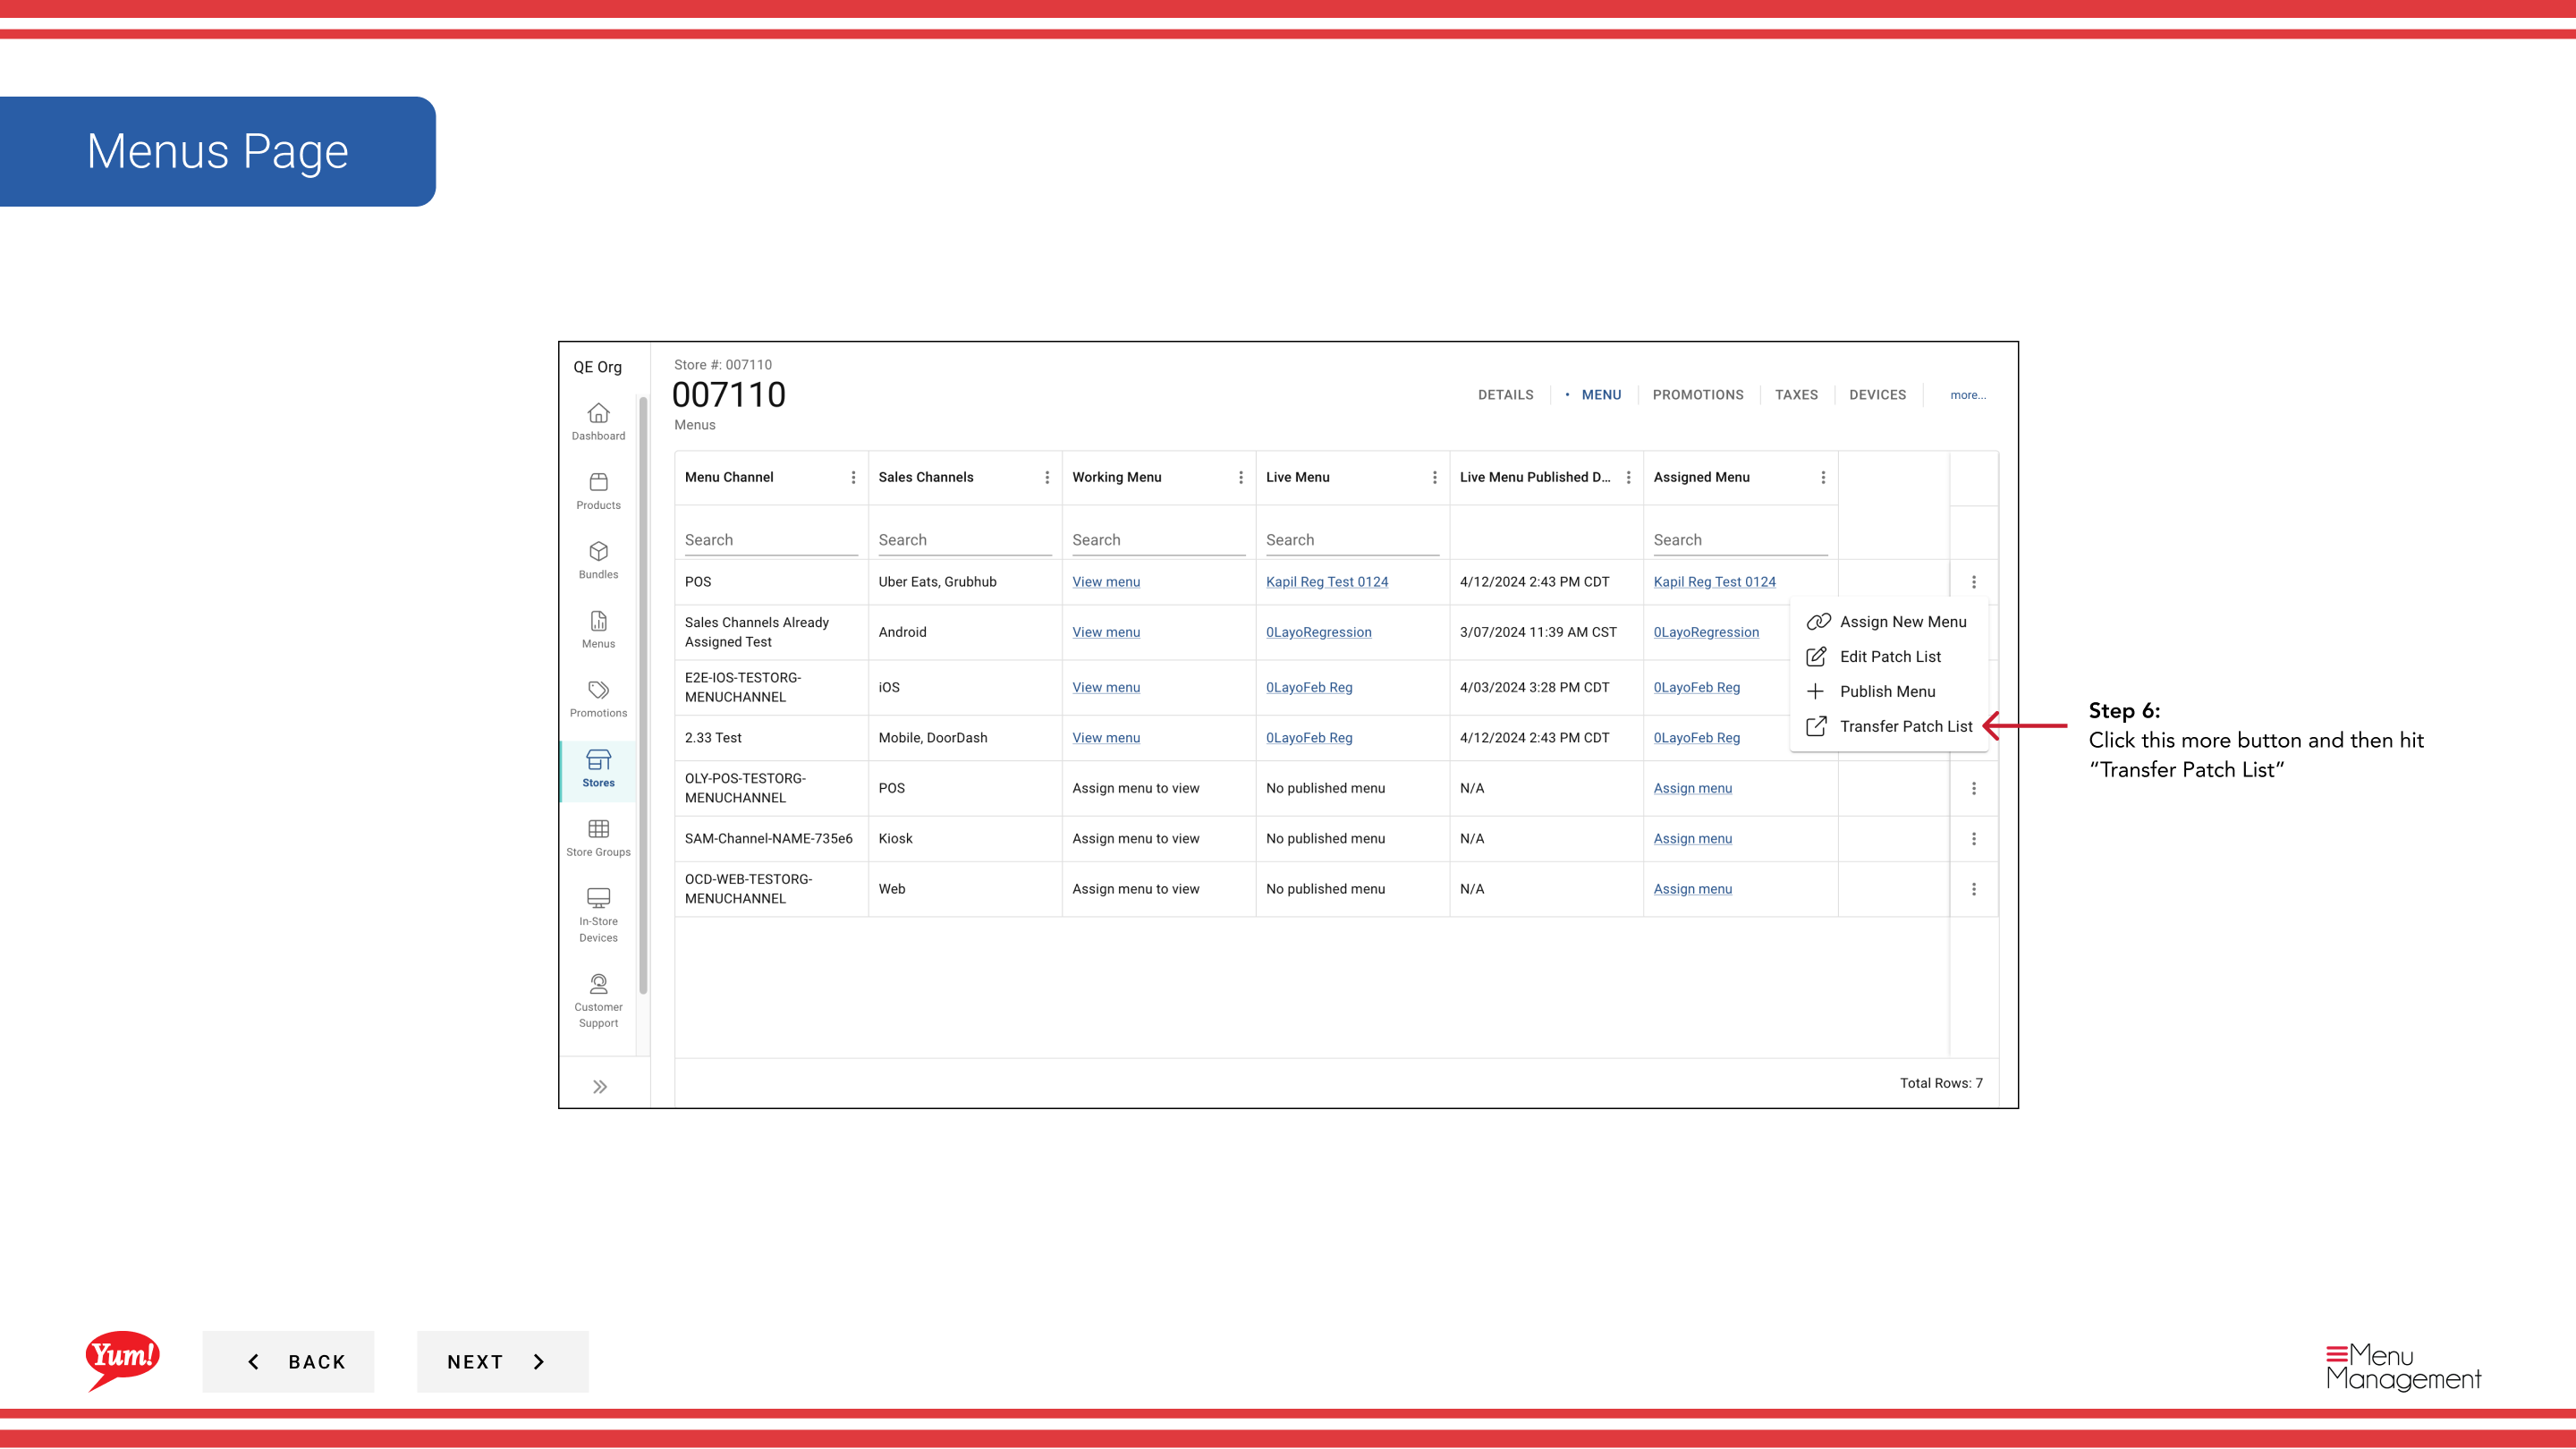
Step 5: Locate the channel with patches you want to transfer, and click the more menu button (⋯) on that row.
Step 6: Click Transfer Patch List from the options menu.
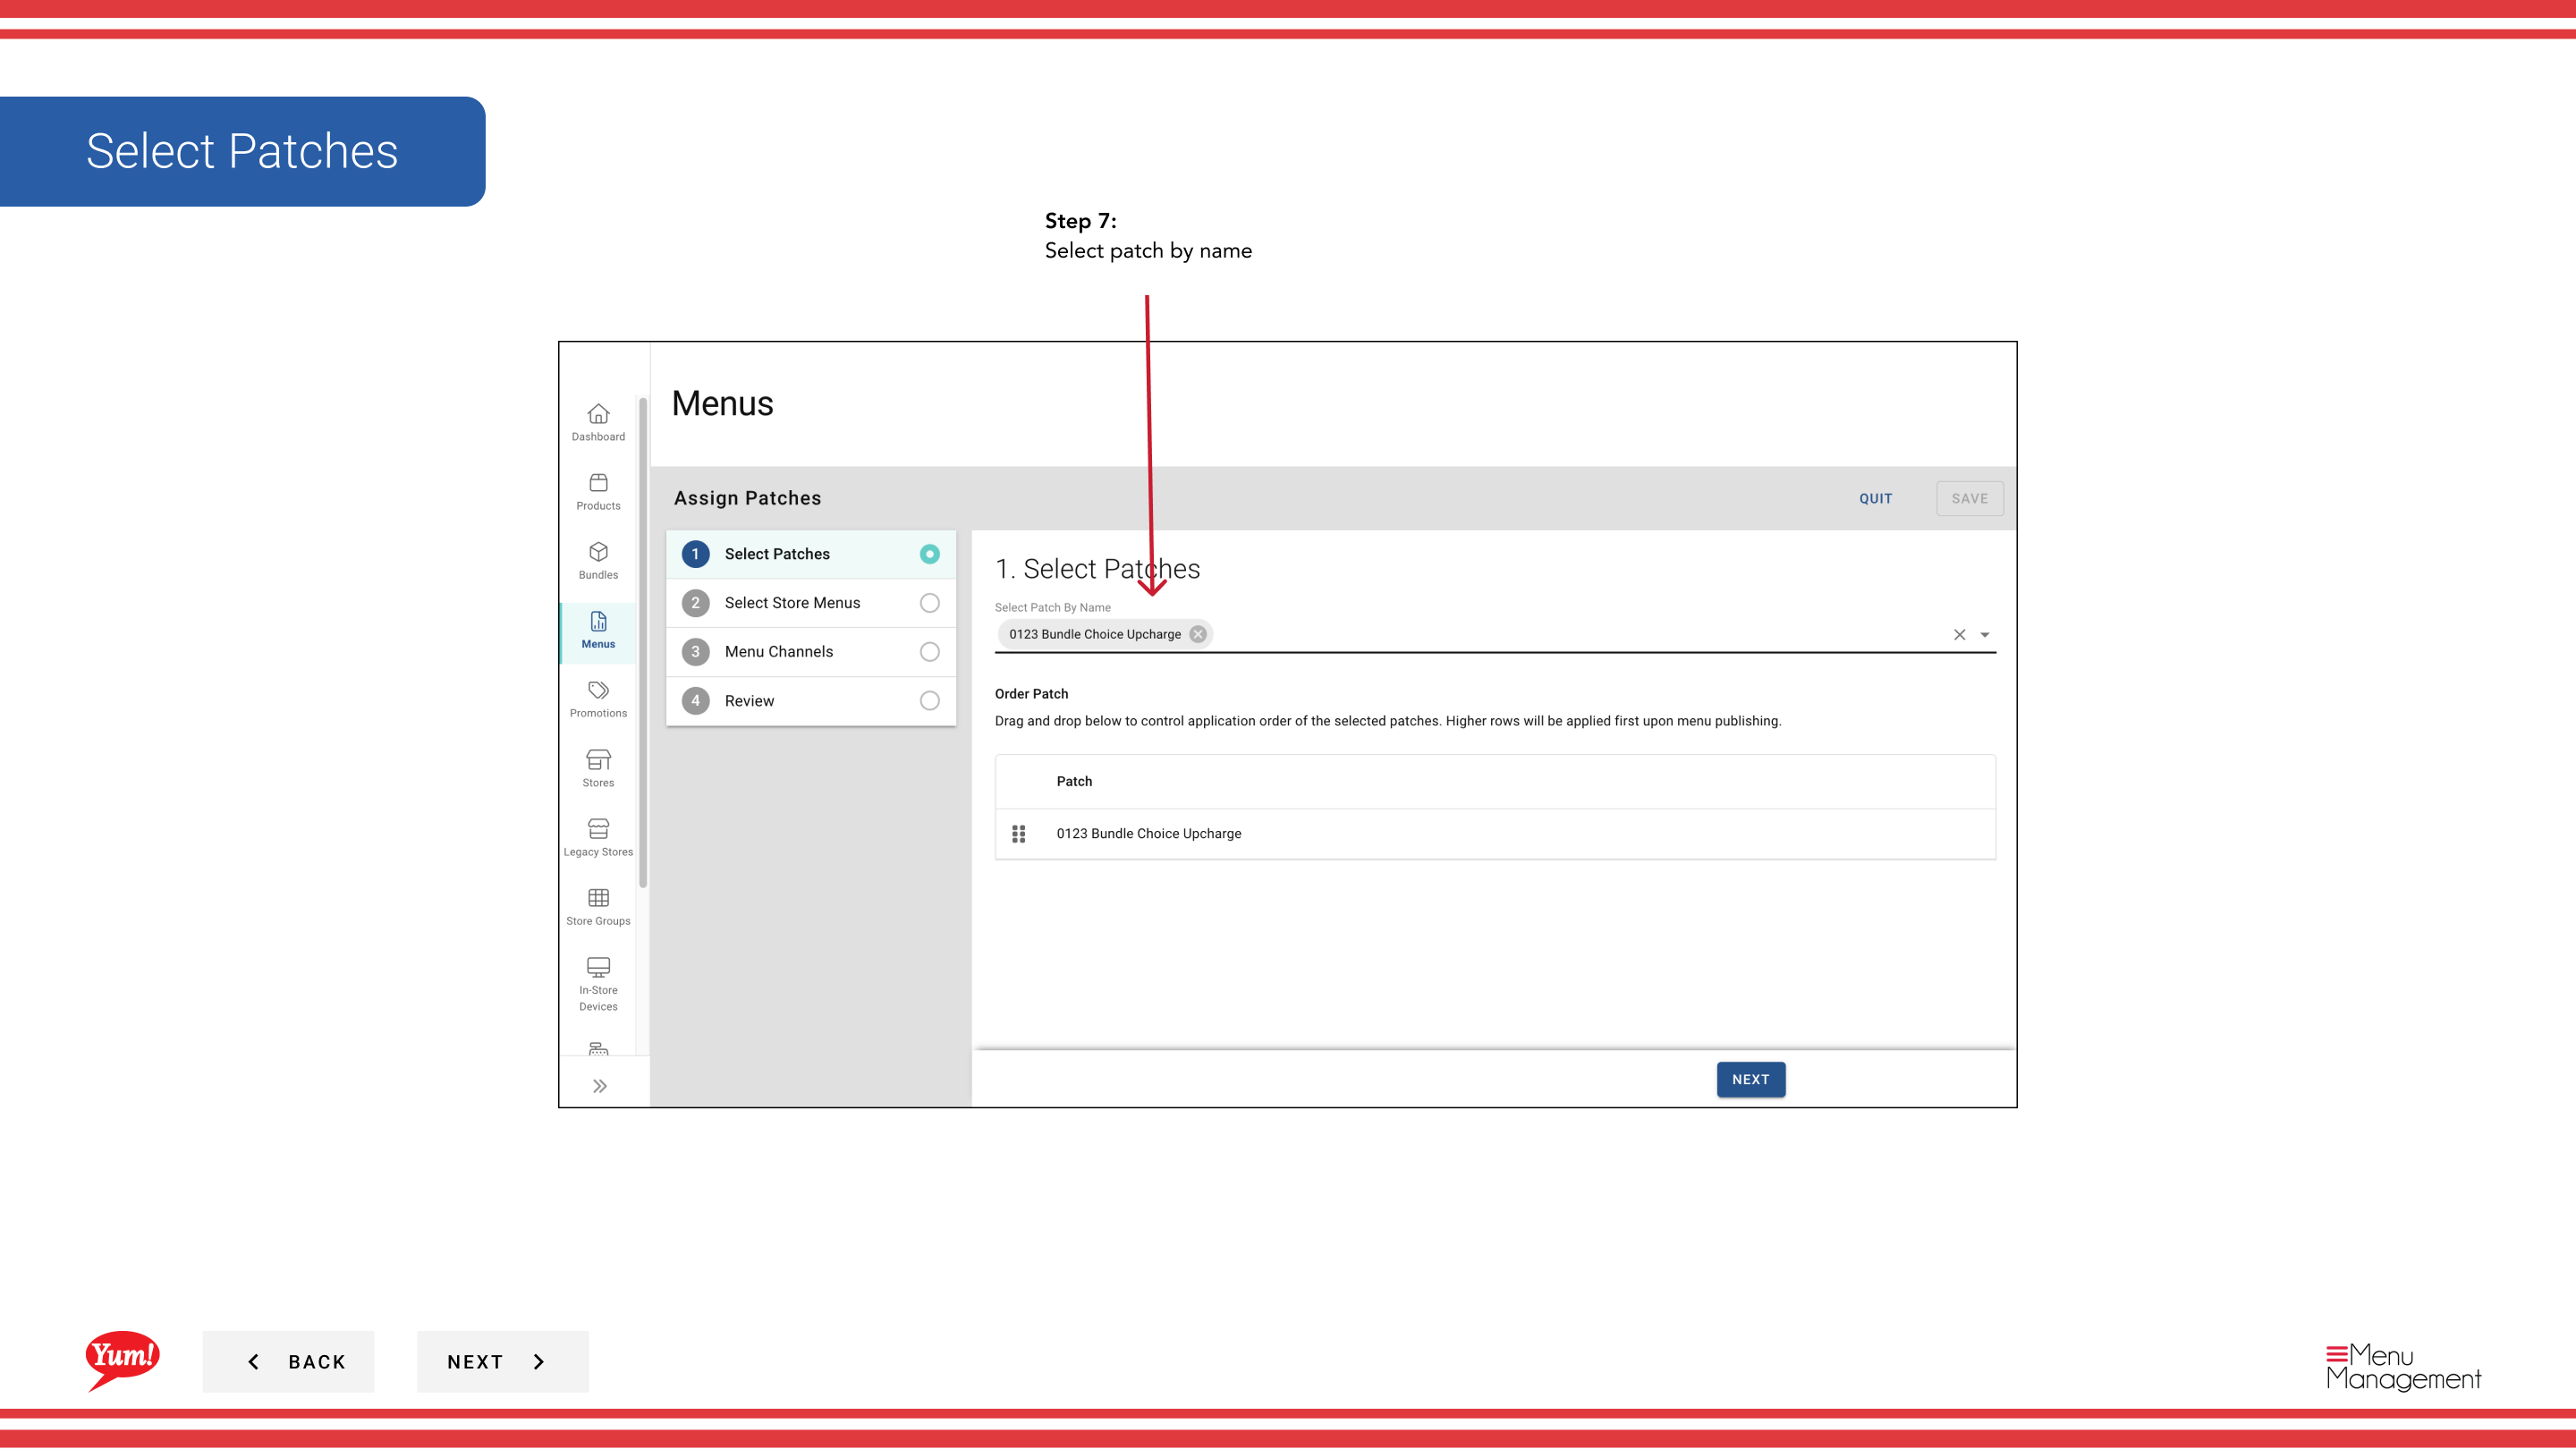
Step 7: Select the patches you want to transfer by checking their names. Review the list of patches to be copied.
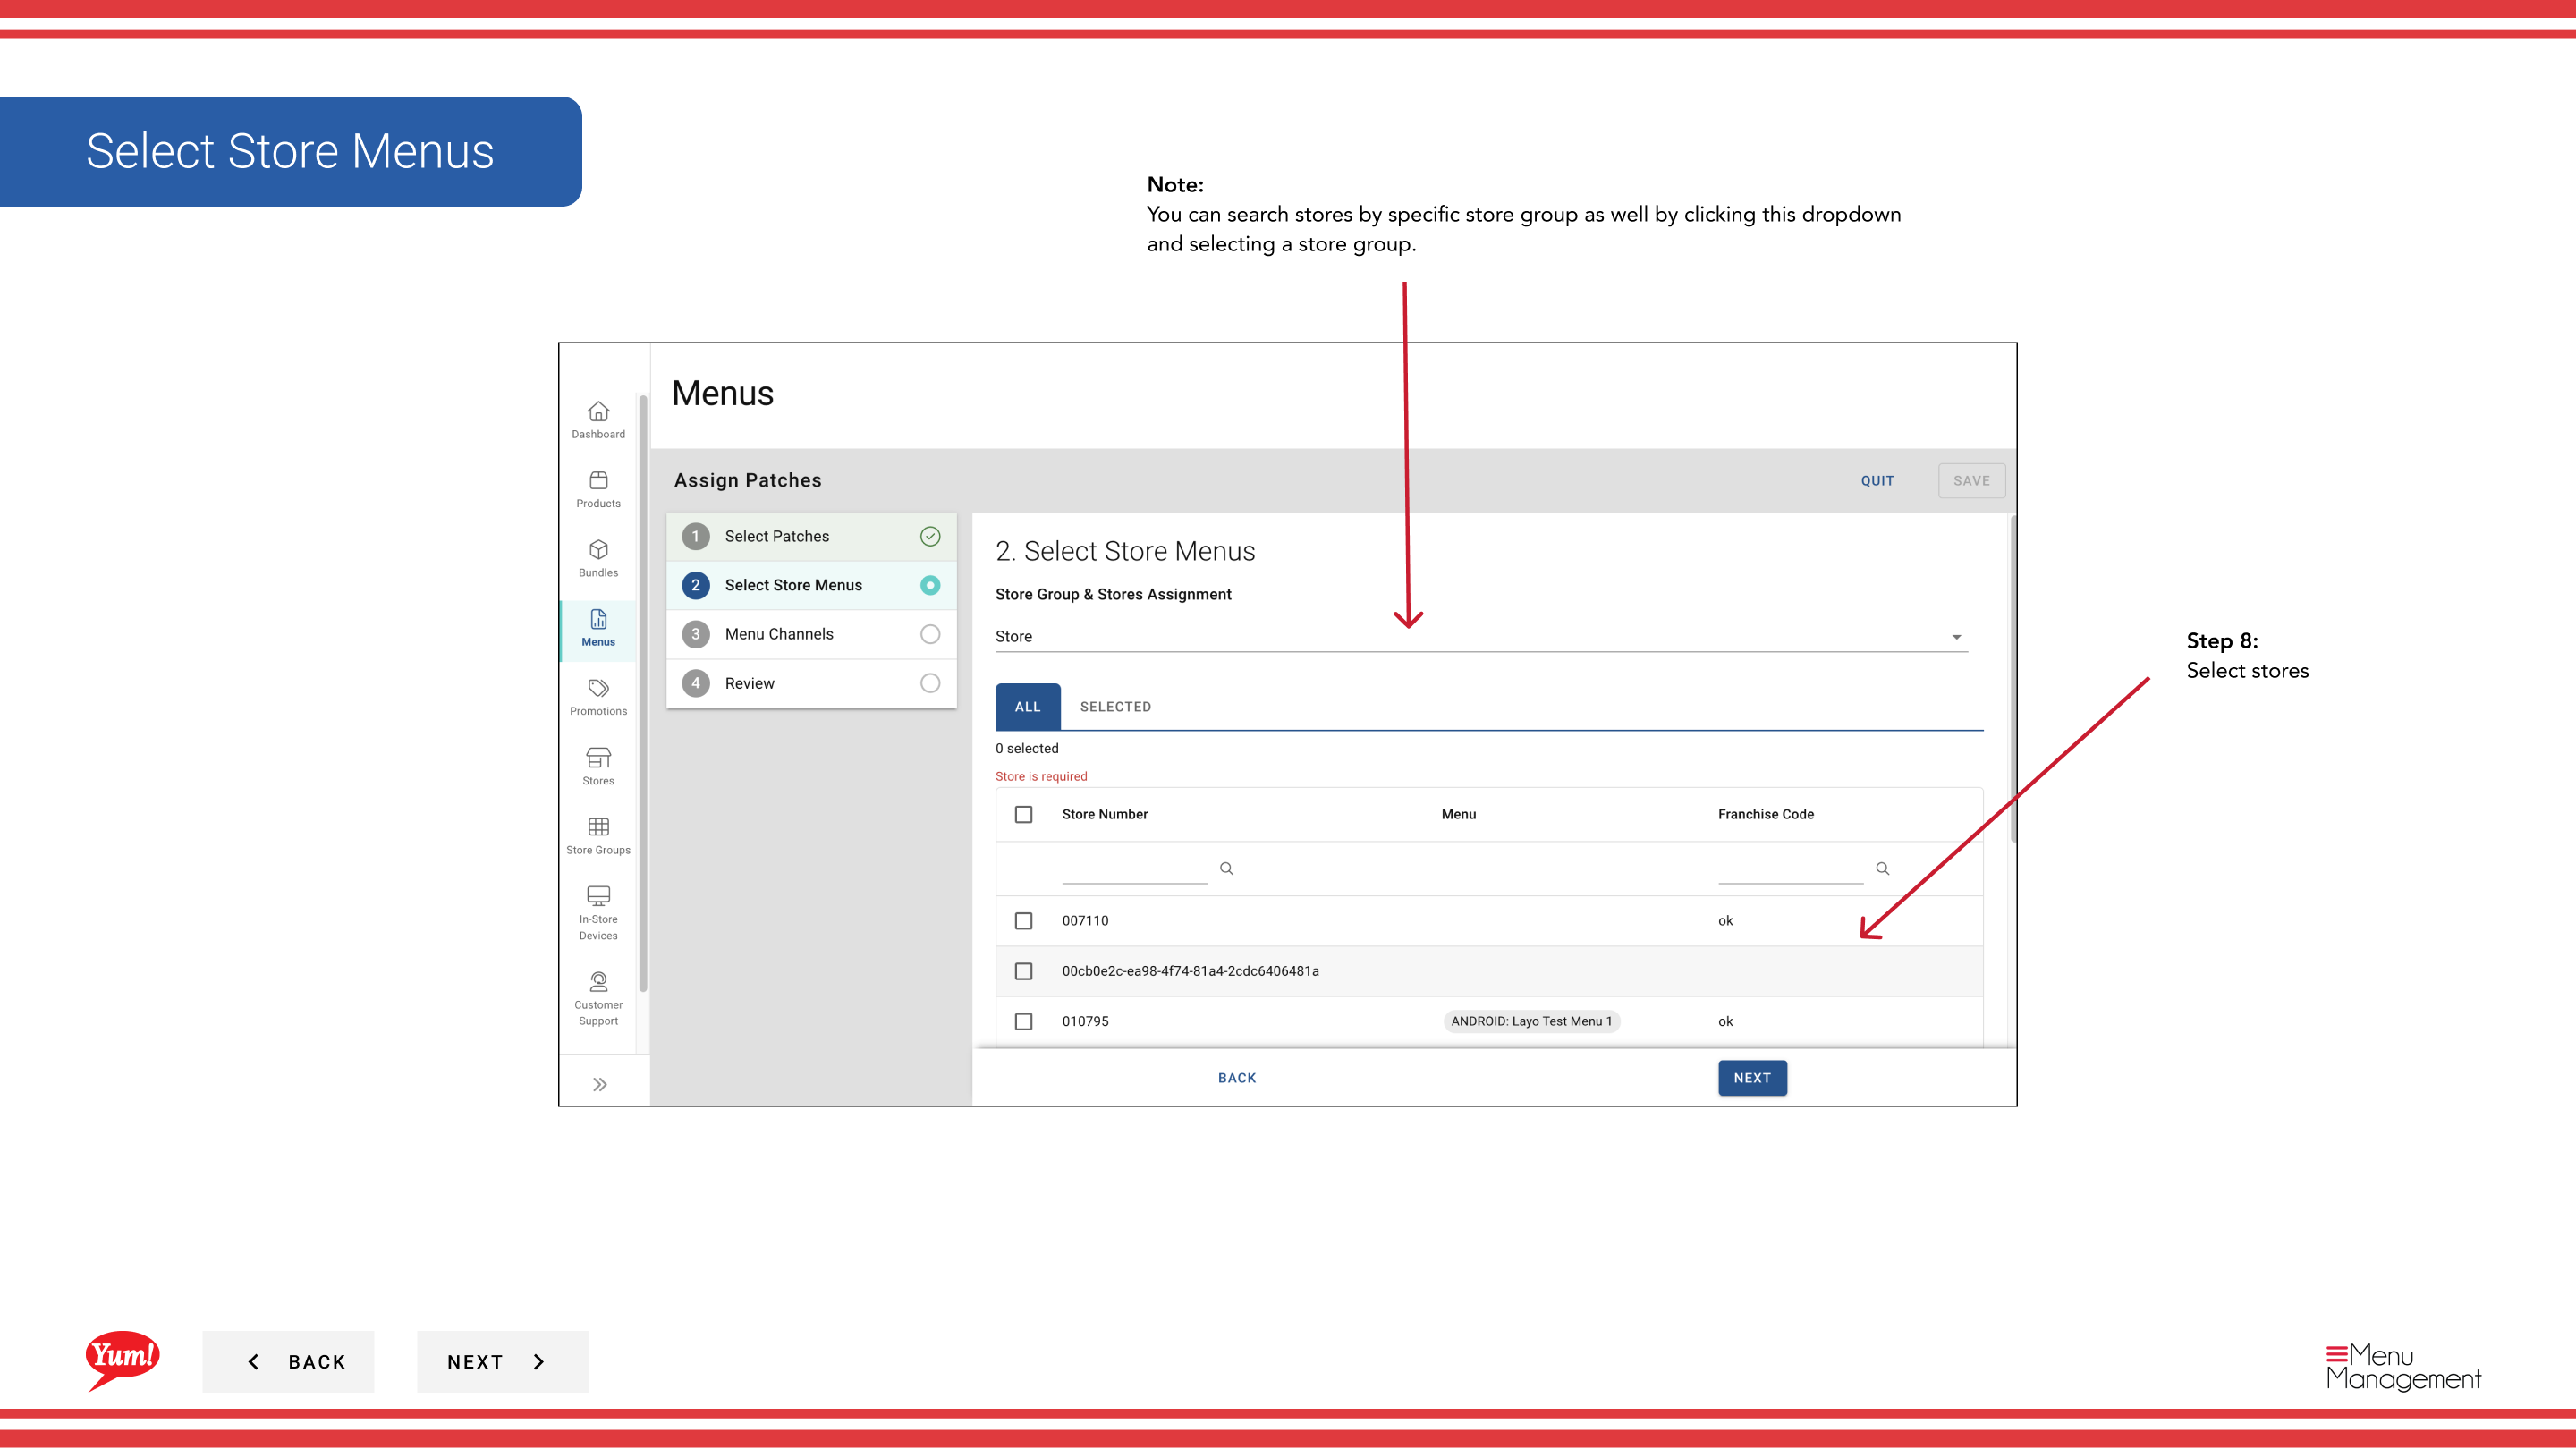
Step 8: Select the destination stores where you want to copy these patches. You can:
- Search stores by name, number, or code
- Filter by Store Group using the dropdown to quickly select all stores in a group
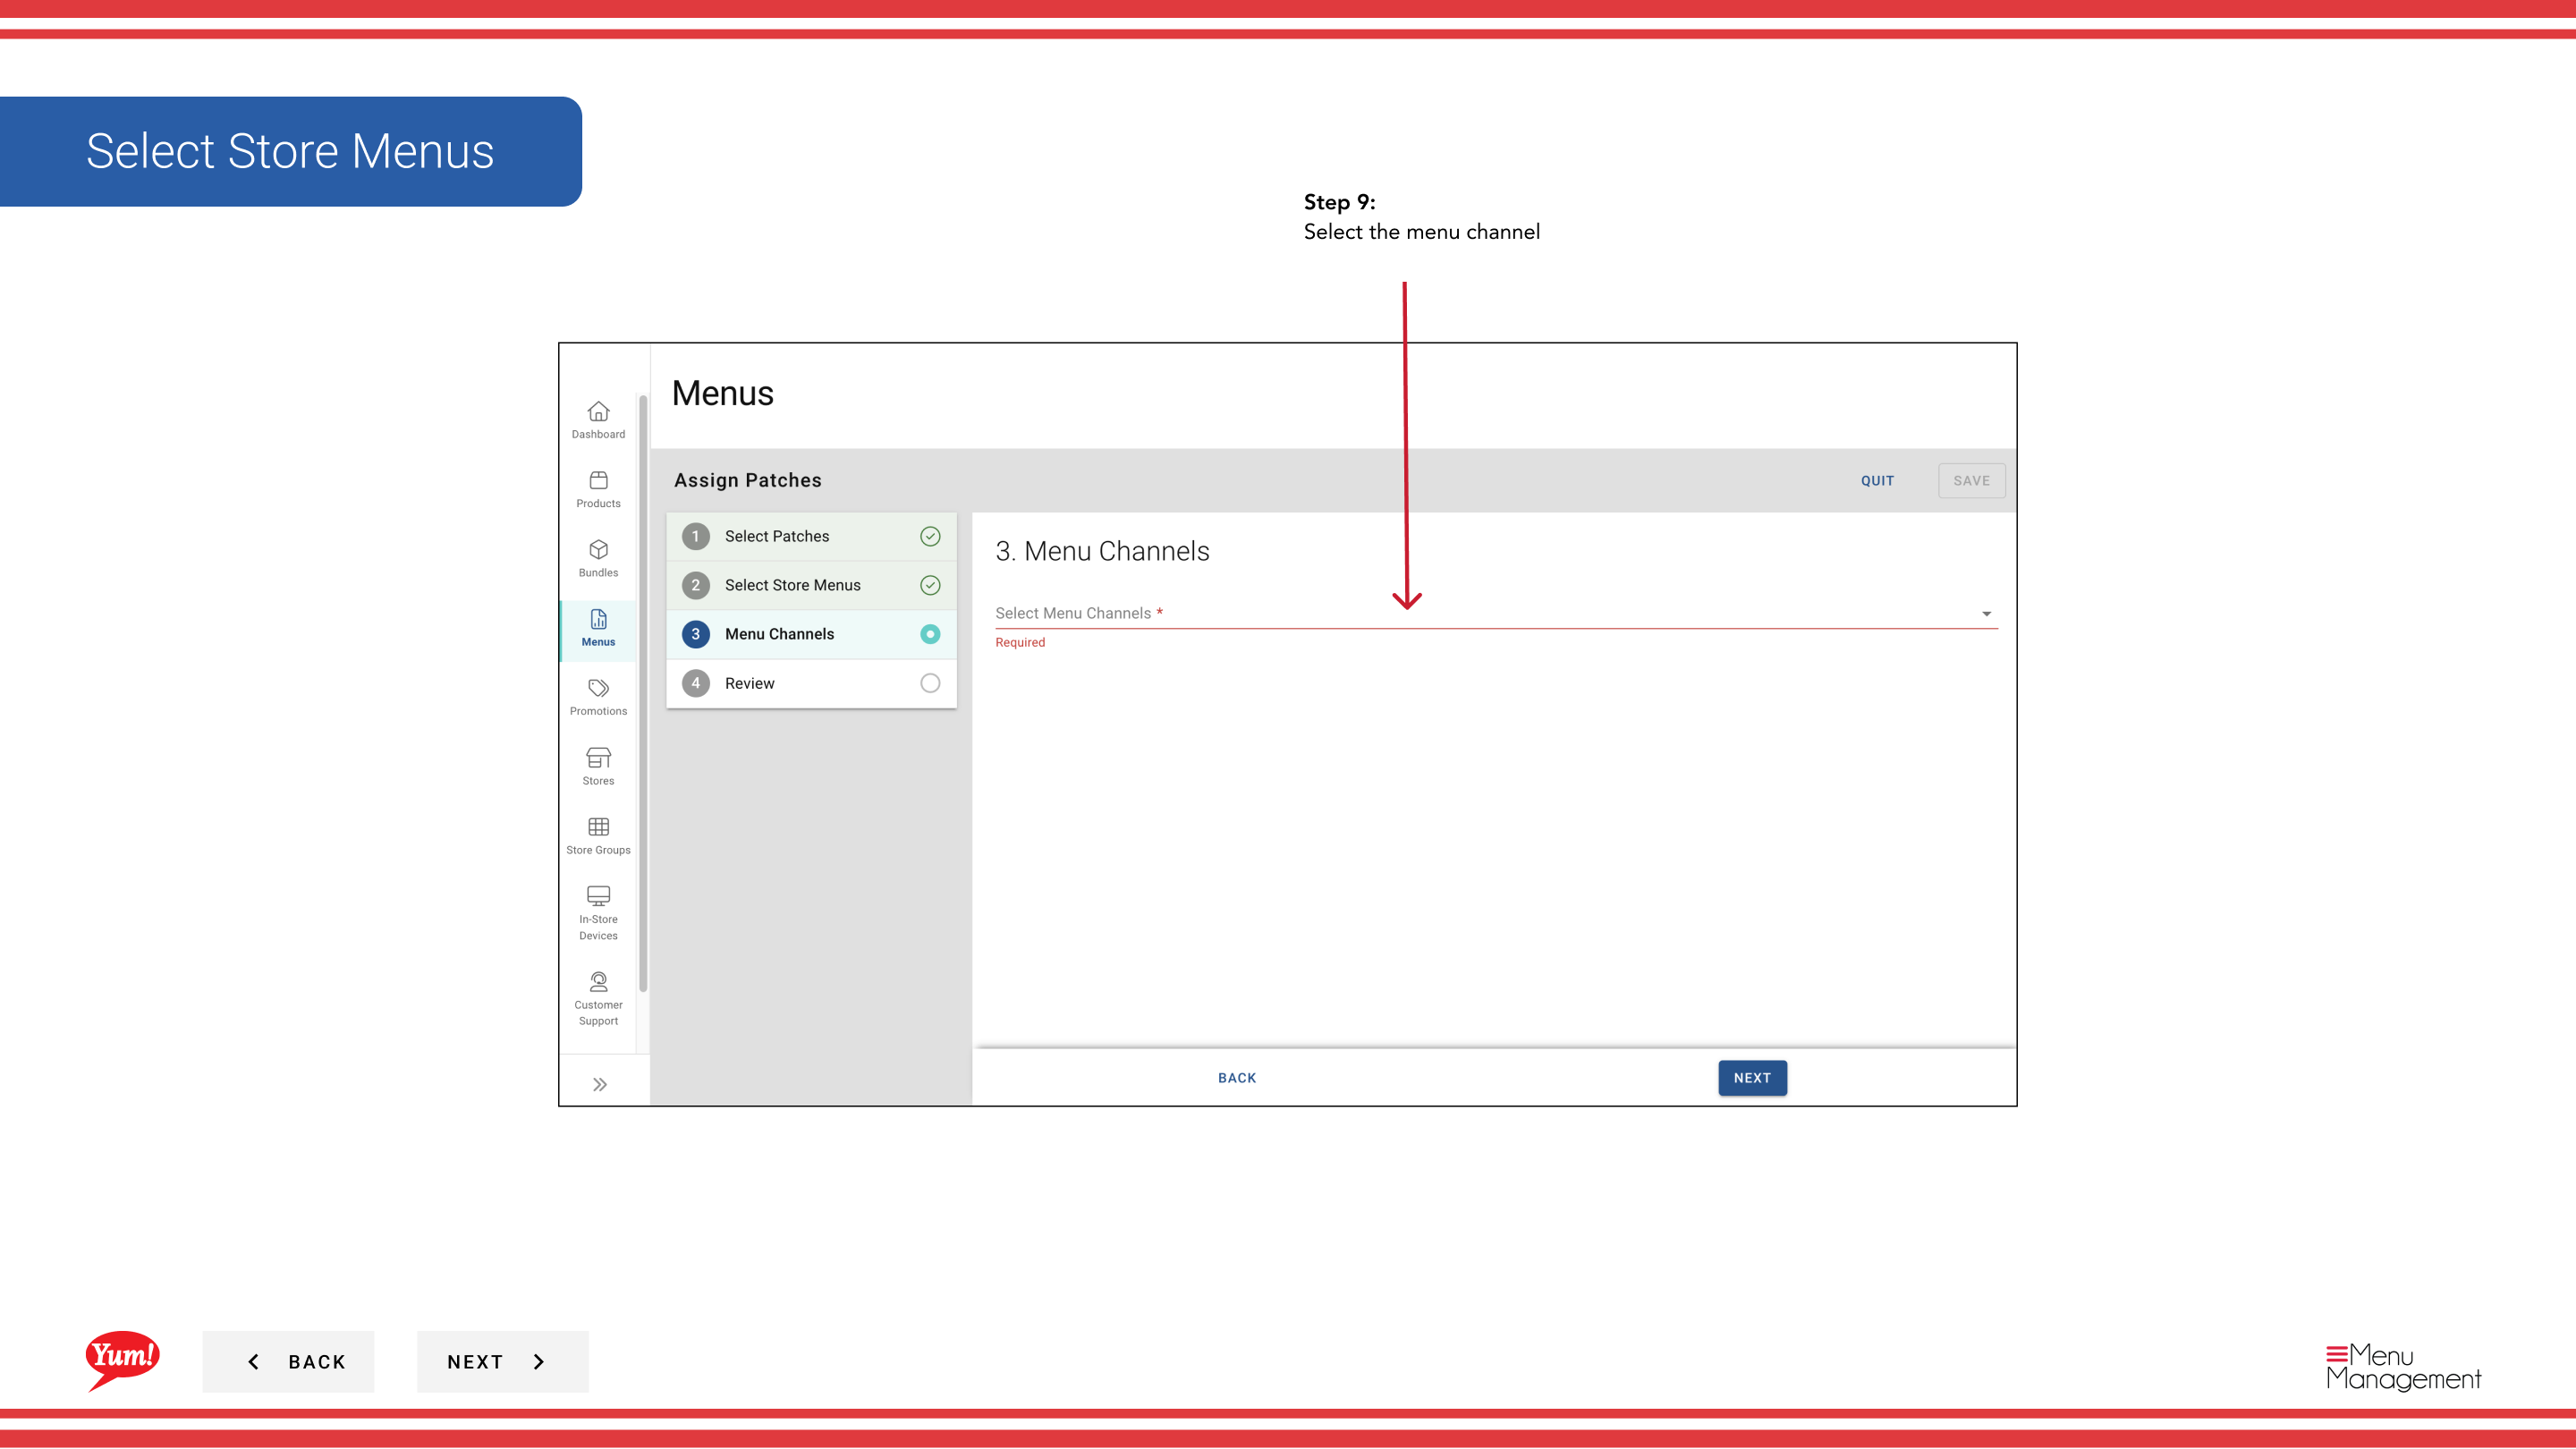
Step 9: Select the menu channel where the patches should be applied on the destination stores (e.g., Digital, Kiosk, In-Store).
Step 10: Review the transfer details to verify everything is correct before proceeding.
Step 11: Click Save (or Transfer) to copy the patches to the selected destination stores.

Store Groups shortcut: Use the Store Group filter dropdown to quickly select all stores in a region or franchise group, rather than searching for each store individually.
Transfer copies the patches as they are ordered. After transfer, verify that the patches work correctly on the destination stores before publishing to customers.
Related guides
- Edit Patch List — Manage patches on a single store
- Publish Menu — Publish the menu after transferring patches
Part of the Admin Portal Guide · Section: Stores