Add Metafields to a Menu
What this guide covers
Attaches public and private custom metadata (key-value pairs) to a store's menu for integration with downstream systems or market-specific requirements.
Steps
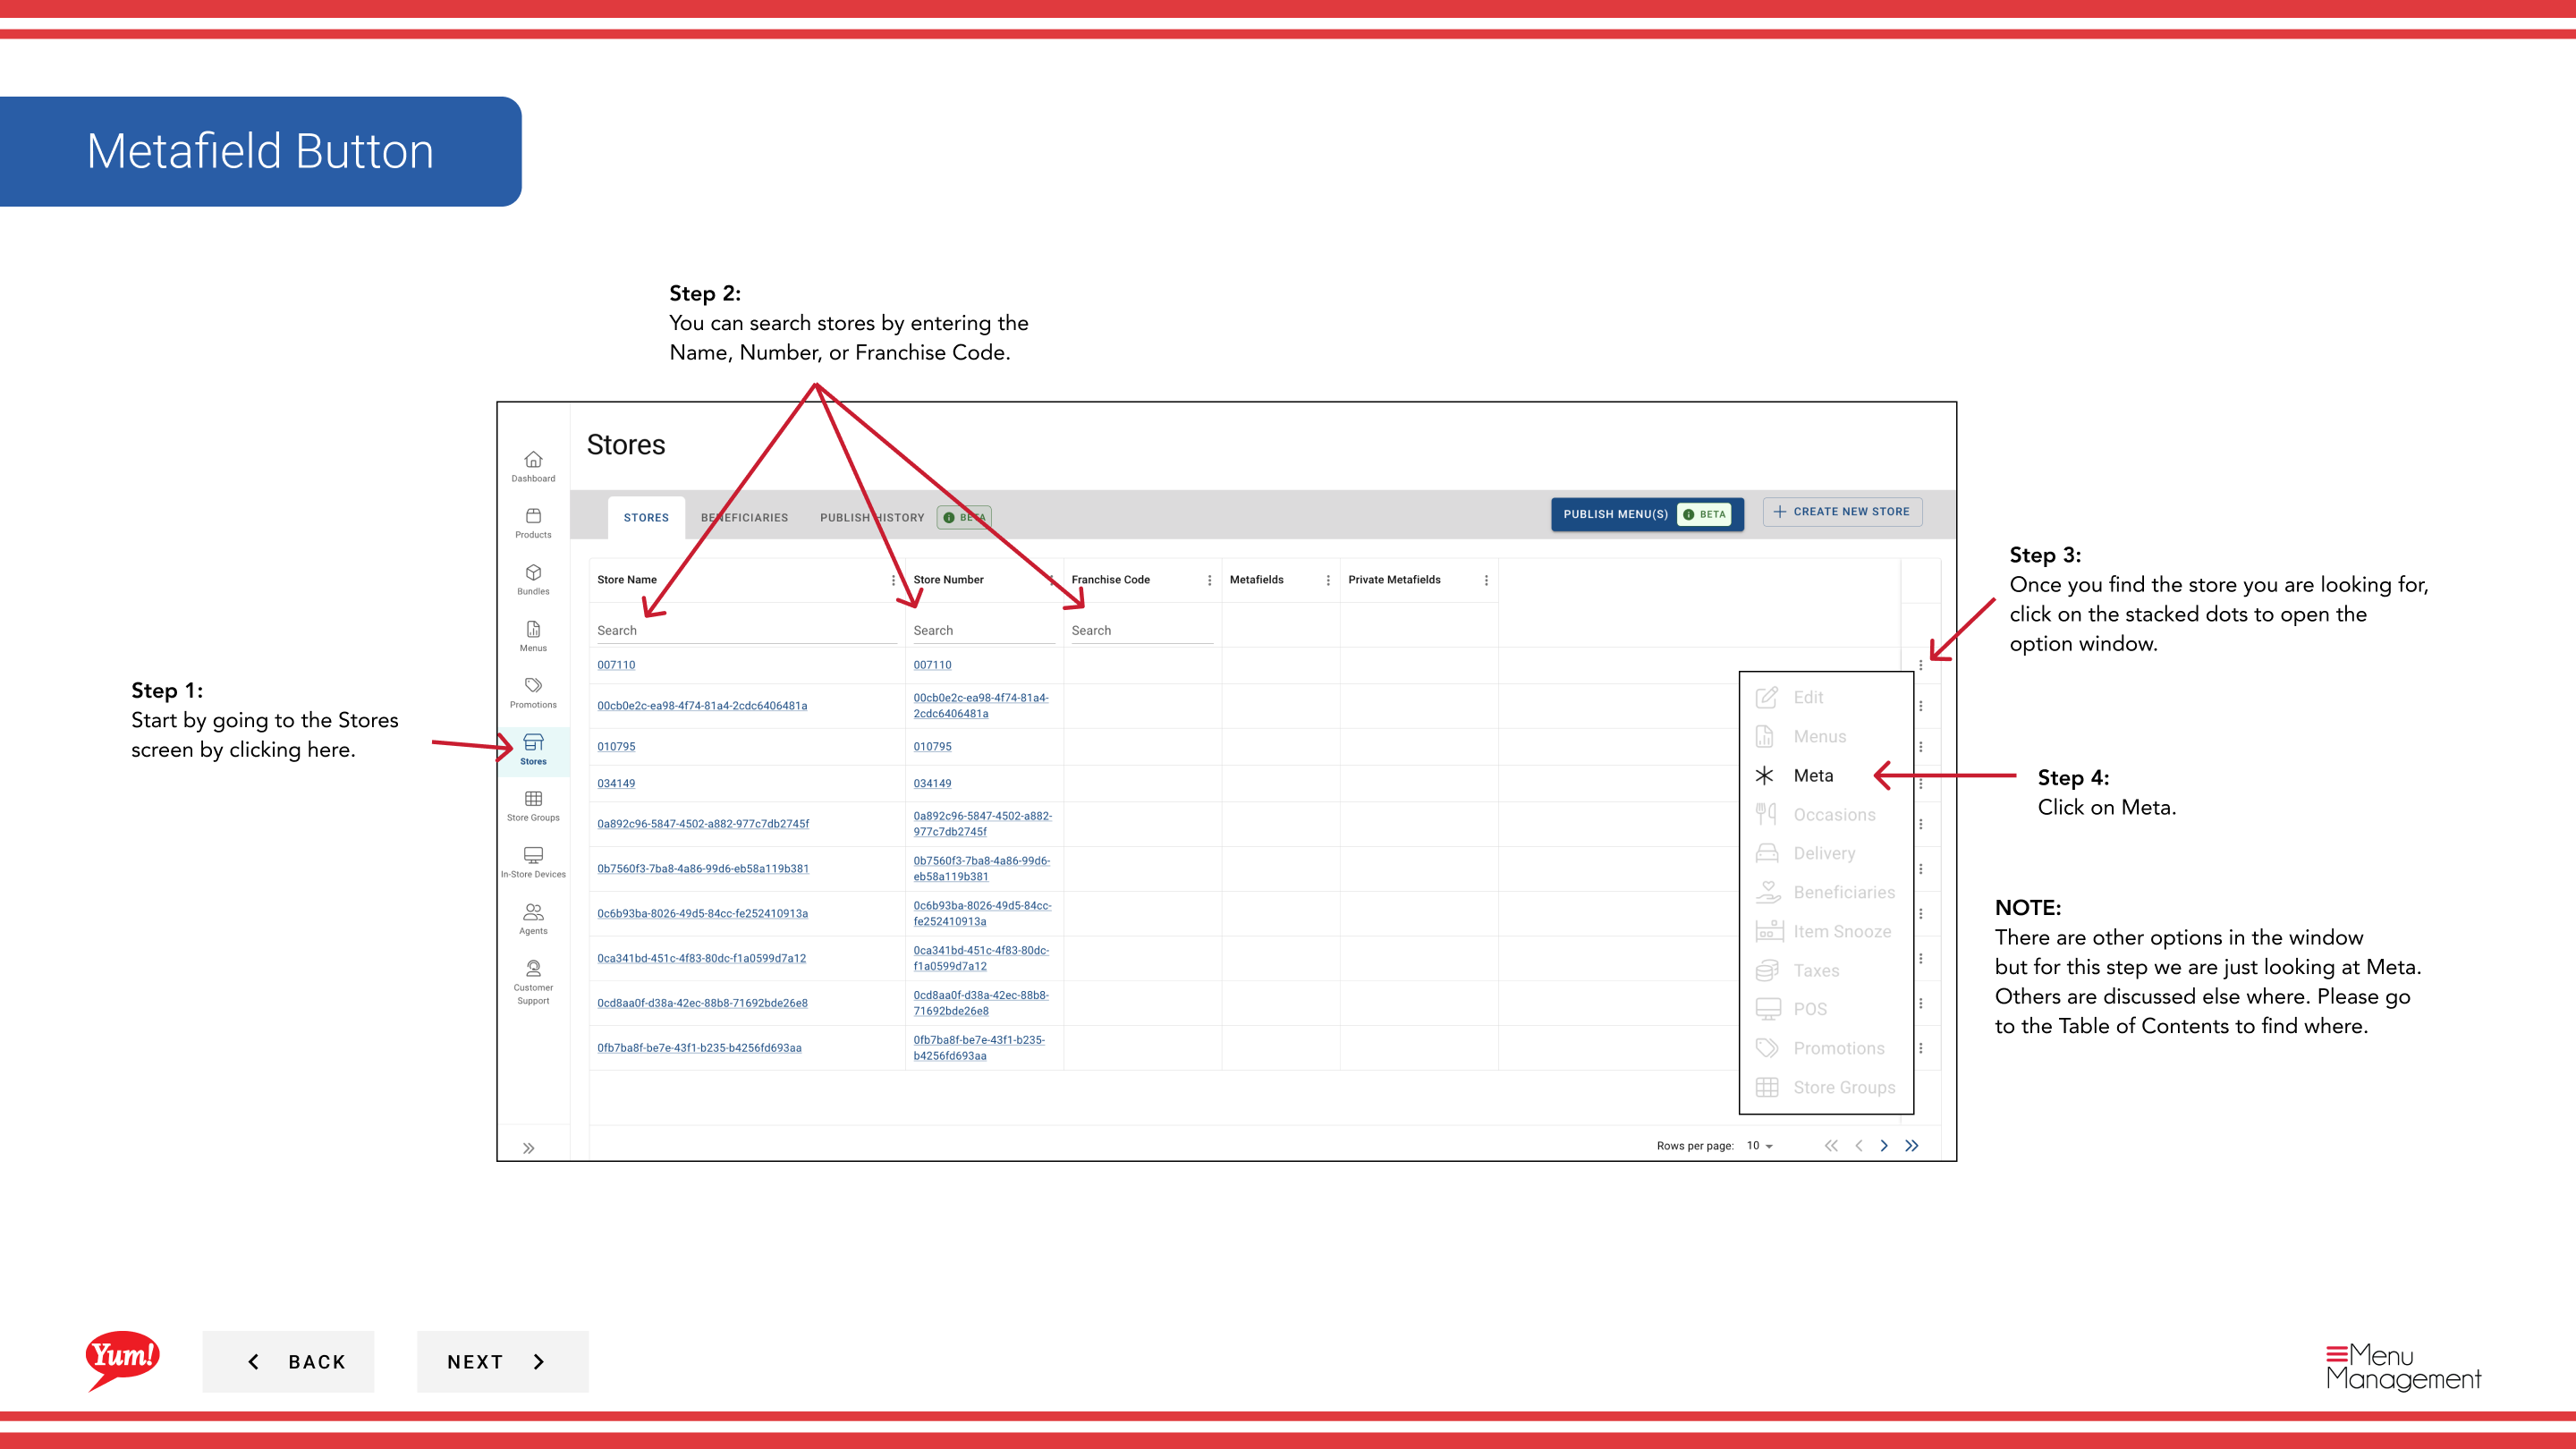
Step 1: Navigate to the Stores section using the left-hand navigation menu.
Step 2: Search for the store by Name, Store Number, or Franchise Code using the search box.
Step 3: Once you find the store, click the three-dot menu (•••) icon to open the options menu.
Step 4: Click Meta from the dropdown menu. This opens the metafields management screen.
Step 5 - Public Metafields: Click the Add Public Metafield button (or tile) to add a public metafield.
Step 6: Fill in the metafield details:
| Field | What to enter | Notes |
|---|---|---|
| Key * | The field name or identifier | e.g., "api_version", "integration_id" |
| Value * | The field value | e.g., "v2", "12345" |
Step 7: Click Add Store Metafields to save the public metafield.

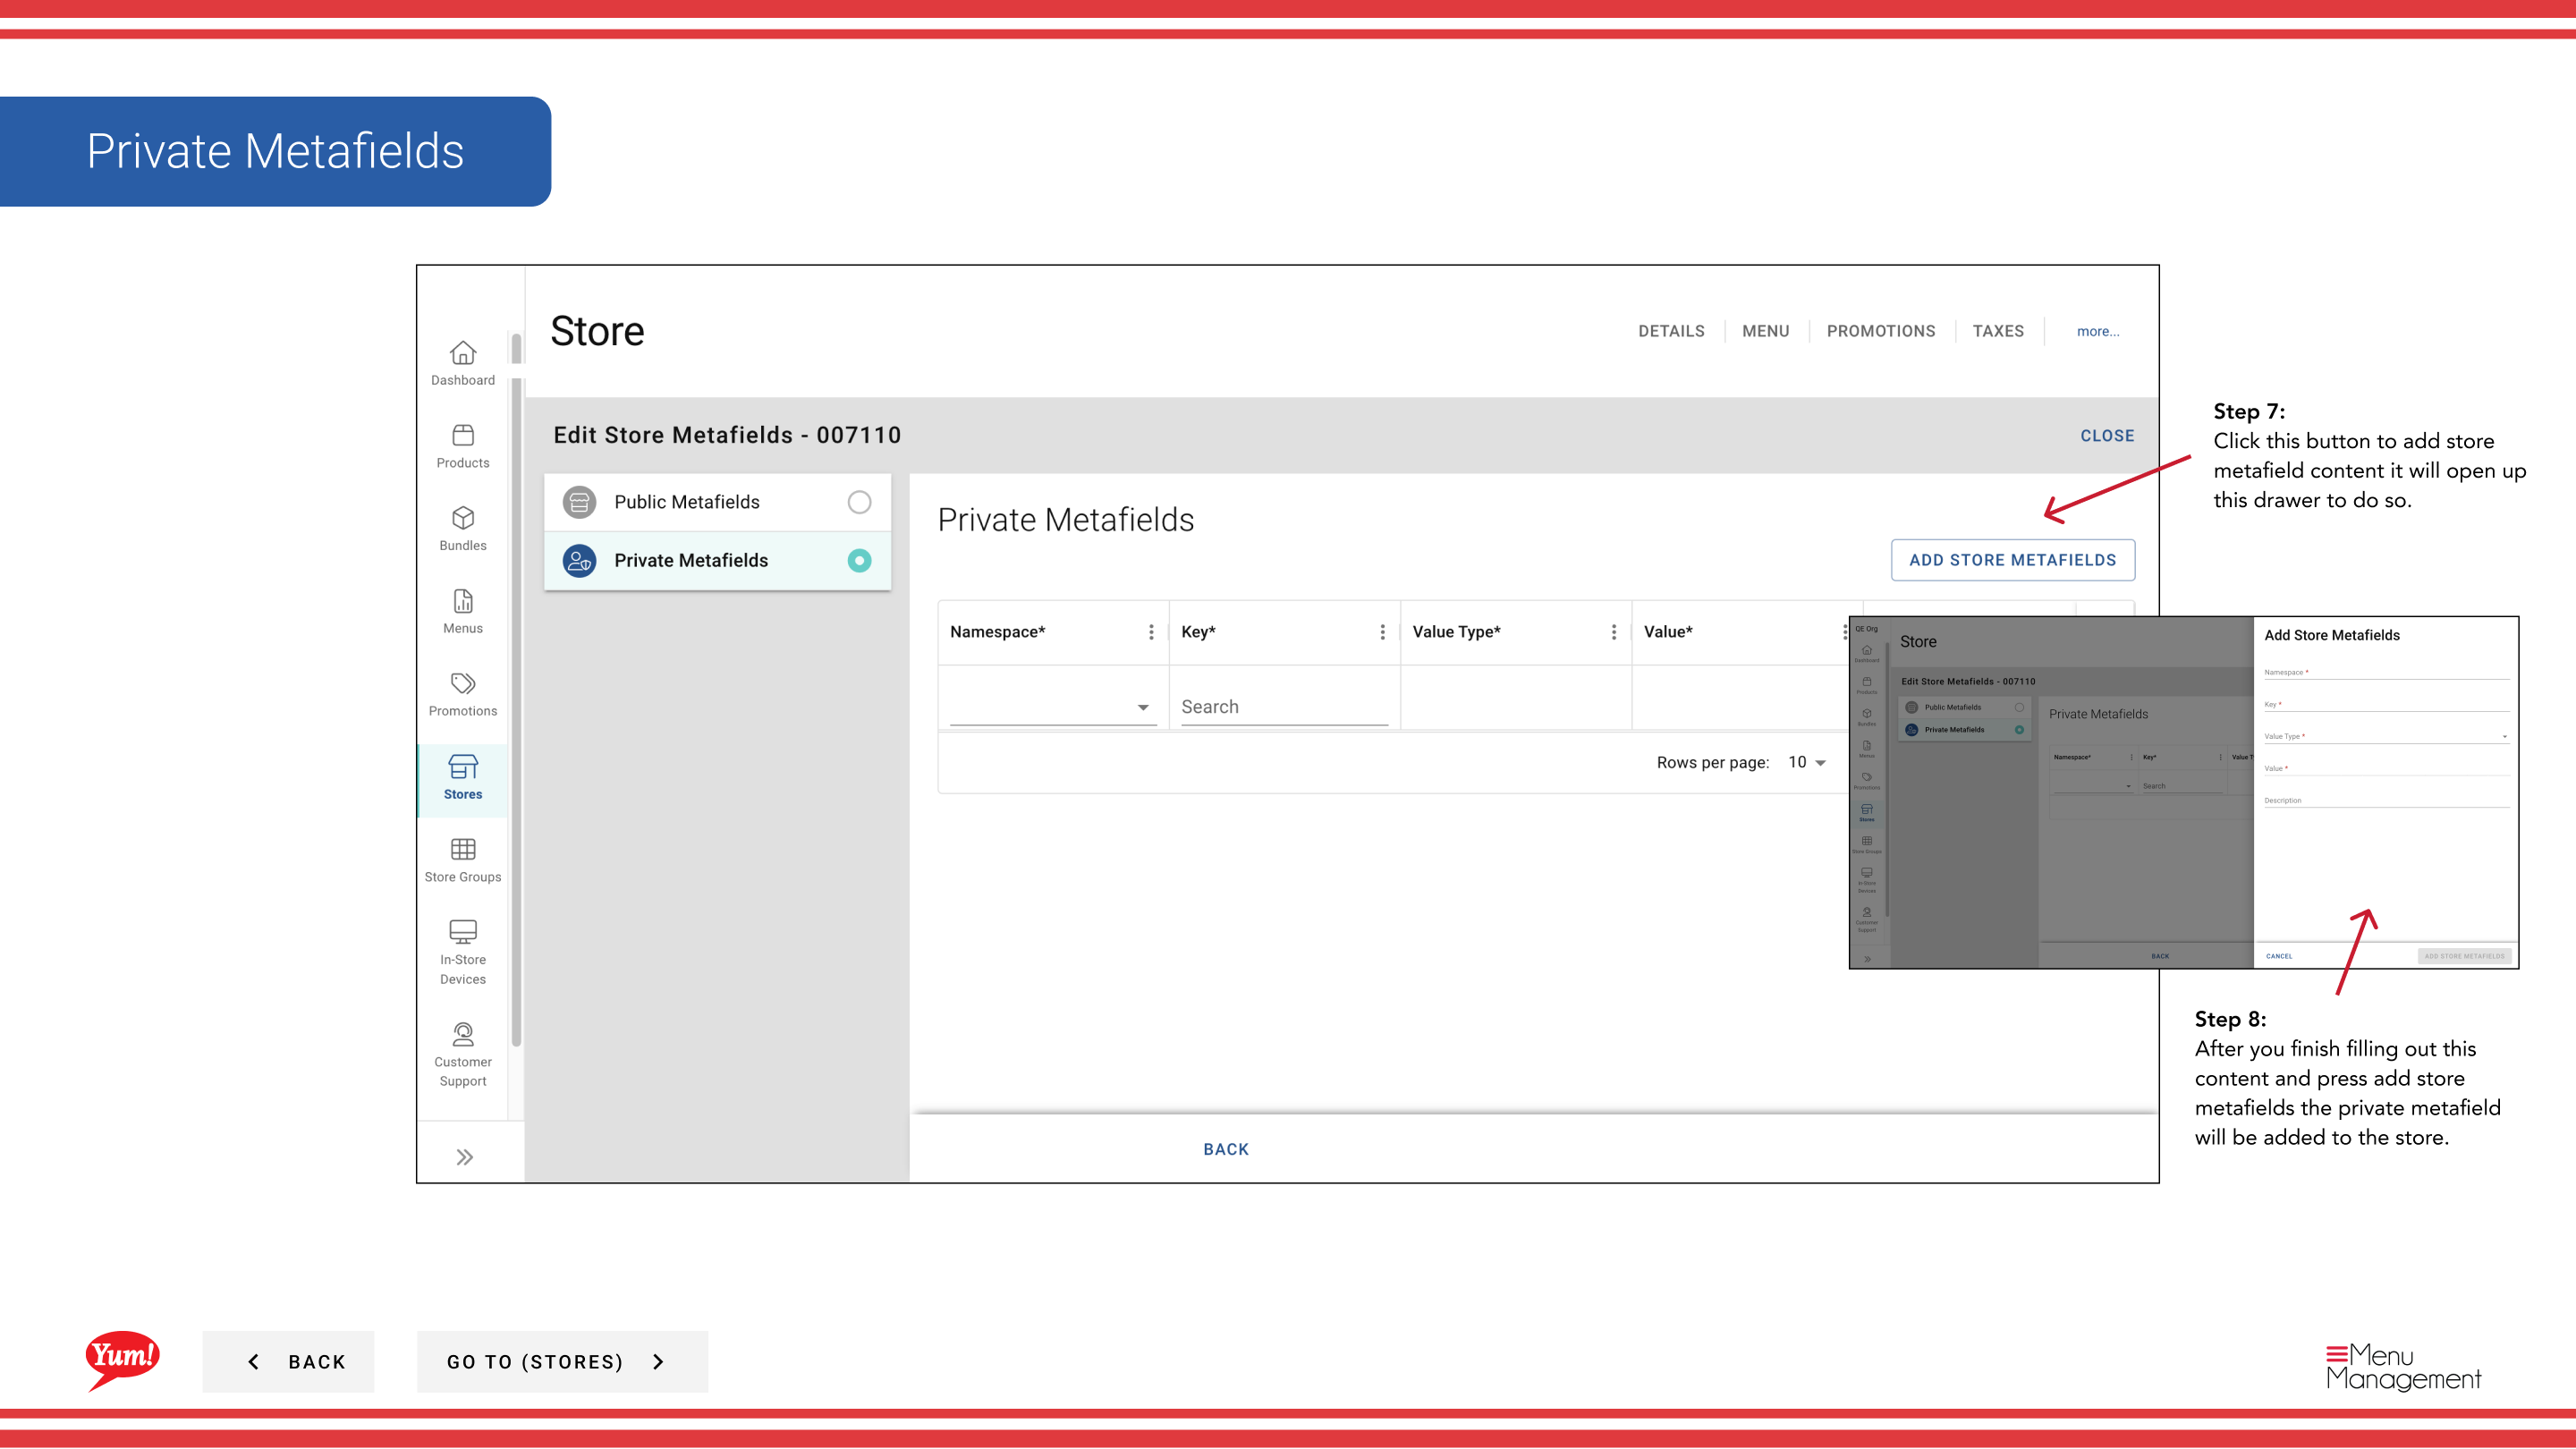
Step 8 - Private Metafields: Click the Add Private Metafield button (or tile) to add a private metafield.
Step 9: Fill in the metafield details using the same field structure as above.
Step 10: Click Add Store Metafields to save the private metafield.
When to use metafields: Only add metafields if your technical team has specified key-value pairs for system integration. Public metafields are visible to external systems; private metafields are for internal use only.
You do not need to add both public and private metafields. Add only the metafields required for your store's integrations.
Related guides
- View a Store's Menu — See menu assignments
Part of the Admin Portal Guide · Section: Stores