Assign New Menu
What this guide covers
Links a published menu to a store's ordering channel (e.g., Digital, Kiosk, In-Store), determining what customers see when ordering from that location.
Steps
Step 1: Navigate to the Stores section using the left-hand navigation menu.
Step 2: Search for the store by Name, Store Number, or Franchise Code using the search box.
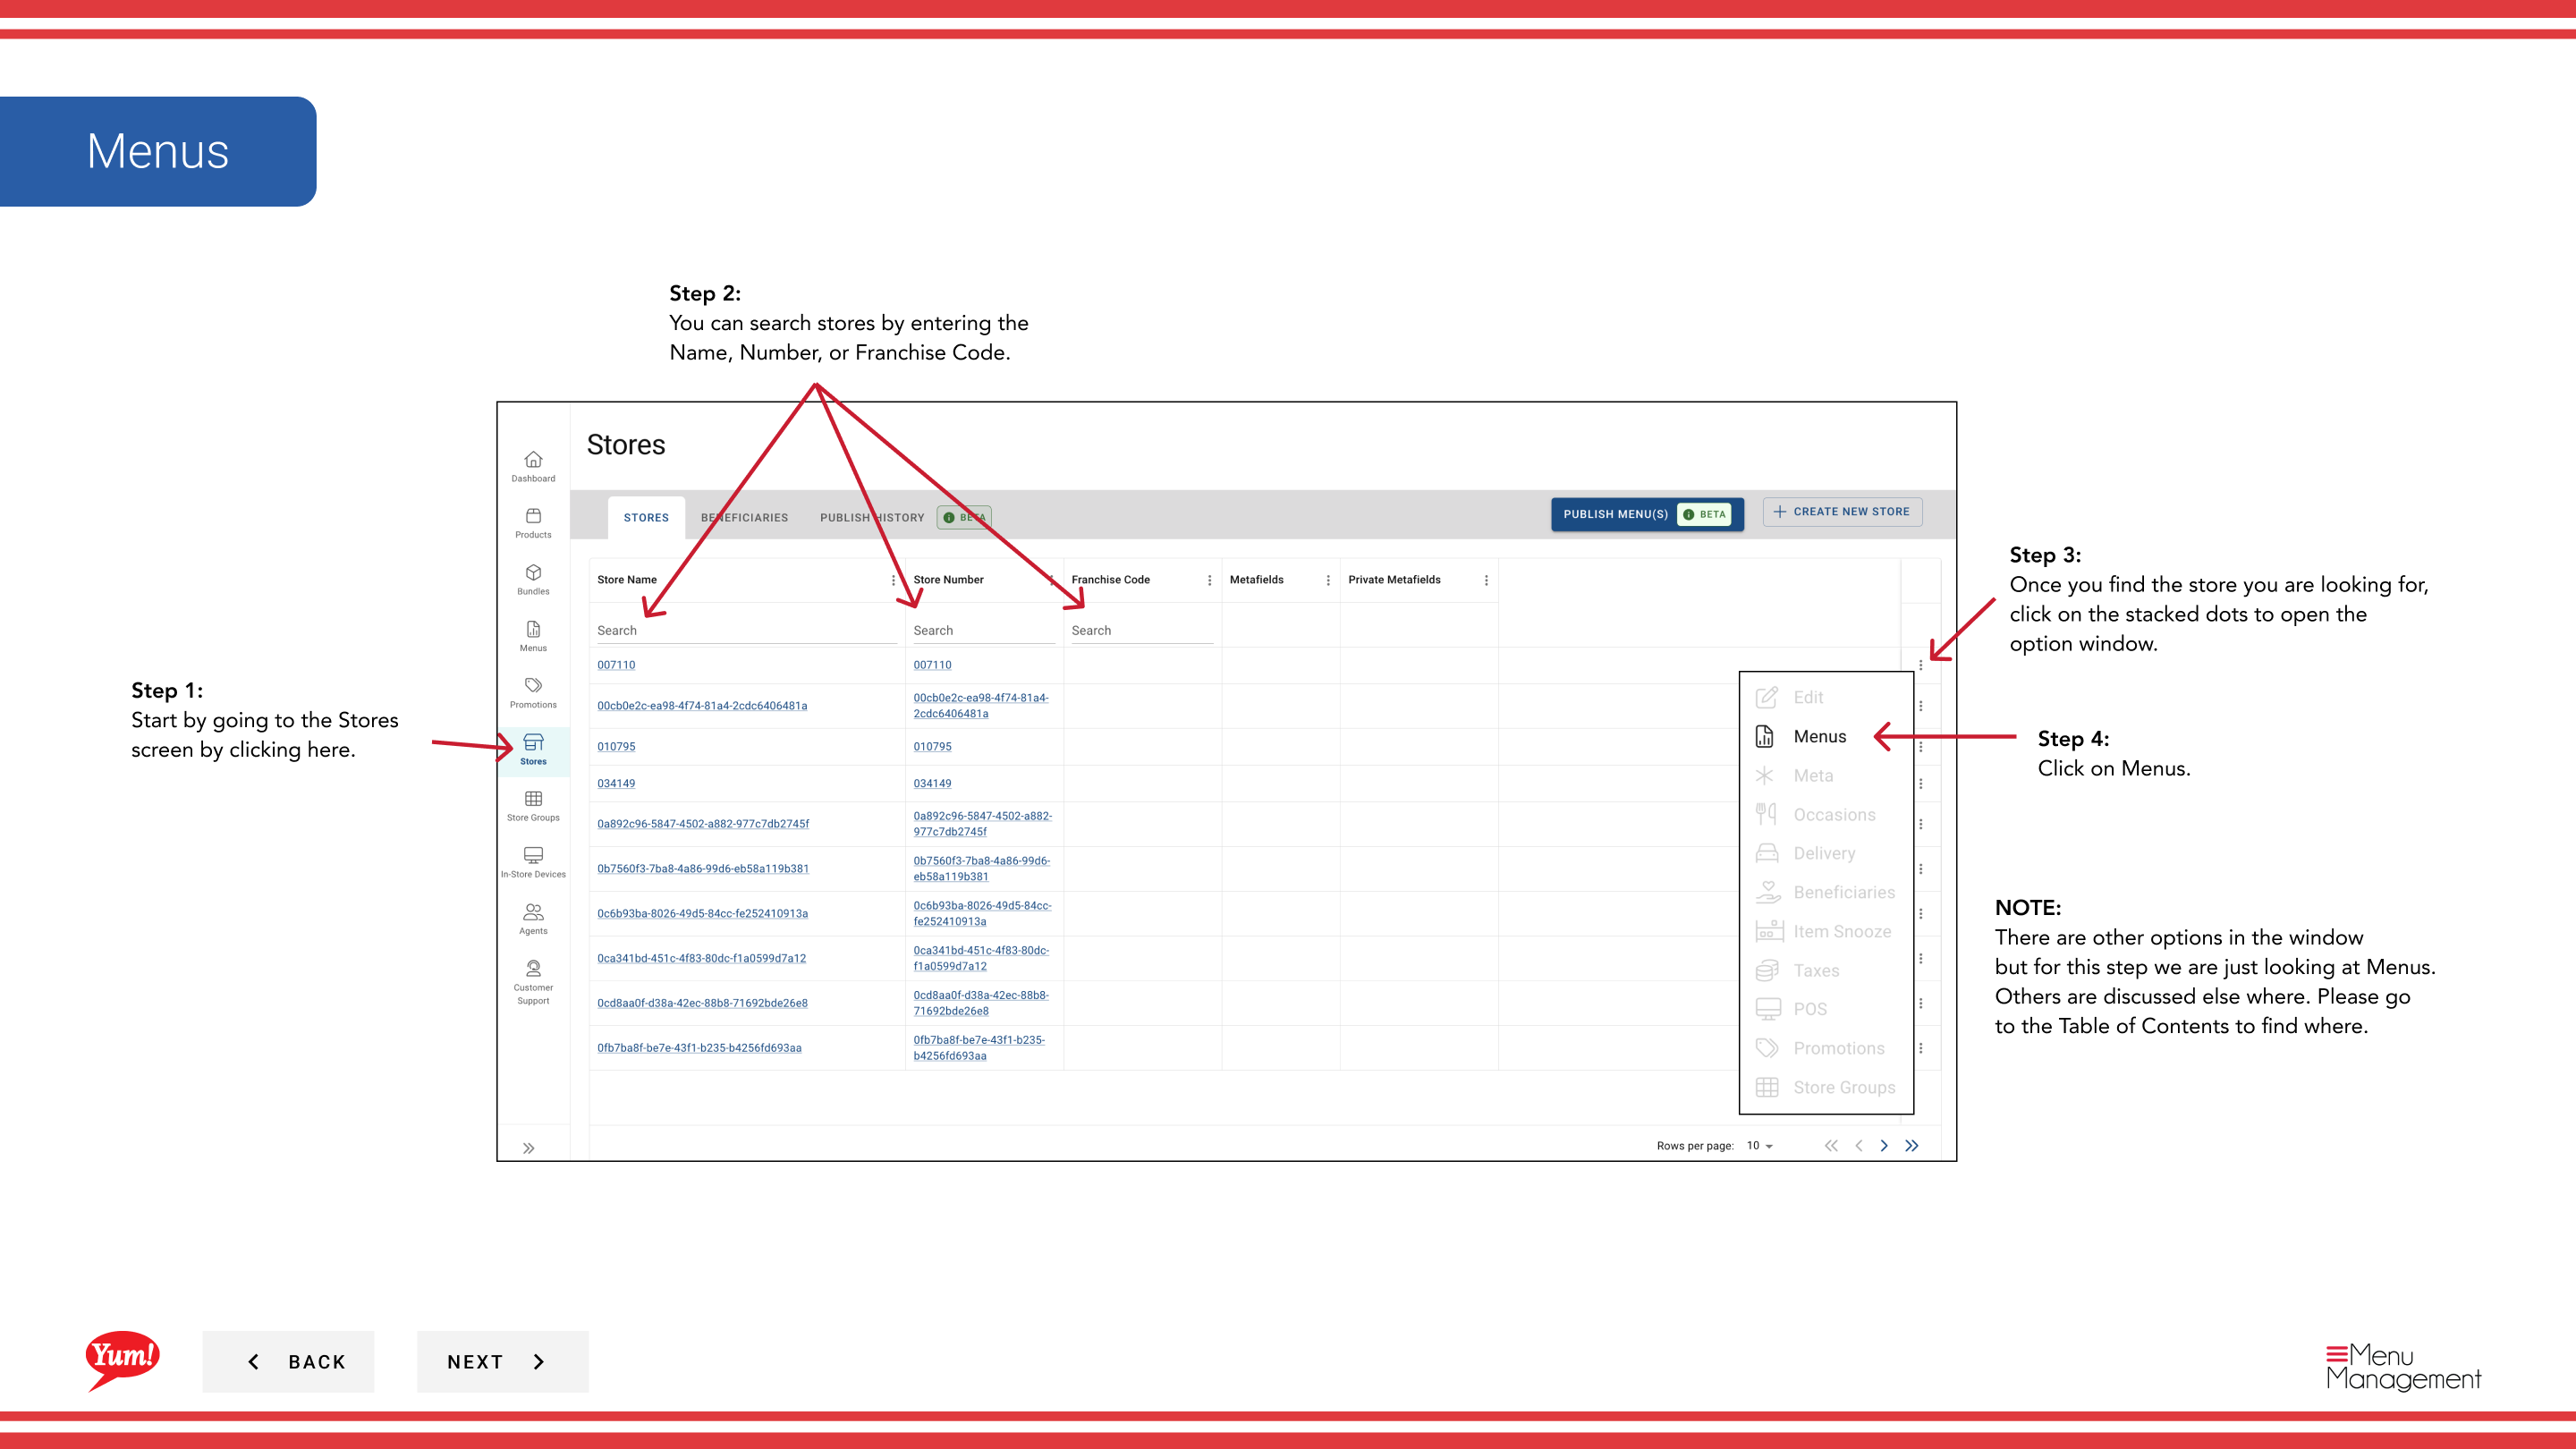
Step 3: Once you find the store, click the three-dot menu (•••) icon to open the options menu.
Step 4: Click Menus from the dropdown menu.
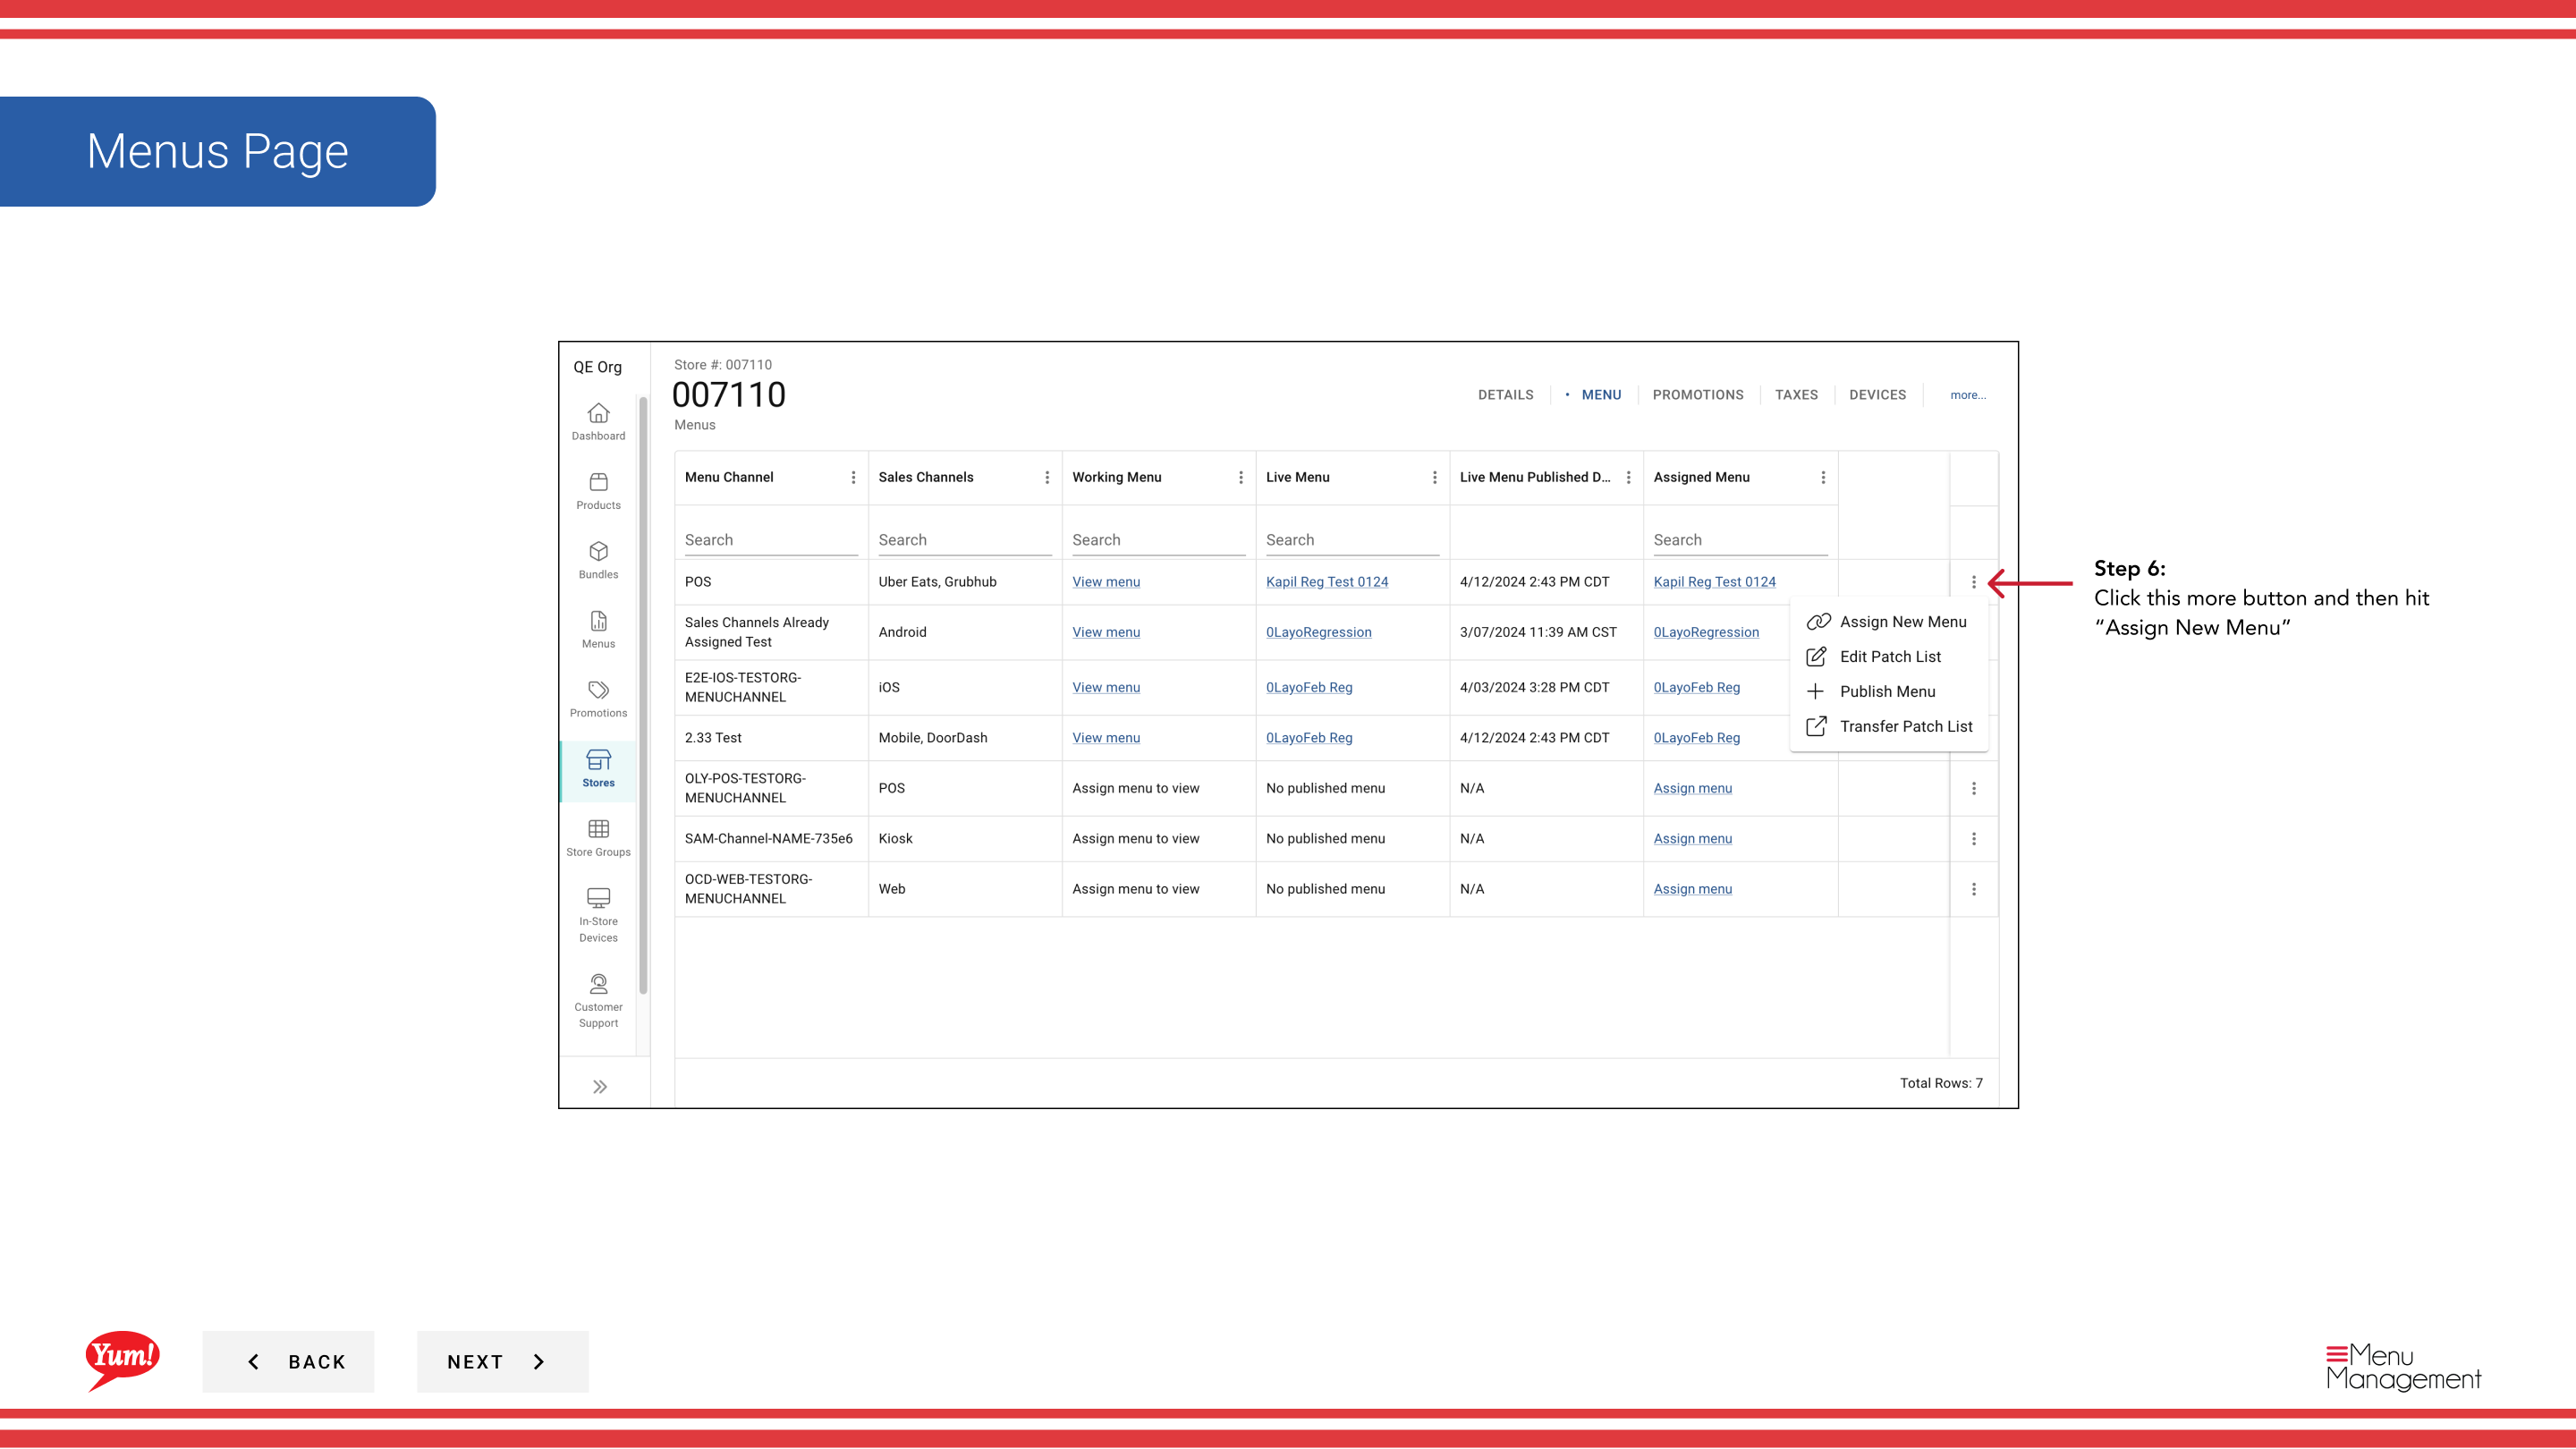
Step 5: Click the more menu button (⋯) or + Assign New Menu button to reveal additional options.
Step 6: Click Assign New Menu.
Step 7: Select a published menu from the list. This menu will be assigned to a specific ordering channel for this store.
| Field | What to enter | Notes |
|---|---|---|
| Menu * | Select from published menus | Only published menus appear here |
| Channel * | Select the ordering channel | e.g., Digital, Kiosk, In-Store |
Step 8: Click Assign to confirm the assignment.
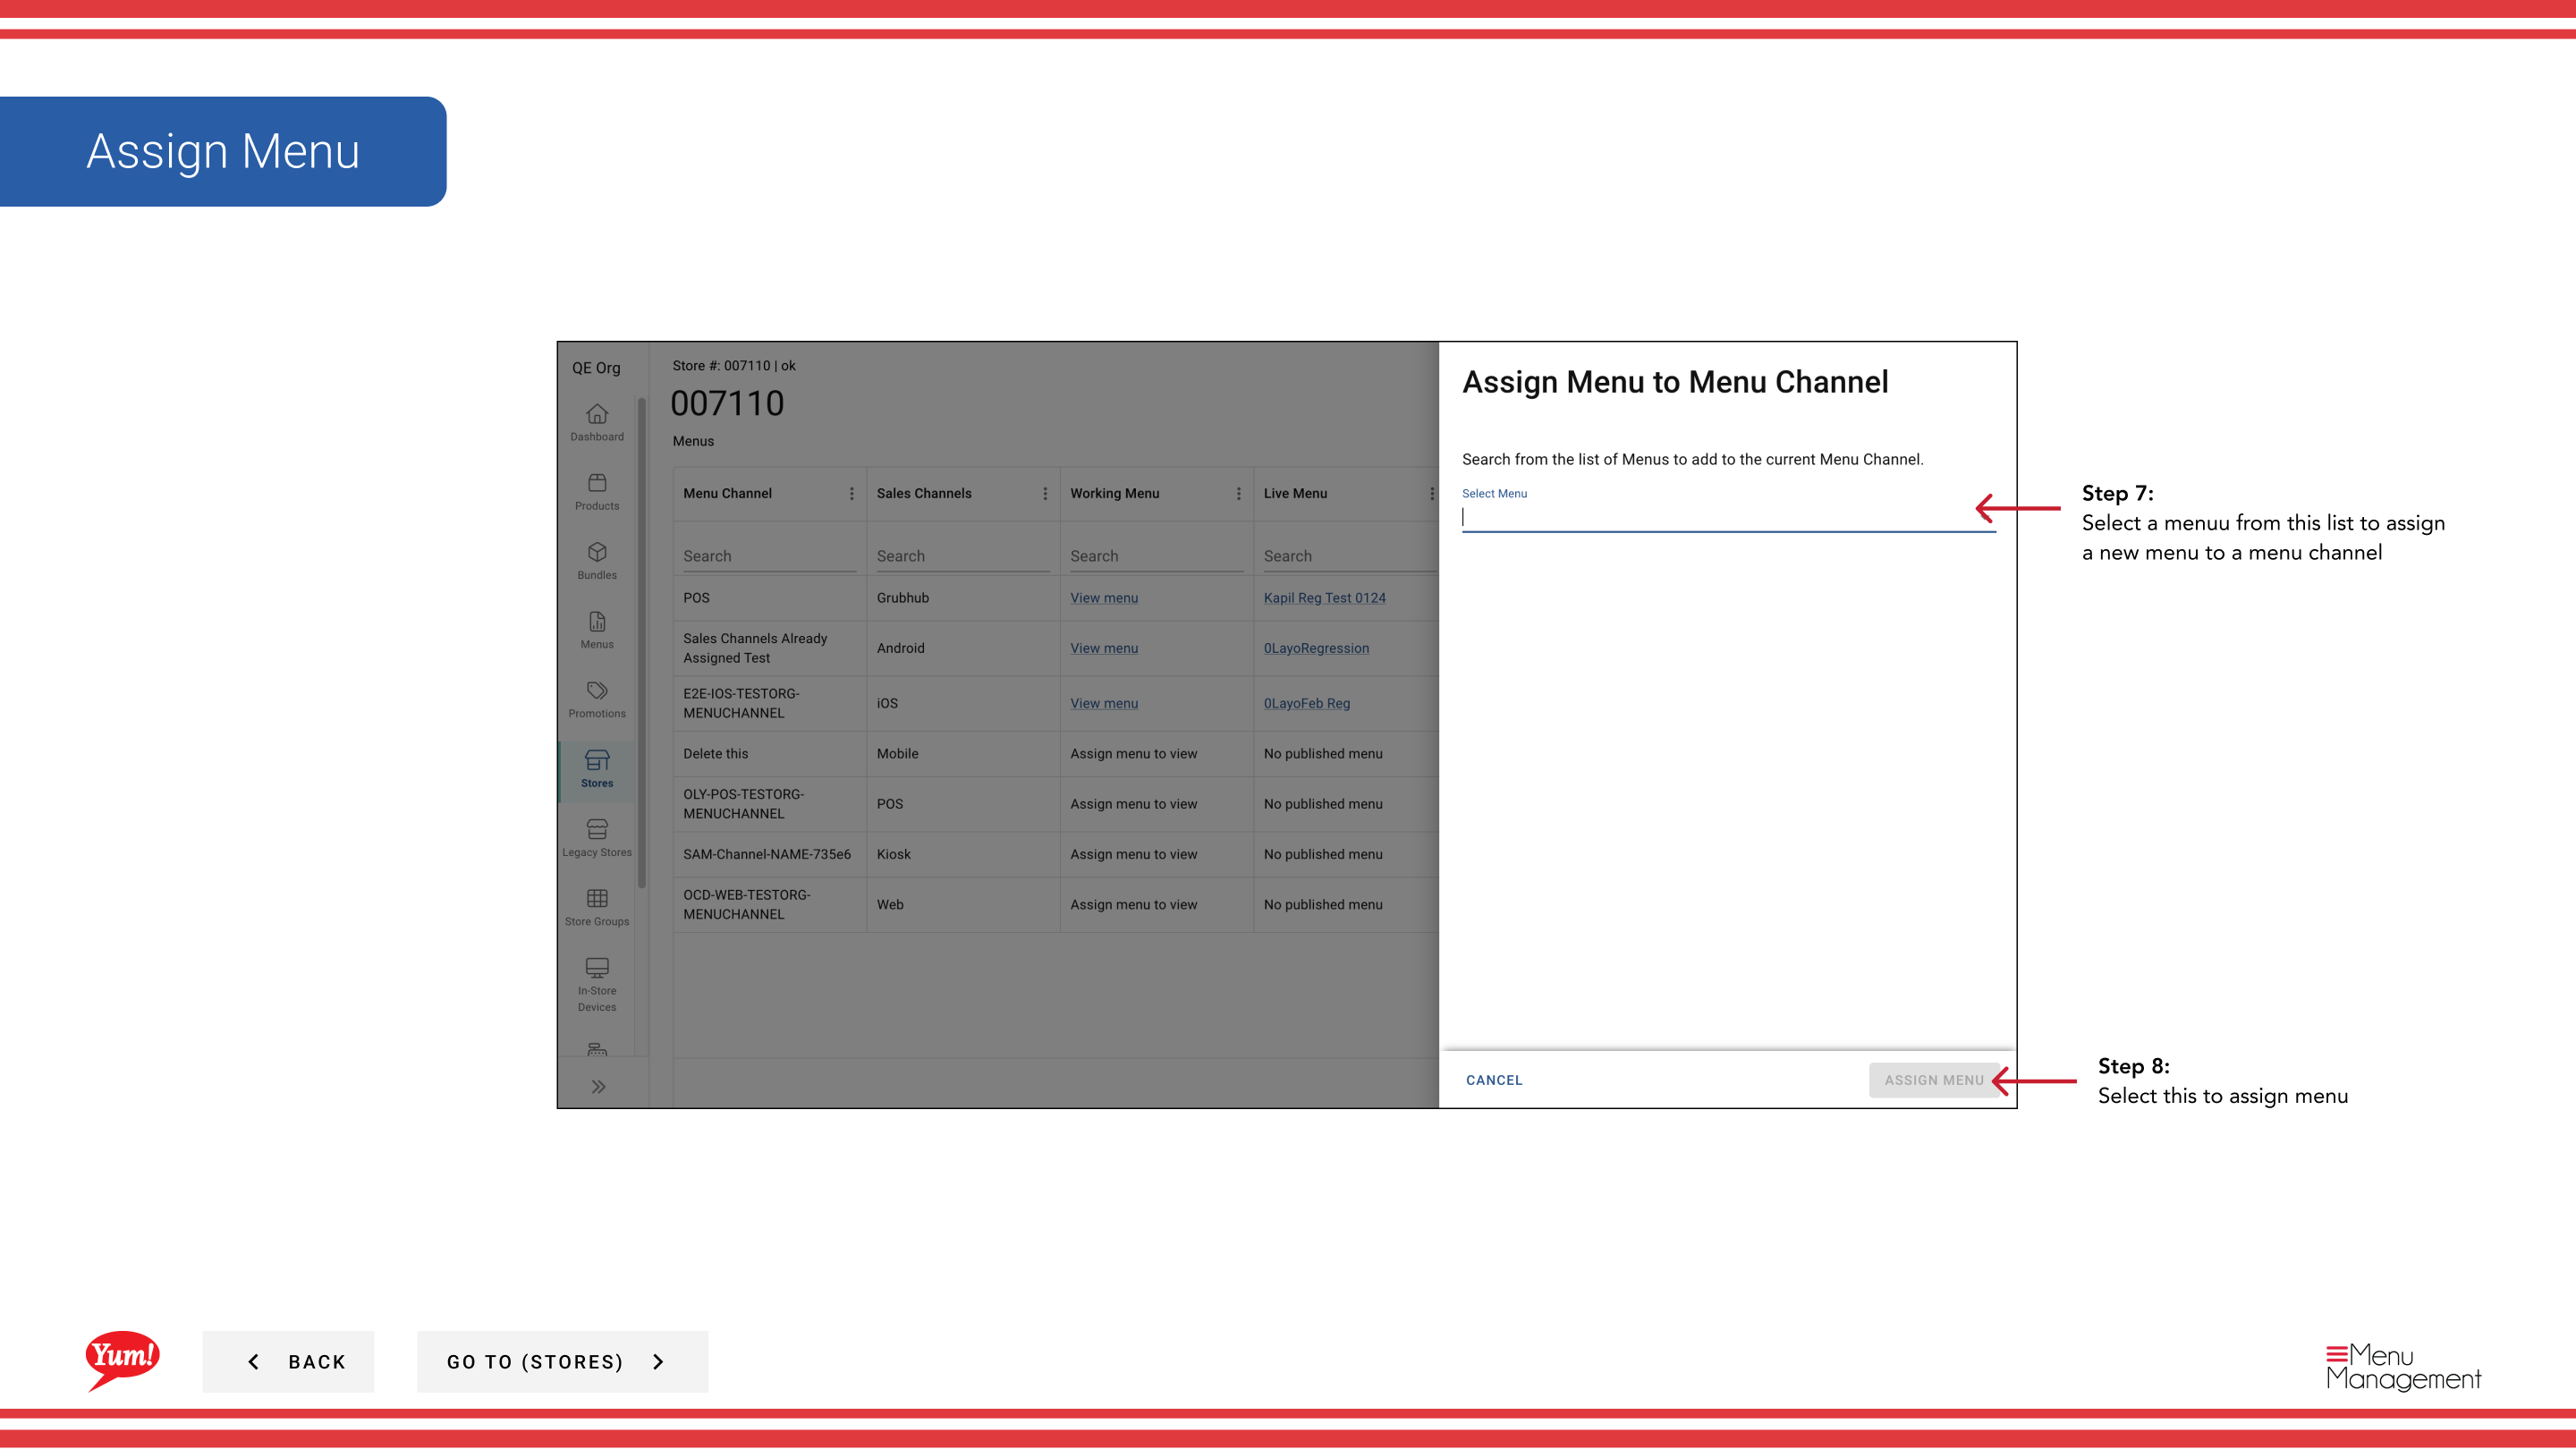
Only published menus are available for assignment. If the menu you need is not in the list, publish it first using Publish a Menu.
Each store can have different menus assigned to different channels. For example, your Digital channel might use one menu while your In-Store Kiosk uses another.
Related guides
- View a Store's Menu — See which menus are assigned to a store
- Publish a Menu — Make a menu live after assignment
Part of the Admin Portal Guide · Section: Stores