Item Snooze
What this guide covers
Temporarily removes a specific item from a store’s menu for a defined period and reason (e.g., stock outage or equipment failure), allowing it to automatically return when the snooze period ends.
Steps
Step 1: Navigate to the Stores section using the left-hand navigation menu.
Step 2: Search for the store by Name, Store Number, or Franchise Code using the search box.
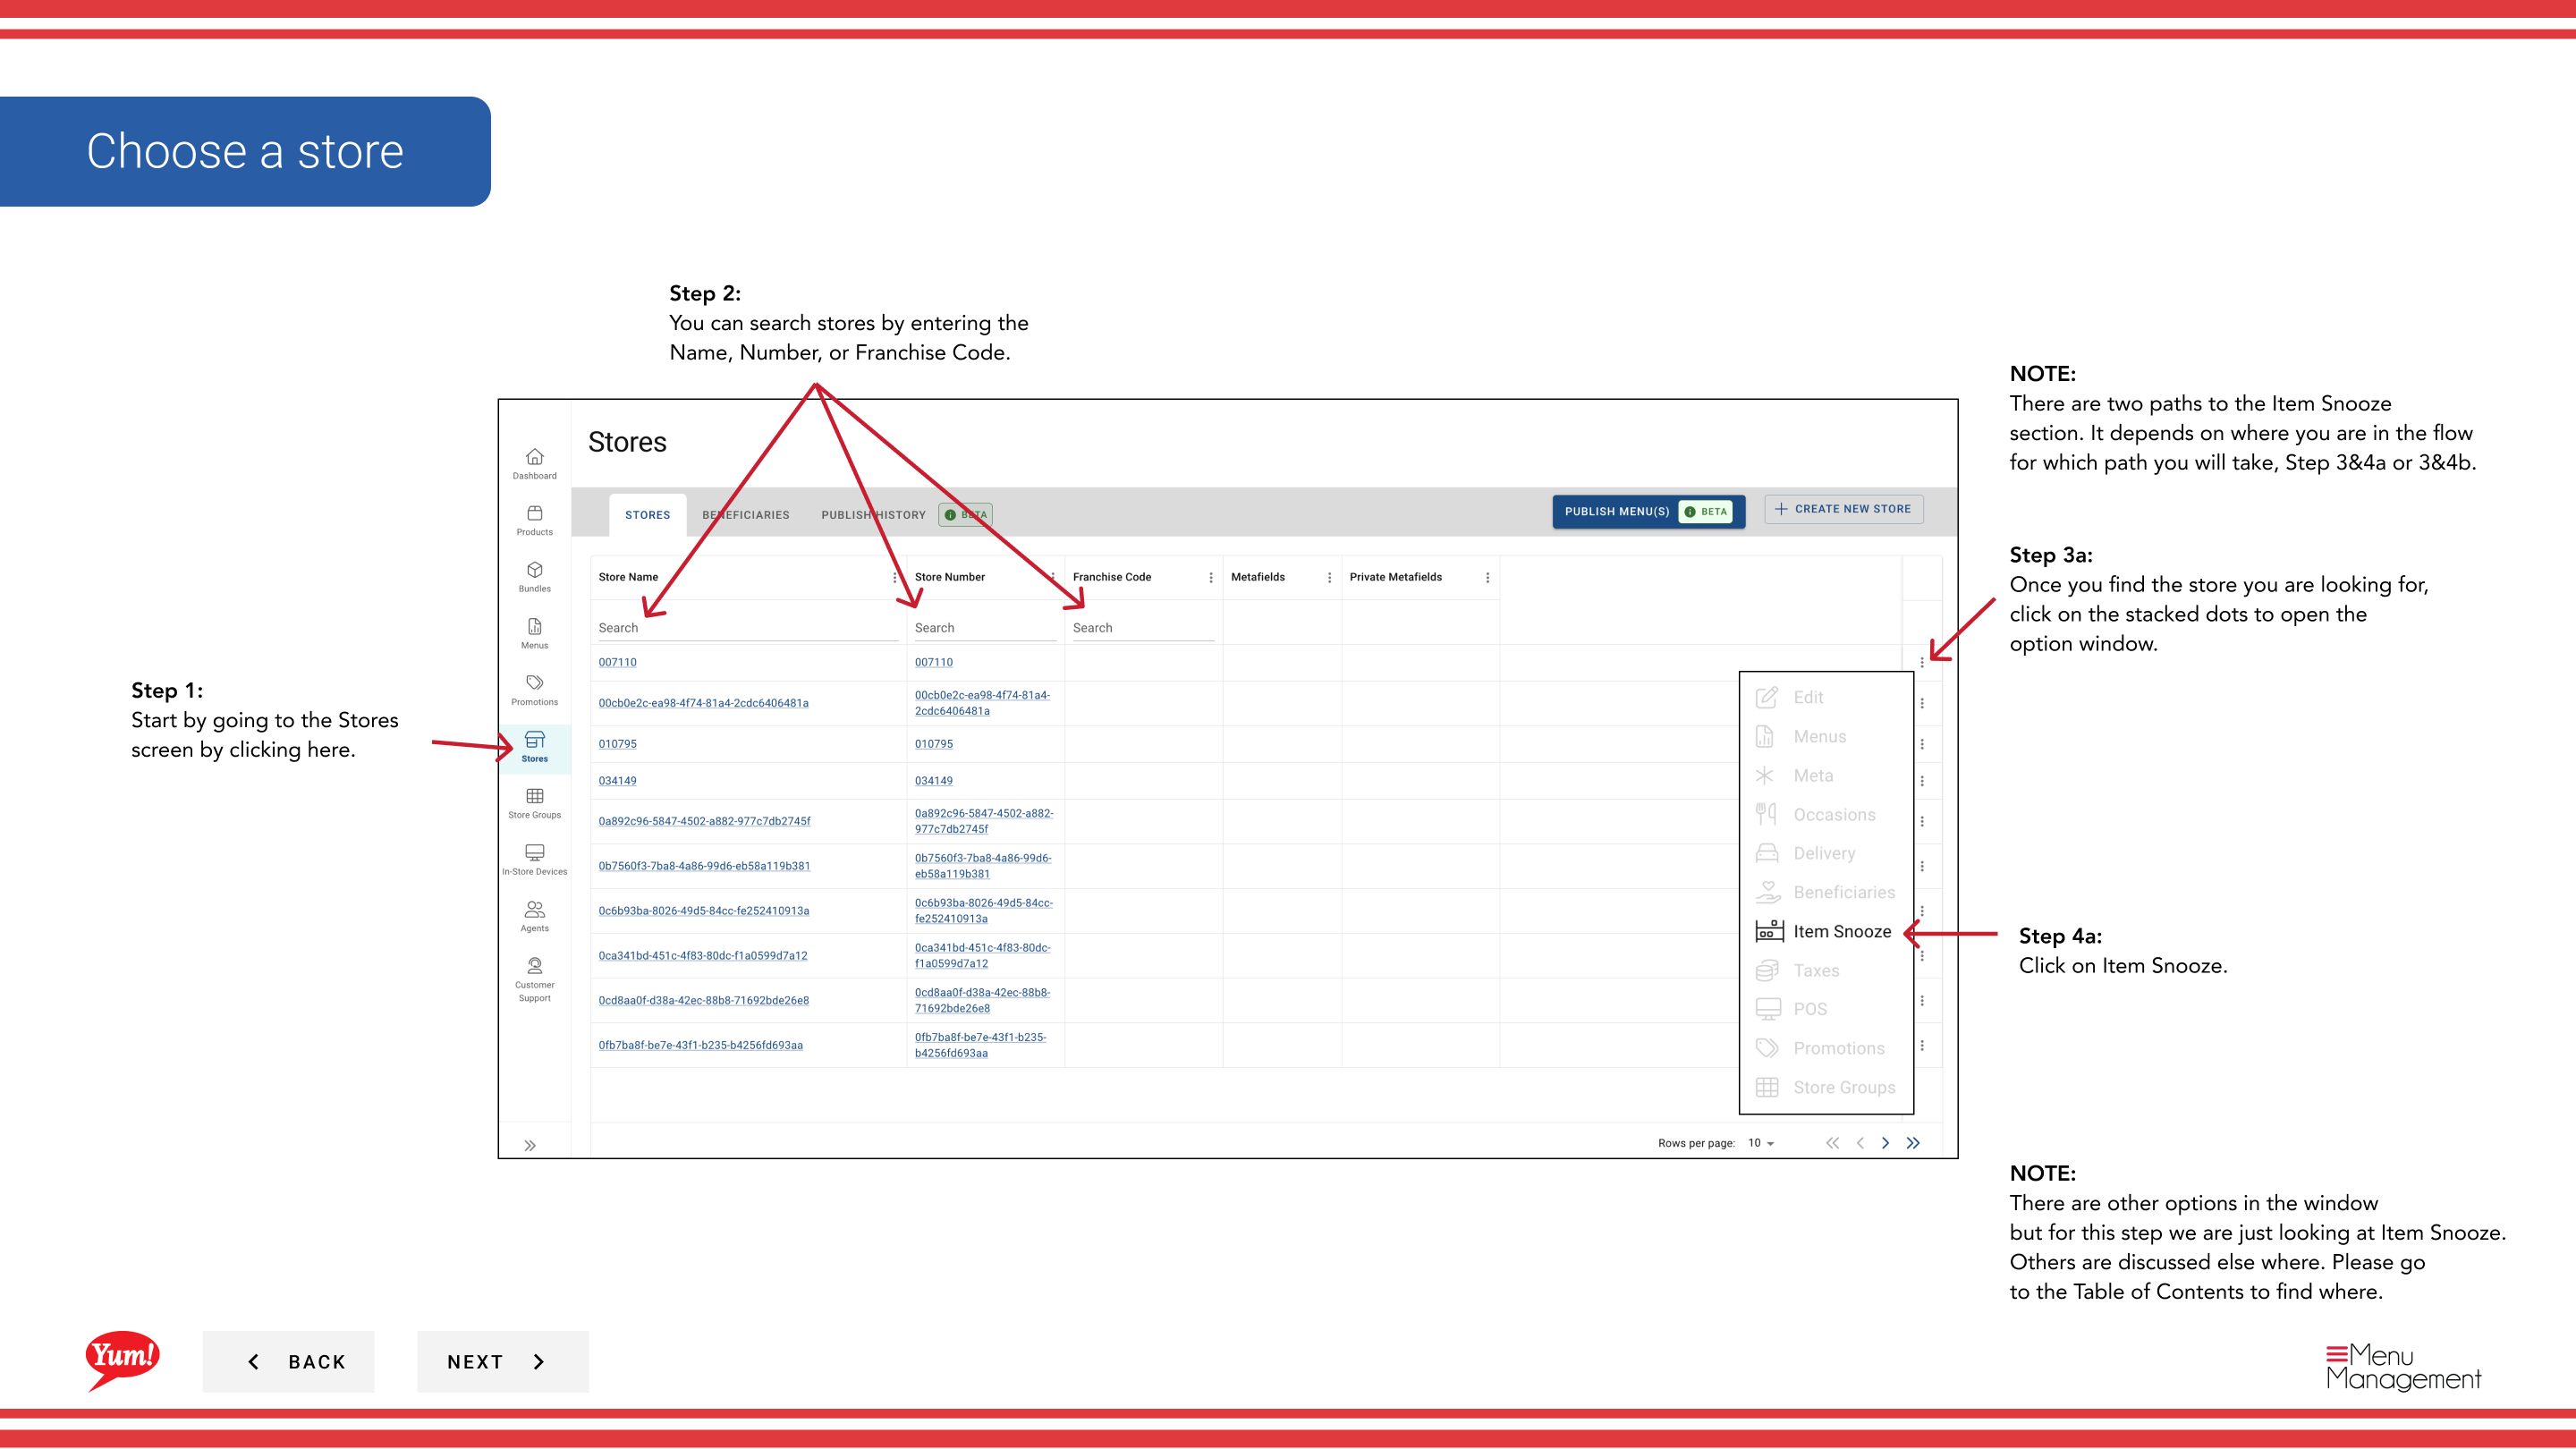
Step 3: Once you find the store, click the three-dot menu (•••) icon to open the options menu.
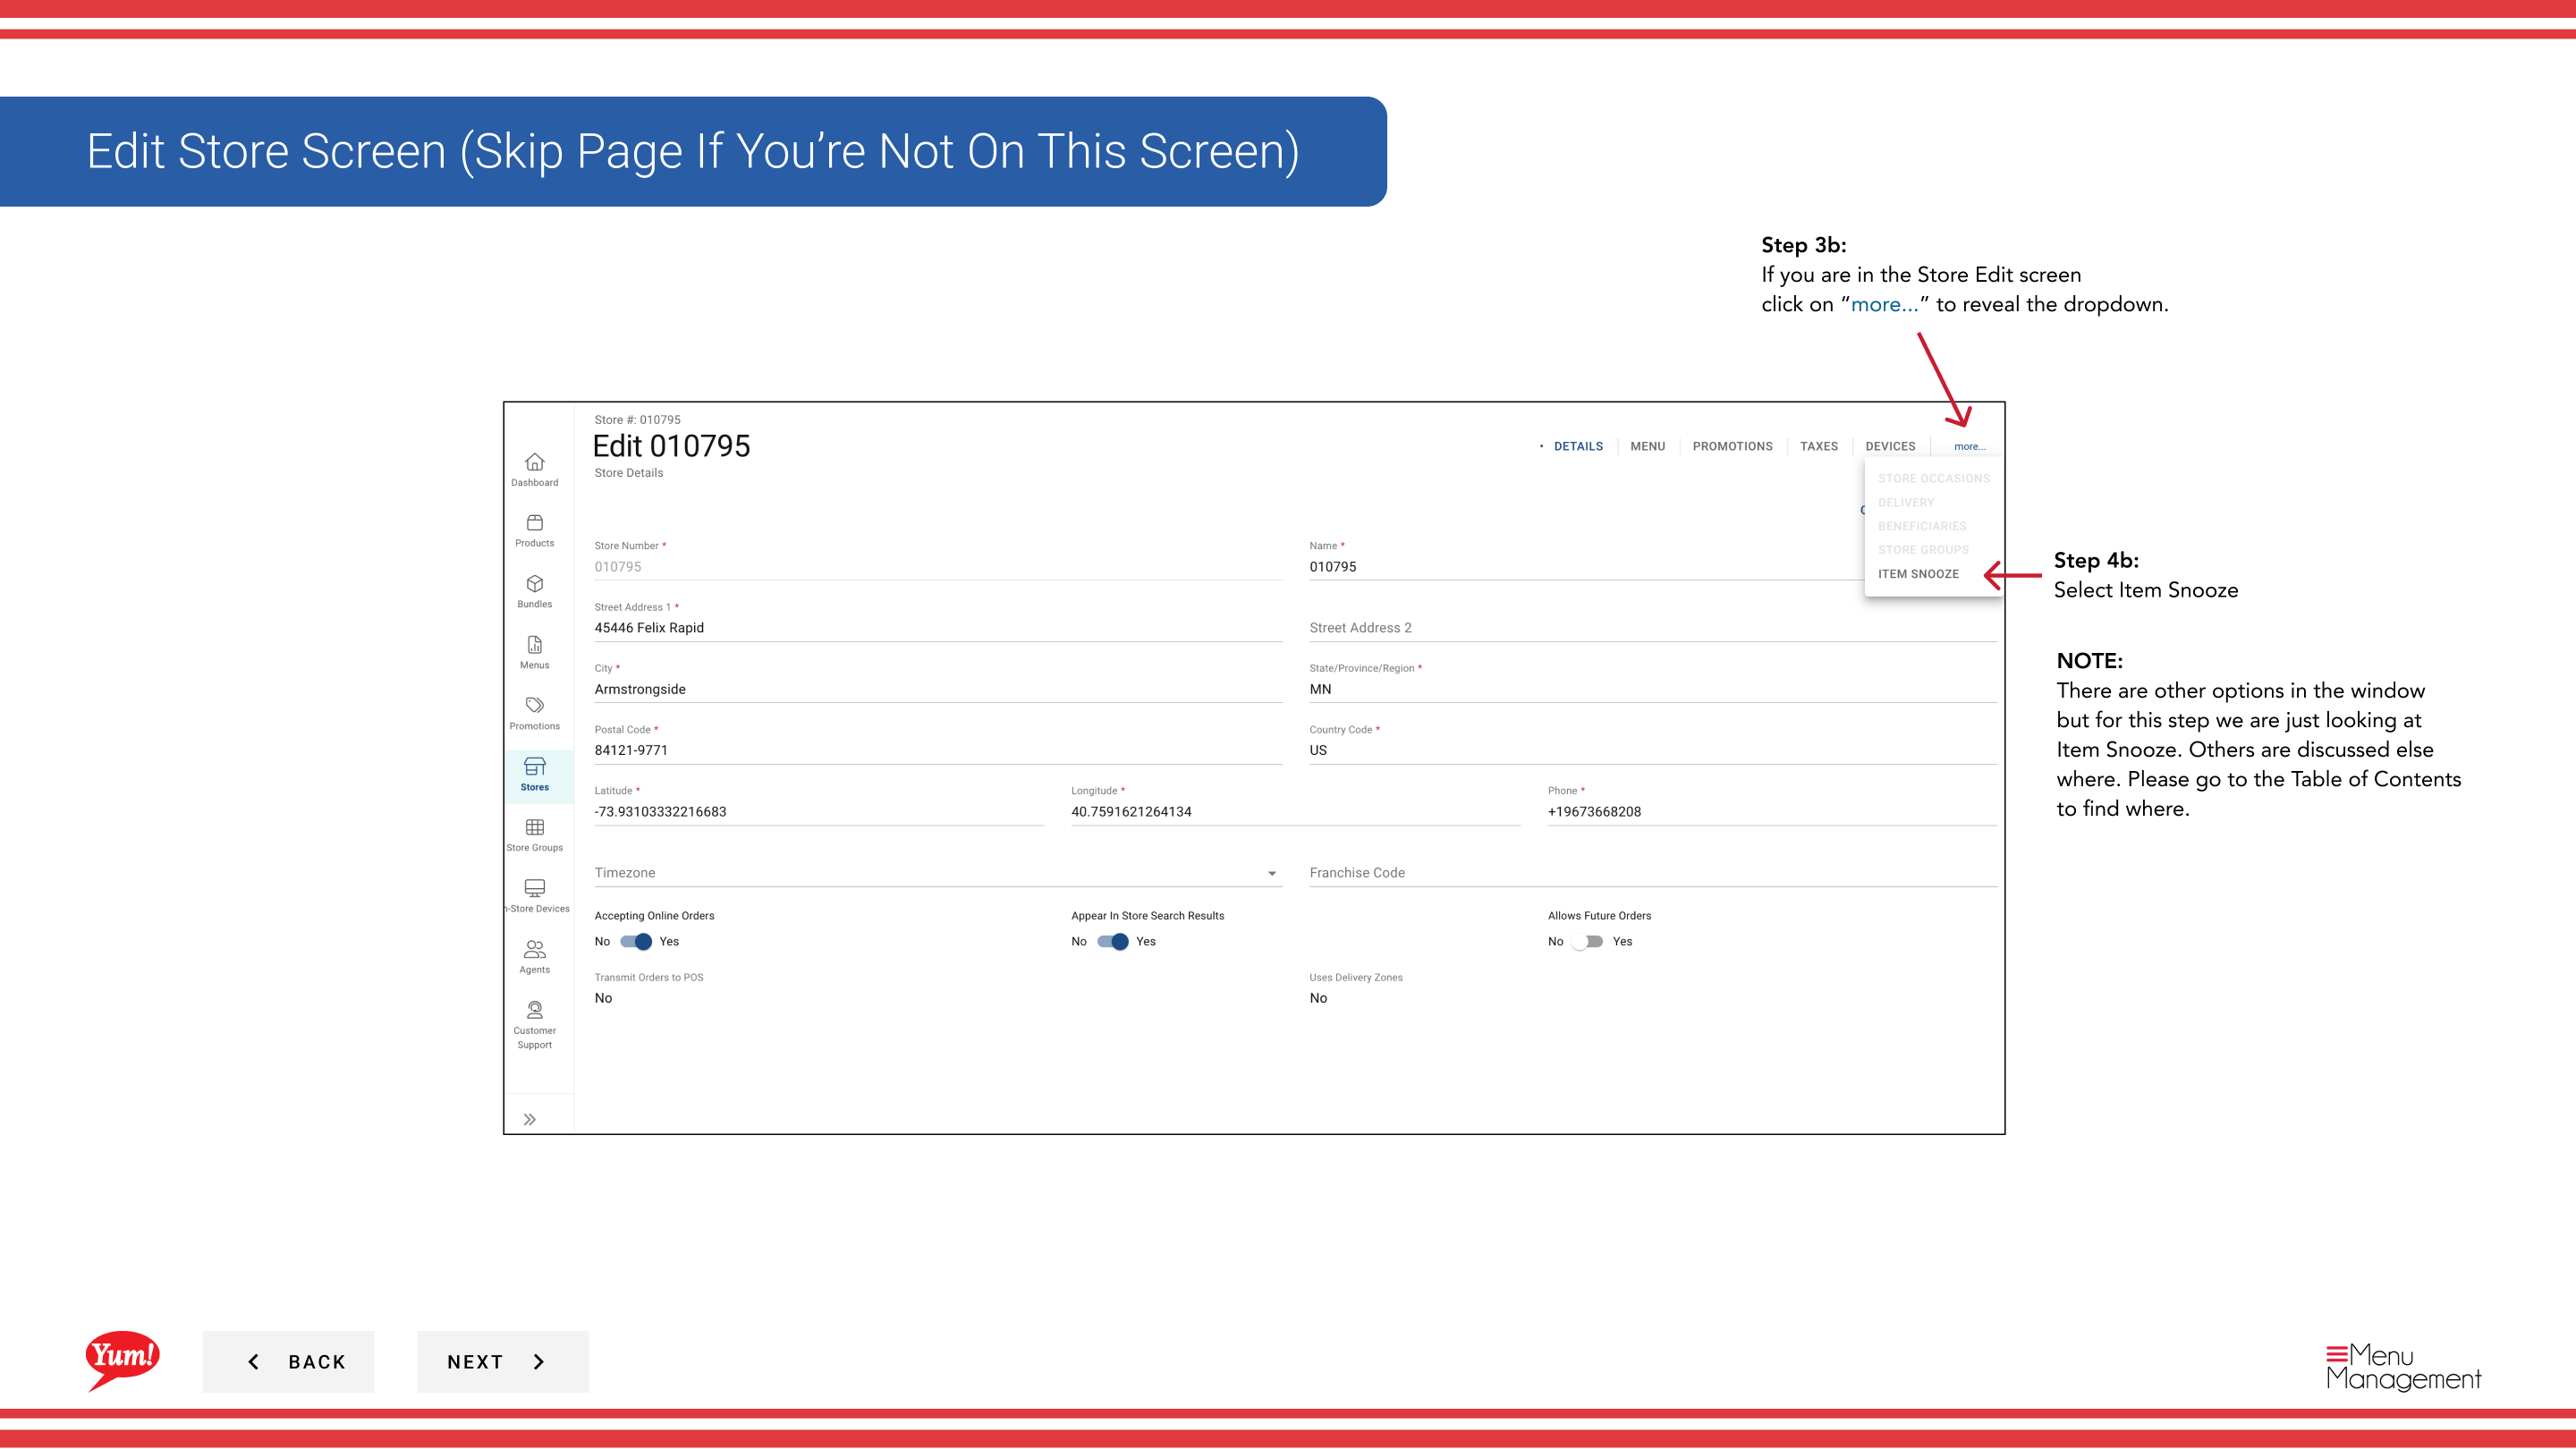
Step 4: Click Item Snooze from the dropdown menu. If you don’t see this option immediately, click the more button (⋯) to reveal additional options.
Step 5: Click the + Add Item button to snooze a new item.
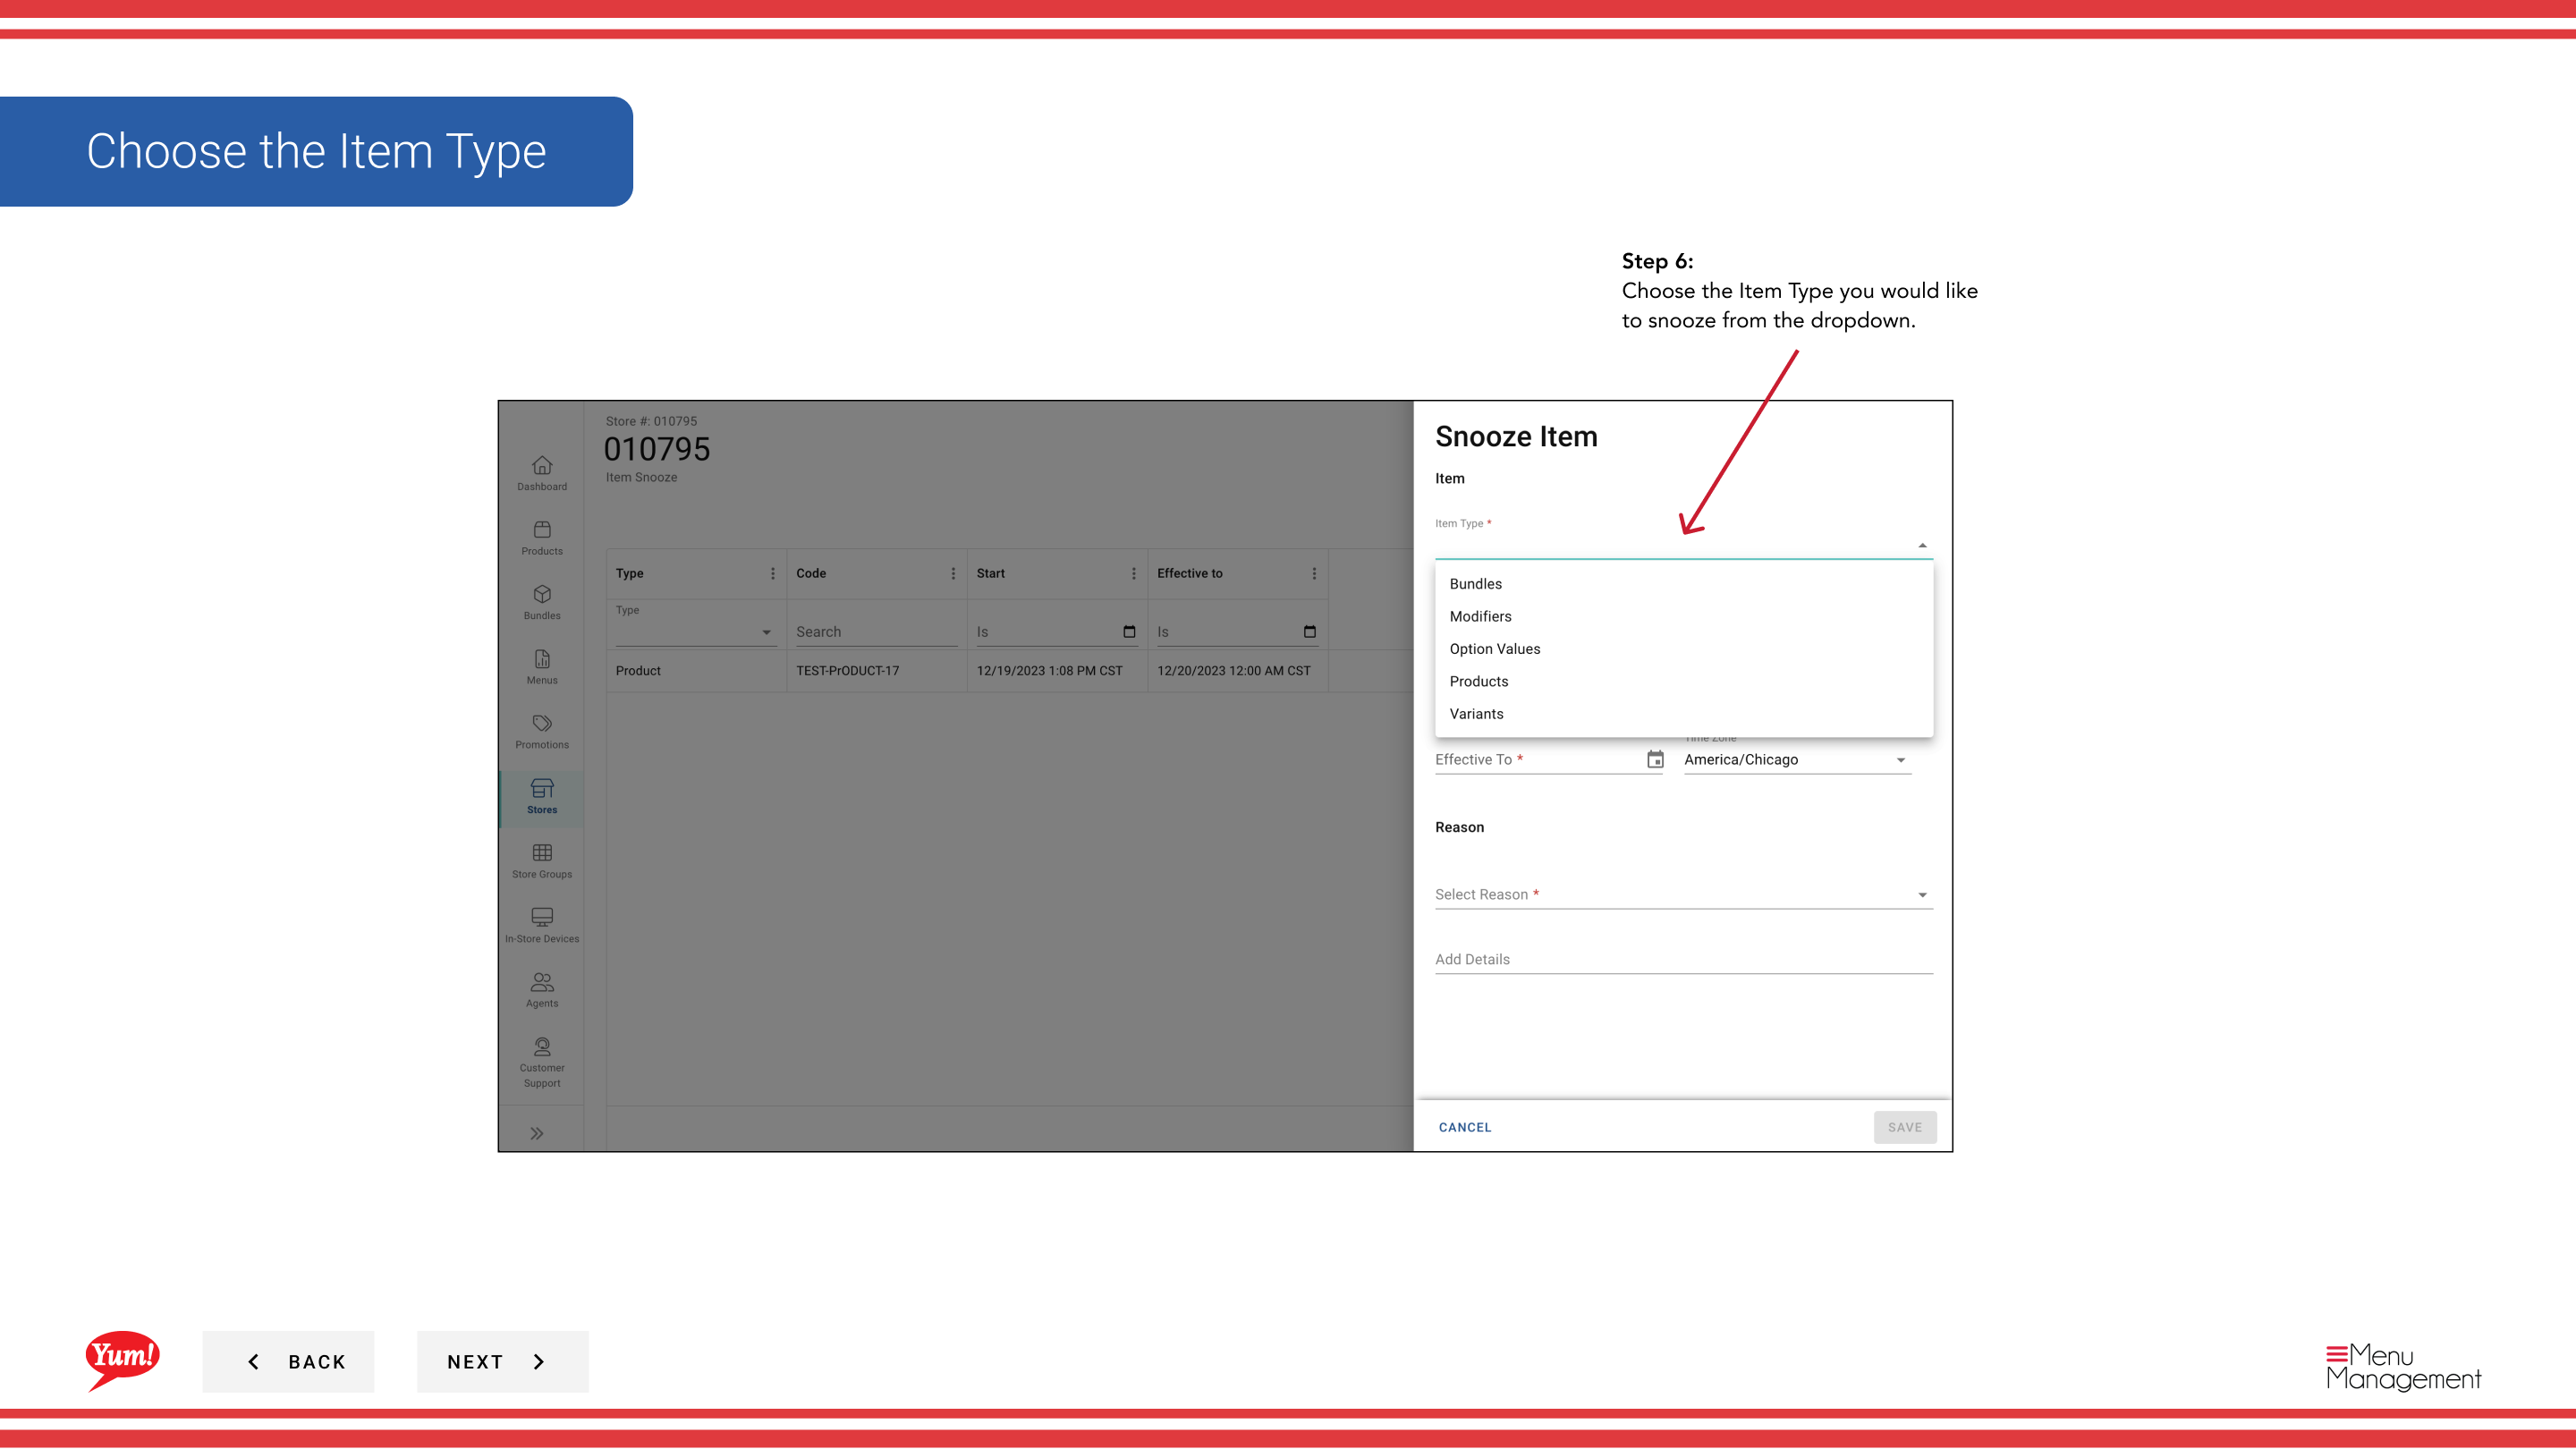
Step 6: Fill in the item snooze form using the field descriptions below. Fields marked with * are required.
| Field | What to enter | Notes |
|---|---|---|
| Item Type * | Select from the dropdown | Usually “Product” or “Bundle” |
| Item * | Search and select the item to snooze | Type at least 3 characters to search. e.g., “Crispy Chicken Sandwich” |
| End Date * | Date and time when the item returns to the menu | The snooze starts immediately when saved; it cannot be scheduled for a future start |
| Reason * | Select from the dropdown | e.g., “Out of Stock”, “Equipment Failure”, “Temporary Removal” |
| Add Details | Optional free-text explanation | e.g., “Supplier delivery delayed until Friday” |
Step 7: Once all required fields are completed, click Save to activate the snooze.
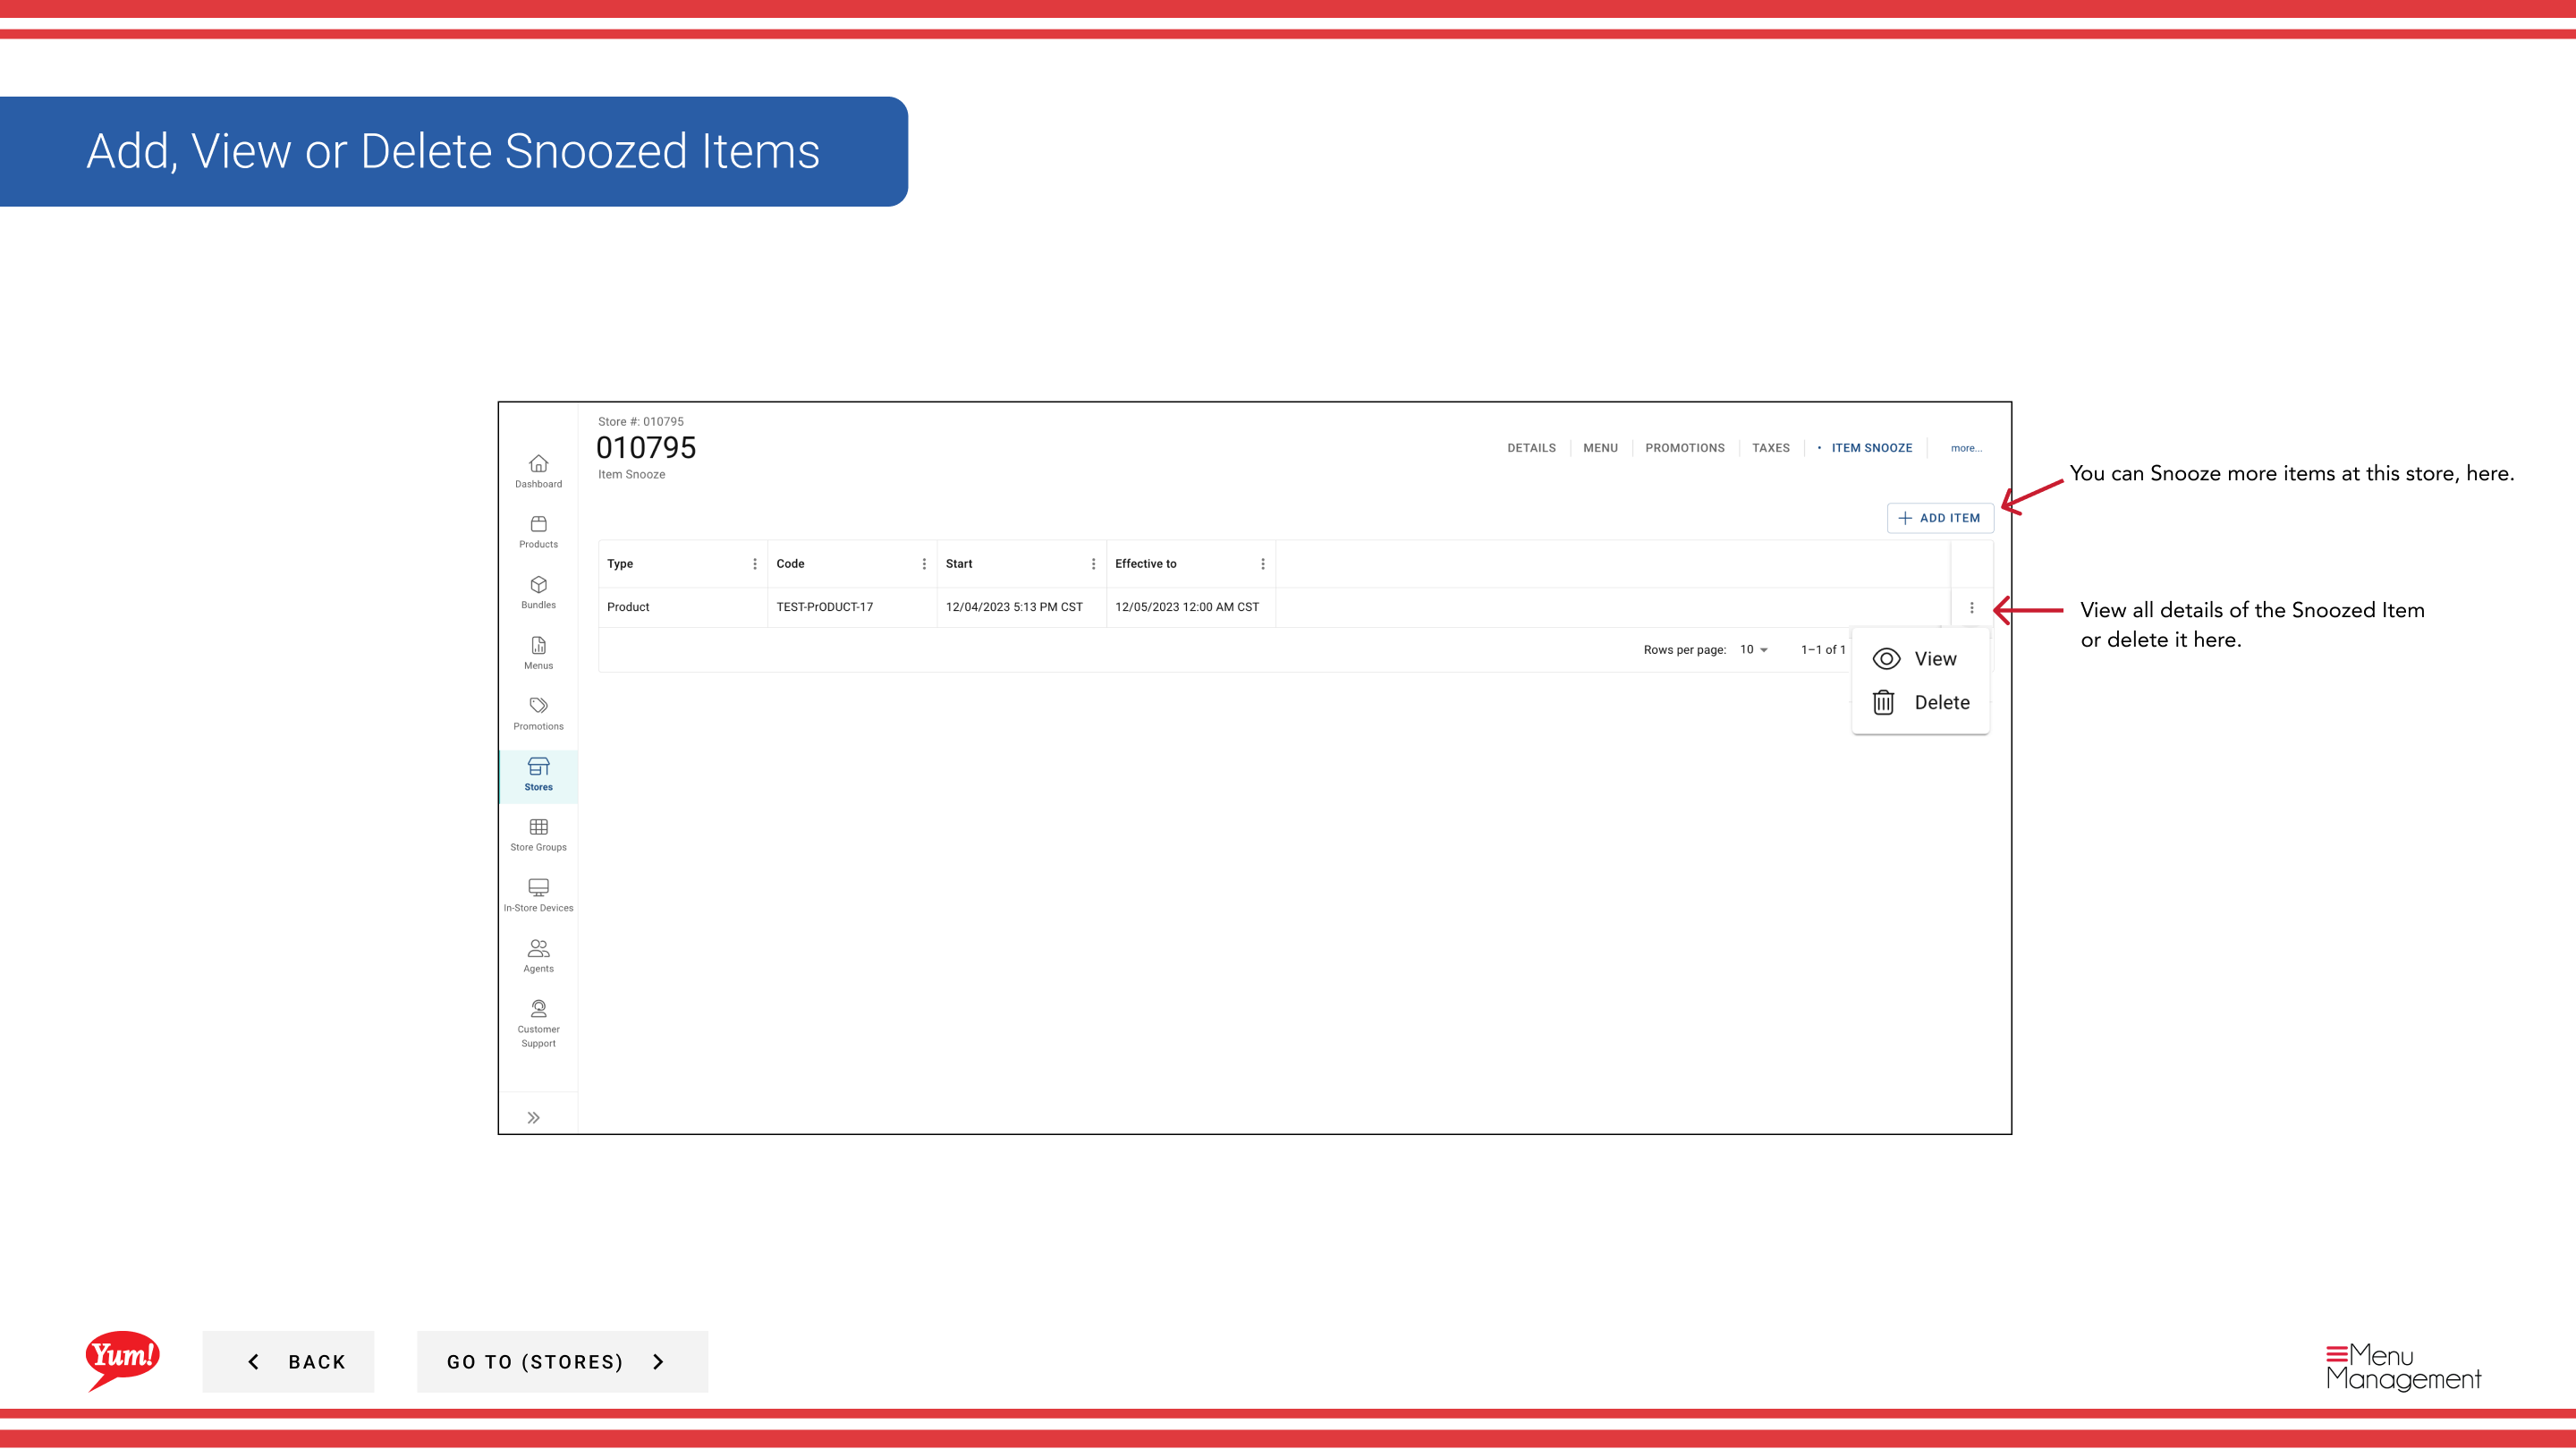
- The snooze takes effect immediately when you click Save — it cannot be scheduled to start later.
- If your store’s Time Zone is not configured, you must set it before creating snoozed items.
Use the Add Details field to document why the item was snoozed. This helps other managers understand the reason when viewing snoozed items later.
Related guides
- Edit Store Details — Configure your store’s Time Zone
- View a Store’s Menu — See all items and their snooze status
Part of the Admin Portal Guide · Section: Stores