View/Unassign a Store's Store Groups
What this guide covers
Displays the store groups a store belongs to and allows operators to unassign the store from a group when needed.
Steps
Step 1: Navigate to the Stores section using the left-hand navigation menu.
Step 2: Search for the store by Name, Store Number, or Franchise Code using the search box.
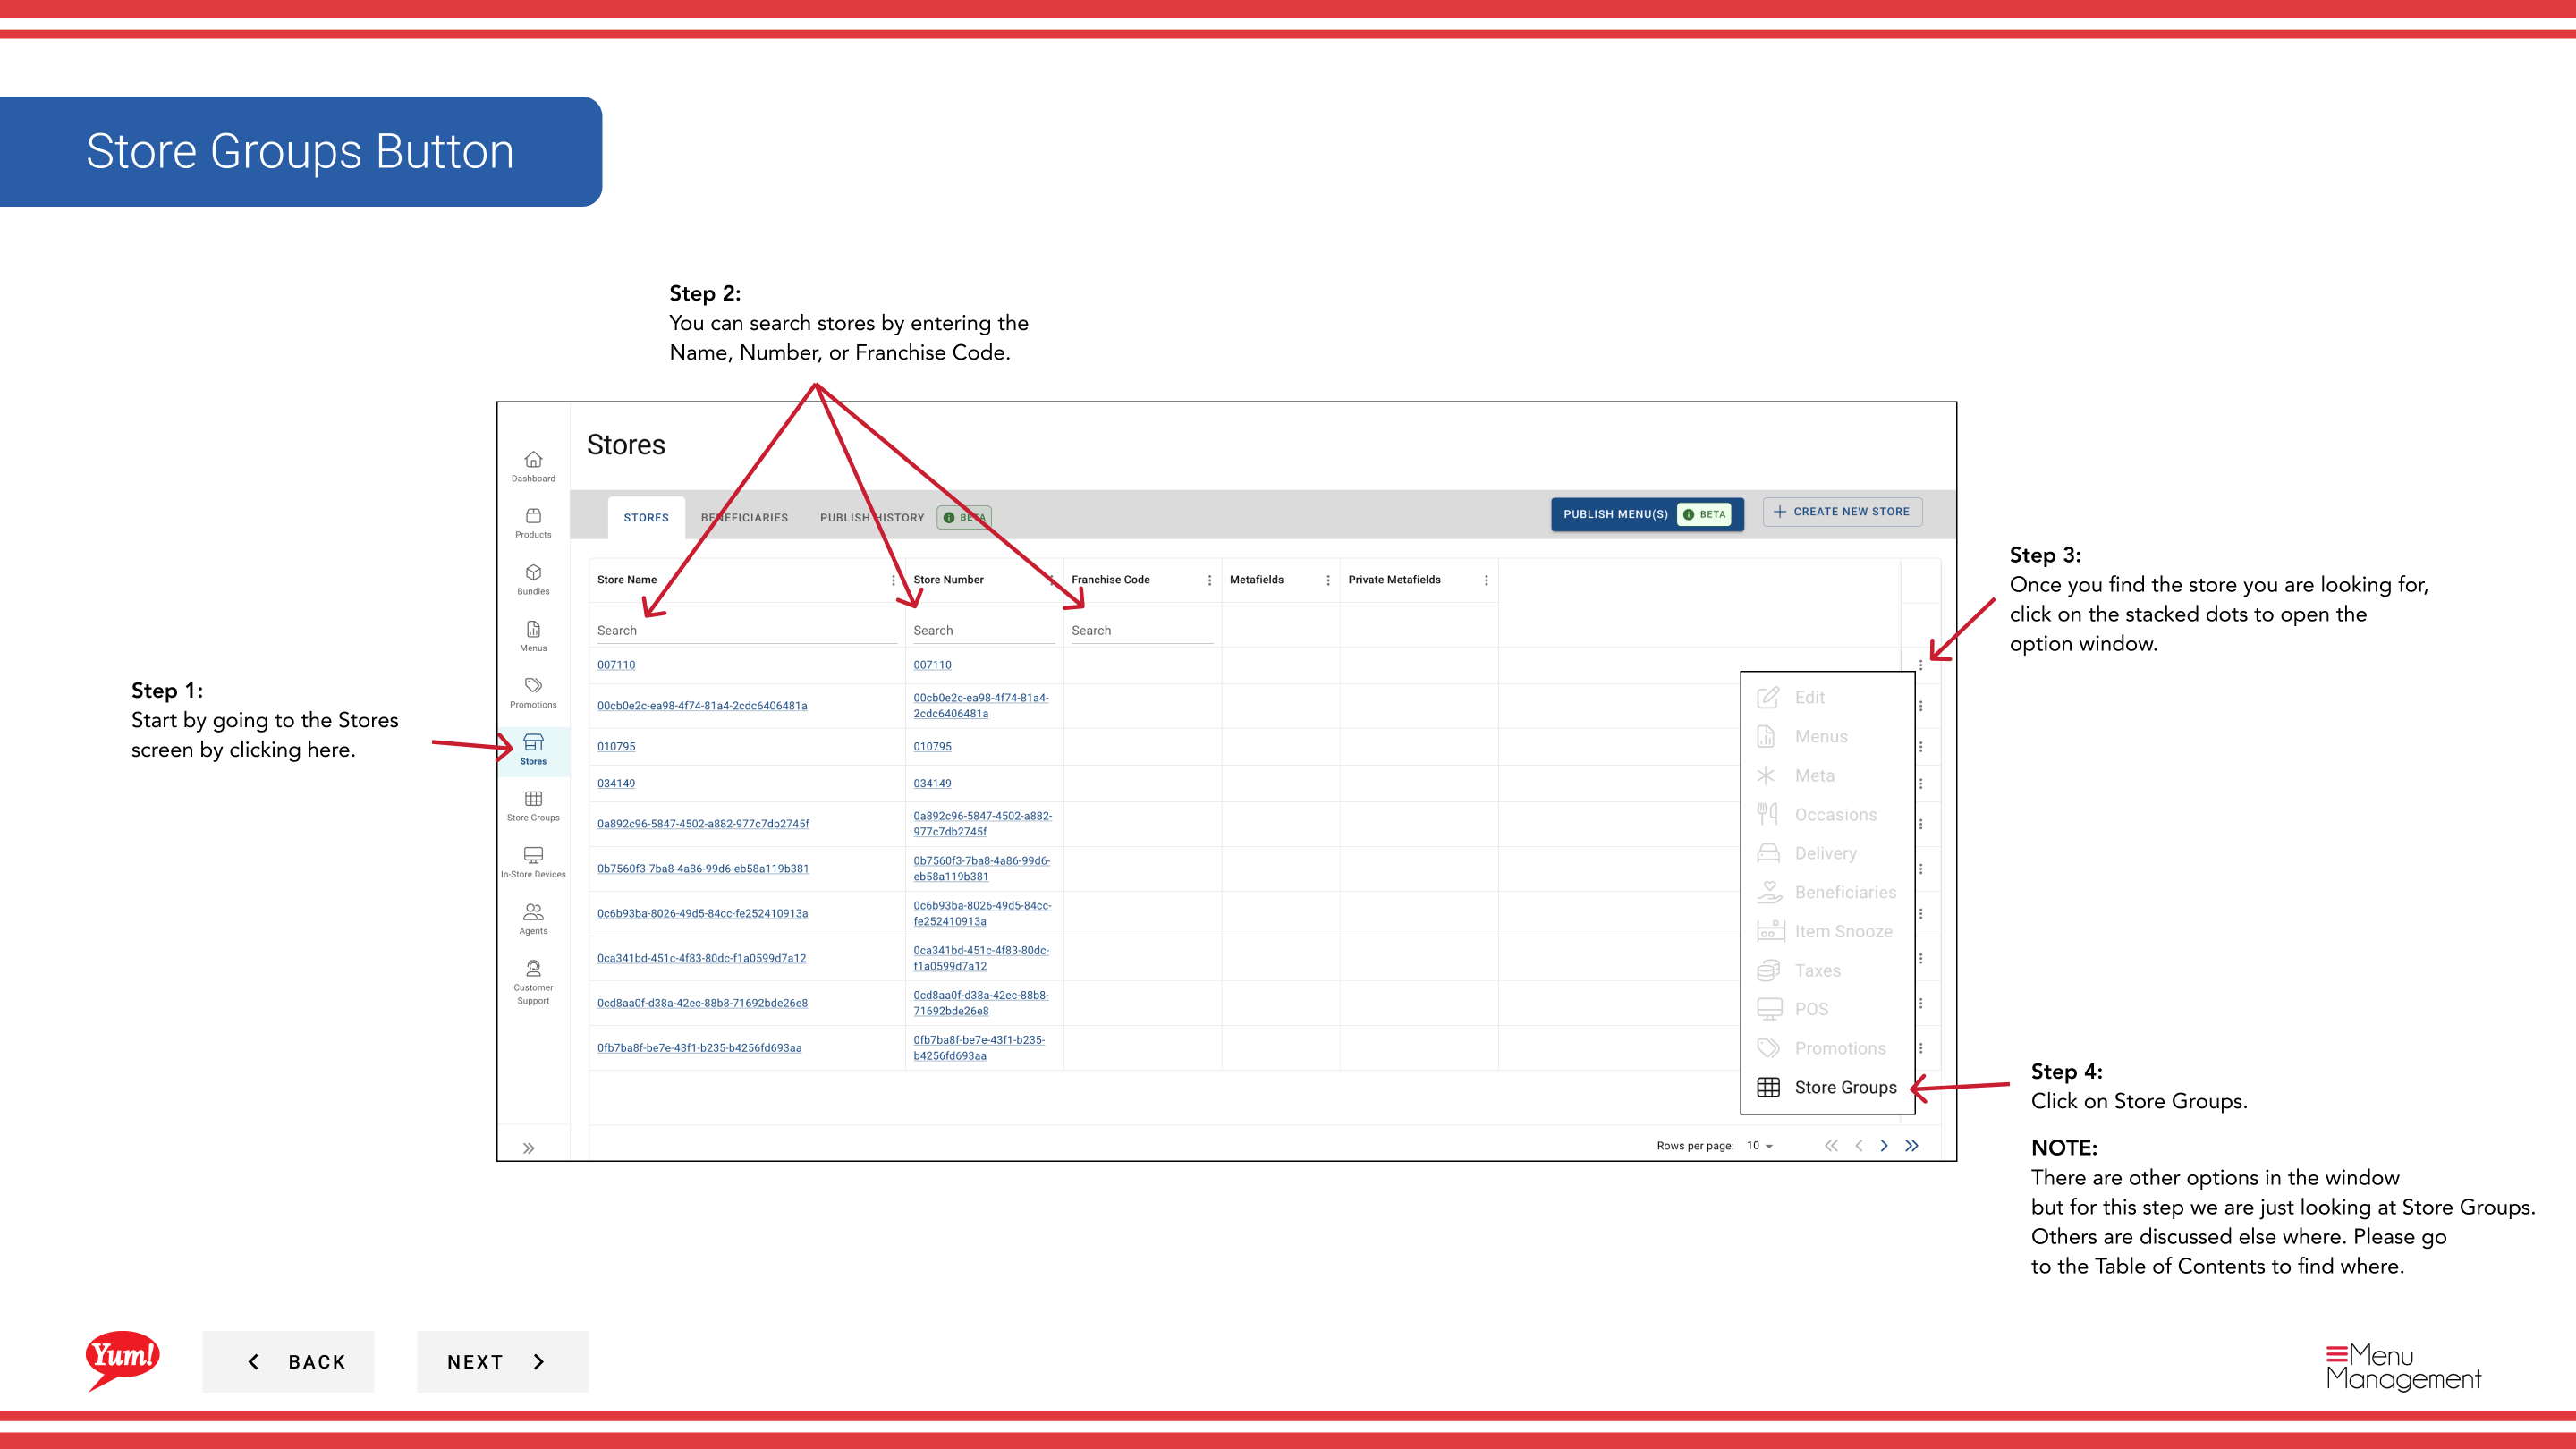
Step 3: Once you find the store, click the three-dot menu (•••) icon to open the options menu.
Step 4: Click Store Groups from the dropdown menu. This displays all store groups the selected store is assigned to.
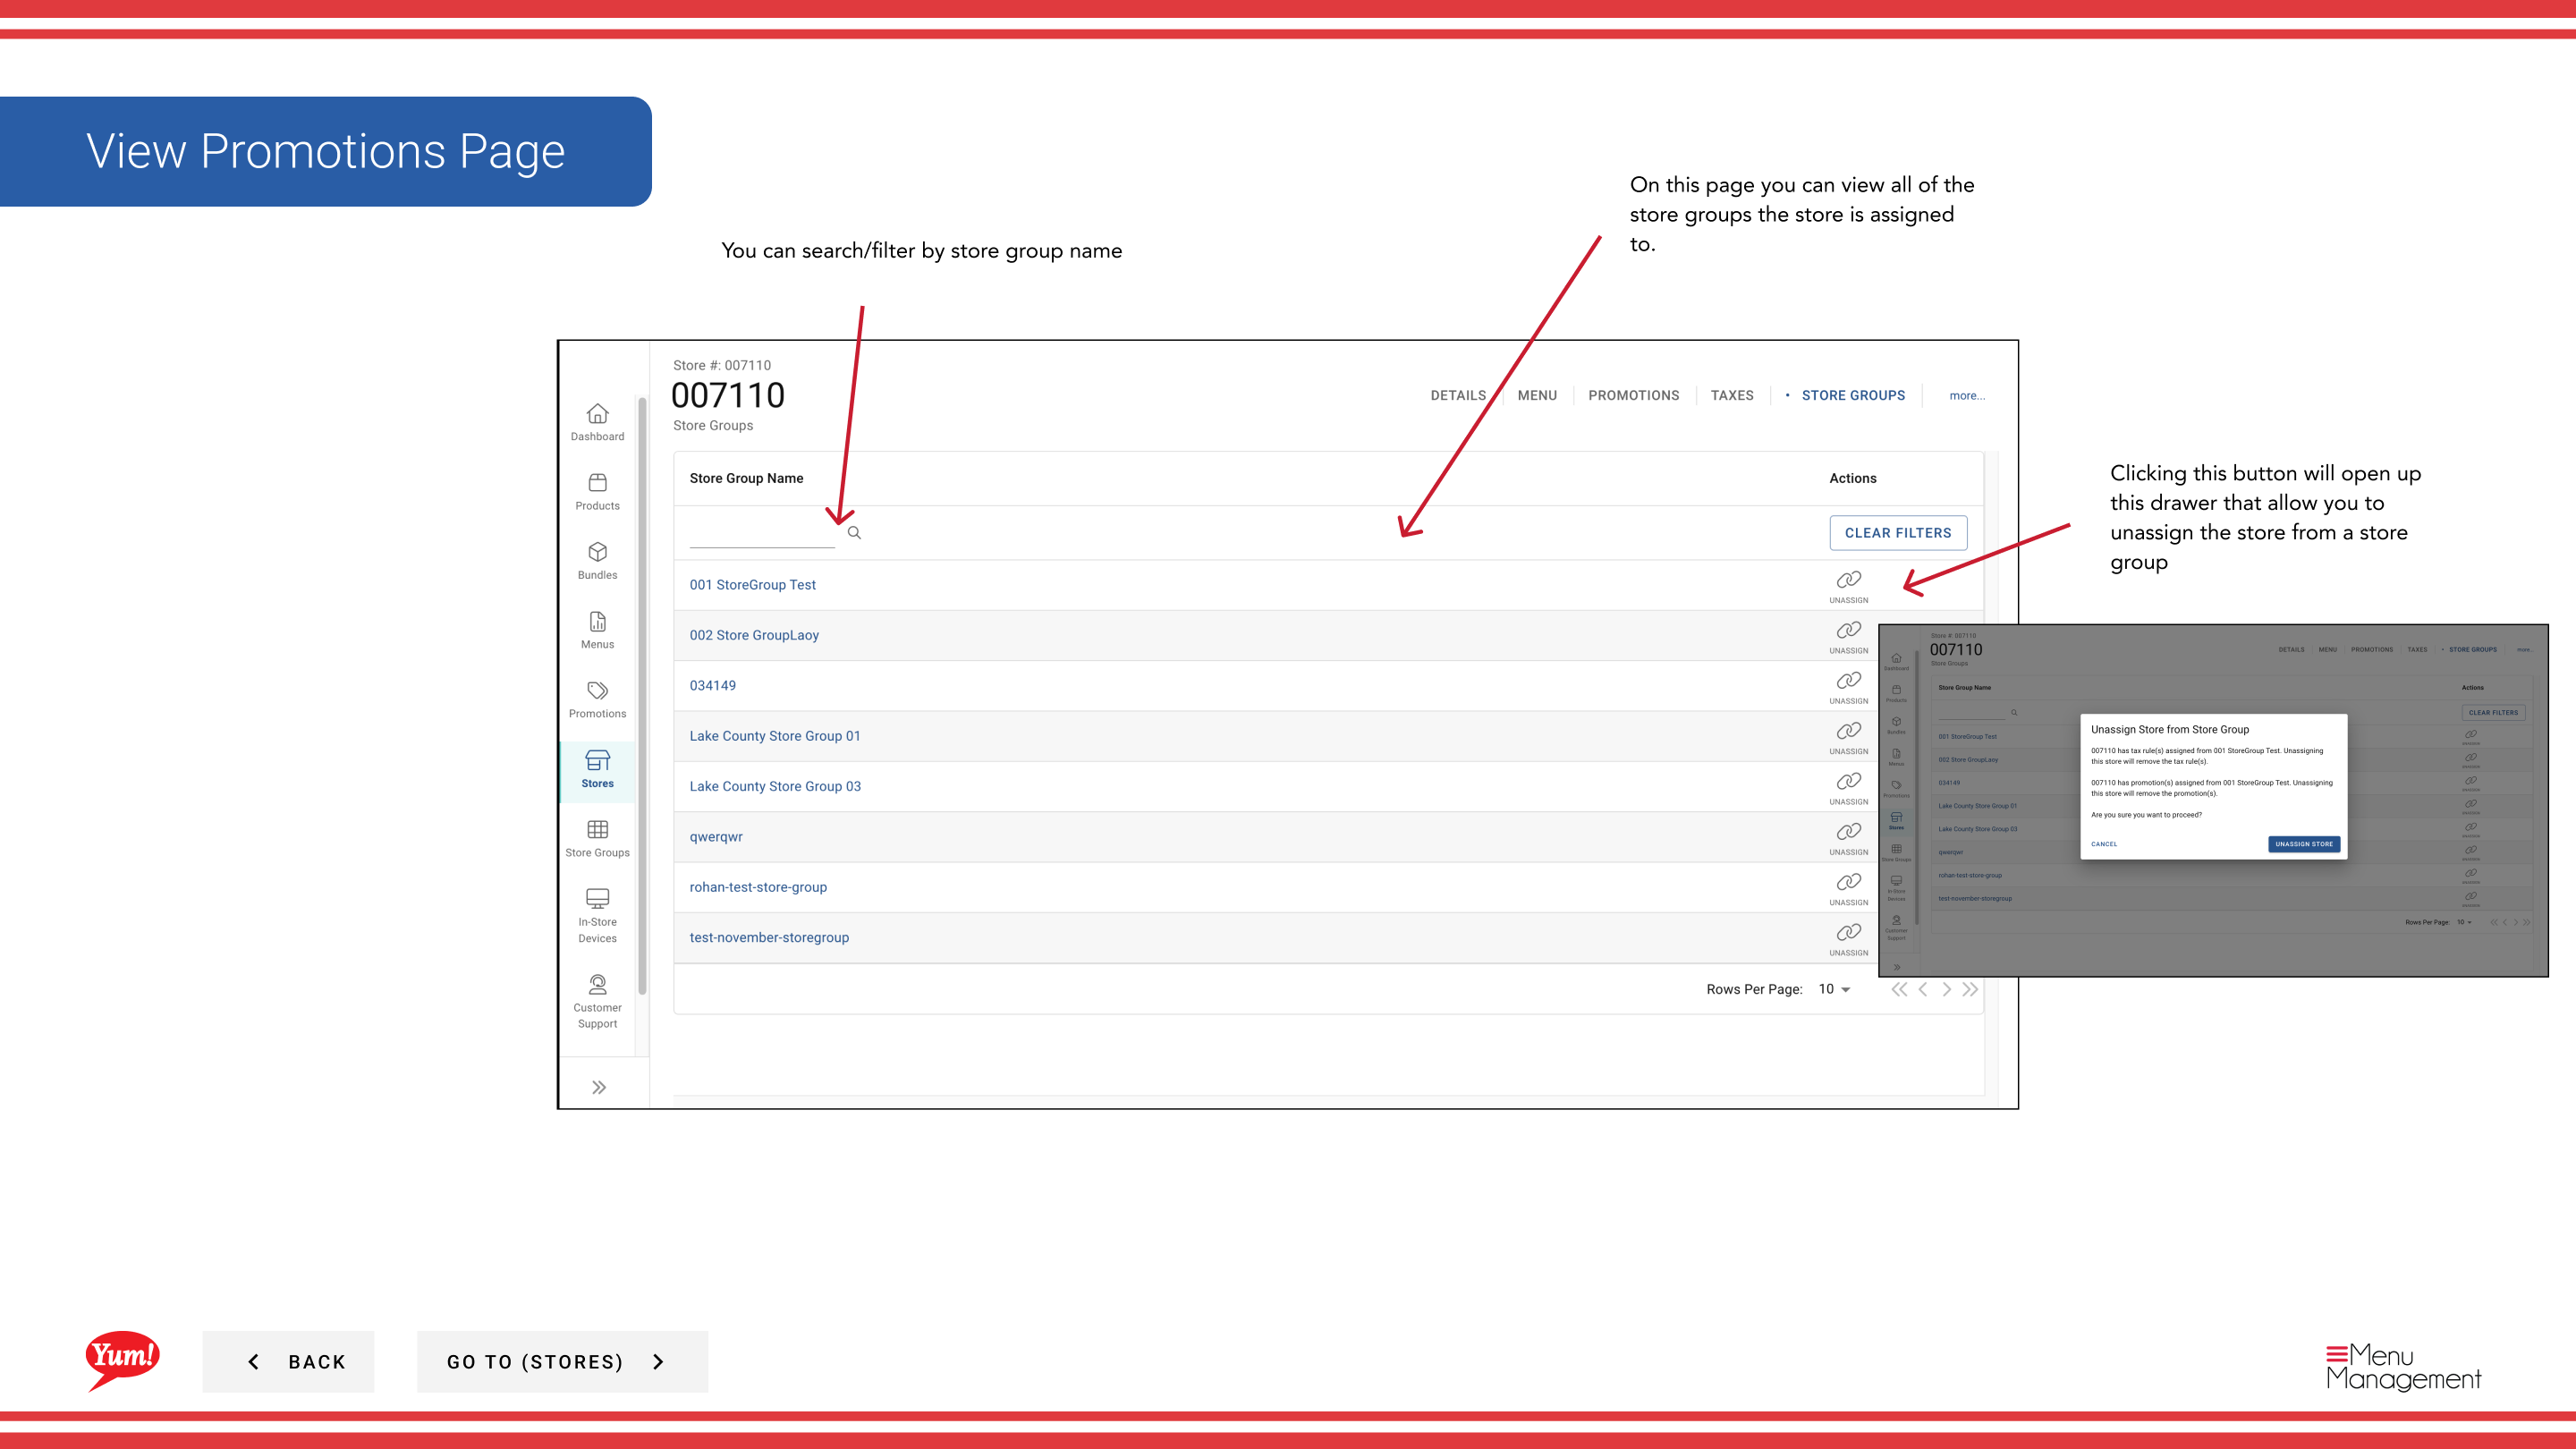
Step 5: Review the store groups table, which shows:
- Store Group Name — Name of the store group this store belongs to
- Status — Assignment status (Active, etc.)
Step 6: Use the search/filter box to narrow the list by store group name if the list is long.
To Unassign a Store from a Group:
Step 7: Click the three-dot menu (•••) icon on the store group row you want to remove.
Step 8: Click Unassign from the menu. This removes the store from the selected store group.
Step 9: Confirm the unassignment in the modal that appears by clicking Unassign again.
Unassigning a store from a group may affect tax rules, promotions, and menu configurations tied to that group. Verify with your regional manager before unassigning.
Store groups are used to organize stores by region, franchise, or operational category. Check which store groups should be associated with a store before making changes.
Related guides
- View Taxes — See tax rules by store group
Part of the Admin Portal Guide · Section: Stores