Edit Patch List
What this guide covers
Manages the ordered list of patches applied to a store's menu, allowing operators to add, remove, or reorder patches that layer overrides on the base menu (e.g., pricing adjustments, item availability changes).
Steps
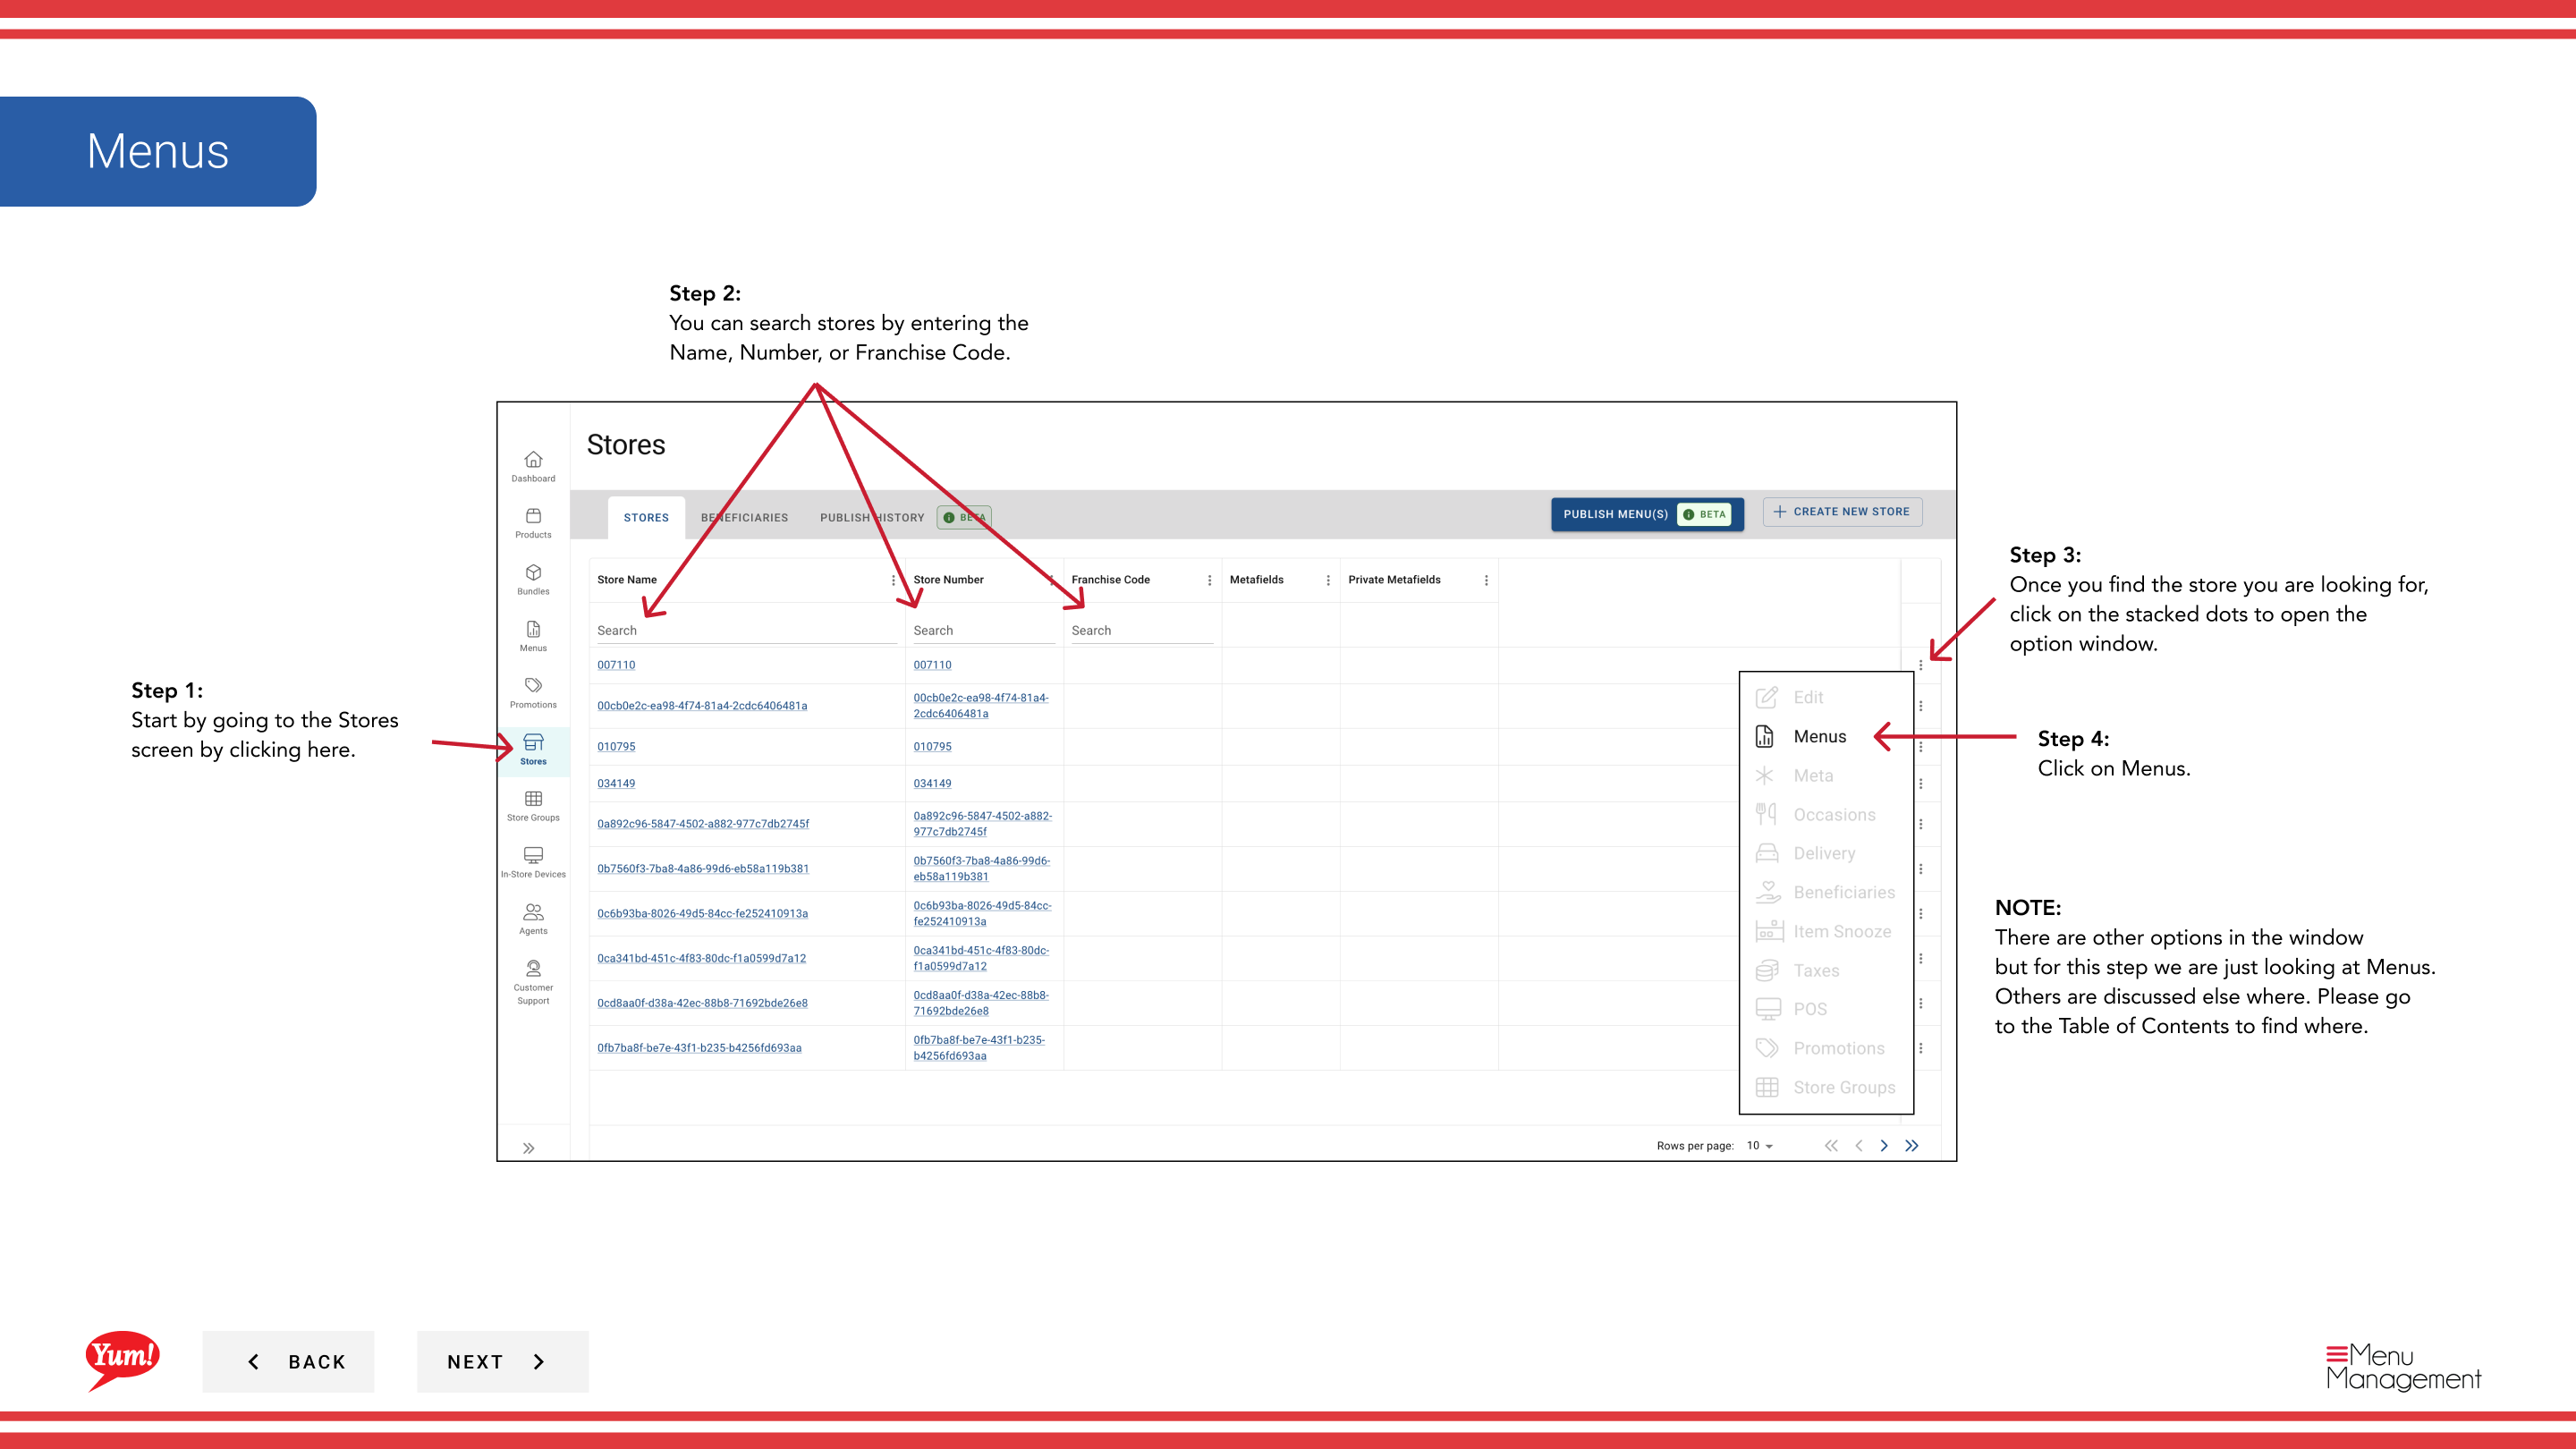
Step 1: Navigate to the Stores section using the left-hand navigation menu.
Step 2: Search for the store by Name, Store Number, or Franchise Code using the search box.
Step 3: Once you find the store, click the three-dot menu (•••) icon to open the options menu.
Step 4: Click Menus from the dropdown menu. This displays the menus assigned to this store.
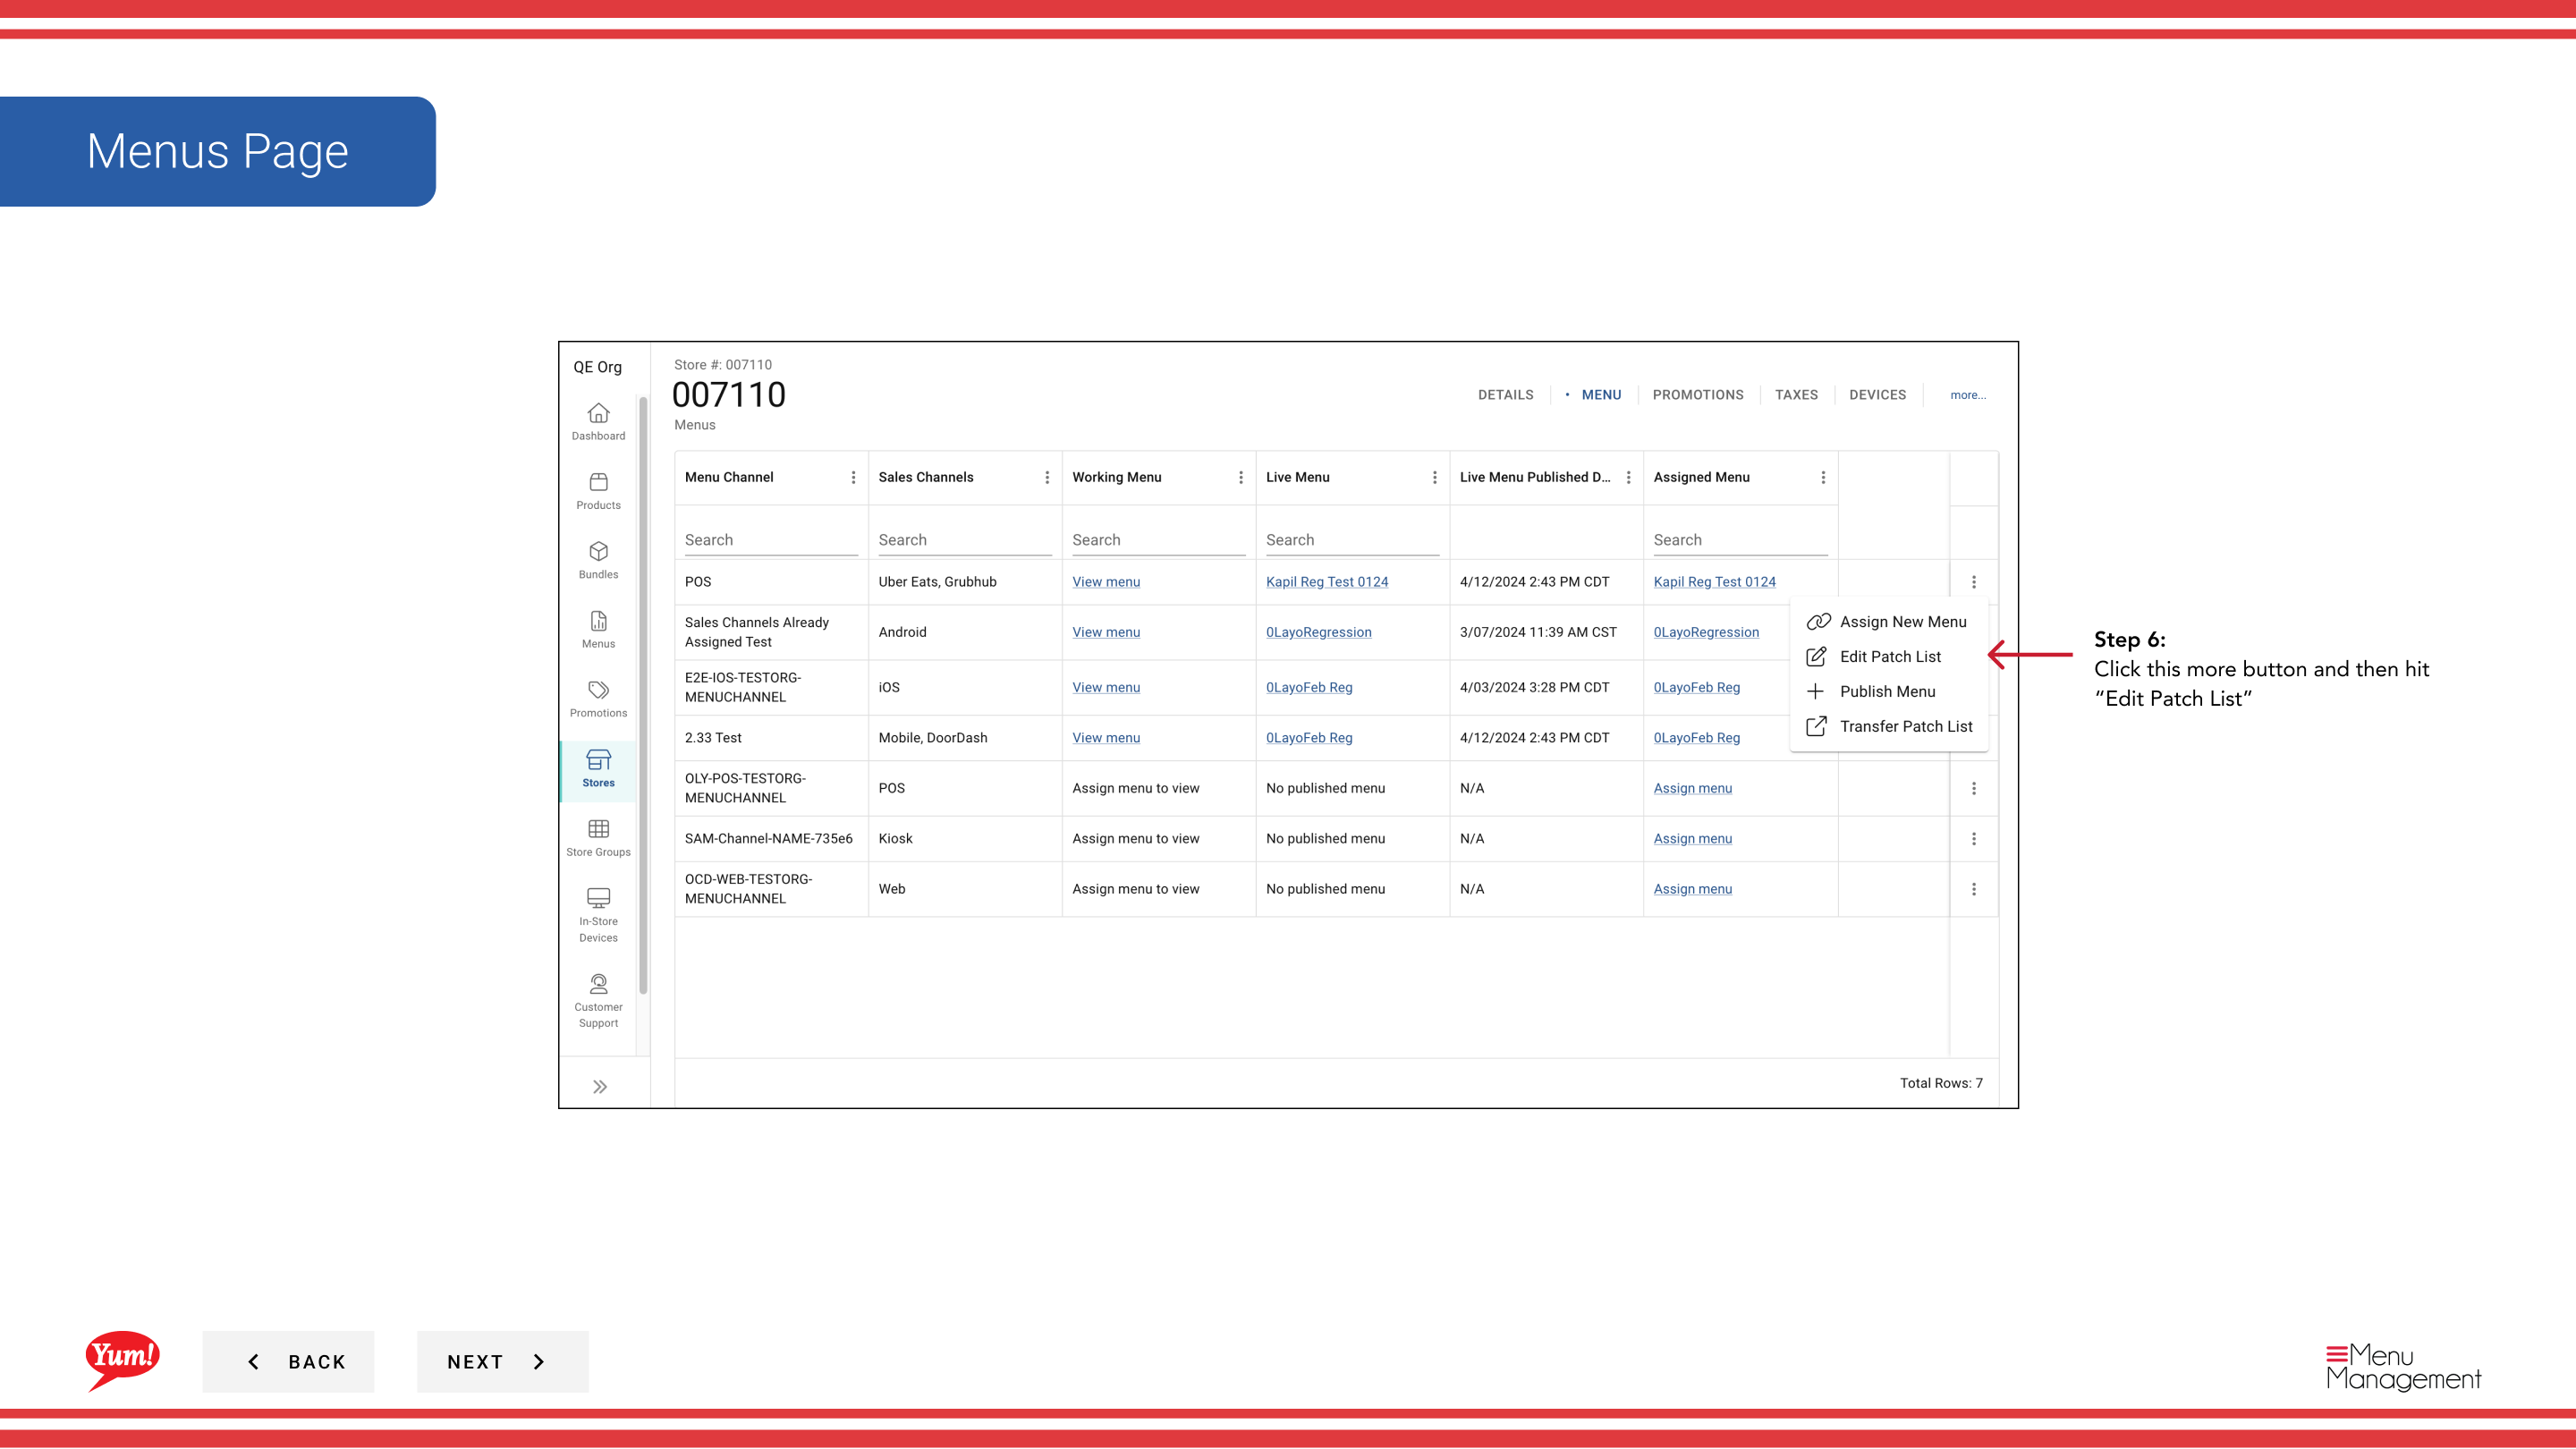
Step 5: Locate the channel you want to edit patches for, and click the more menu button (⋯) on that row.
Step 6: Click Edit Patch List from the options menu.
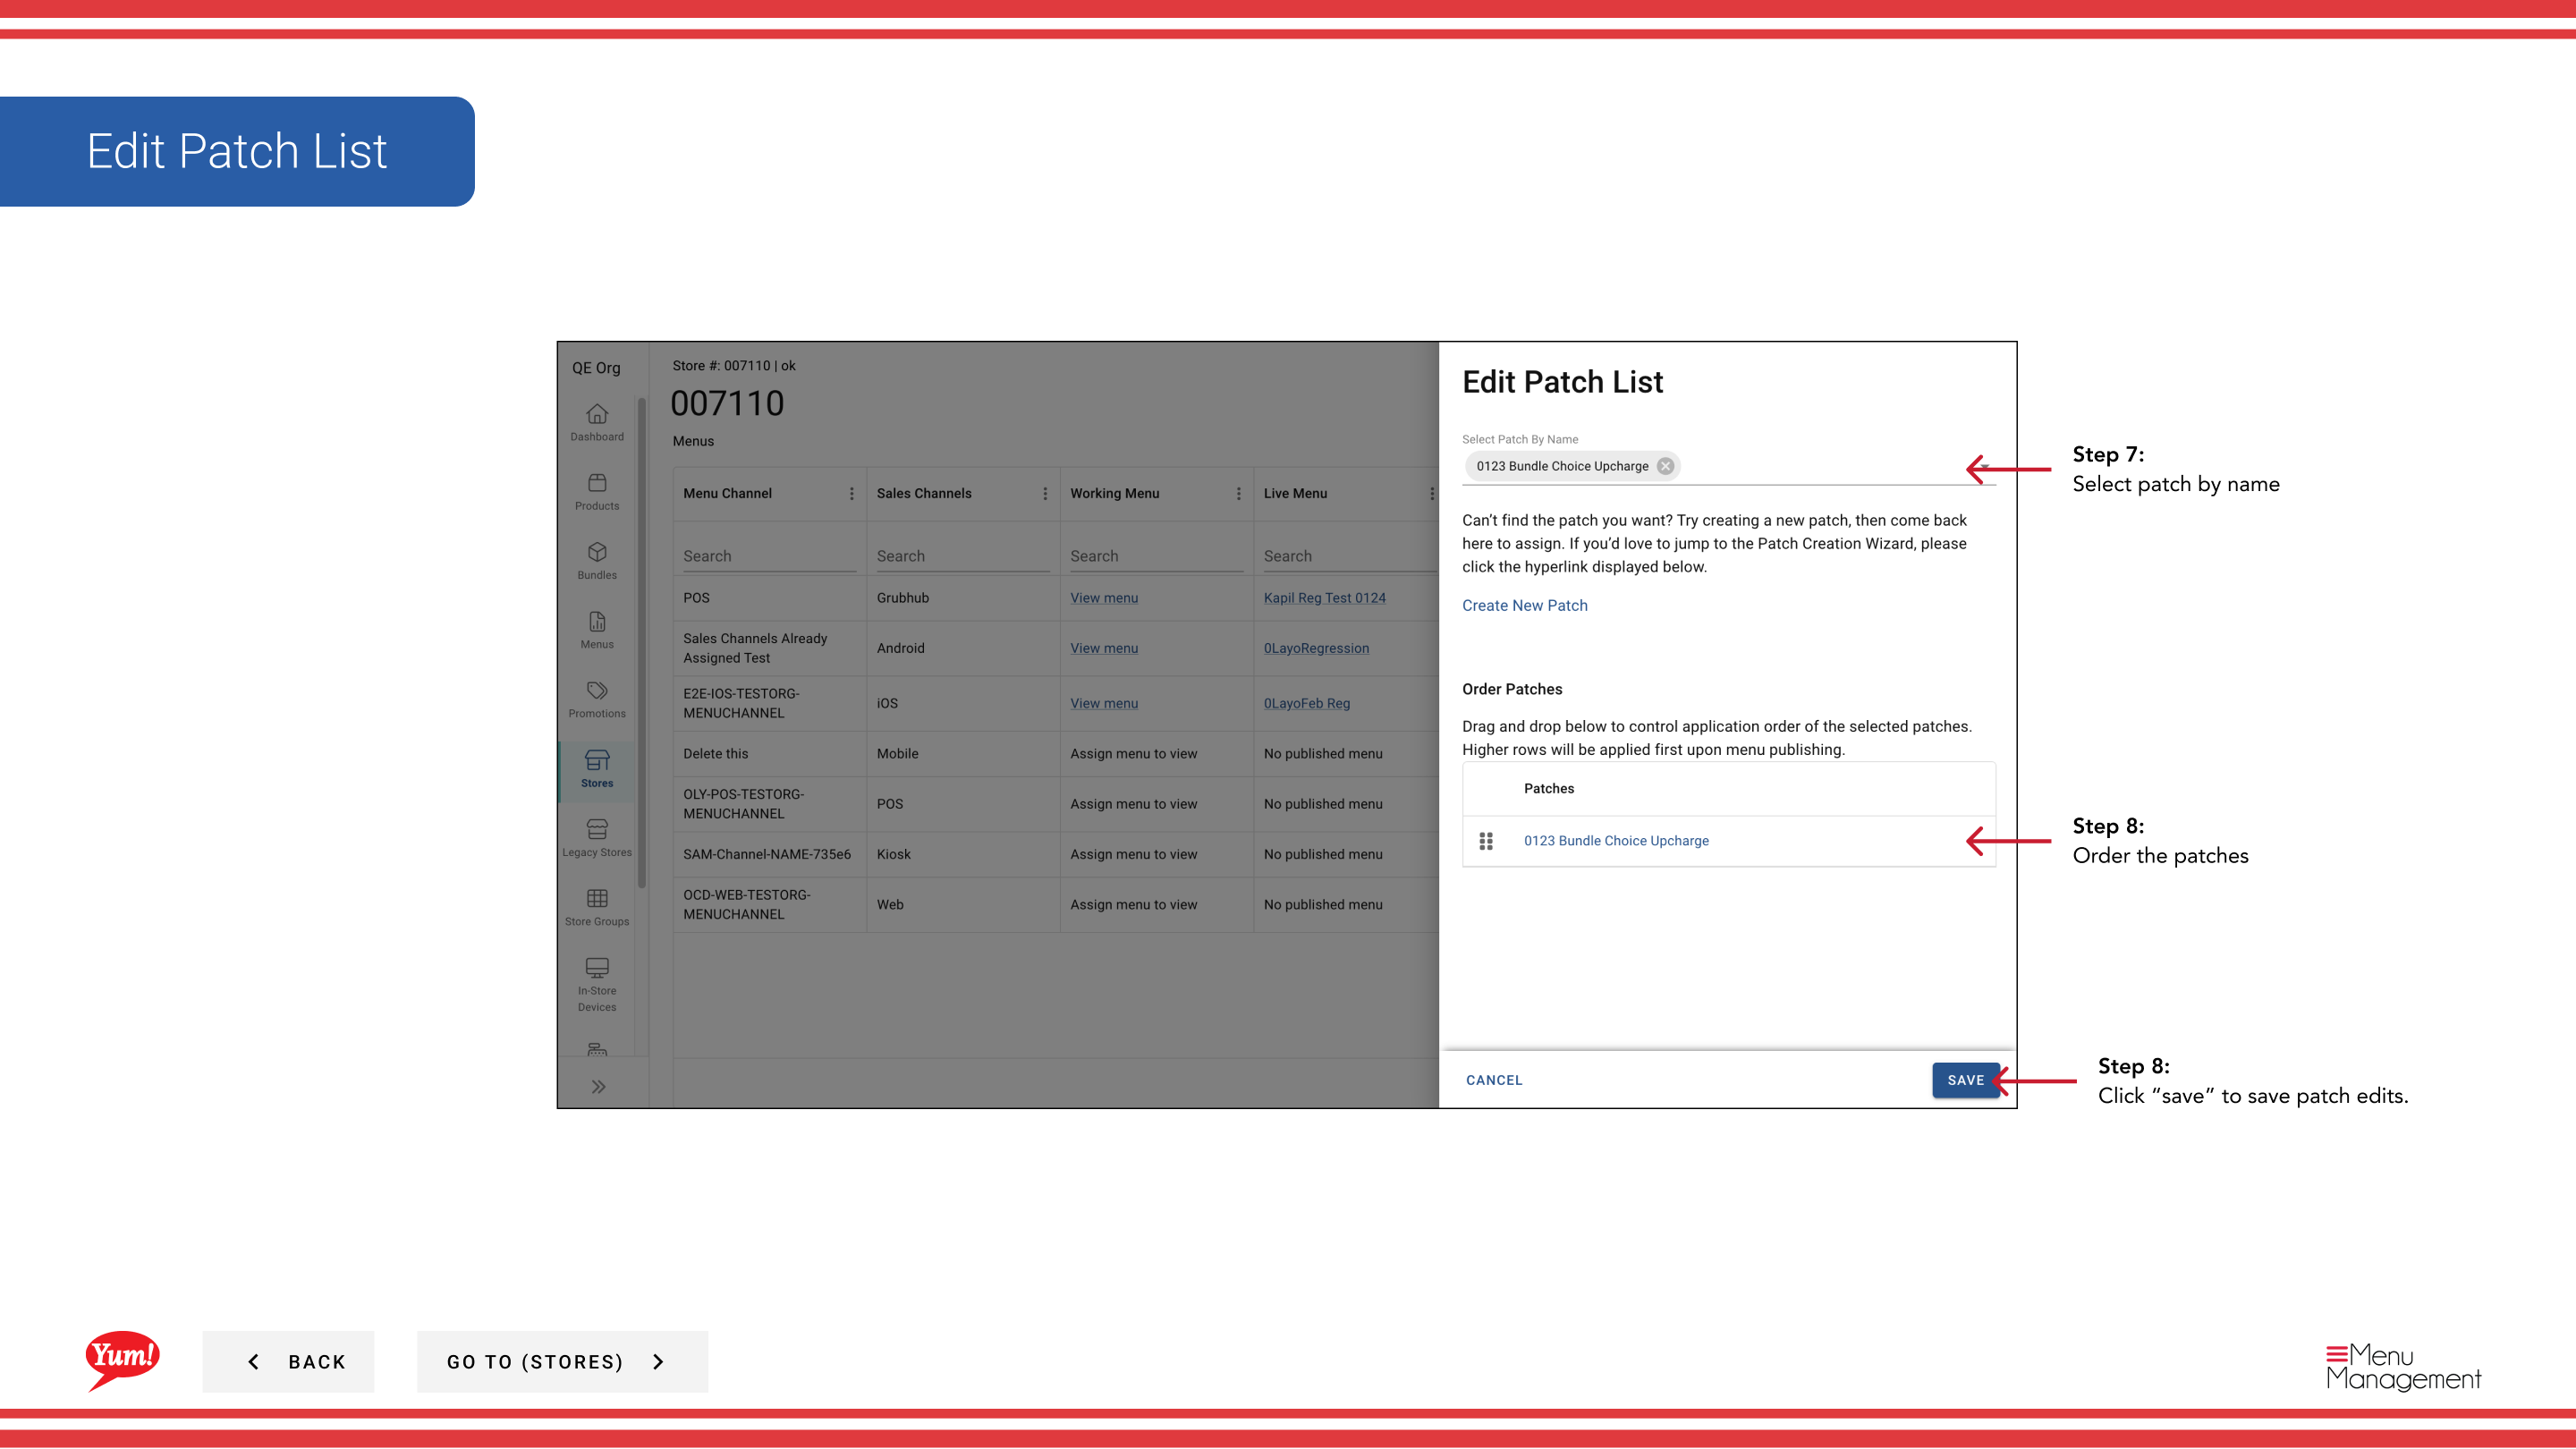
Step 7: Add, remove, or reorder patches:
| Action | How to do it |
|---|---|
| Add Patch | Click the + Add Patch button and search for the patch by name |
| Remove Patch | Click the delete/remove icon next to the patch name |
| Reorder Patches | Drag and drop patches to change their order (top = applied first) |
Step 8: Review the final patch list order. Patches are applied from top to bottom — the topmost patch is applied first.
Step 9: Click Save to apply the patch list changes.
What are patches? Patches are menu overrides specific to a store. They can adjust item pricing, add/remove items, or change availability for this store only, layered on top of the base menu.
Patch order matters: Patches are applied in order from top to bottom. If patches conflict, the first one in the list takes precedence.
After editing patches, publish the menu to make the changes live to customers.
Related guides
- View a Store's Menu — See menu assignments
- Transfer Patch List — Copy patch list to other stores
- Publish Menu — Publish changes to customers
Part of the Admin Portal Guide · Section: Stores