Create a Menu
What this guide covers
Builds a new menu structure in Atlas that can be assigned to stores and channels, defining the catalogue of products and bundles available for ordering.
Steps
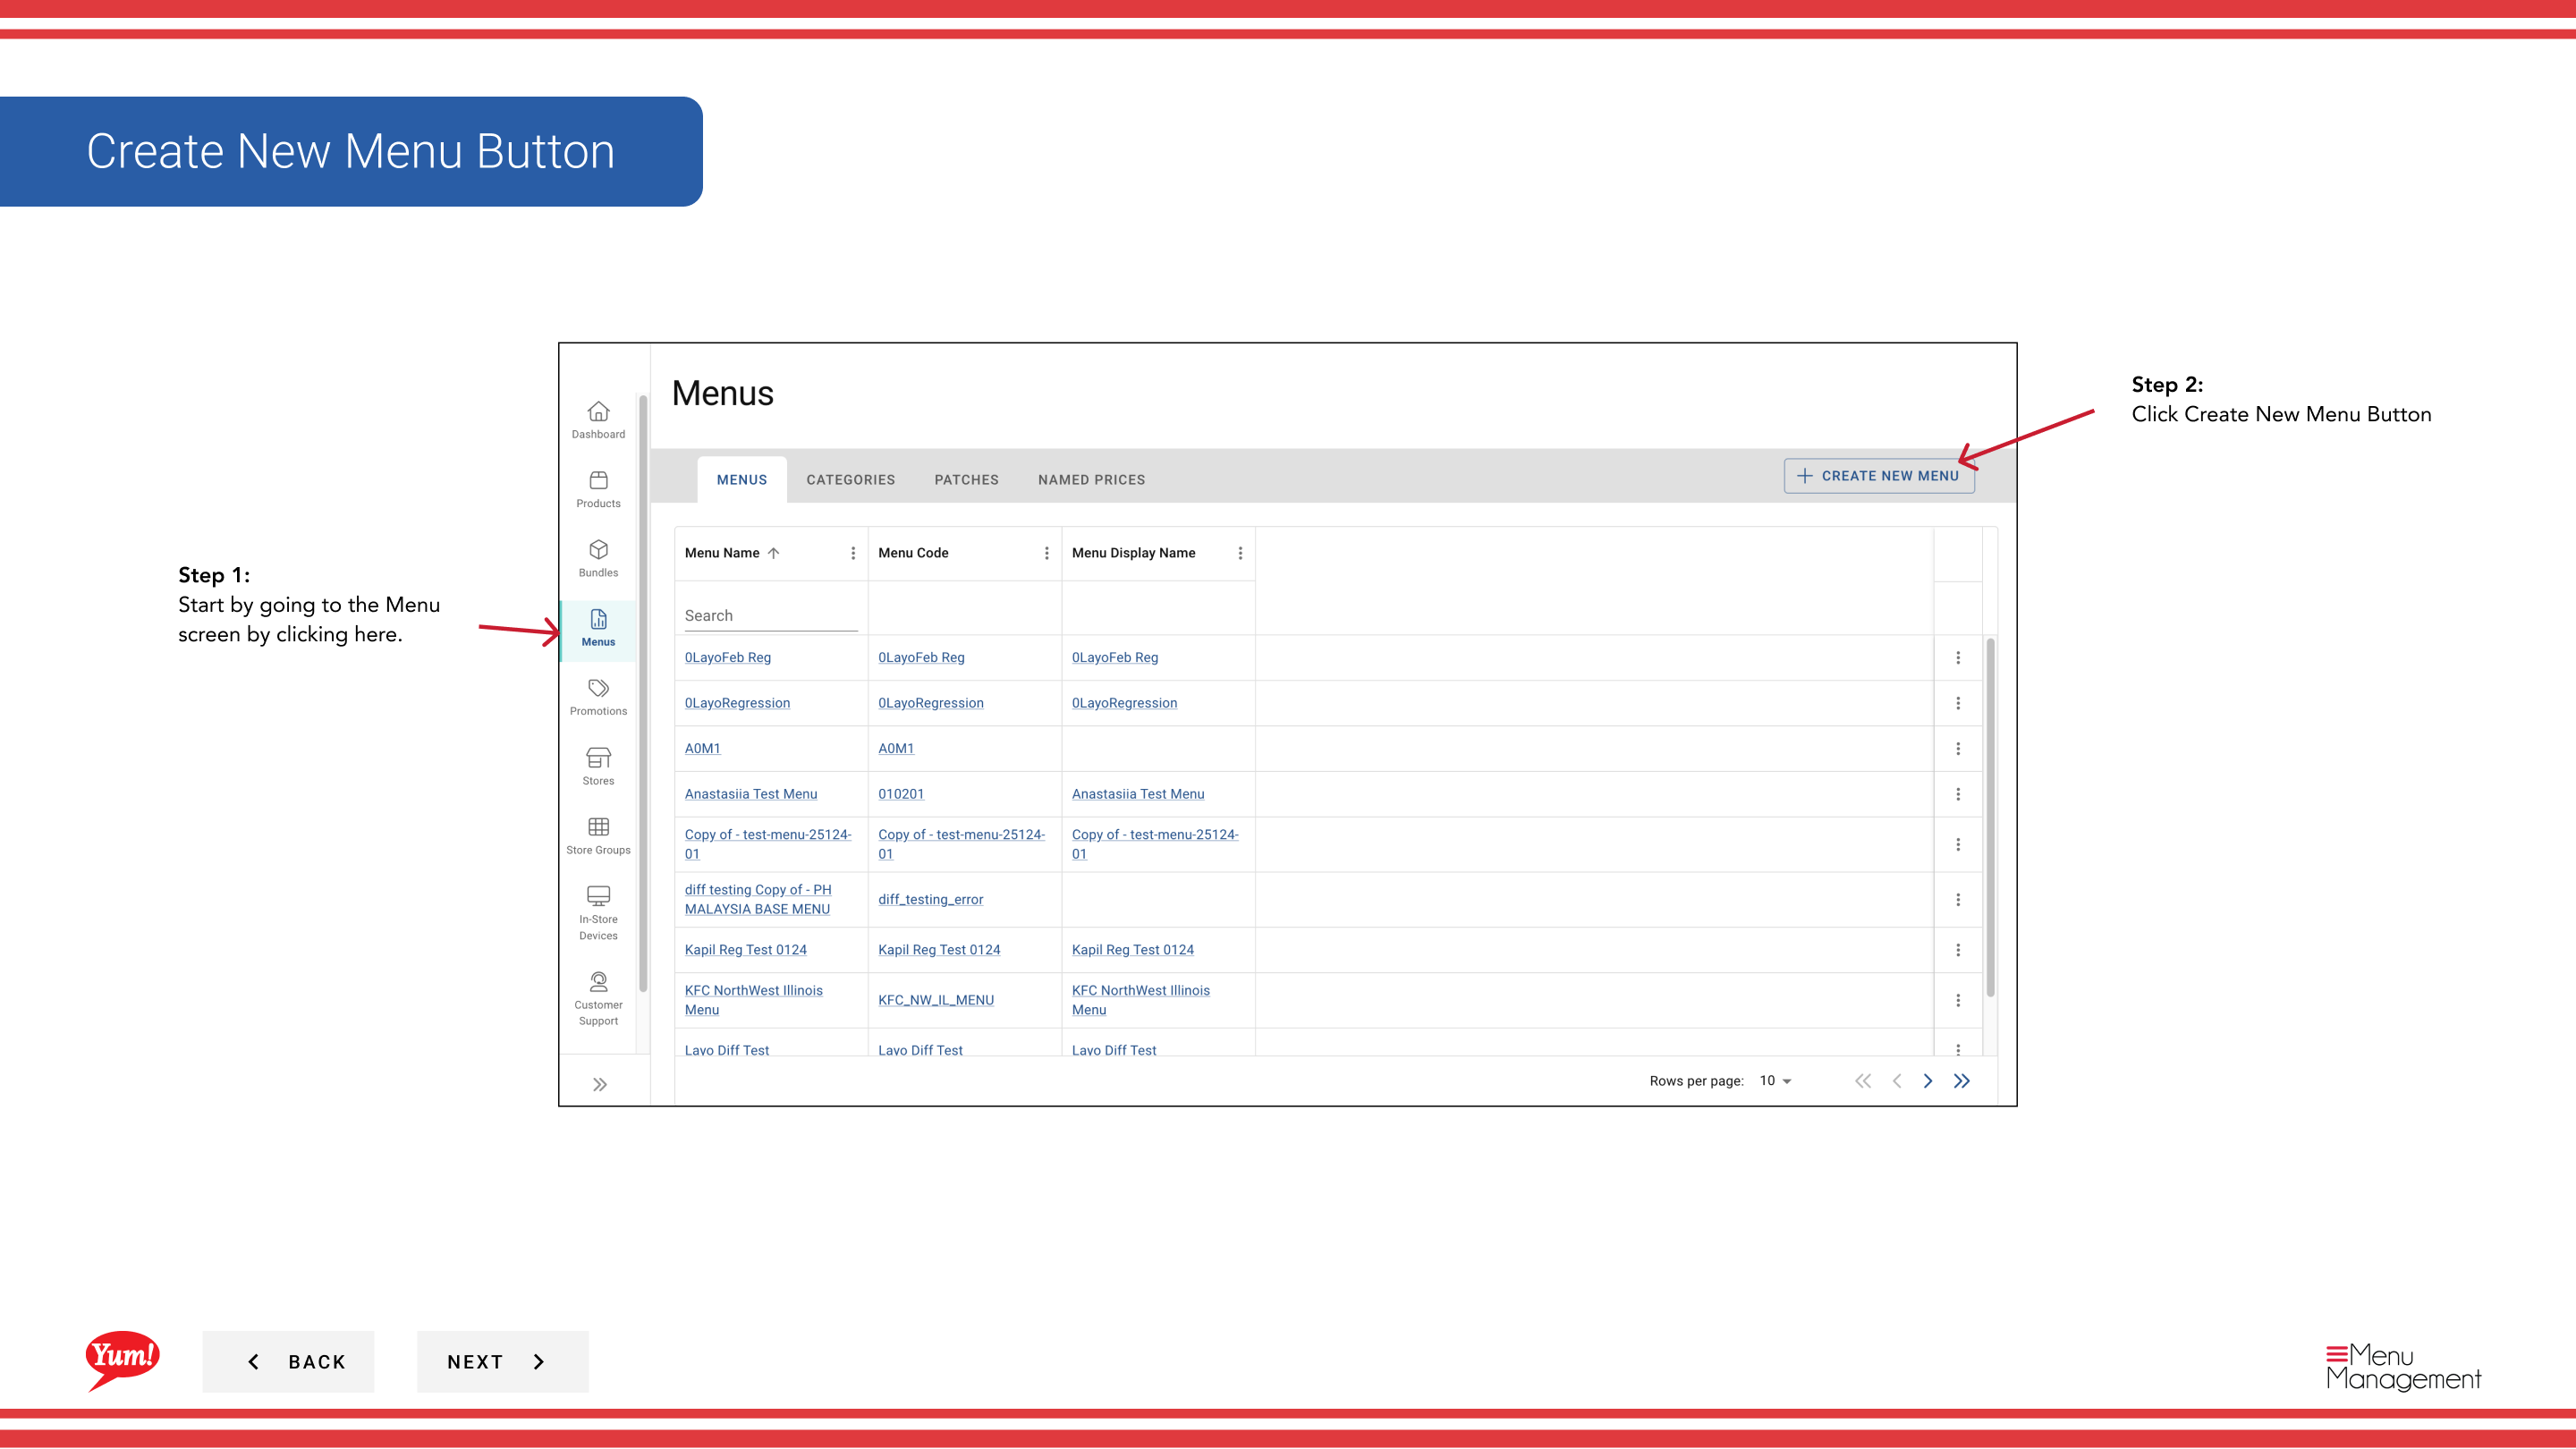
Step 1: Navigate to the Menus section using the left-hand navigation menu.
Step 2: Click the Create New Menu button.
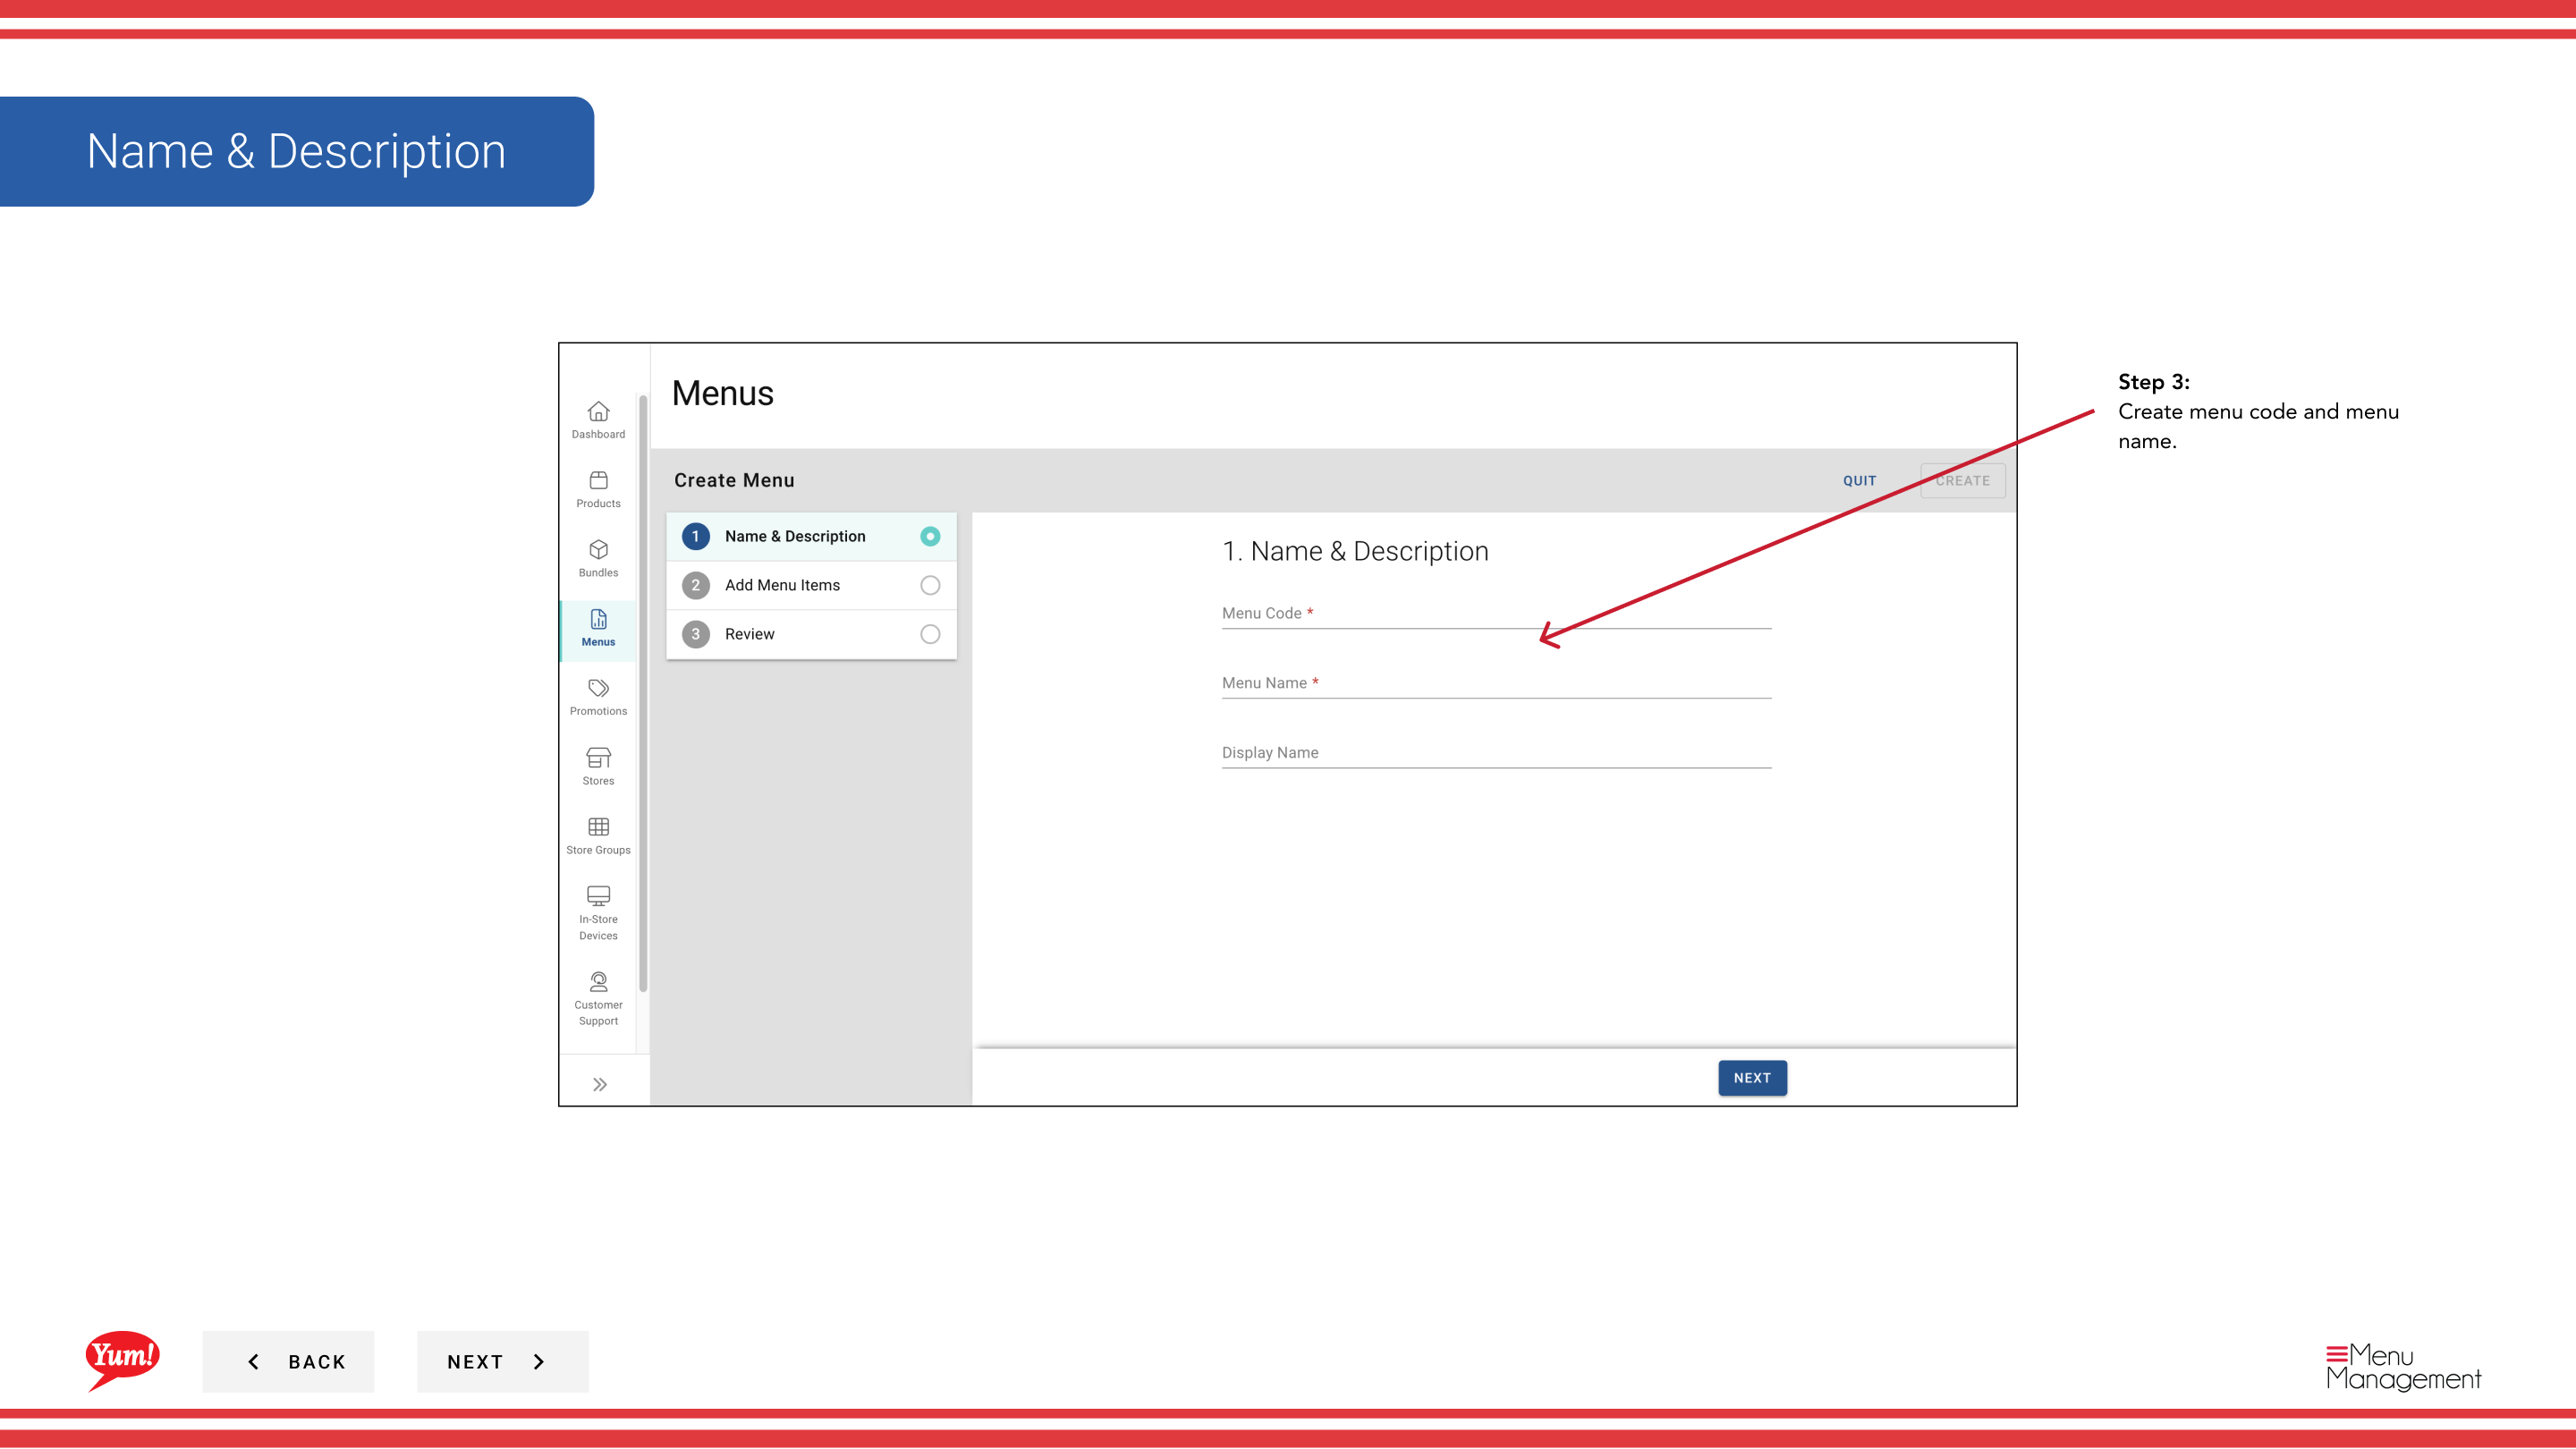
Step 3: Fill in the menu details. Fields marked with * are required.
| Field | What to enter | Notes |
|---|---|---|
| Menu Code * | A unique identifier for this menu | Use uppercase letters, numbers, and hyphens only — e.g., AU-BREAKFAST-2024. Cannot be changed after creation. |
| Menu Name * | A human-readable name for this menu | e.g., "Australia Breakfast Menu 2024". Displayed in the Menus list and shown when assigning menus to stores. |
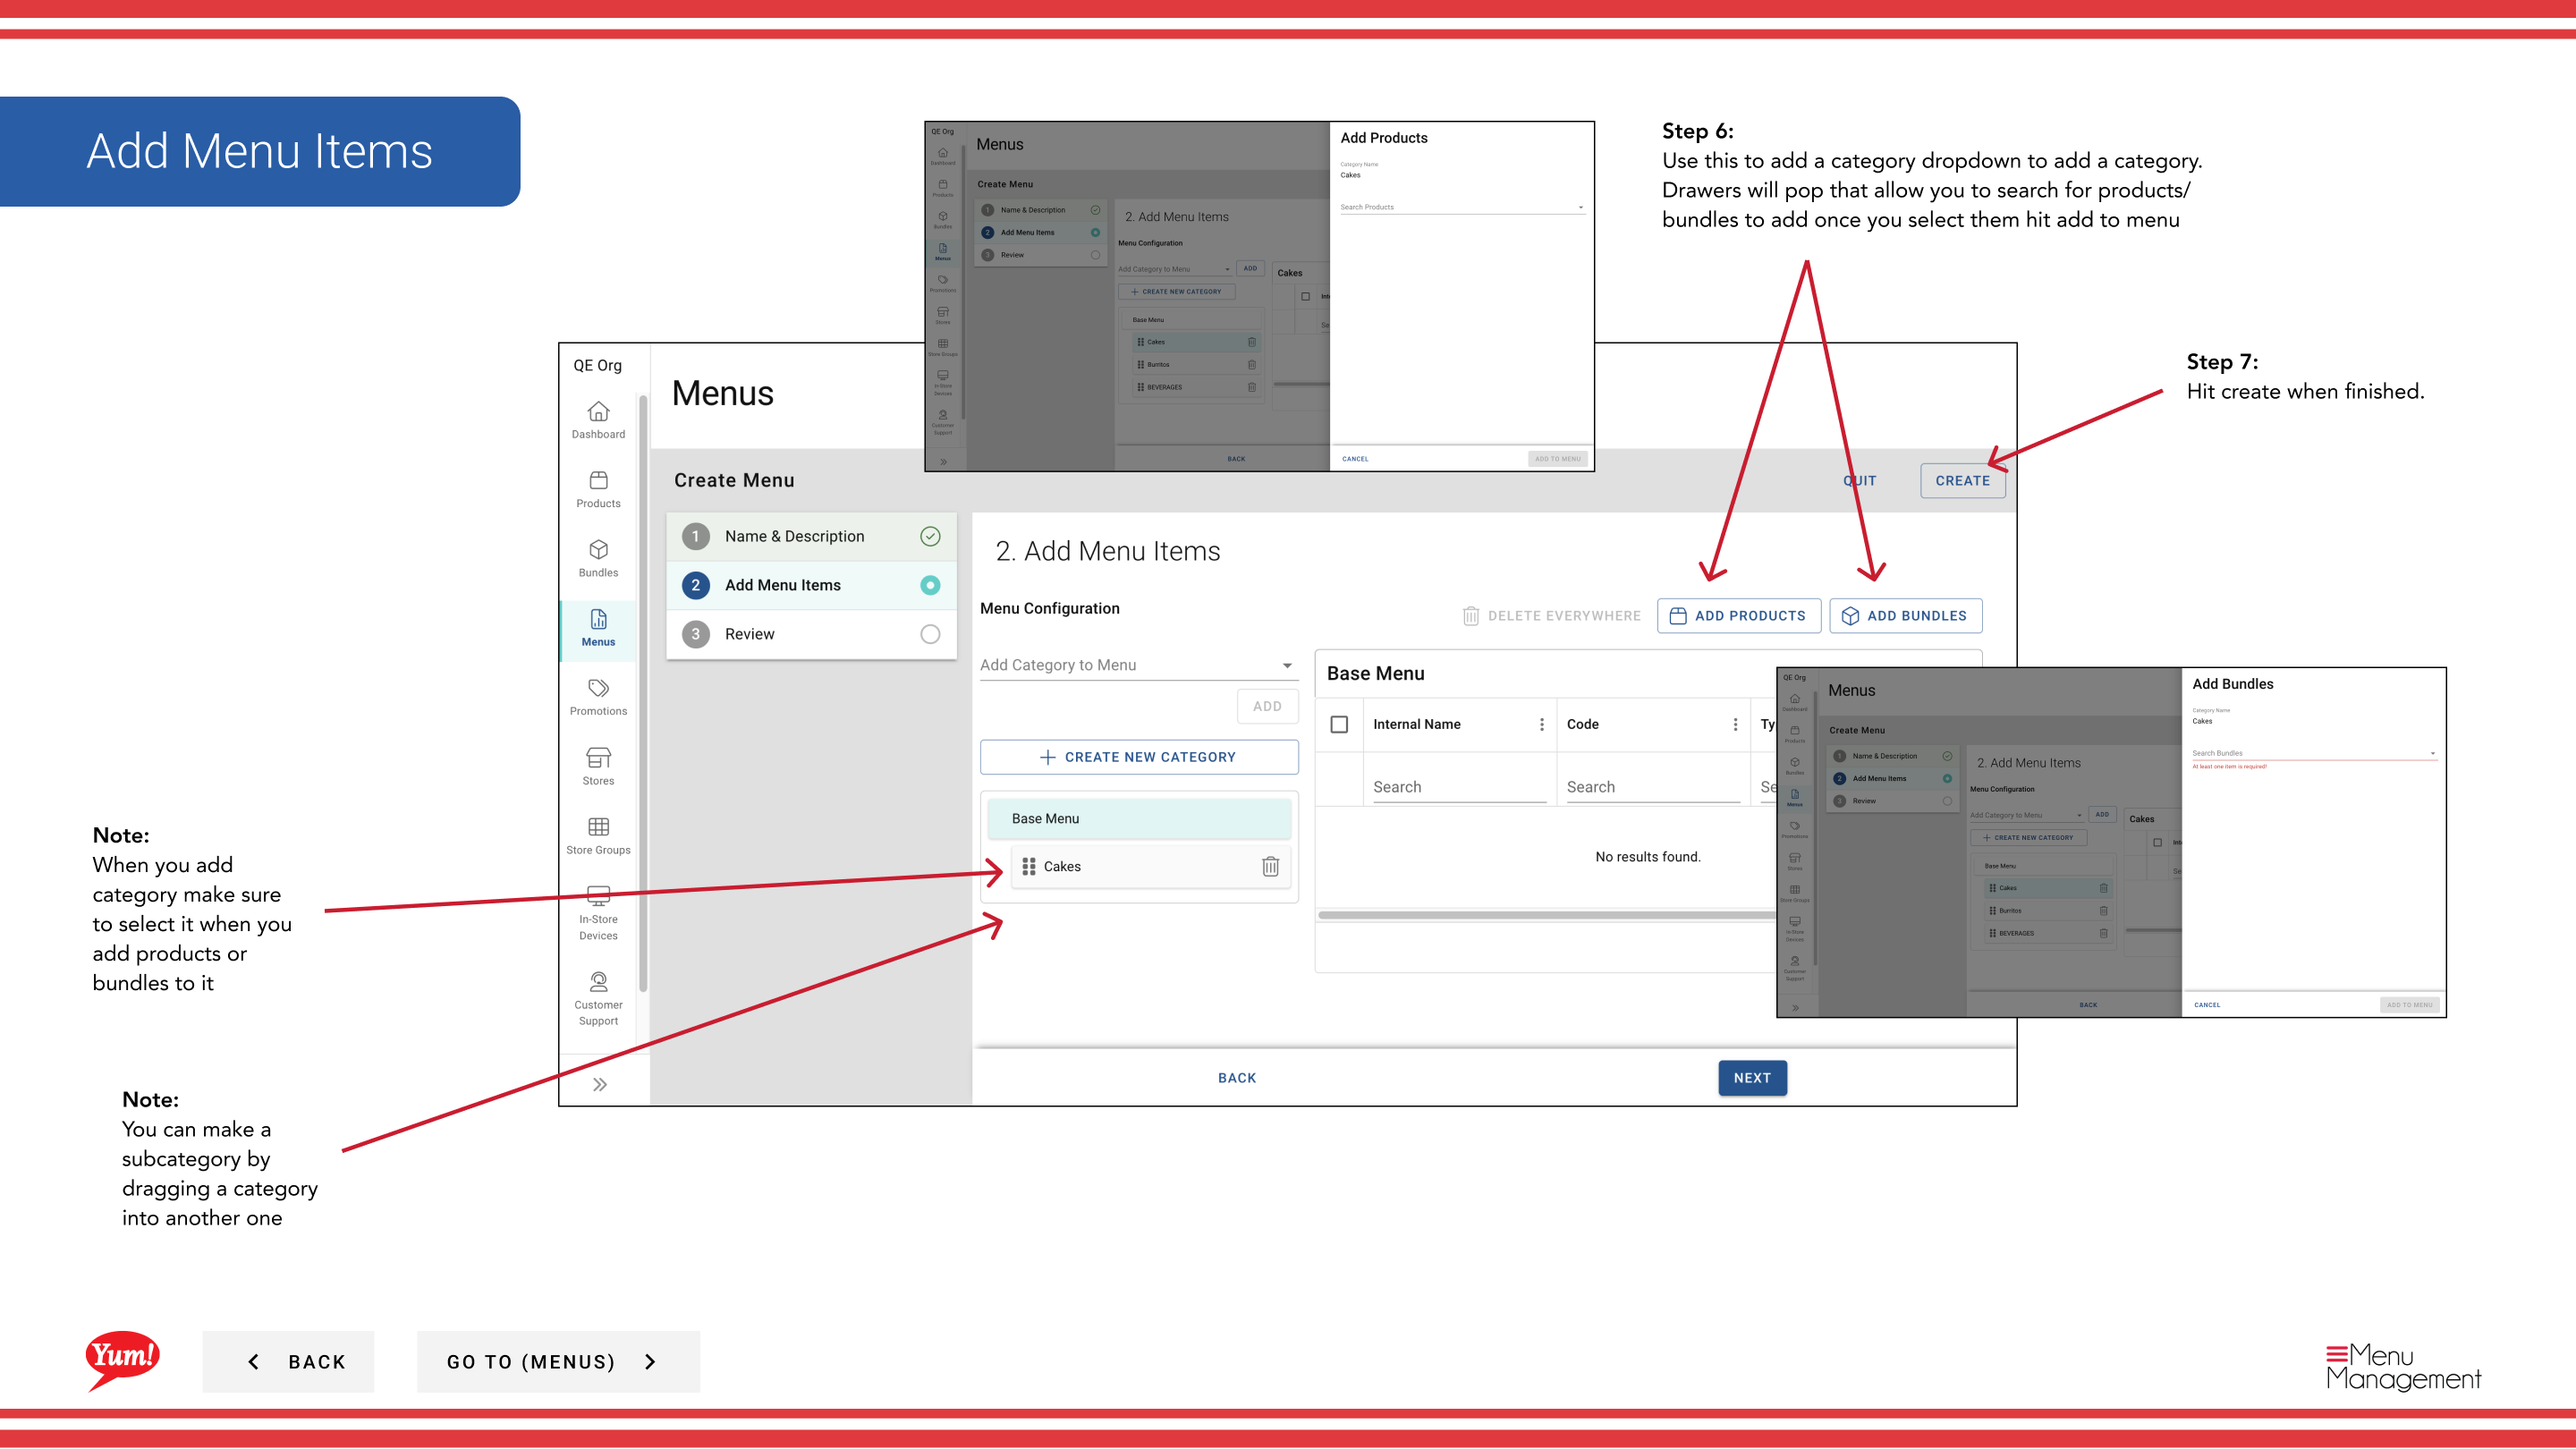
Step 4: Add categories to your menu by clicking the Add Category dropdown and selecting from the list. You can add multiple categories.
To create a nested subcategory, drag a category into another category in the menu builder. The dragged category becomes nested under the target.
Step 5: Once you have added your categories, click the Add Products/Bundles dropdown within each category to populate it with items. A drawer will open — search for items and click Add to Menu.
Step 6: Click Create to save the menu.
Clicking Cancel at any time discards all unsaved changes.
Related guides
- Assign a Menu — Link this menu to stores and channels
- Publish a Menu — Push the menu to live ordering channels
- Create a Category — Create custom categories to add to your menu
Part of the Admin Portal Guide · Section: Menus