Assign a Menu
What this guide covers
Links a menu to specific stores and ordering channels so the correct catalogue is served to customers.
Steps
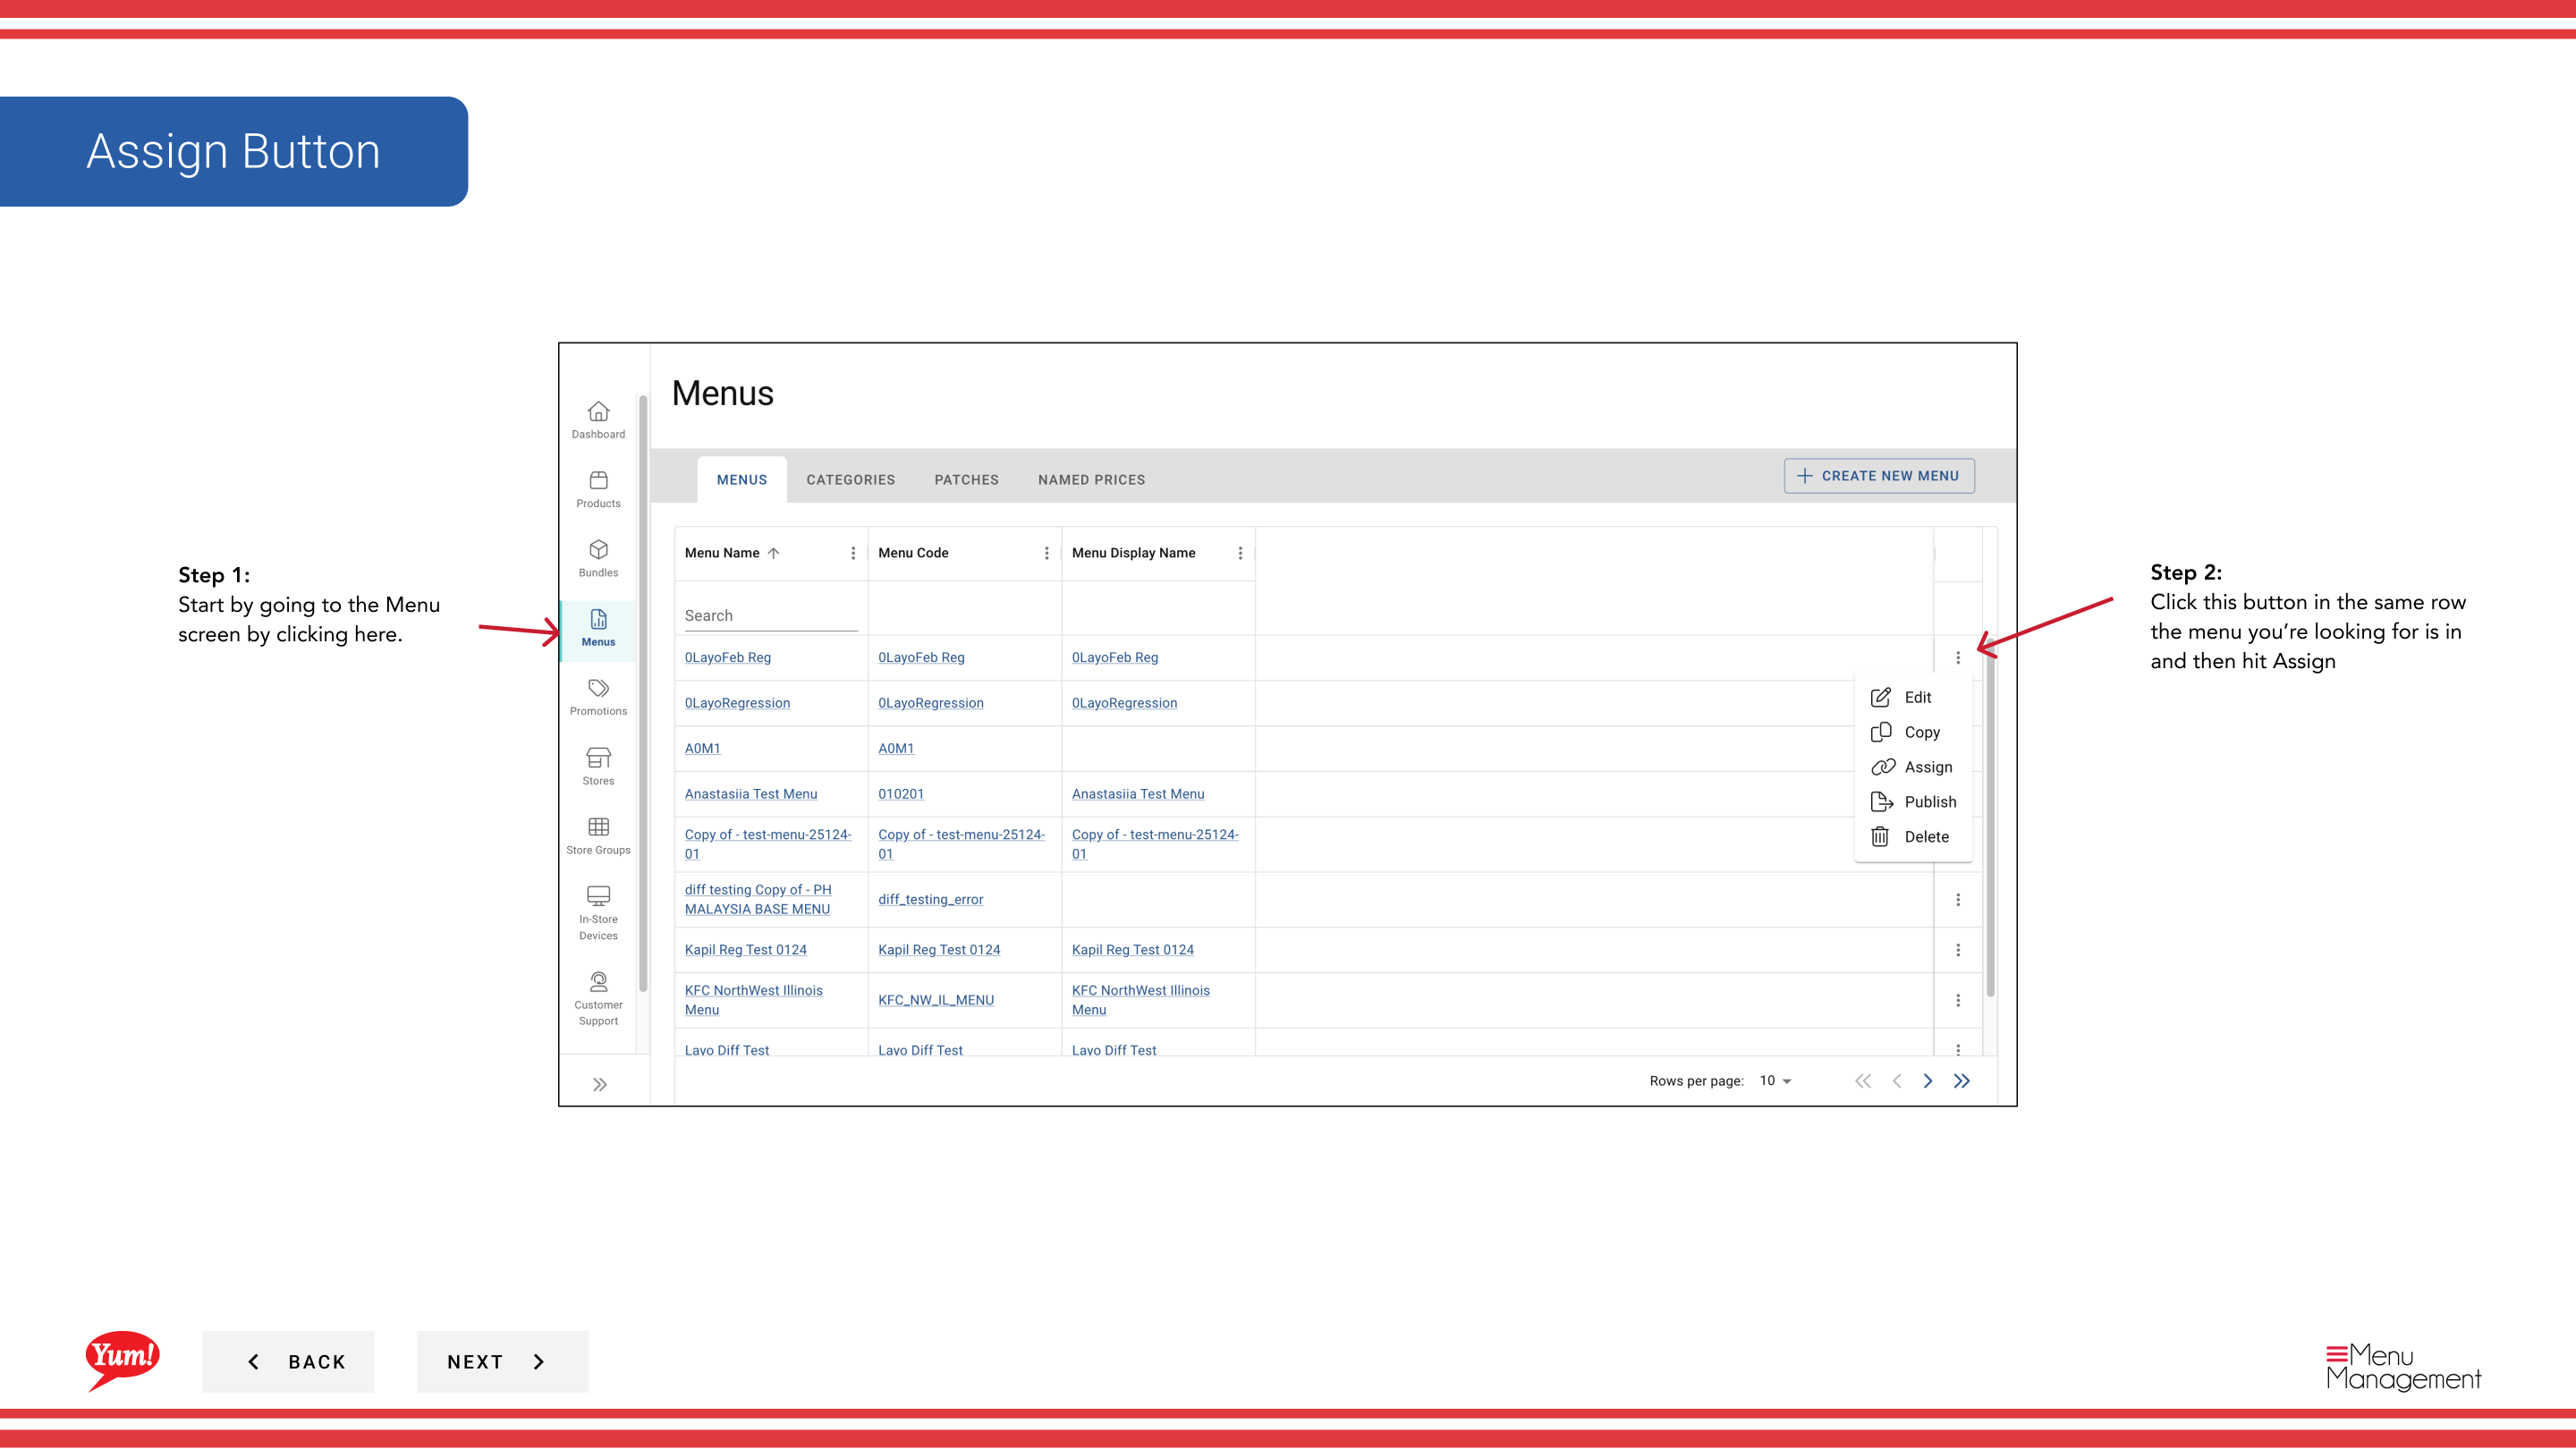
Step 1: Navigate to the Menus section using the left-hand navigation menu.
Step 2: Find the menu you want to assign in the menus list, click the action menu (three dots) in the same row, and select Assign.
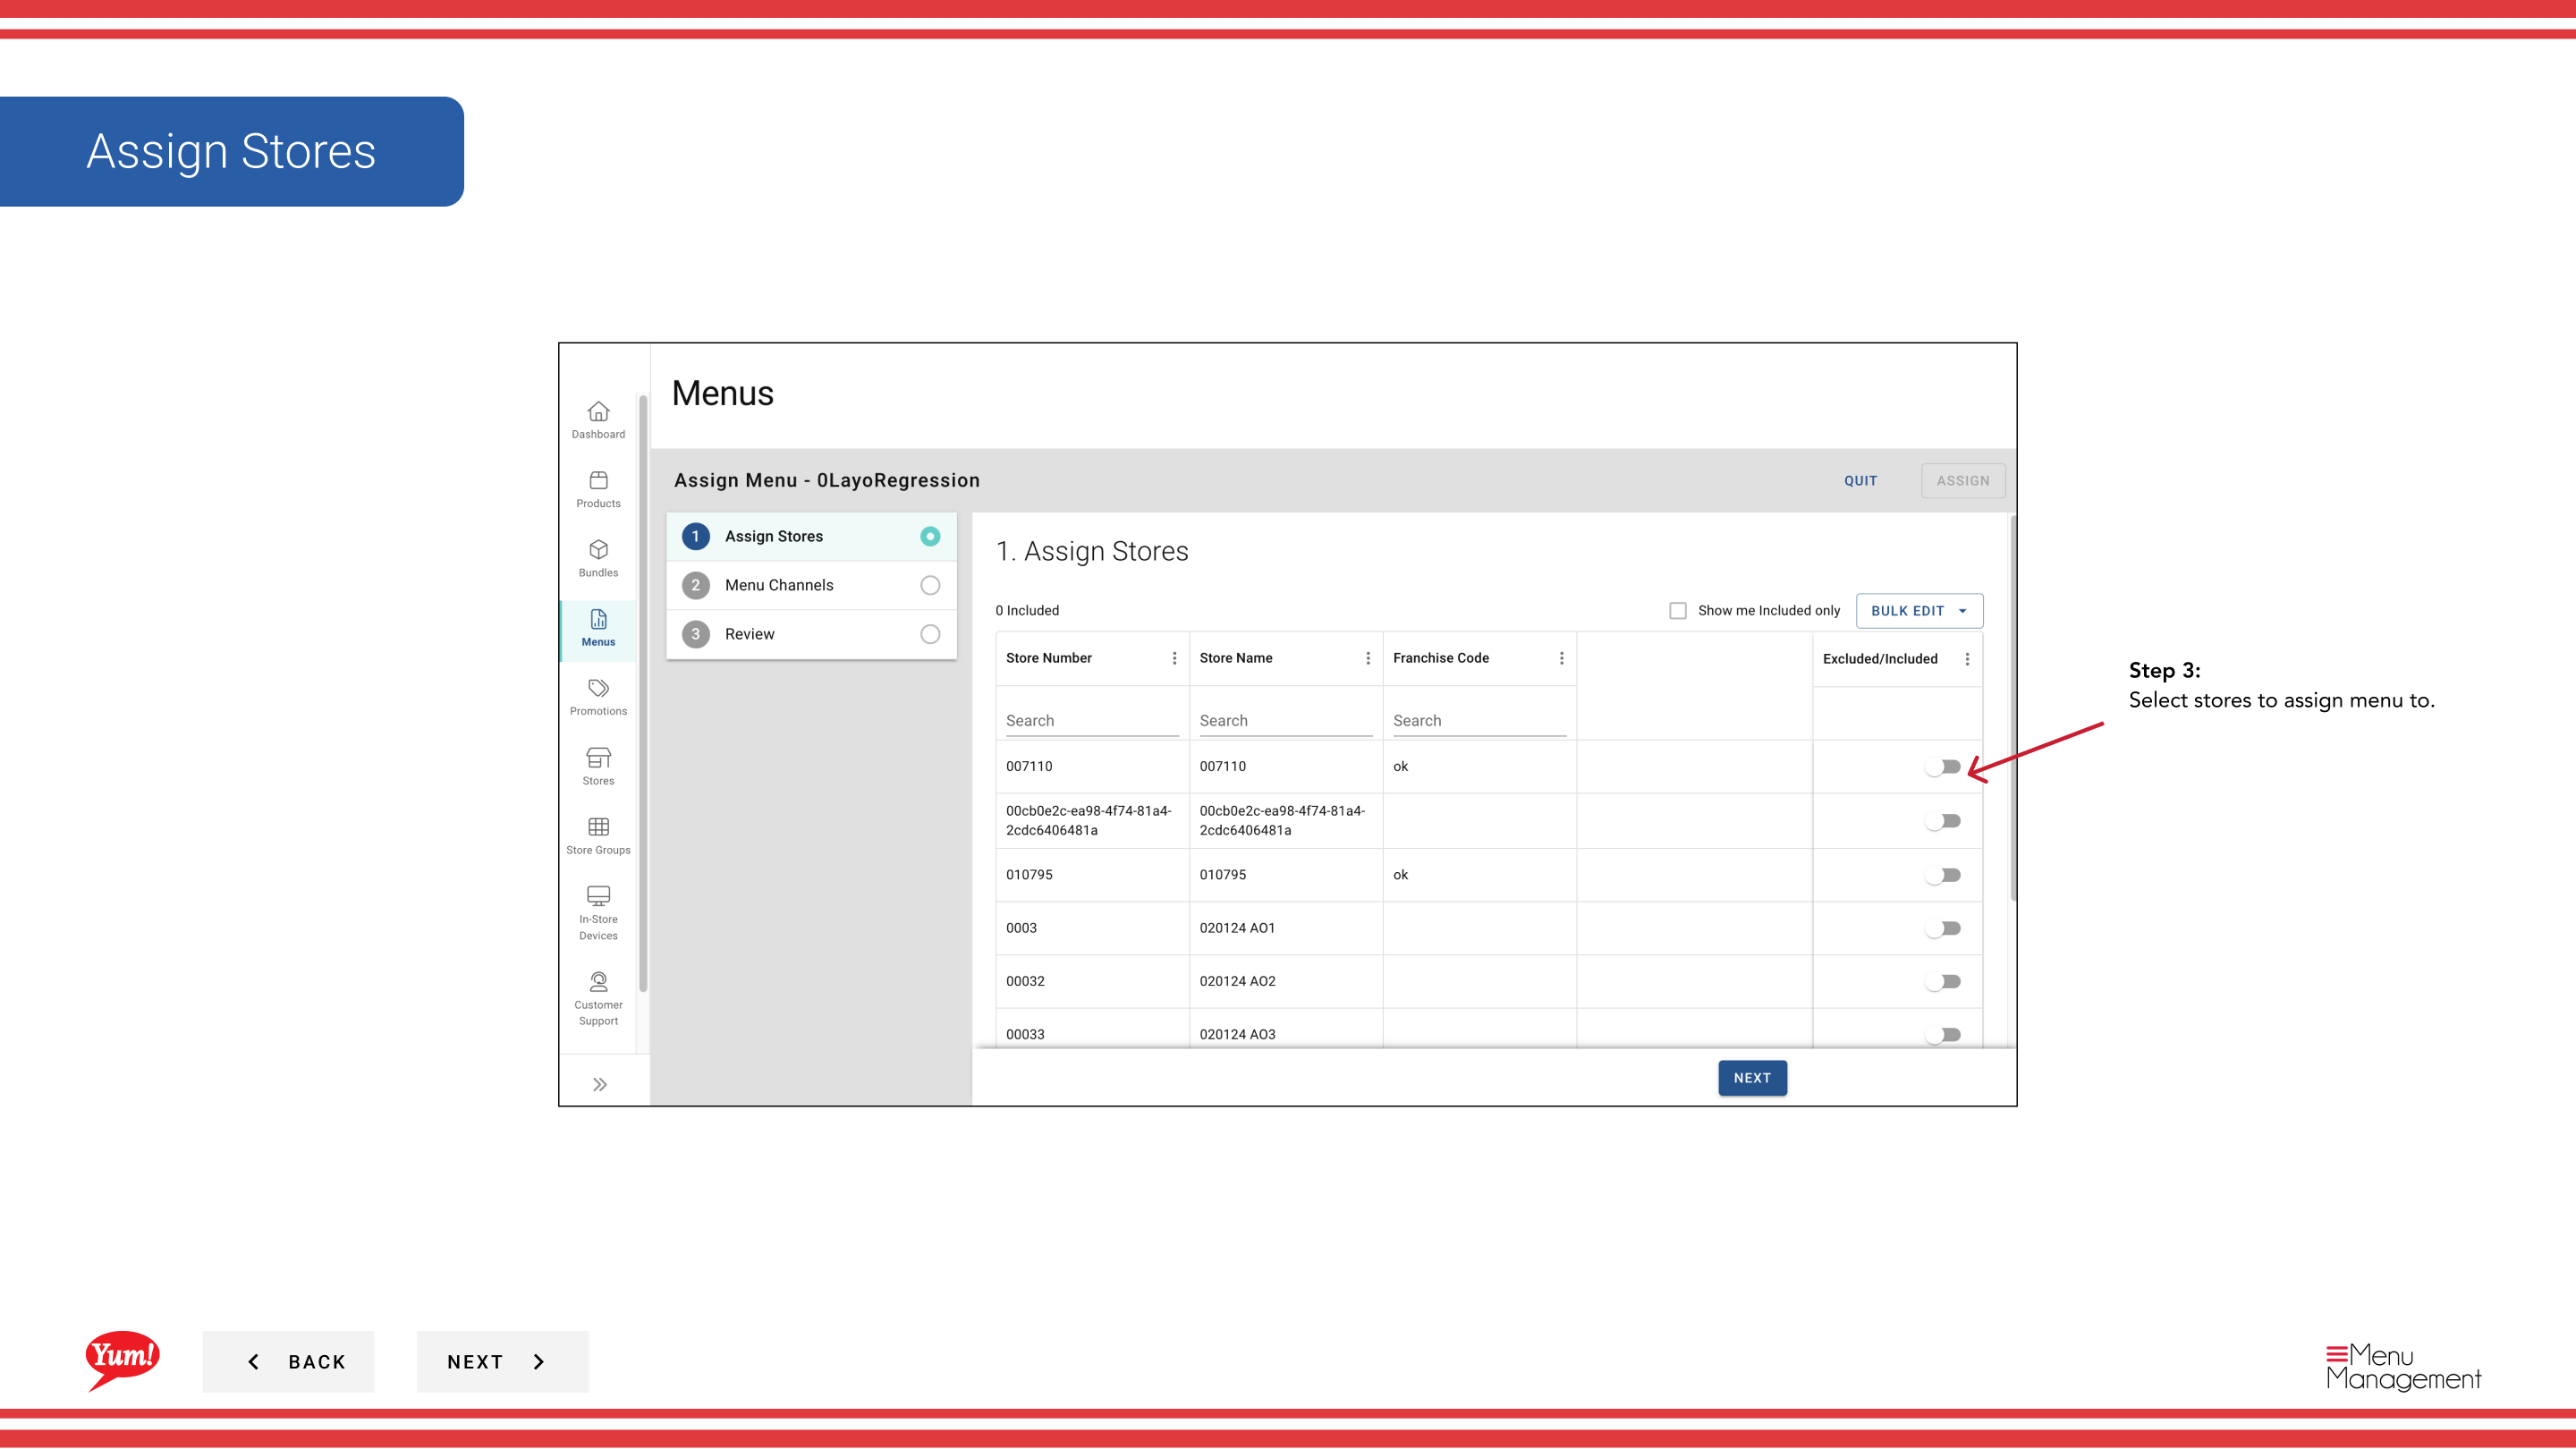
Step 3: On the Stores step, select the stores or store groups that will use this menu. You can search and filter by store group if needed.
| Field | What to enter | Notes |
|---|---|---|
| Stores * | Select one or more stores | Use search to find specific stores, or select entire store groups. Only selected stores will receive this menu. |
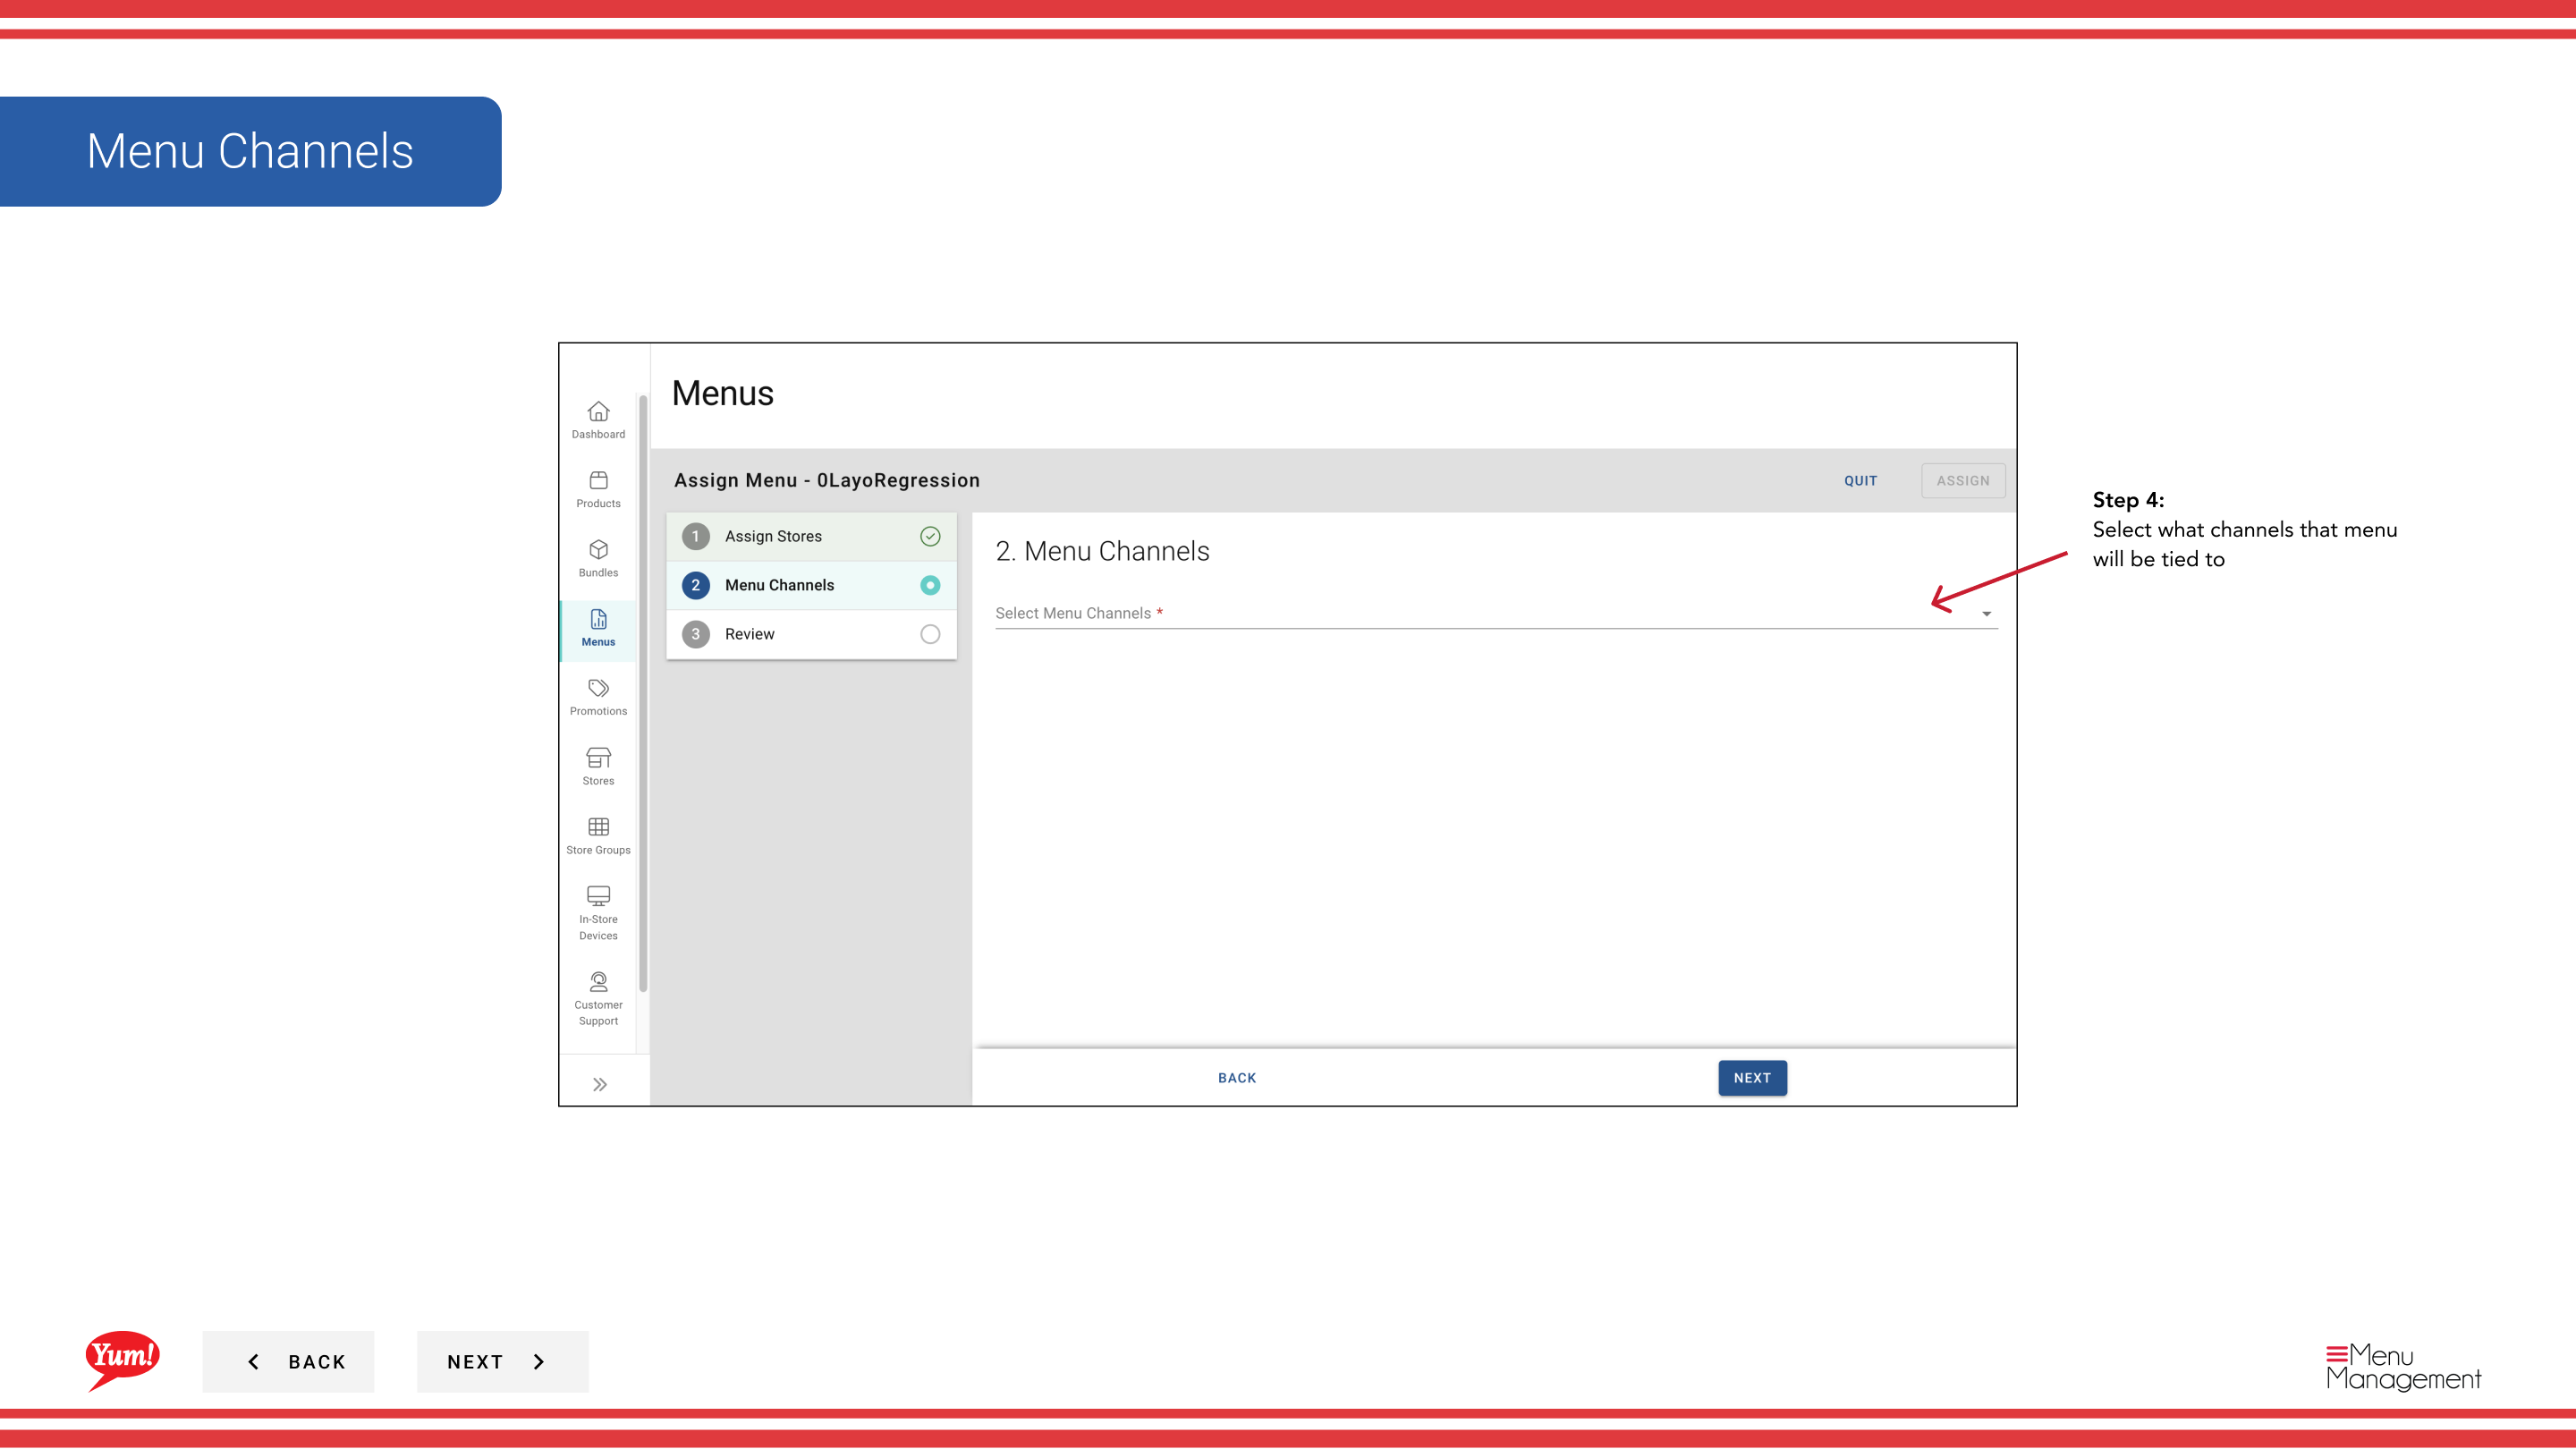
Step 4: On the Channels step, select which ordering channels this menu will be tied to (e.g., web, mobile, delivery platforms). You can select multiple channels.
| Field | What to enter | Notes |
|---|---|---|
| Channels * | Select one or more channels | Choose all channels where customers should see this menu. The menu will only appear on selected channels. |
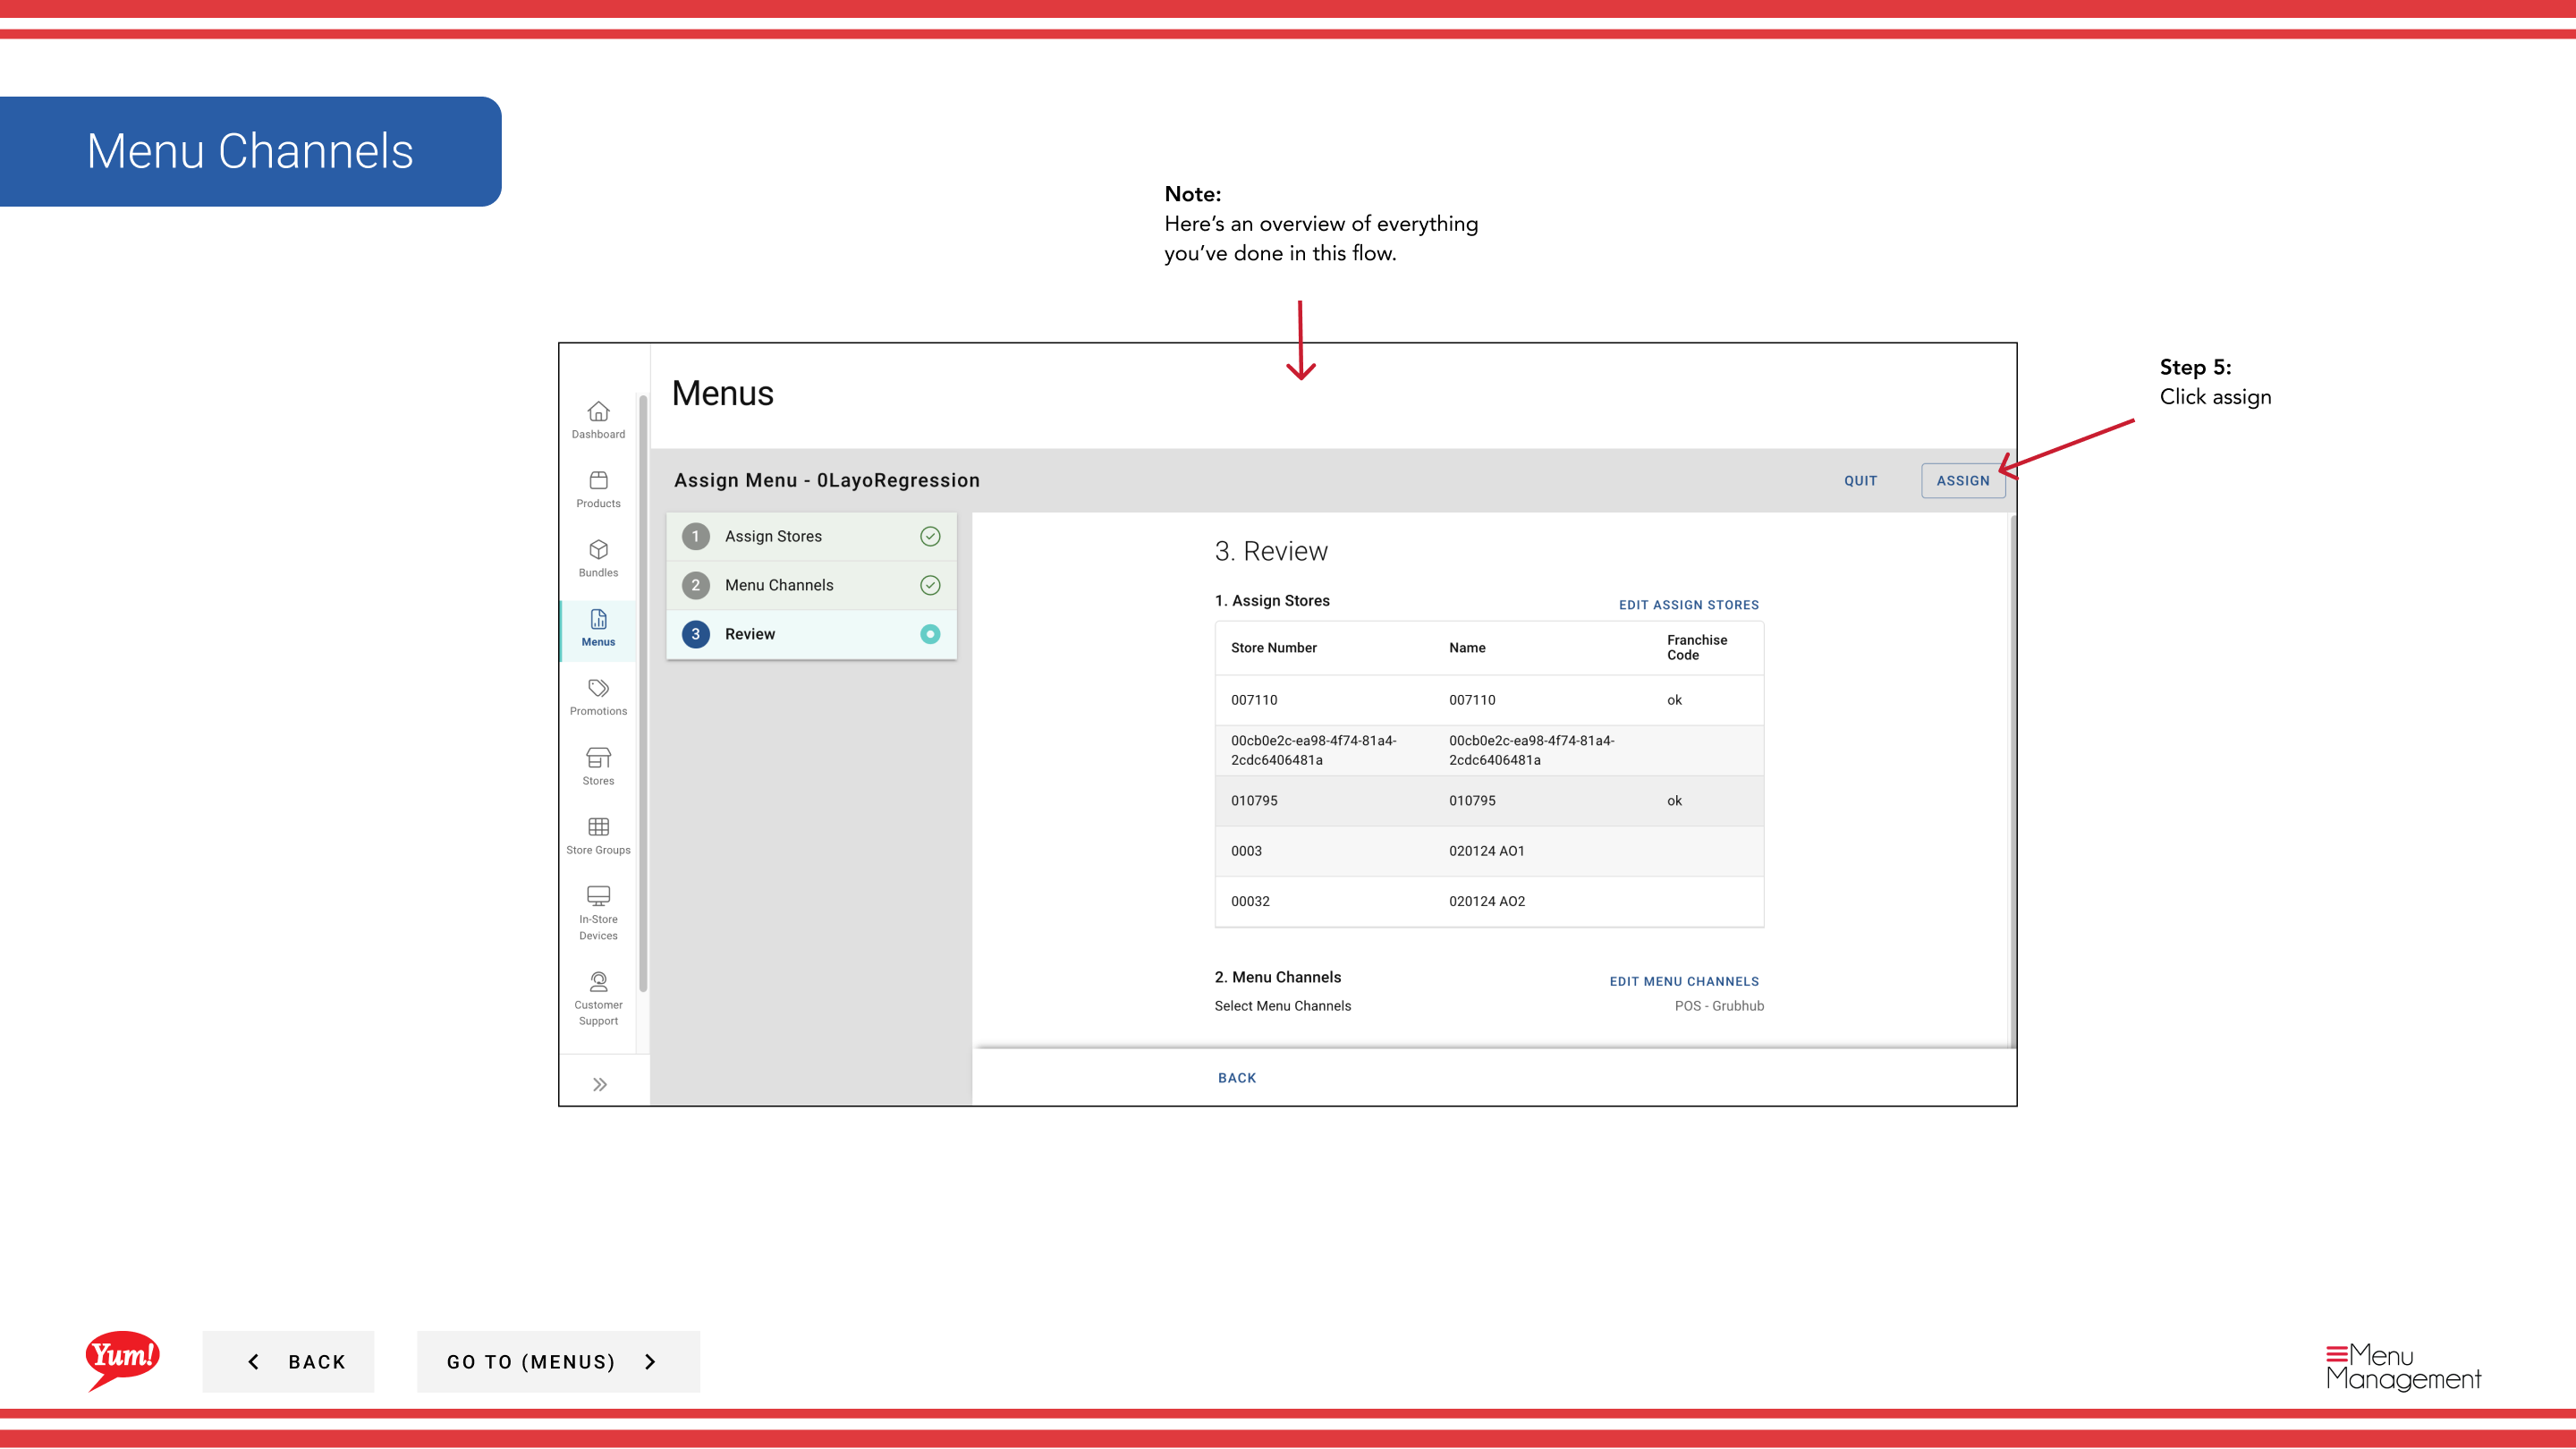
Step 5: Review your selections on the Summary tab to confirm the stores and channels, then click Assign to save.
The menu will not appear at stores immediately. You must publish the menu to make it live on the selected channels.
Related guides
- Publish a Menu — Make the assigned menu live on ordering channels
- Edit a Menu — Update the menu before assigning it to stores
Part of the Admin Portal Guide · Section: Menus