Edit a Menu
What this guide covers
Updates an existing menu’s configuration, such as its name, assigned items, or category structure.
Steps
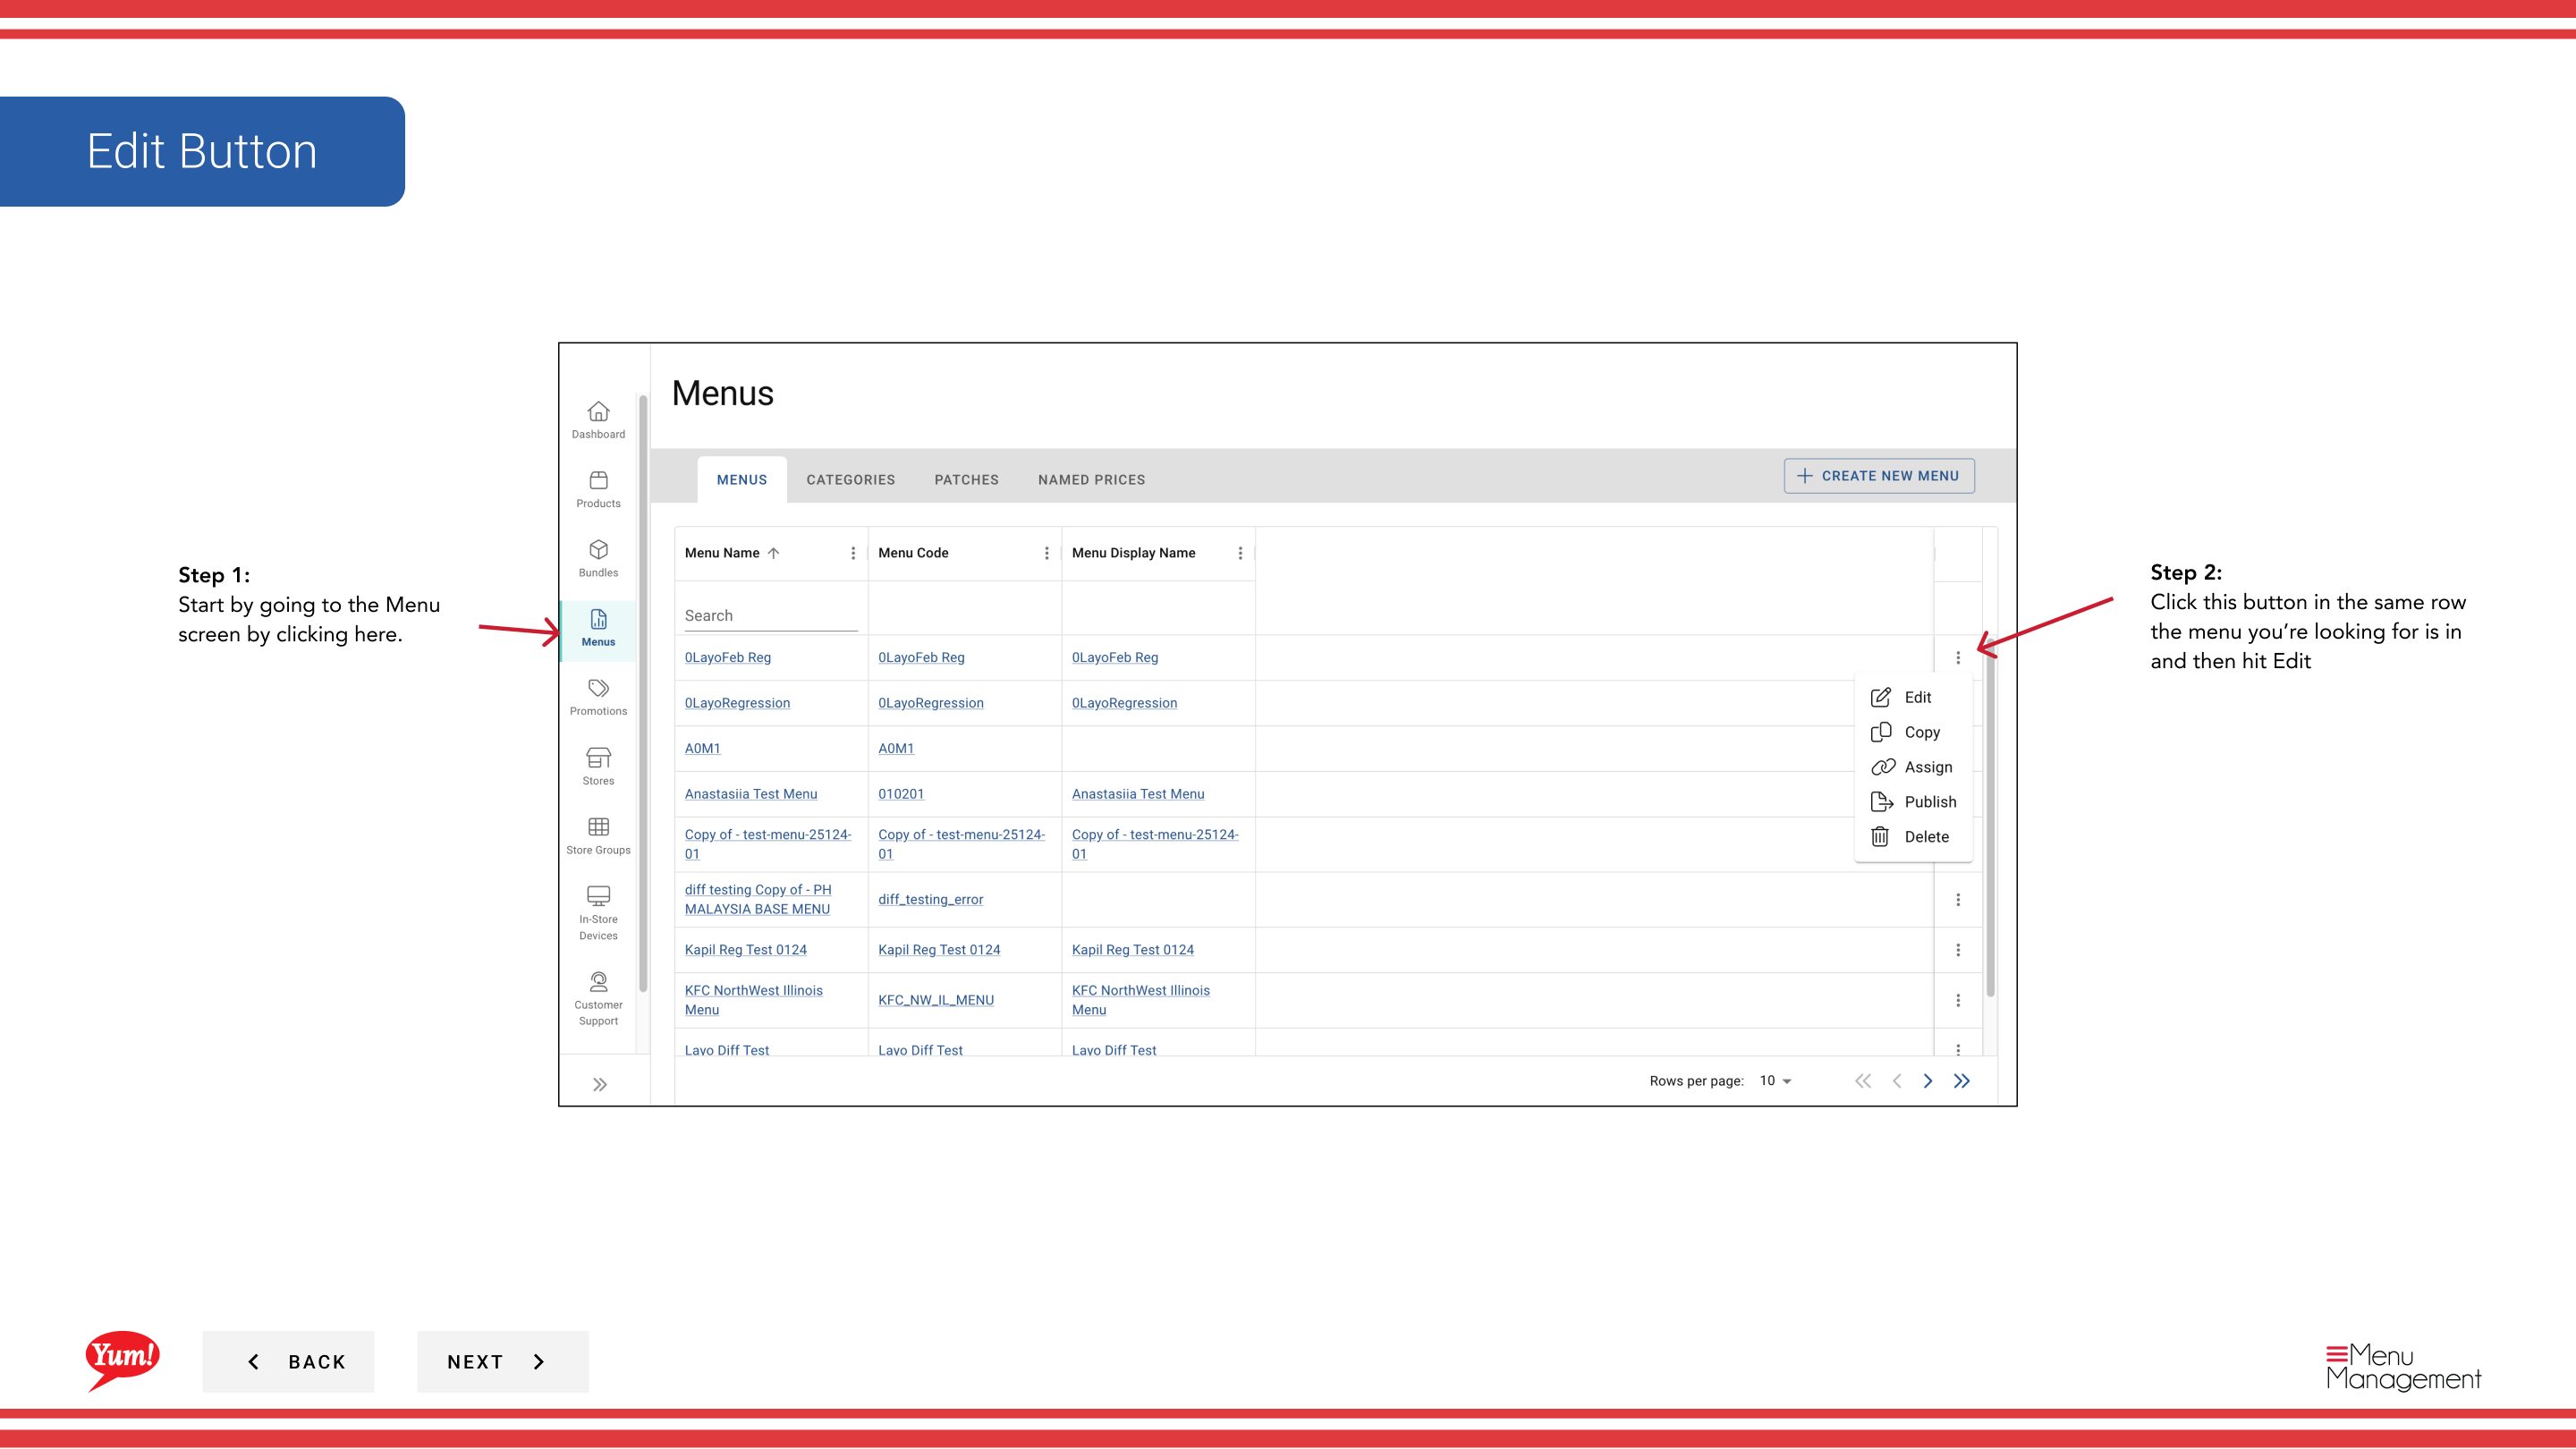
Step 1: Navigate to the Menus section using the left-hand navigation menu.
Step 2: Find the menu you want to edit in the menus list, click the action menu (three dots) in the same row, and select Edit.
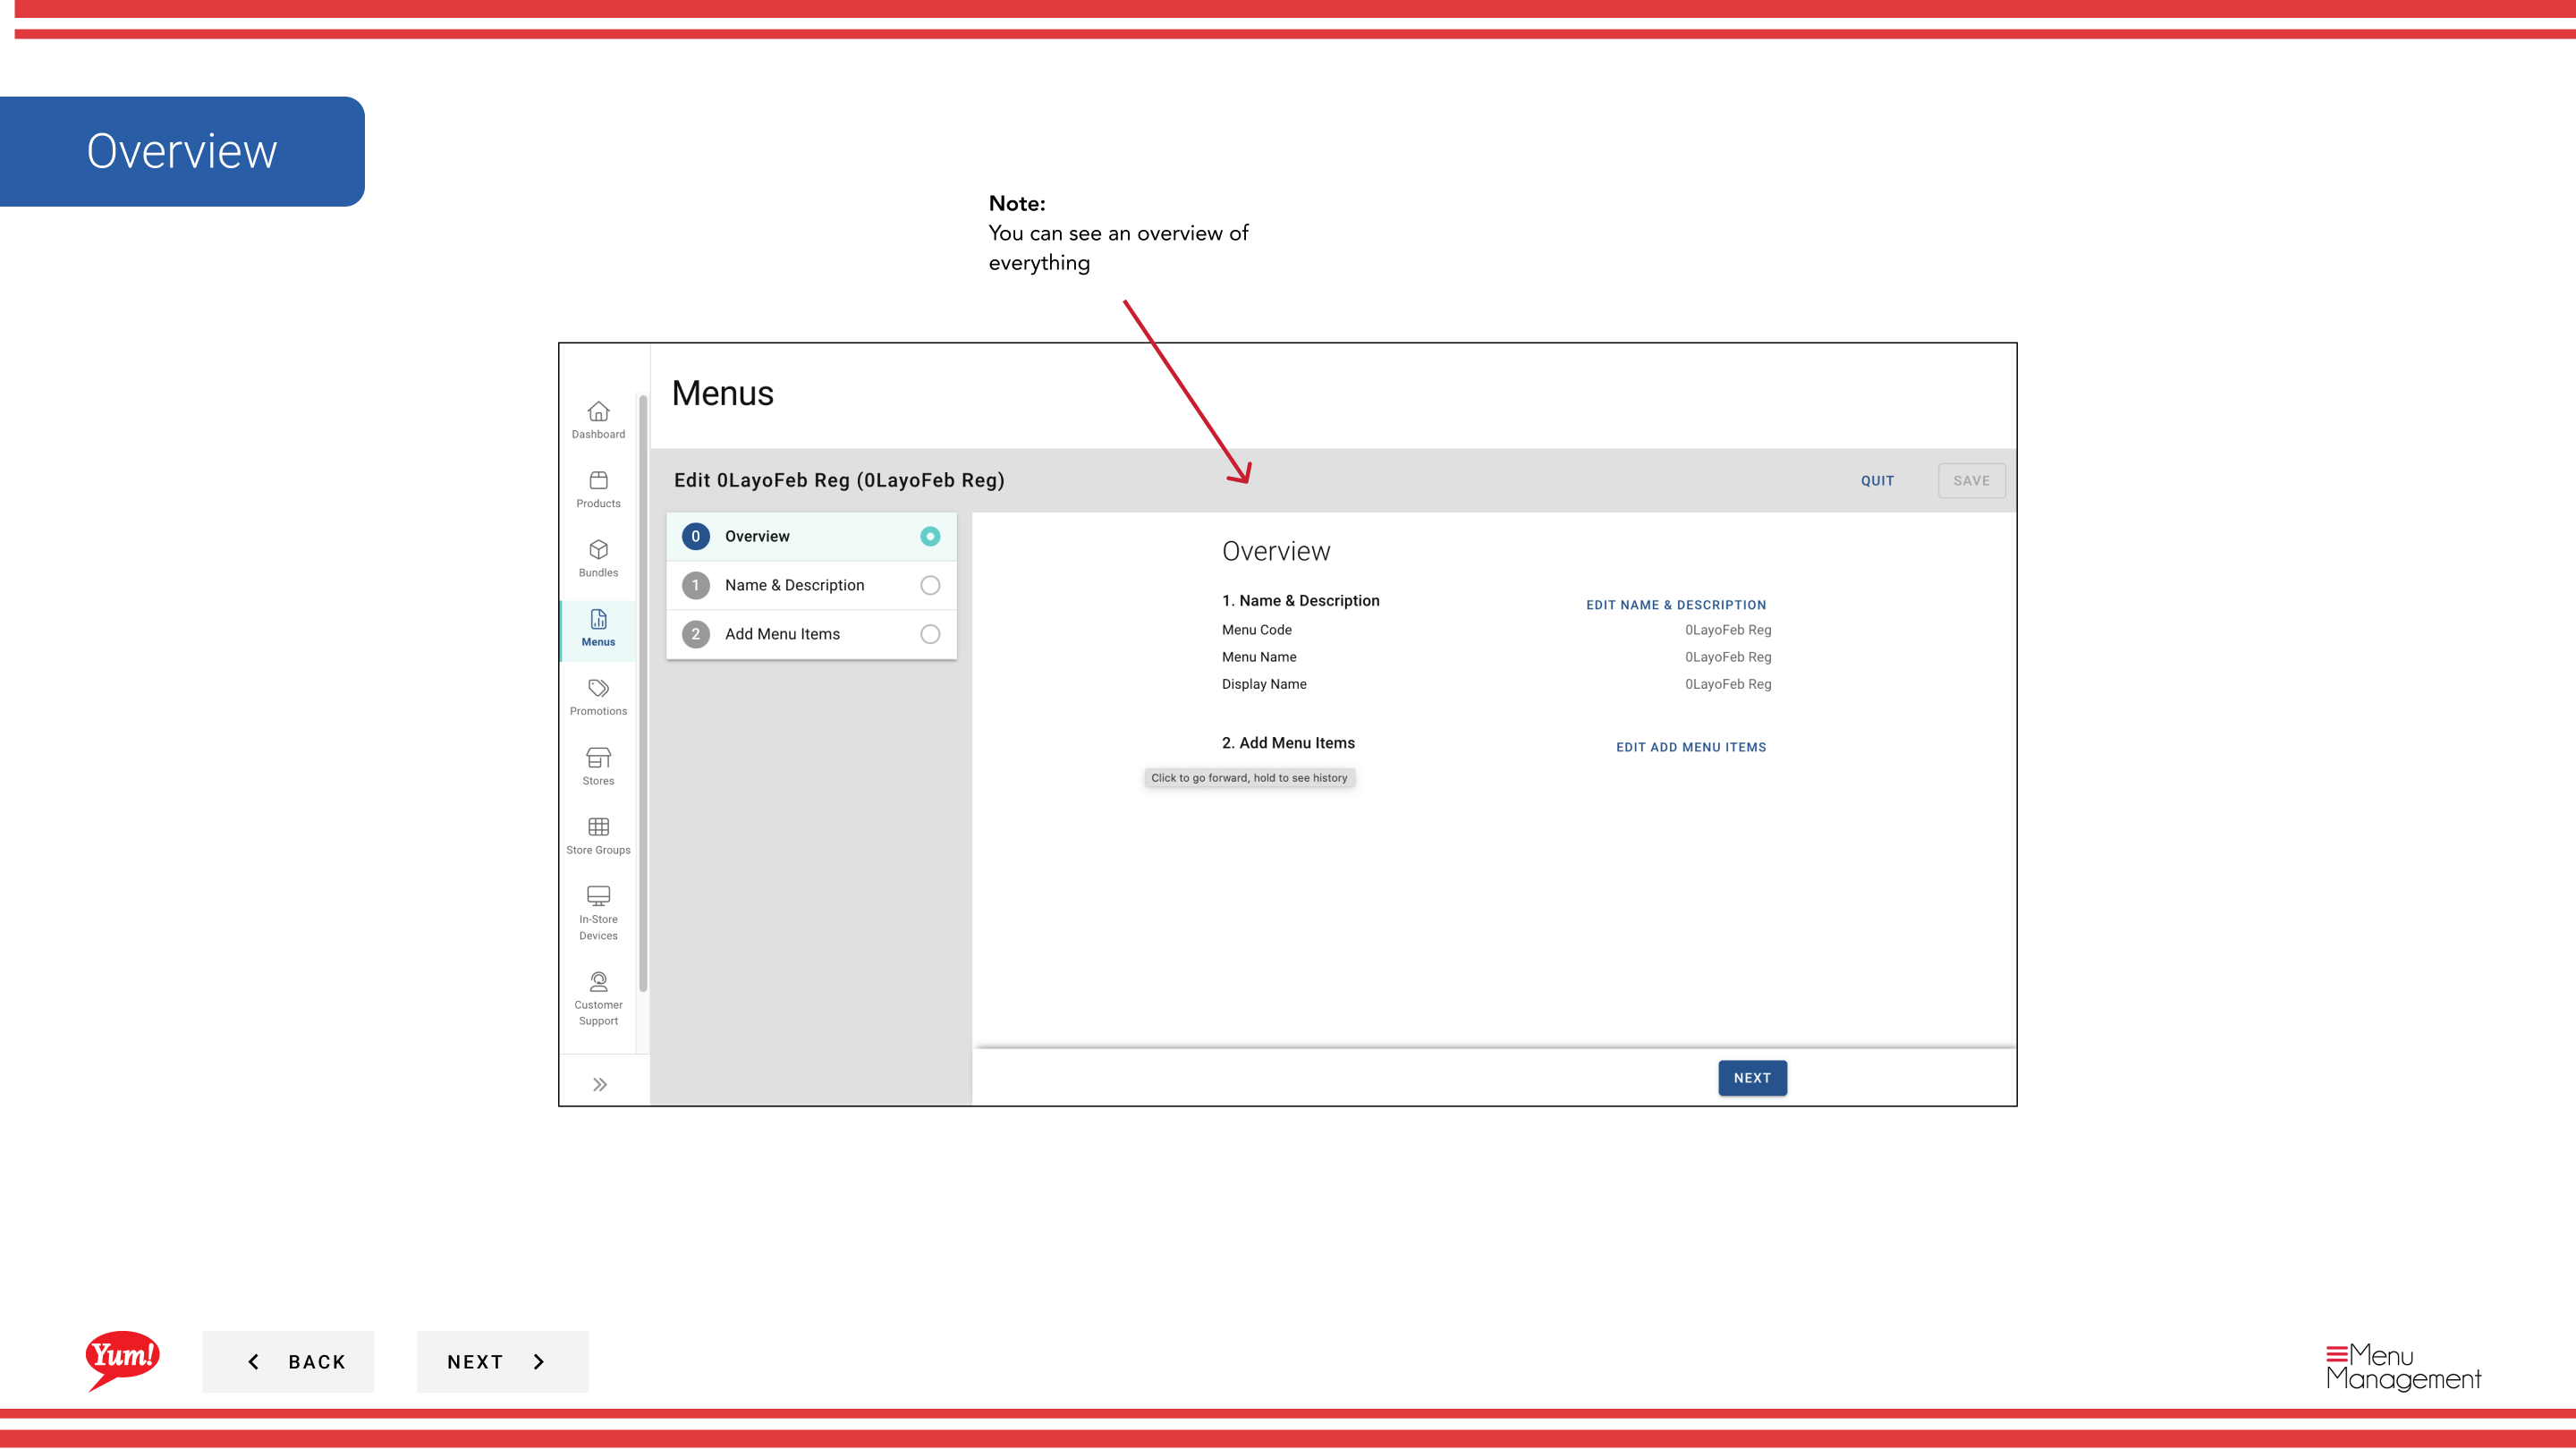
Step 3: On the Overview tab, you can view or modify the following fields:
| Field | What to enter | Notes |
|---|---|---|
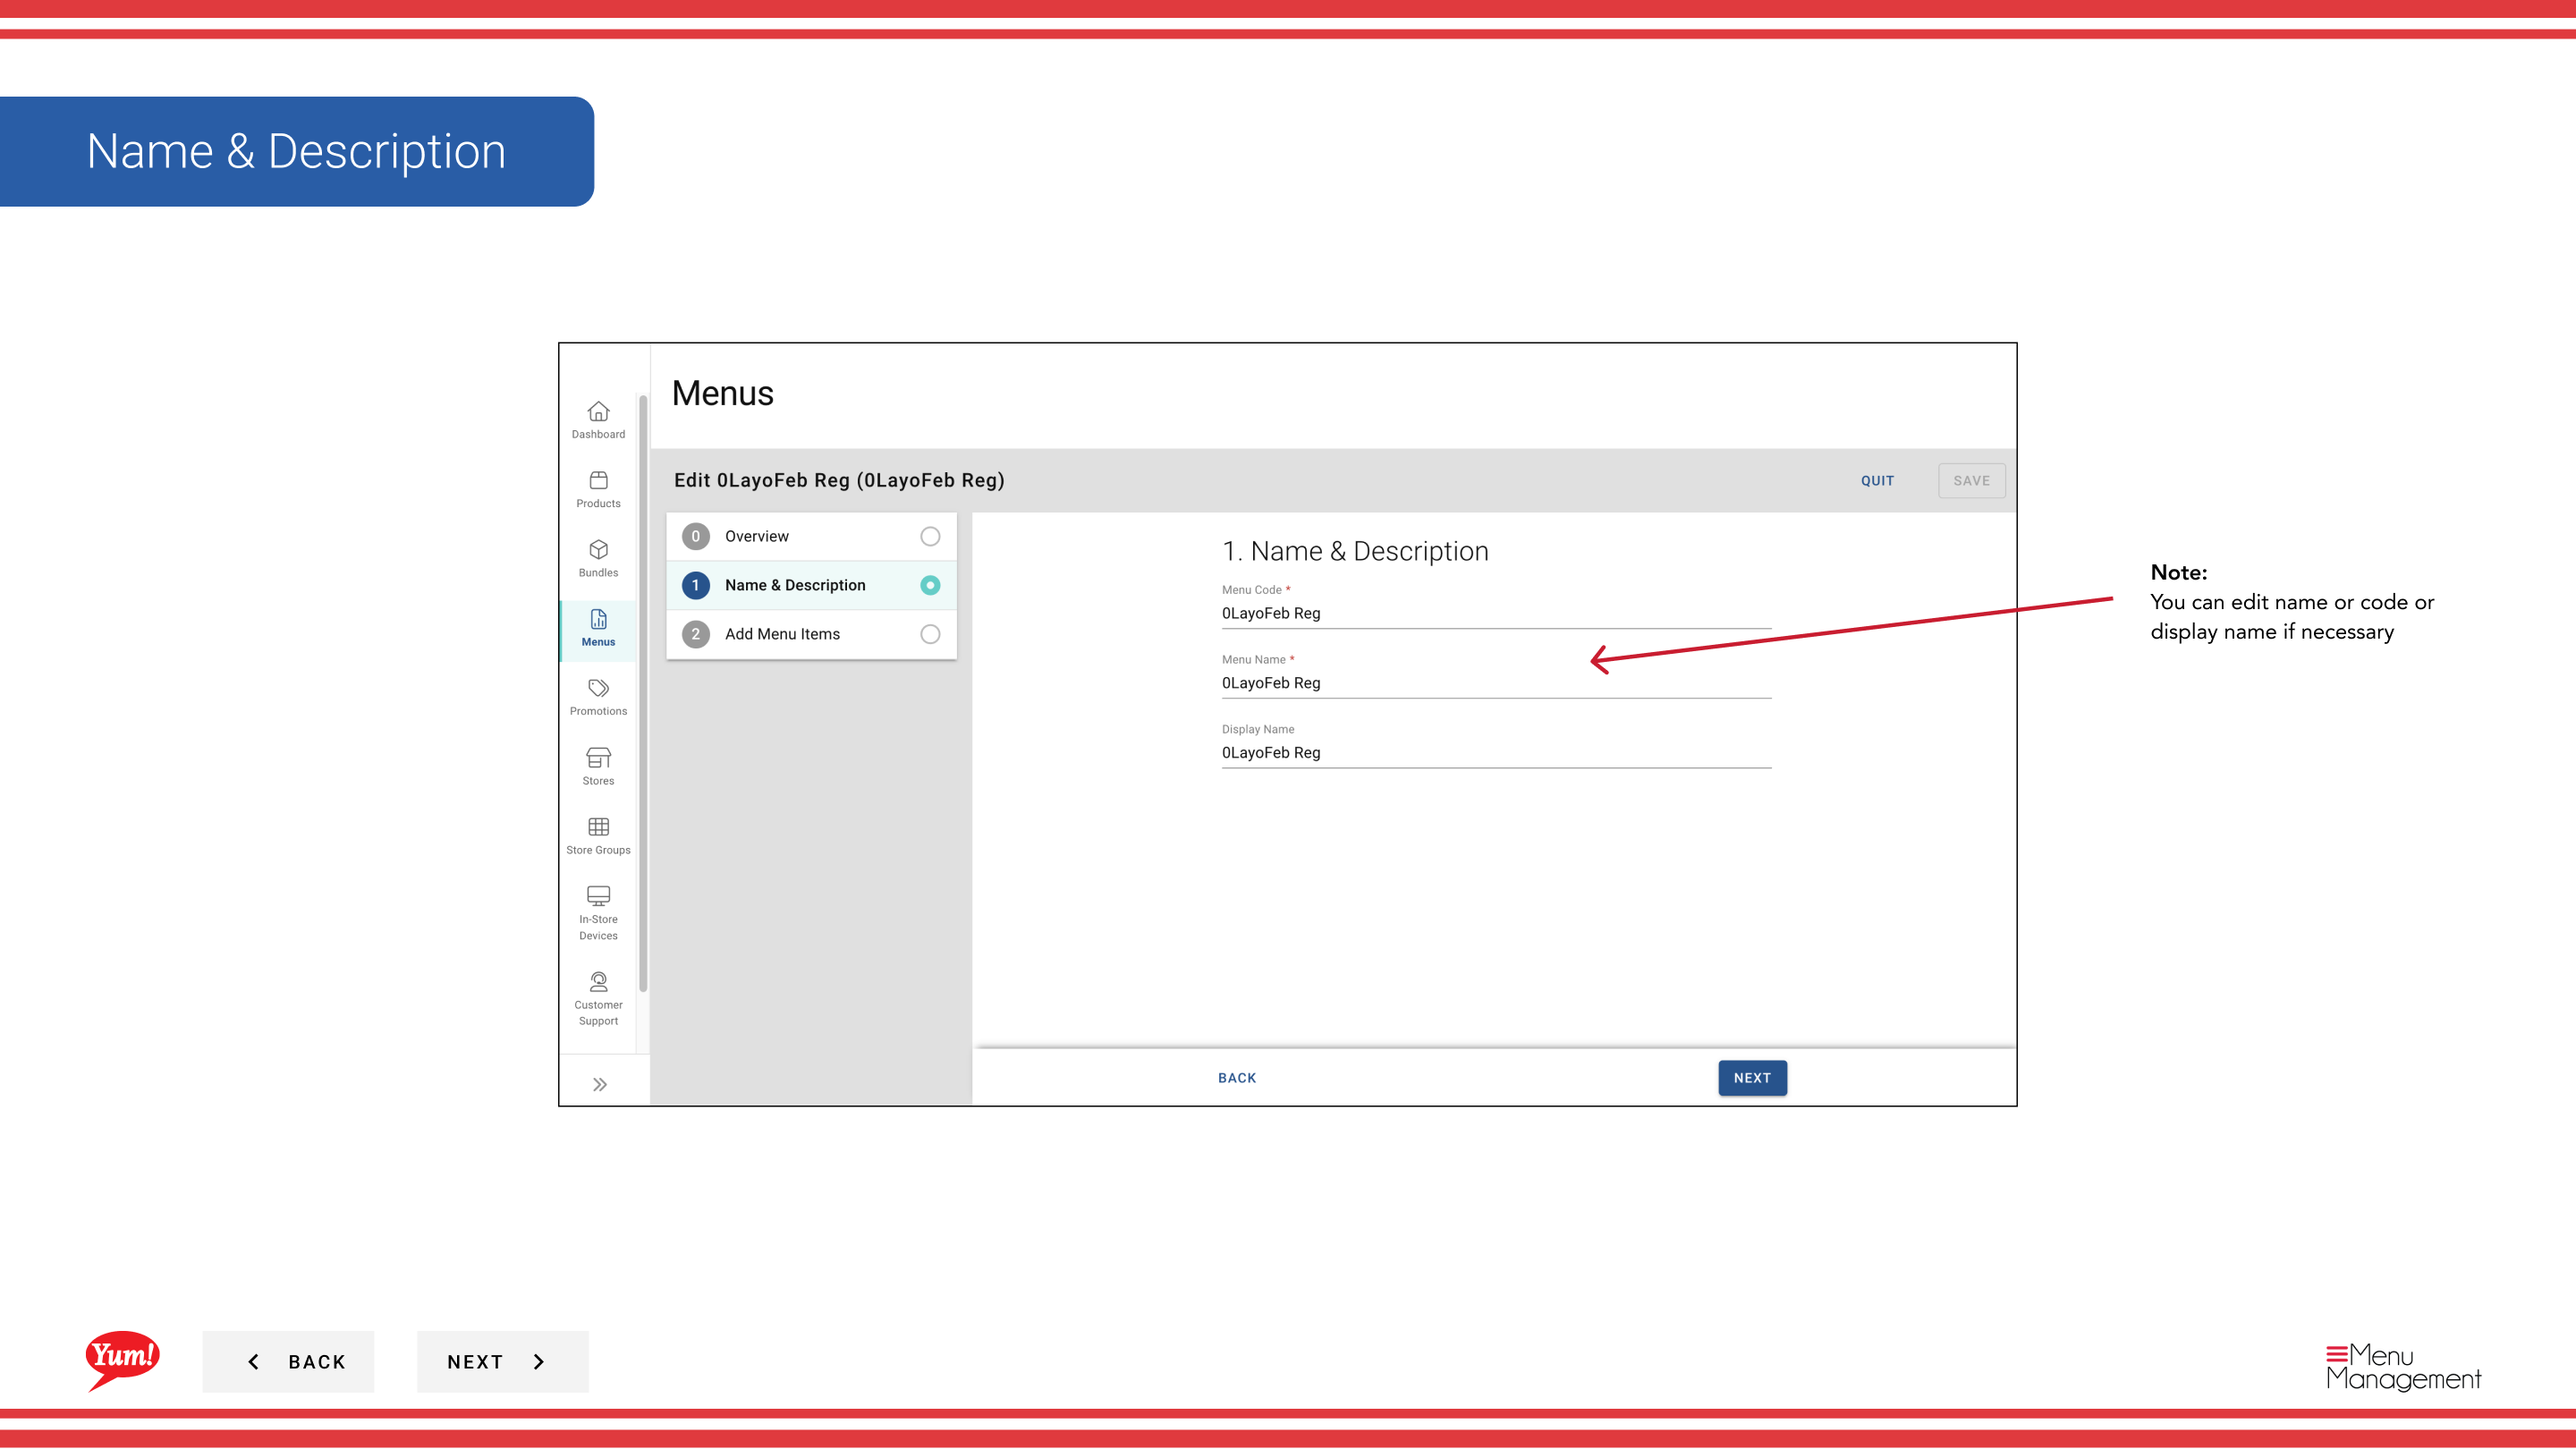
| Menu Name | A human-readable name for this menu | e.g., "Australia Breakfast Menu 2024". Shown in the Menus list and when assigning menus to stores. |
| Menu Code | The unique system identifier | Display only — cannot be changed after creation. |
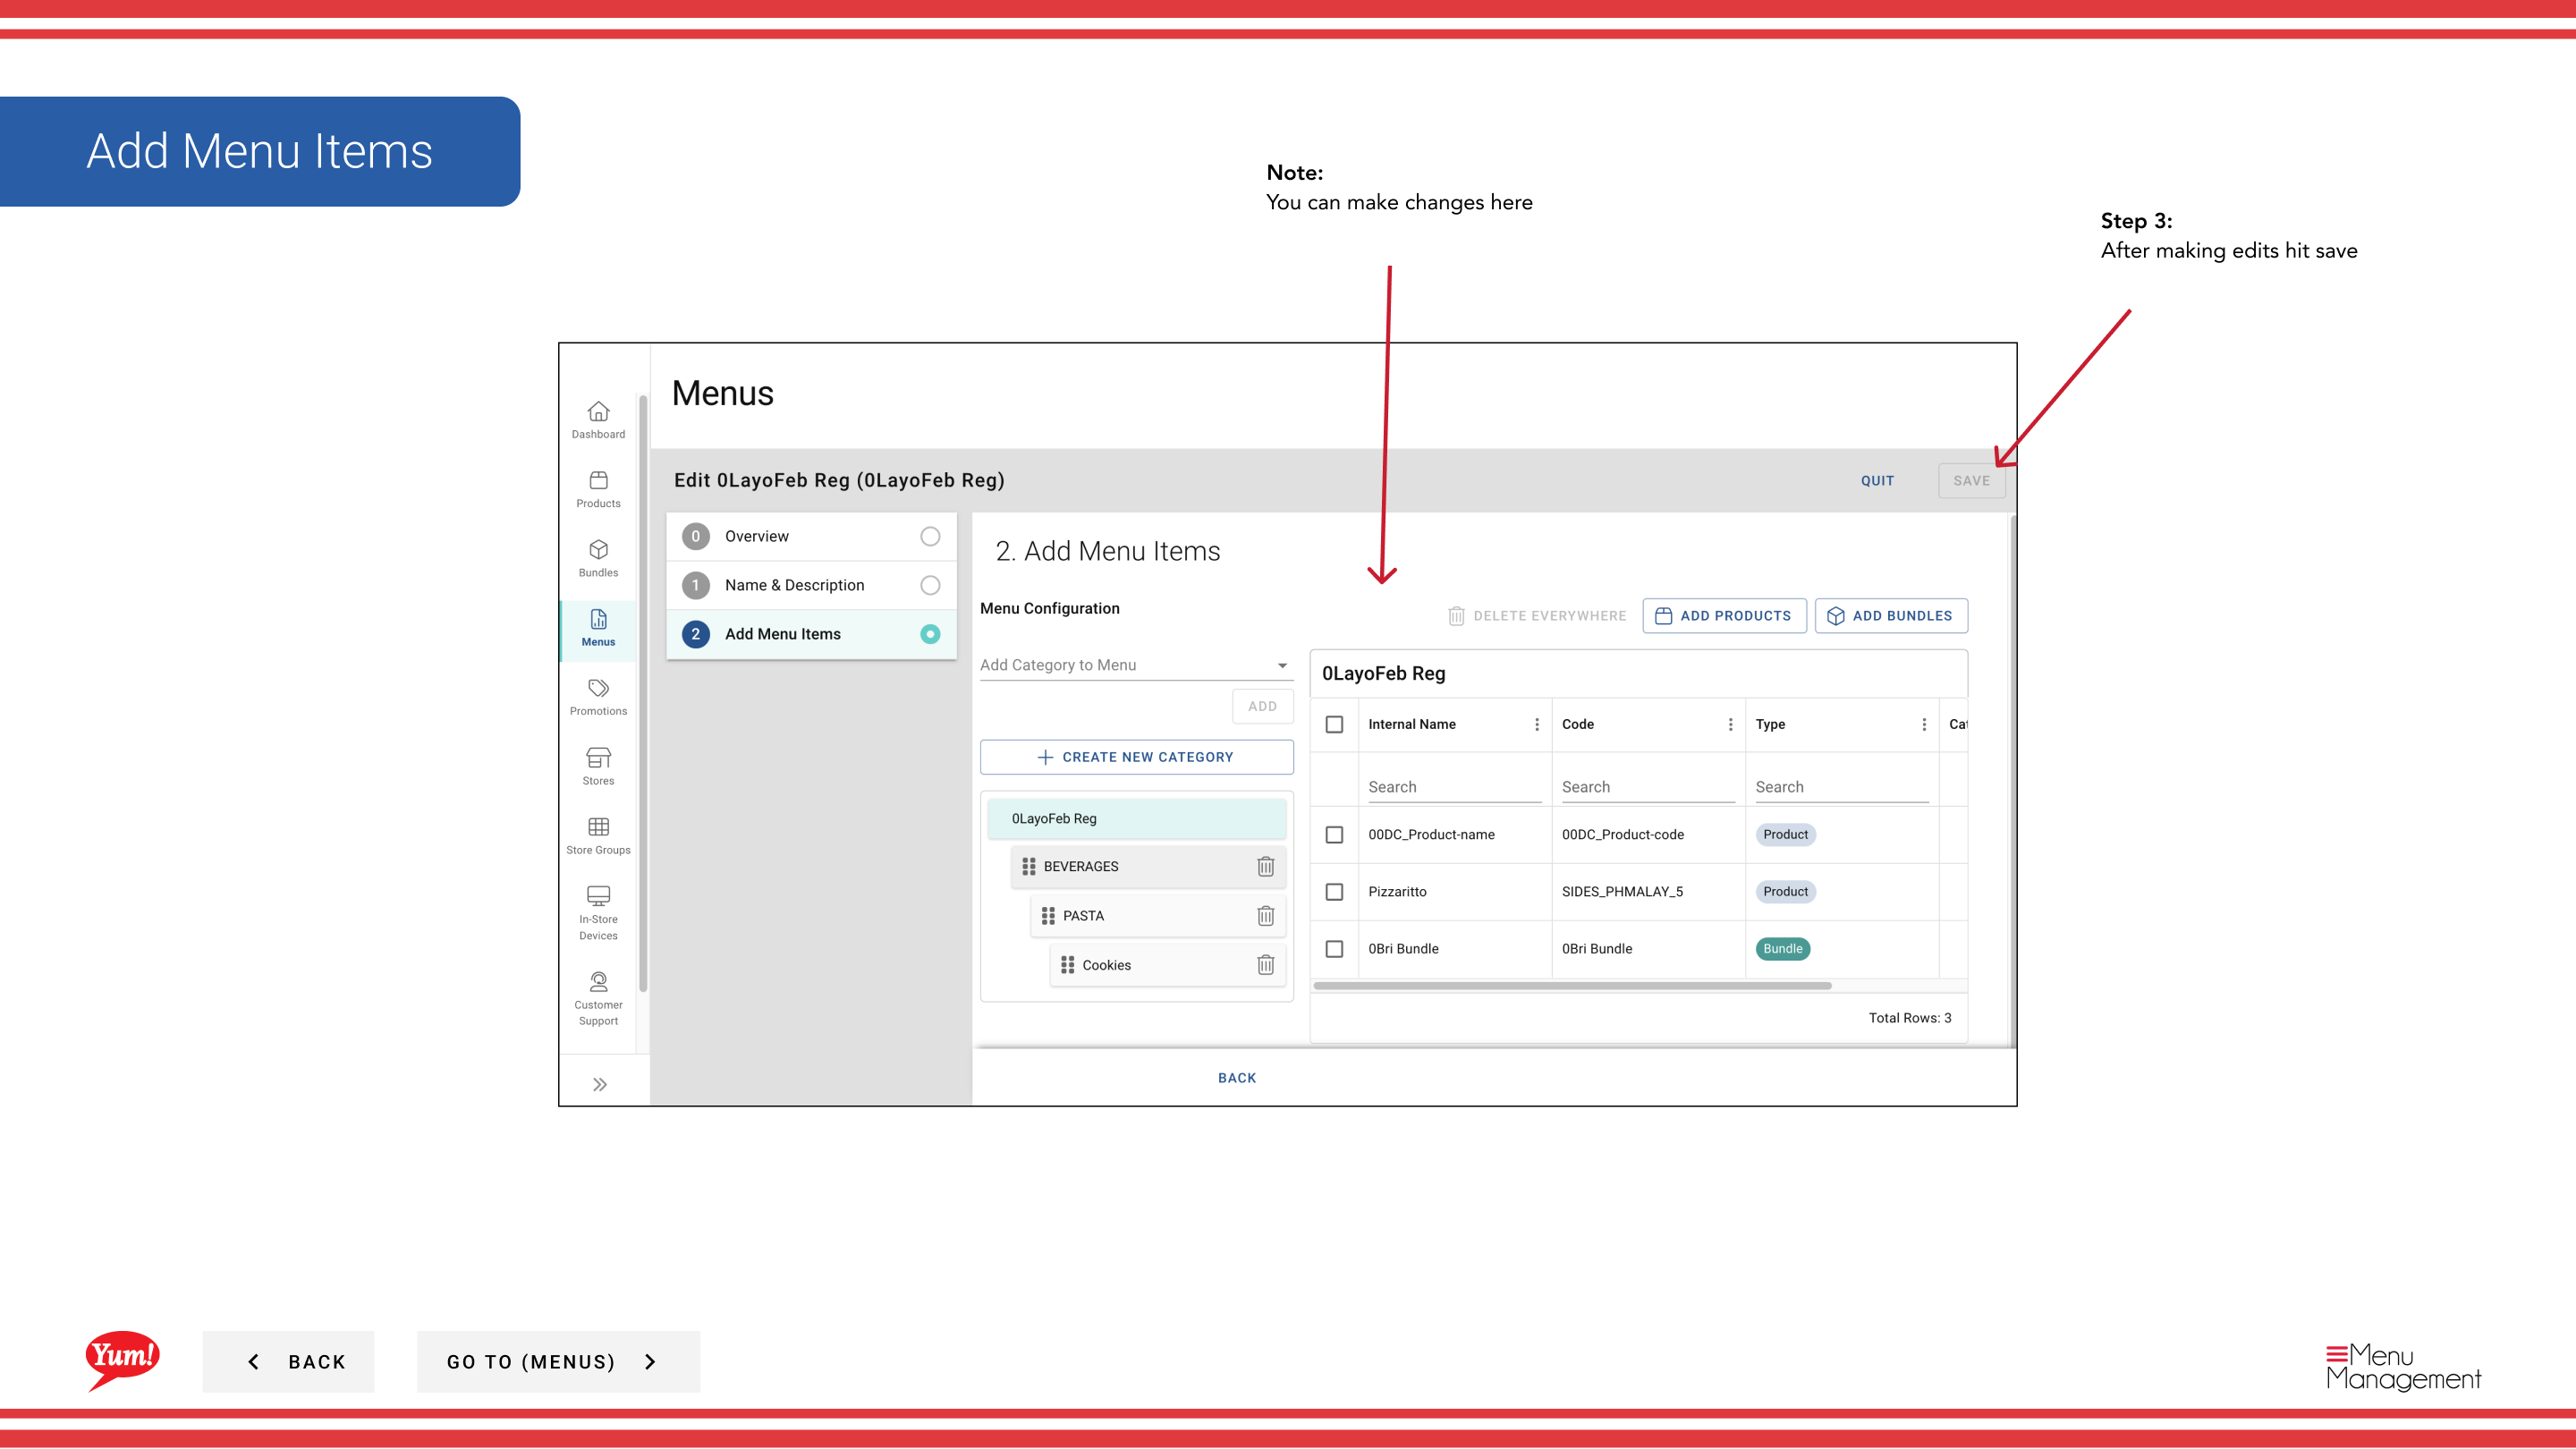
Step 4: Add or remove categories by using the Add Category dropdown or by dragging categories to reorder them. To remove a category, click the remove icon next to it.
Step 5: Edit category contents by expanding each category and using the Add Products/Bundles dropdown to add or remove items.
Step 6: Once you have made all changes, click Save to apply them.
All changes are saved to this menu version. They will not appear at stores unless the menu is reassigned and republished.
Related guides
- Publish a Menu — Publish menu changes to live channels
- Assign a Menu — Assign this menu to stores and channels
- Copy a Menu — Duplicate this menu to create a new version
Part of the Admin Portal Guide · Section: Menus