Add Metafields to a Modifier
What this guide covers
Attaches structured custom data to a modifier for integration or compliance purposes.
Steps
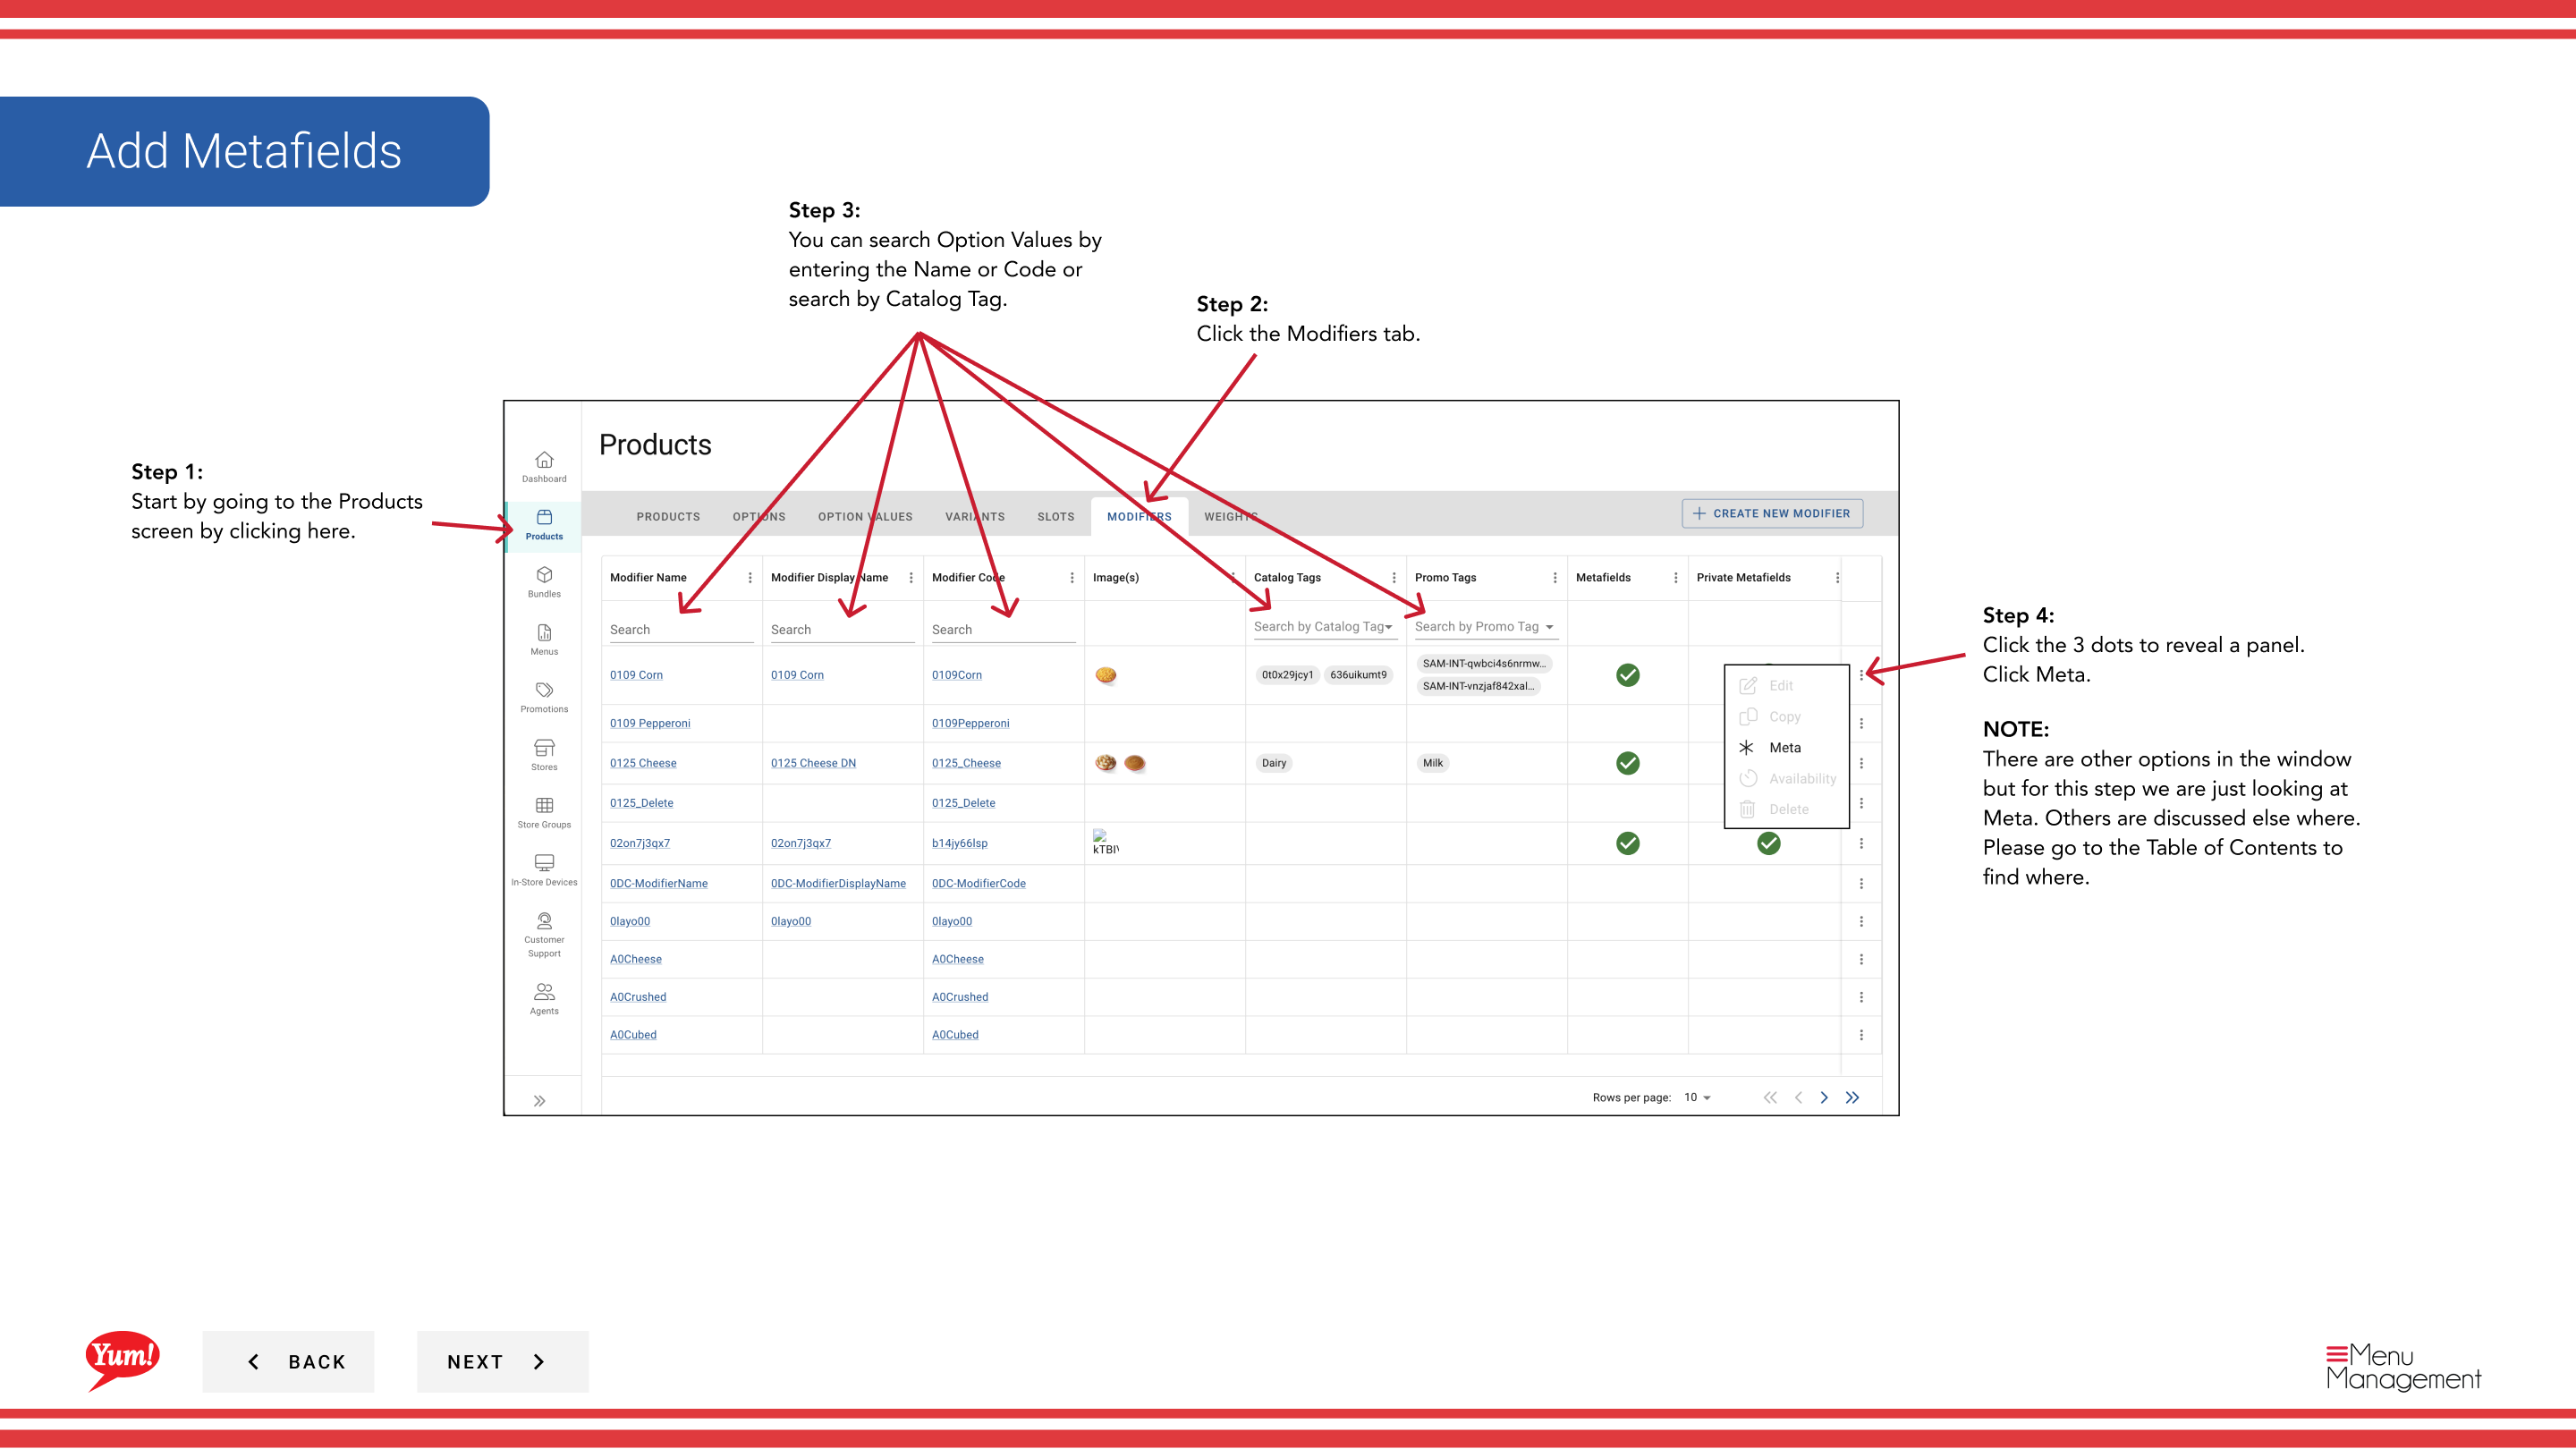
Step 1: Navigate to the Products section using the left navigation menu.
Step 2: Click the Modifiers tab.
Step 3: Search for the modifier by entering the Name, Code, or Catalog Tag in the search field.
Step 4: Click the three-dot menu next to the modifier, then select Meta.
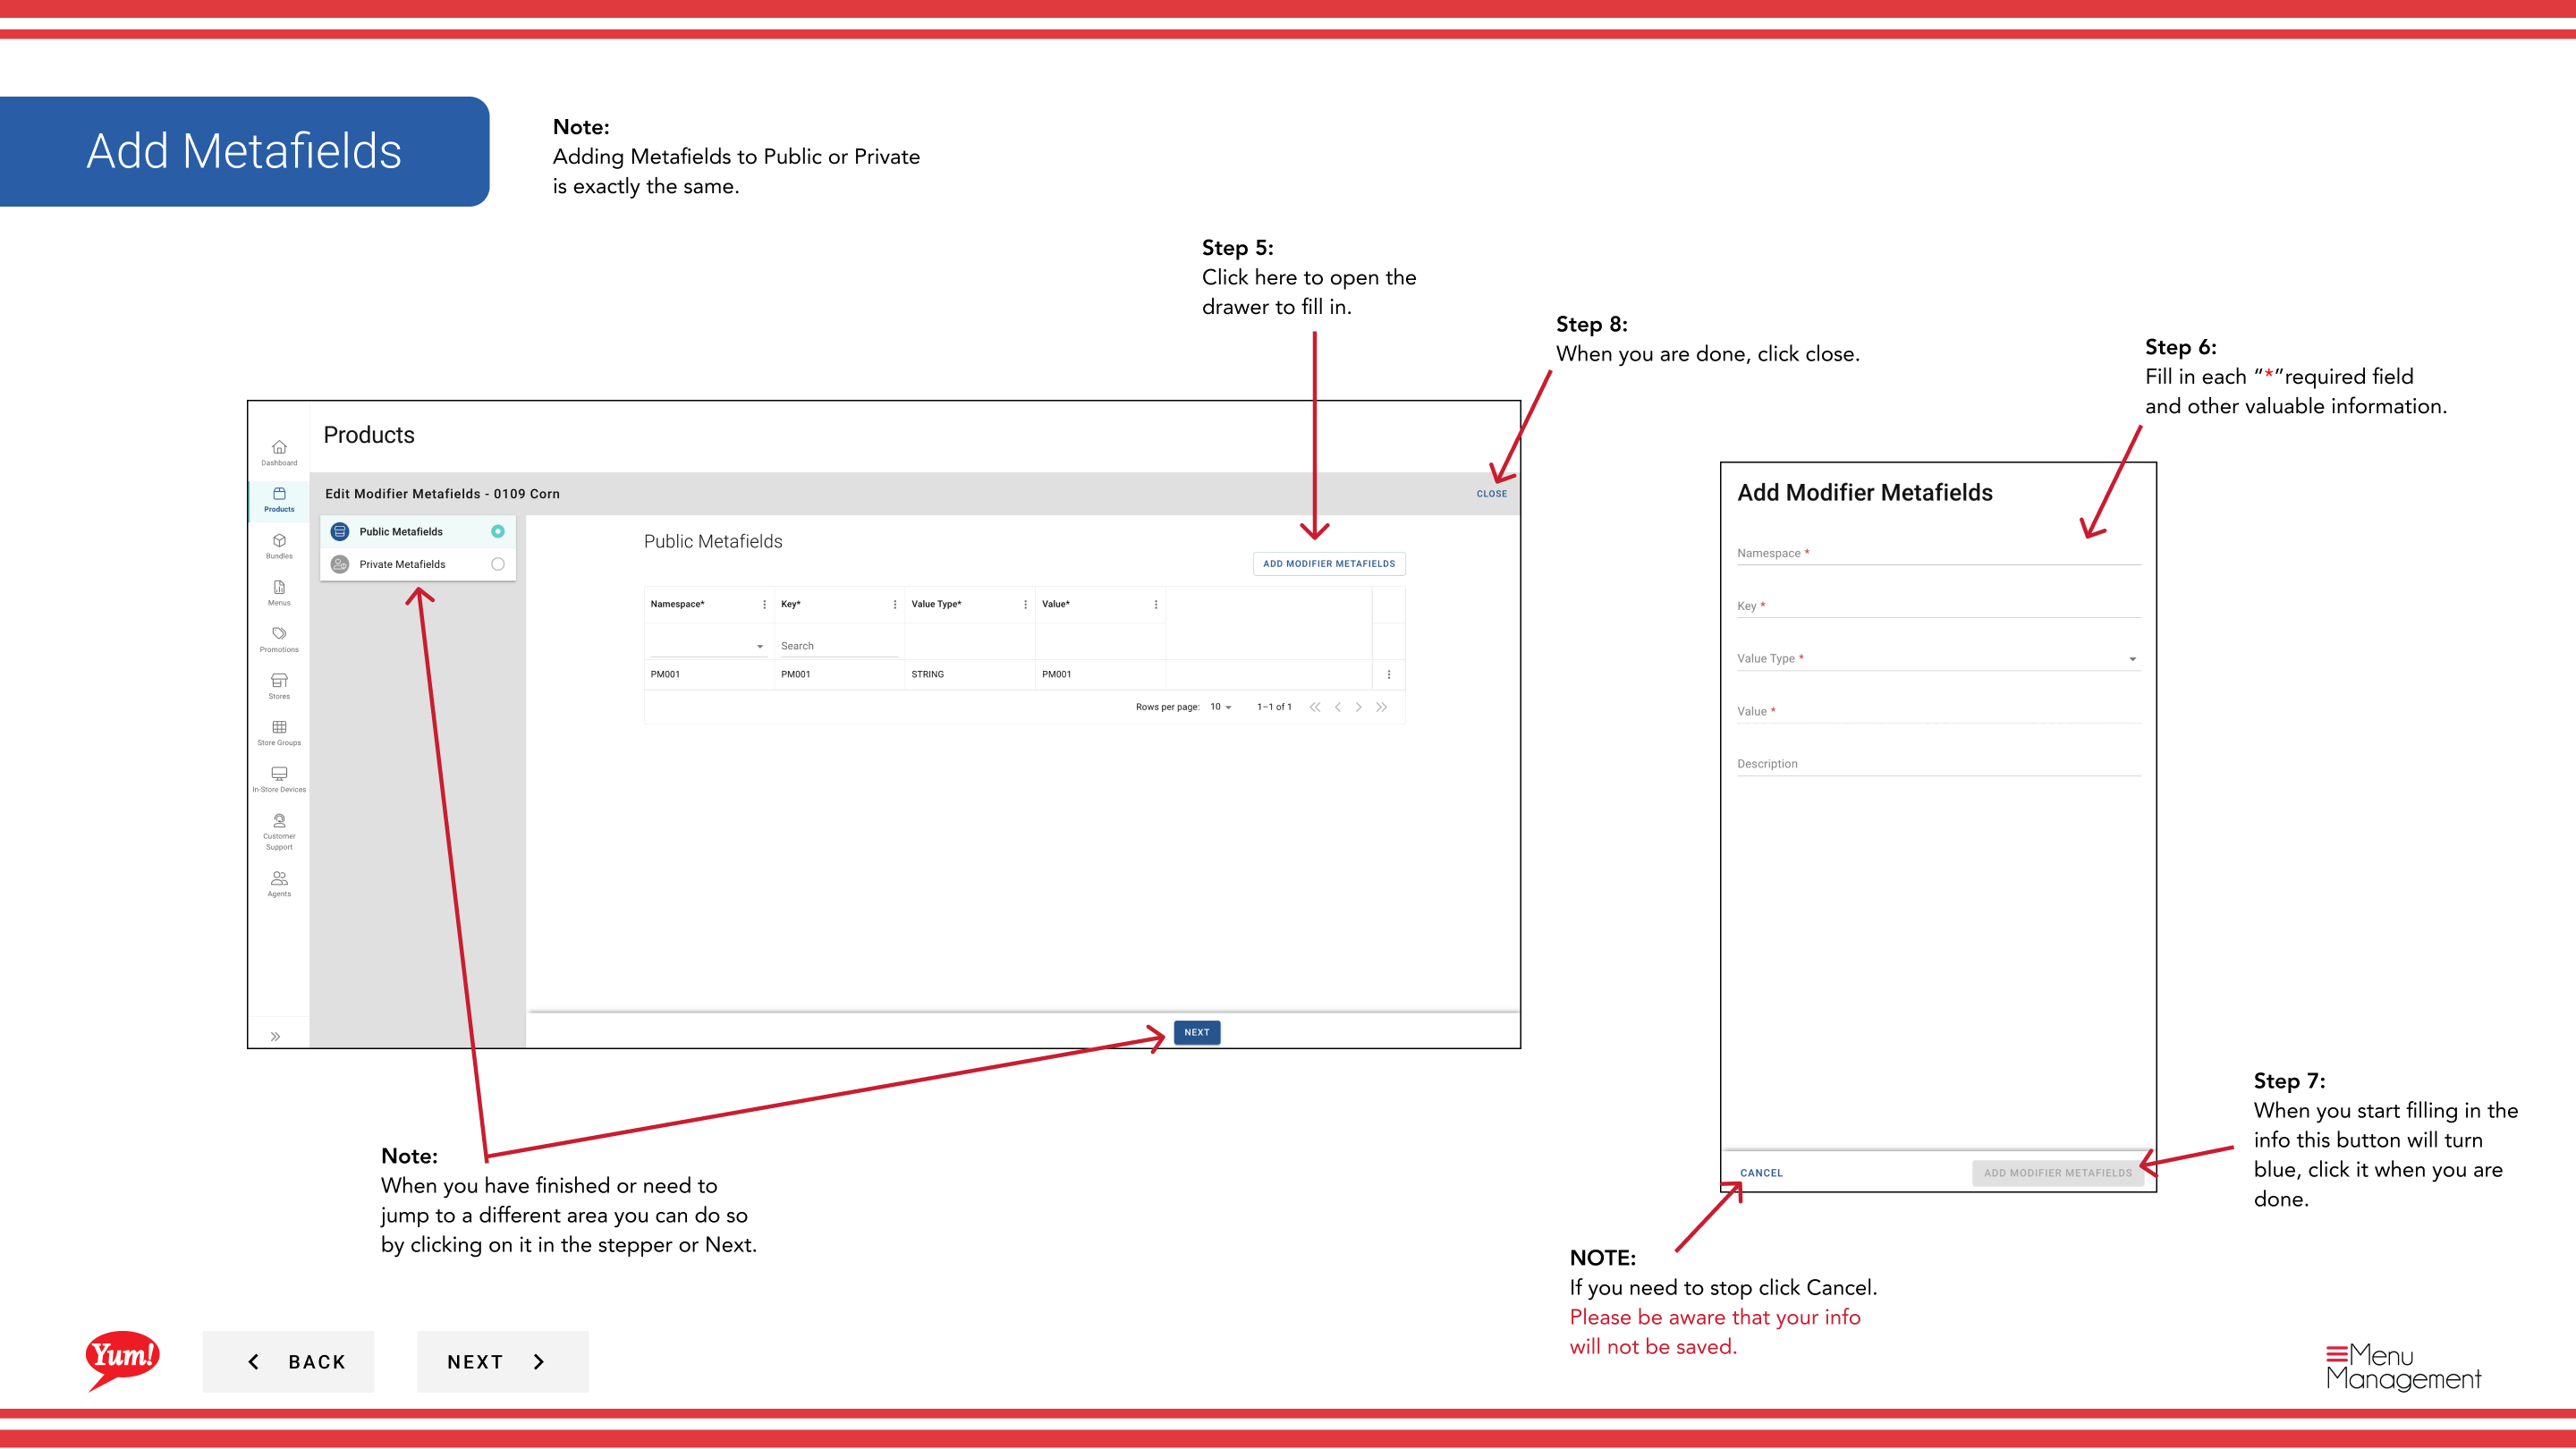
Step 5: A drawer will open showing both Public and Private metafield sections.
Step 6: Click the Add button to add a new metafield.
Step 7: Fill in each metafield with the exact key and value your technical team has specified.
To Edit an Existing Metafield
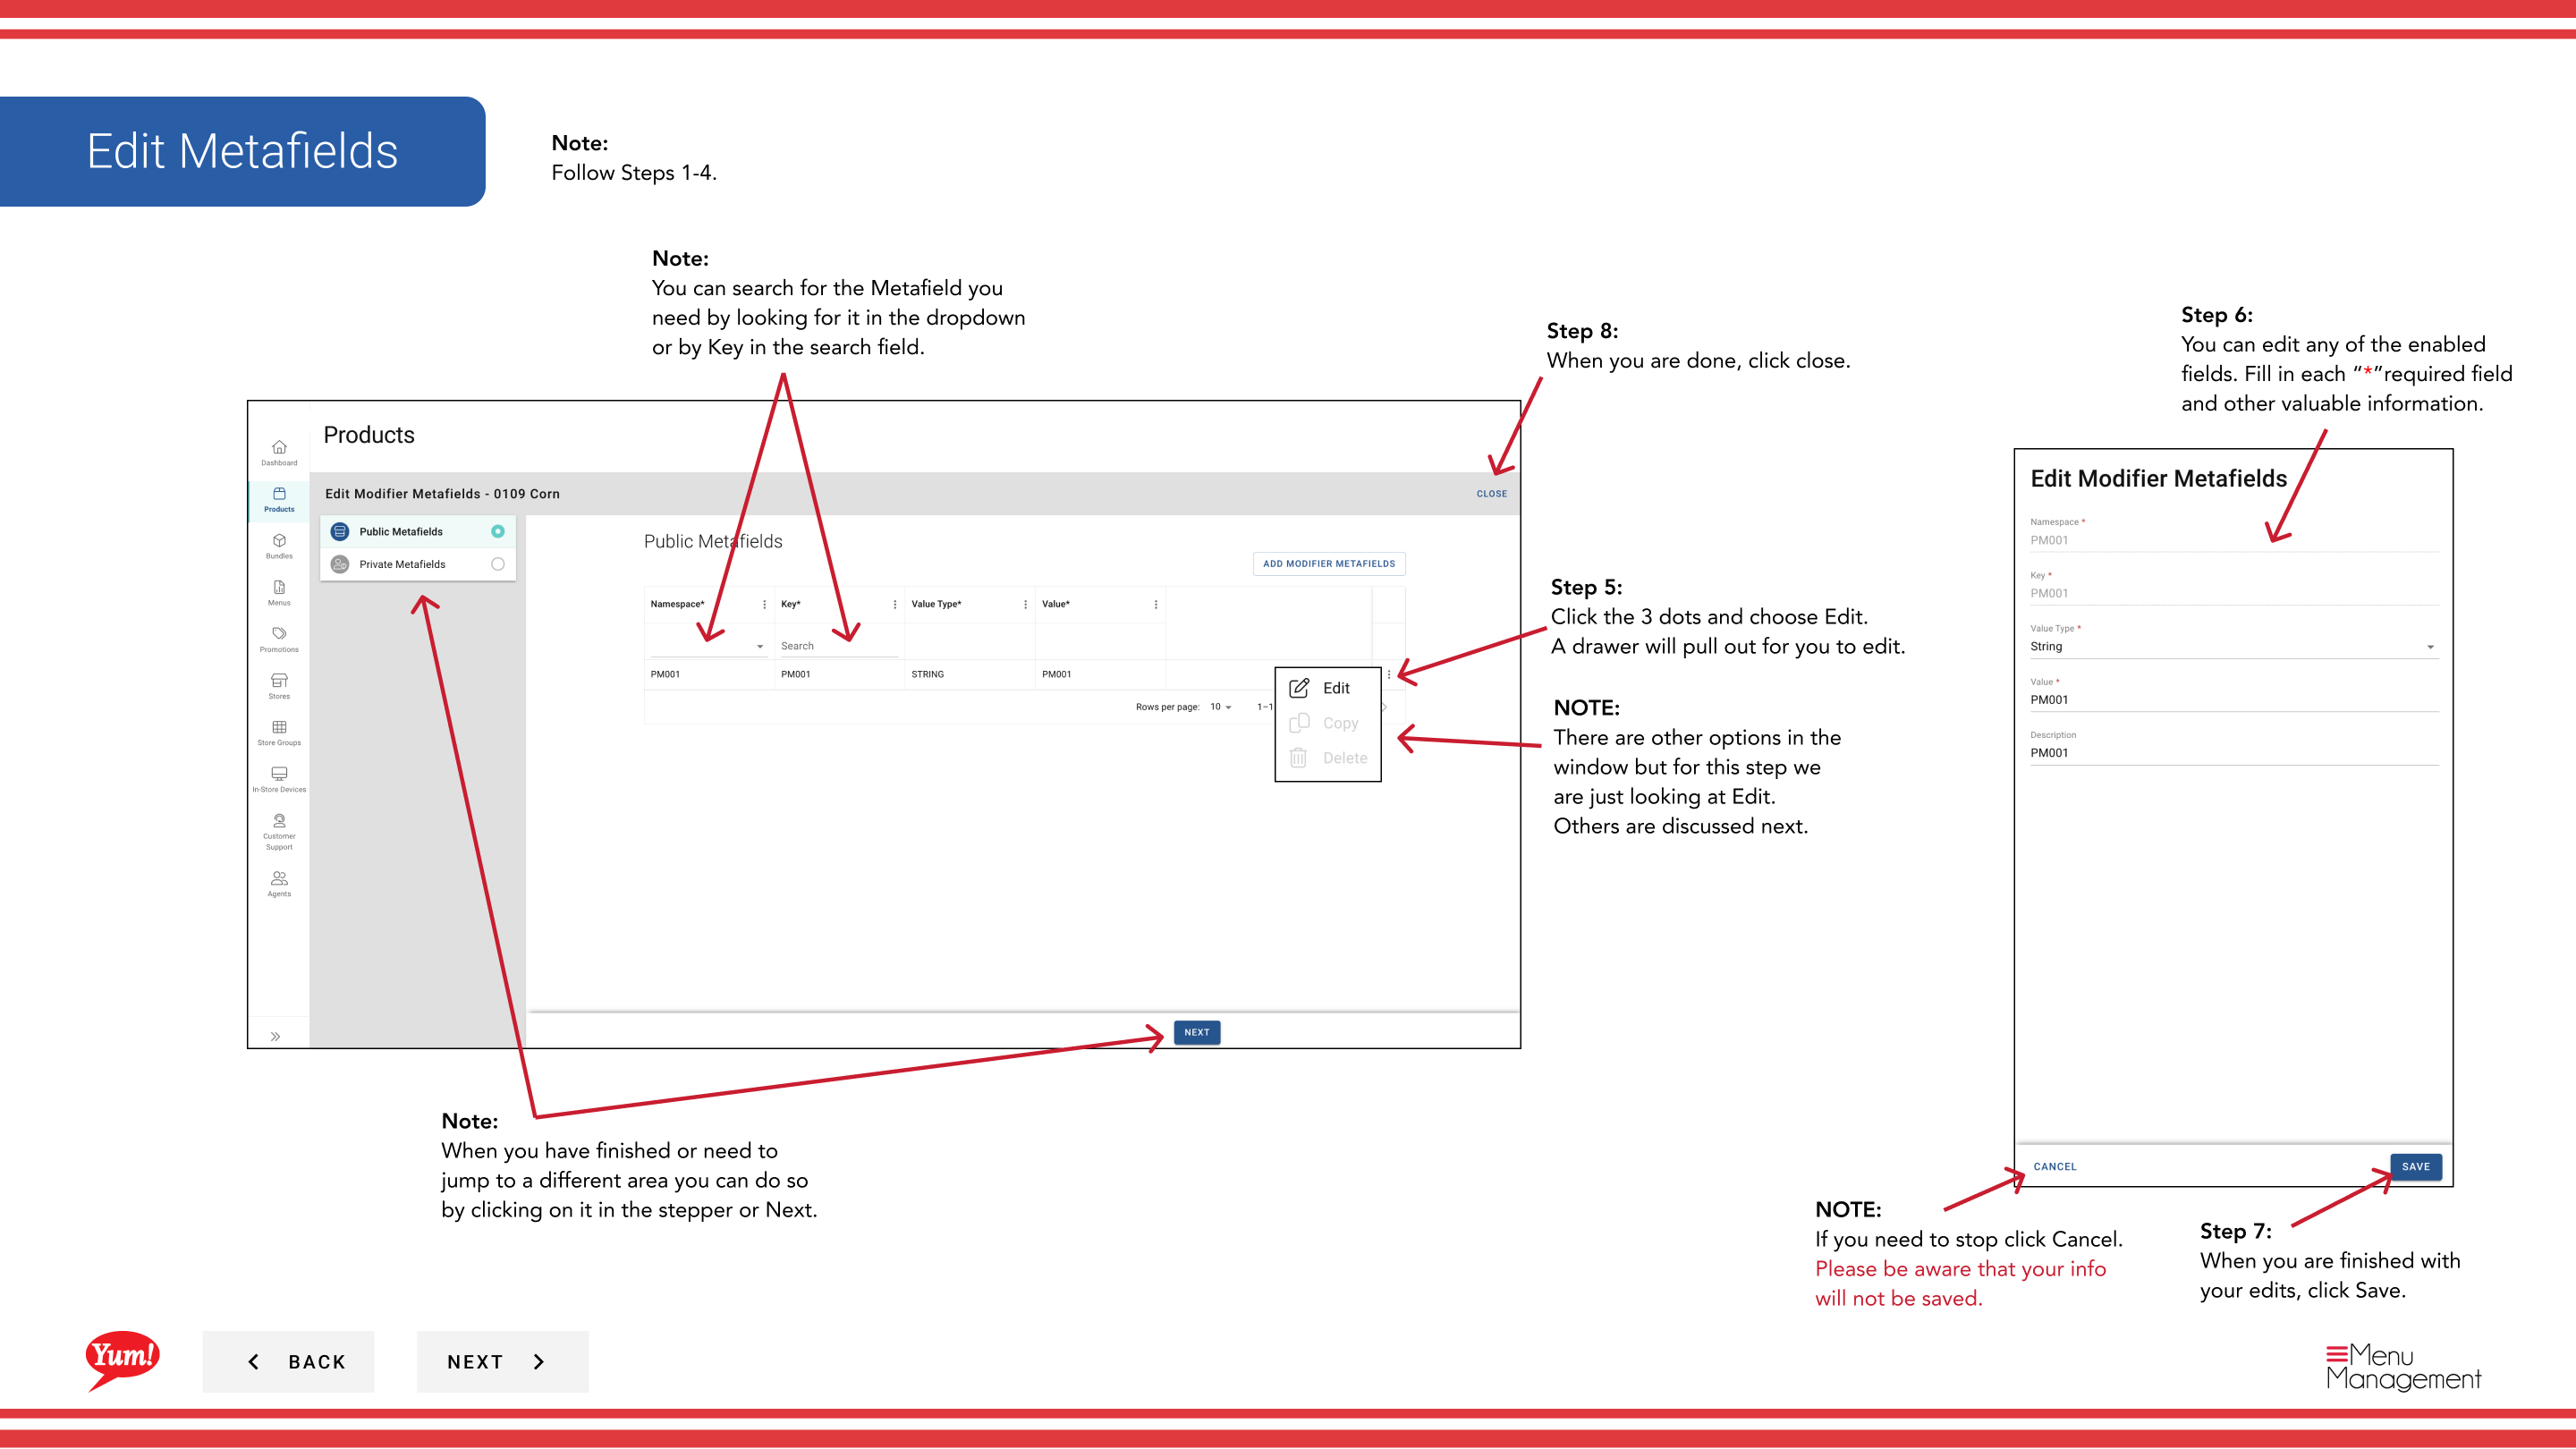
Step 8: Click the three-dot menu next to the metafield you want to edit, then select Edit.
Step 9: Update the key and value as needed, then click Save.
To Copy a Metafield
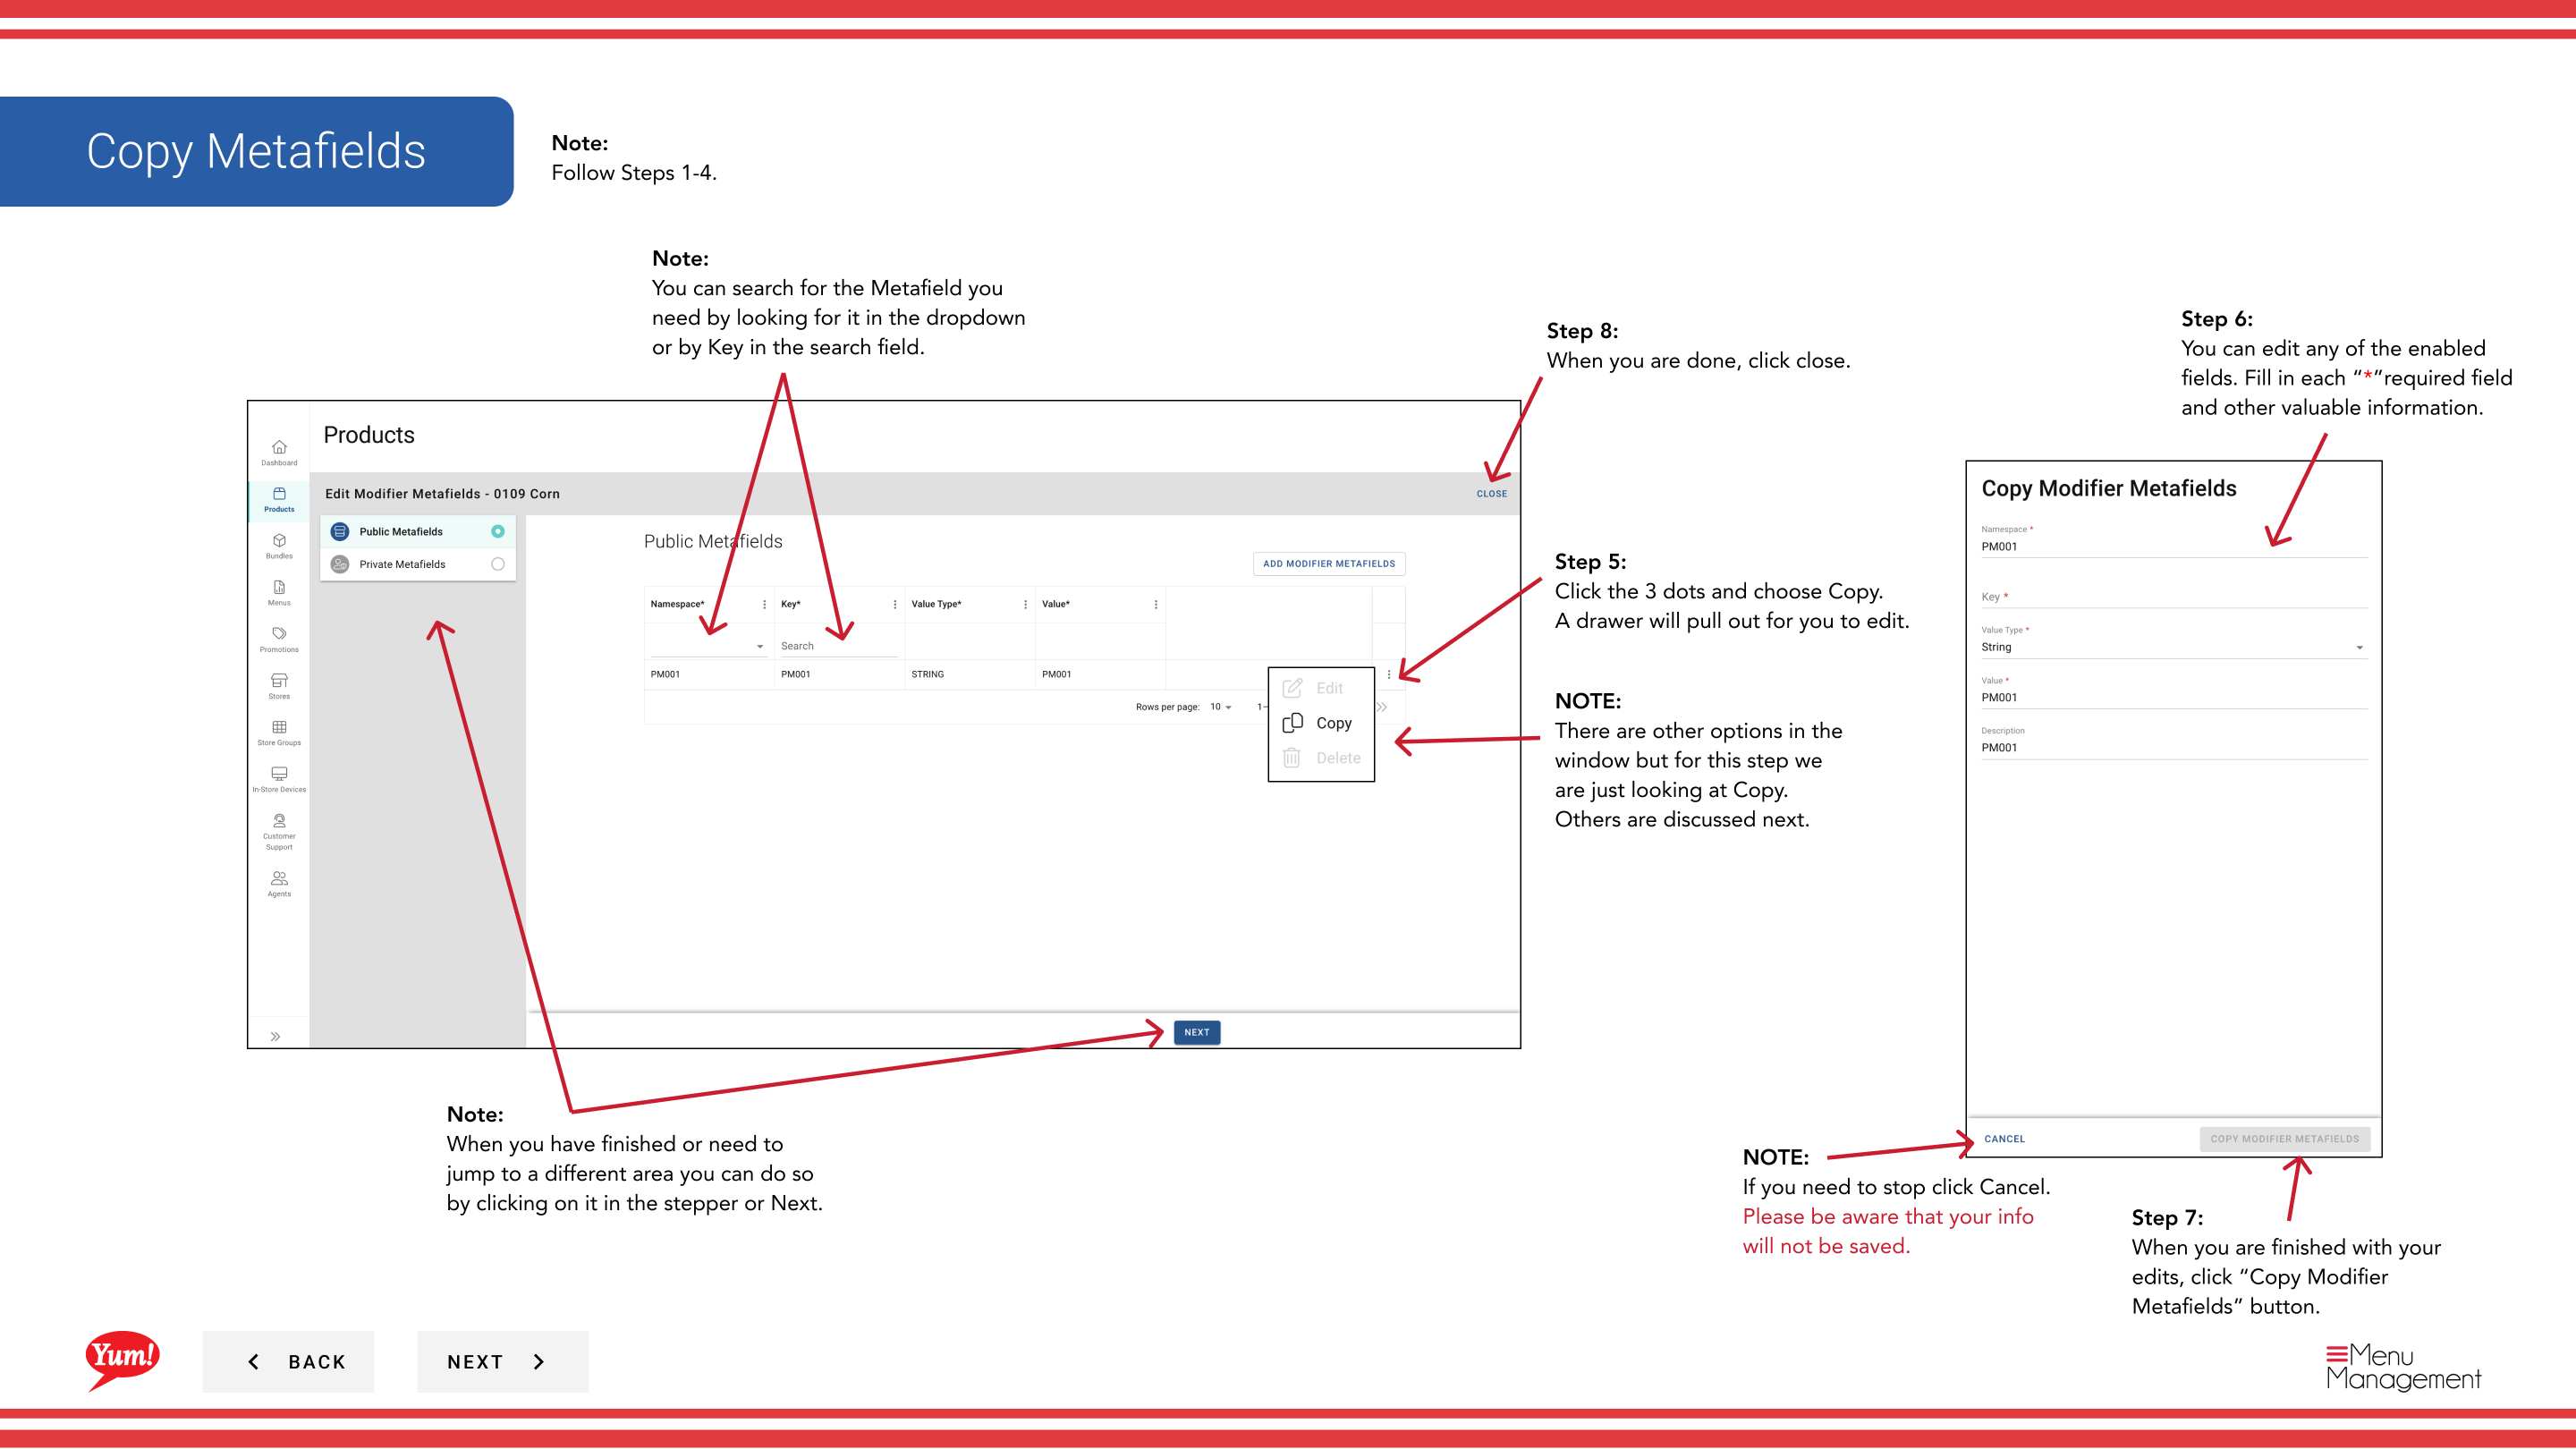
Step 10: Click the three-dot menu next to the metafield you want to copy, then select Copy.
Step 11: A new metafield entry will be created with the same key and value. Edit if needed.
To Delete a Metafield
Step 12: Click the three-dot menu next to the metafield you want to delete, then select Delete.
Step 13: Click the red Delete button to permanently remove the metafield.
Step 14: When you are finished, click Close to close the drawer.
Notes
Only add metafields if your technical team has specified the exact keys and values to use. Incorrect metafields may cause integration failures.
You can search for metafields by looking in the dropdown or by typing the key name in the search field.
Adding metafields to Public or Private follows the same process.
Deleting a metafield is permanent. Confirm you are removing the correct entry before clicking Delete.
Part of the Admin Portal Guide · Section: Products