Create a Slot
What this guide covers
Creates a position within a product where modifiers can be placed (e.g., “Sauce Selection”, “Cheese Options”), structuring how add-ons are presented to customers.
Steps
Step 1: Basic Slot Information
Step 1: Navigate to the Products section using the left navigation menu.
Step 2: Click the Slots tab.
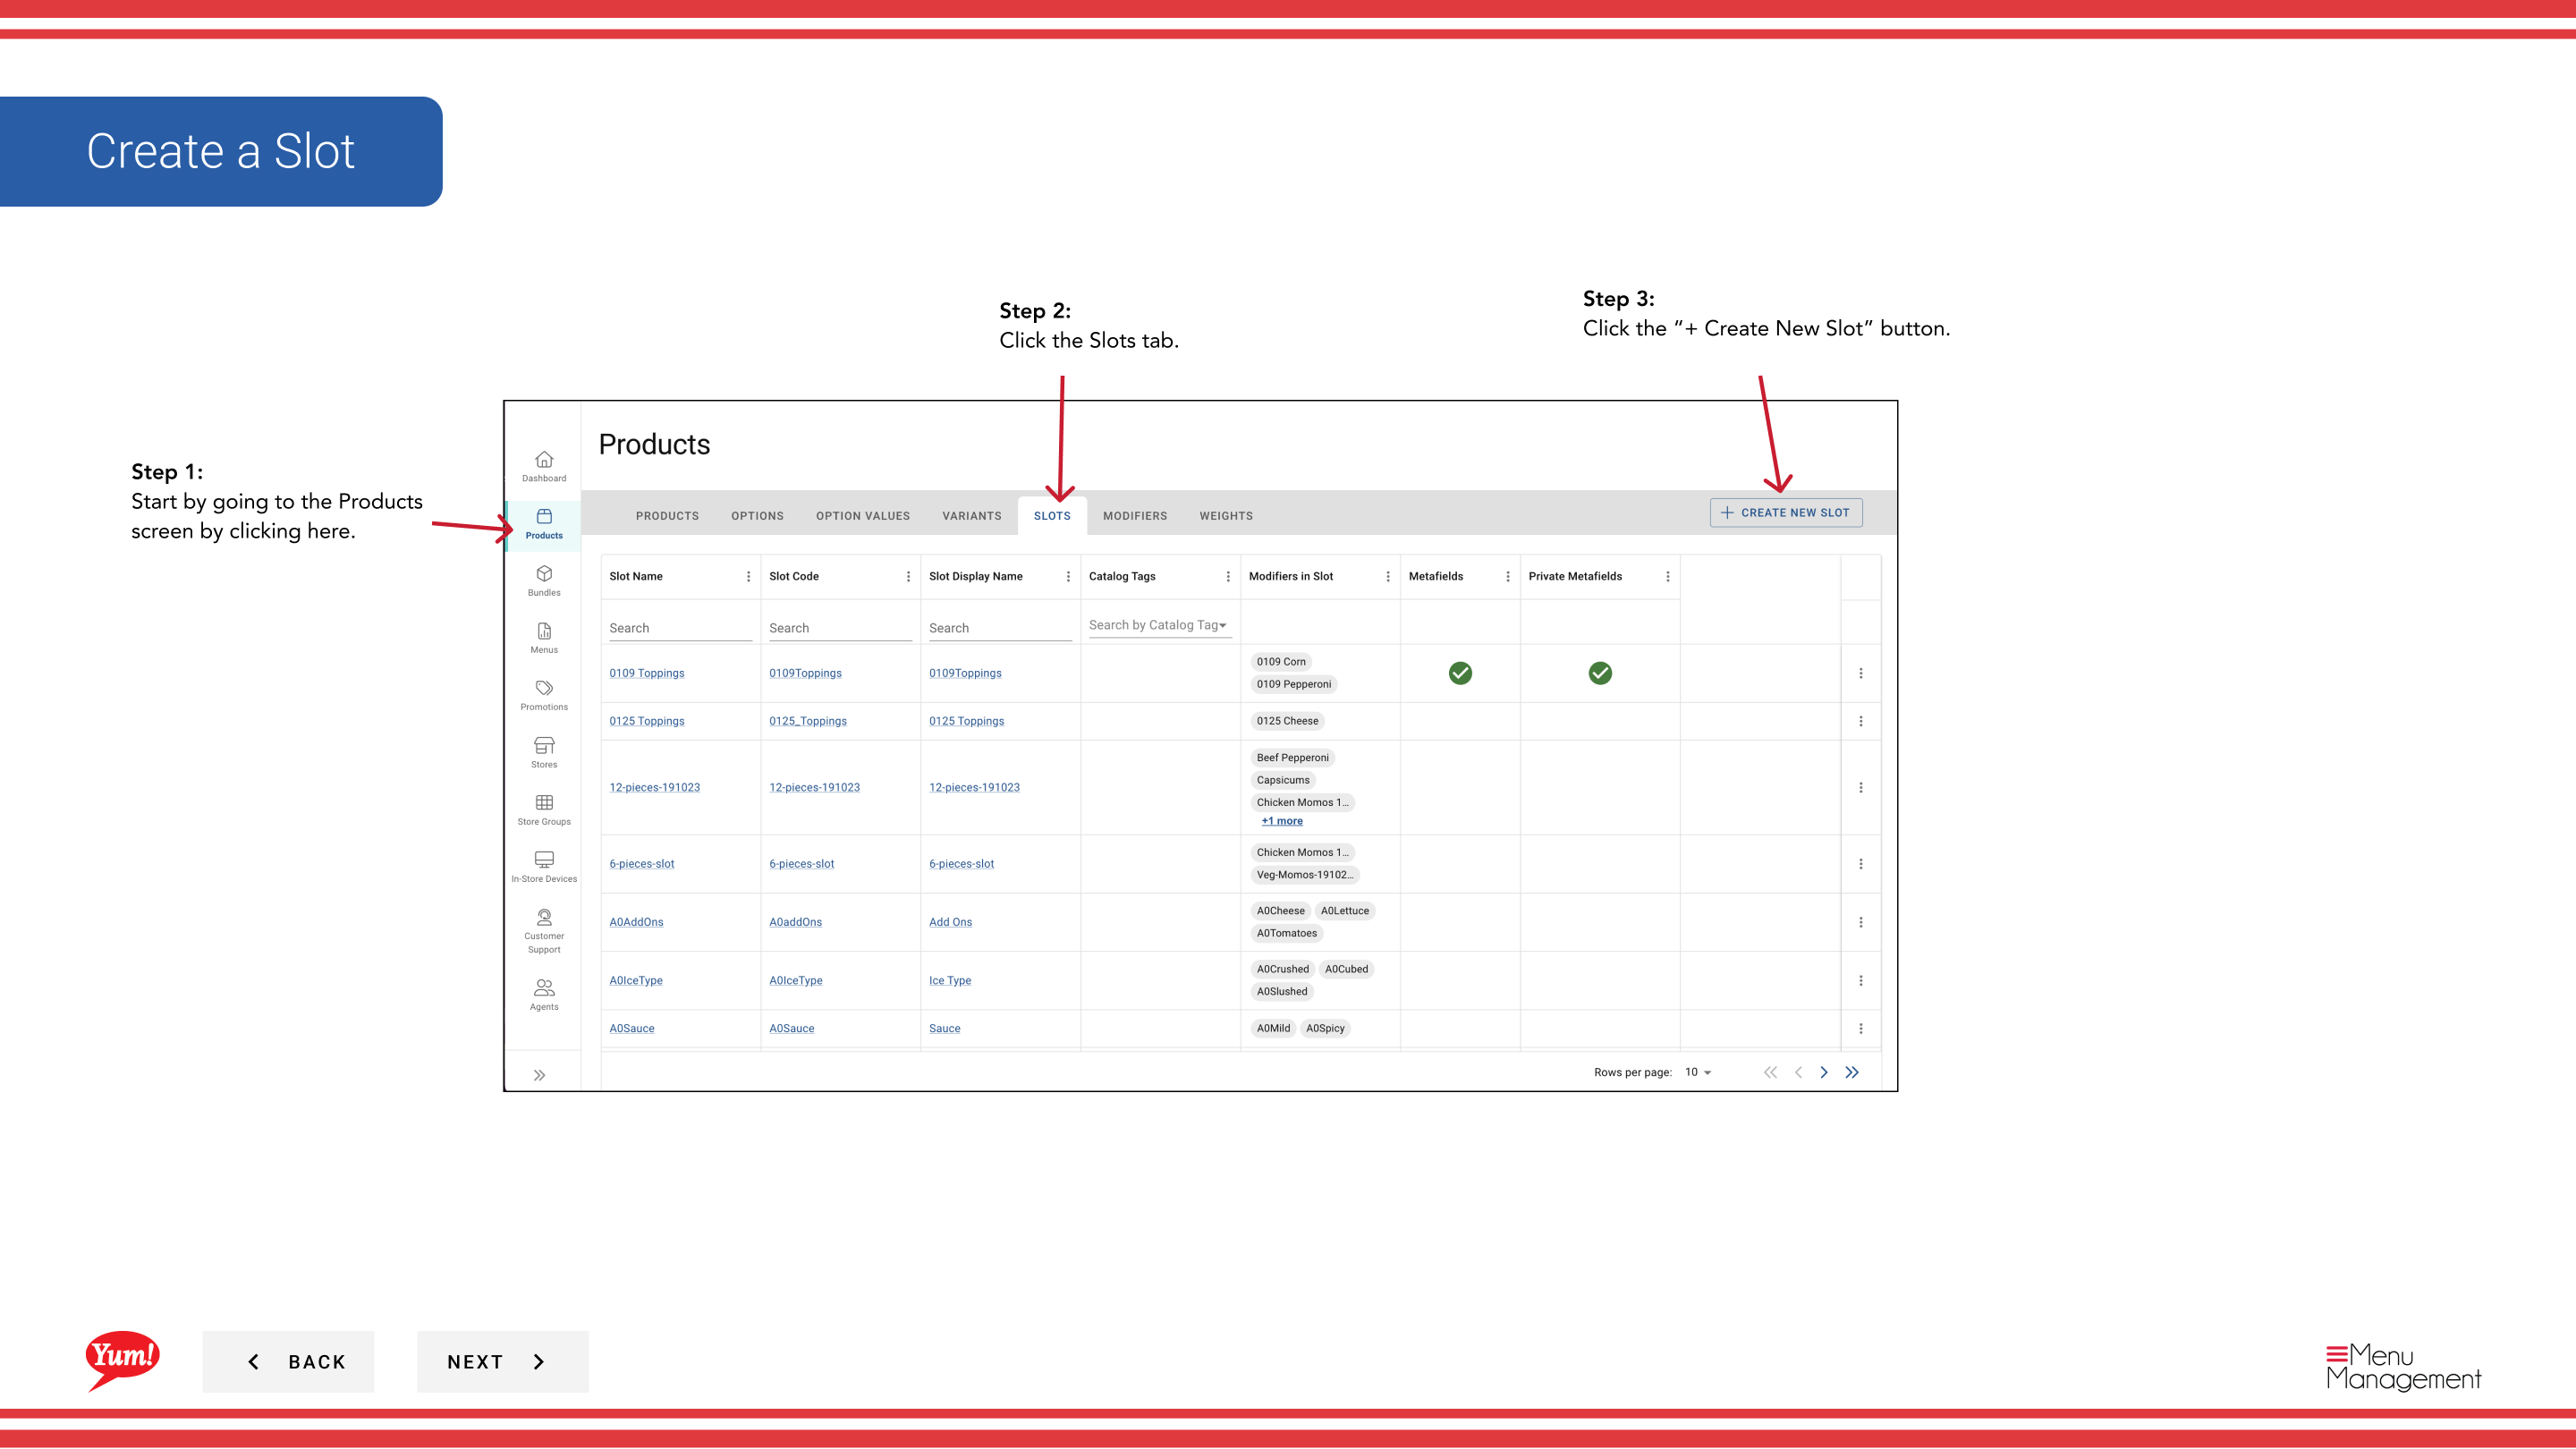
Step 3: Click the + Create New Slot button.
Step 4: Fill in the slot details. Fields marked with * are required.
| Field | What to enter | Notes |
|---|---|---|
| Slot Code * | Unique identifier for this slot | Use uppercase letters, numbers, and hyphens (e.g., “SLOT-SAUCE”) |
| Slot Name * | Describes what customisation this slot offers | e.g., “Sauce Selection”, “Cheese Options” |
| Min Quantity | Minimum number of modifier selections required | 0 = optional |
| Max Quantity | Maximum number of modifier selections allowed | Leave blank for unlimited |
Step 5: When you are finished, click Next to proceed to the Modifiers page.
Step 2: Add Modifiers
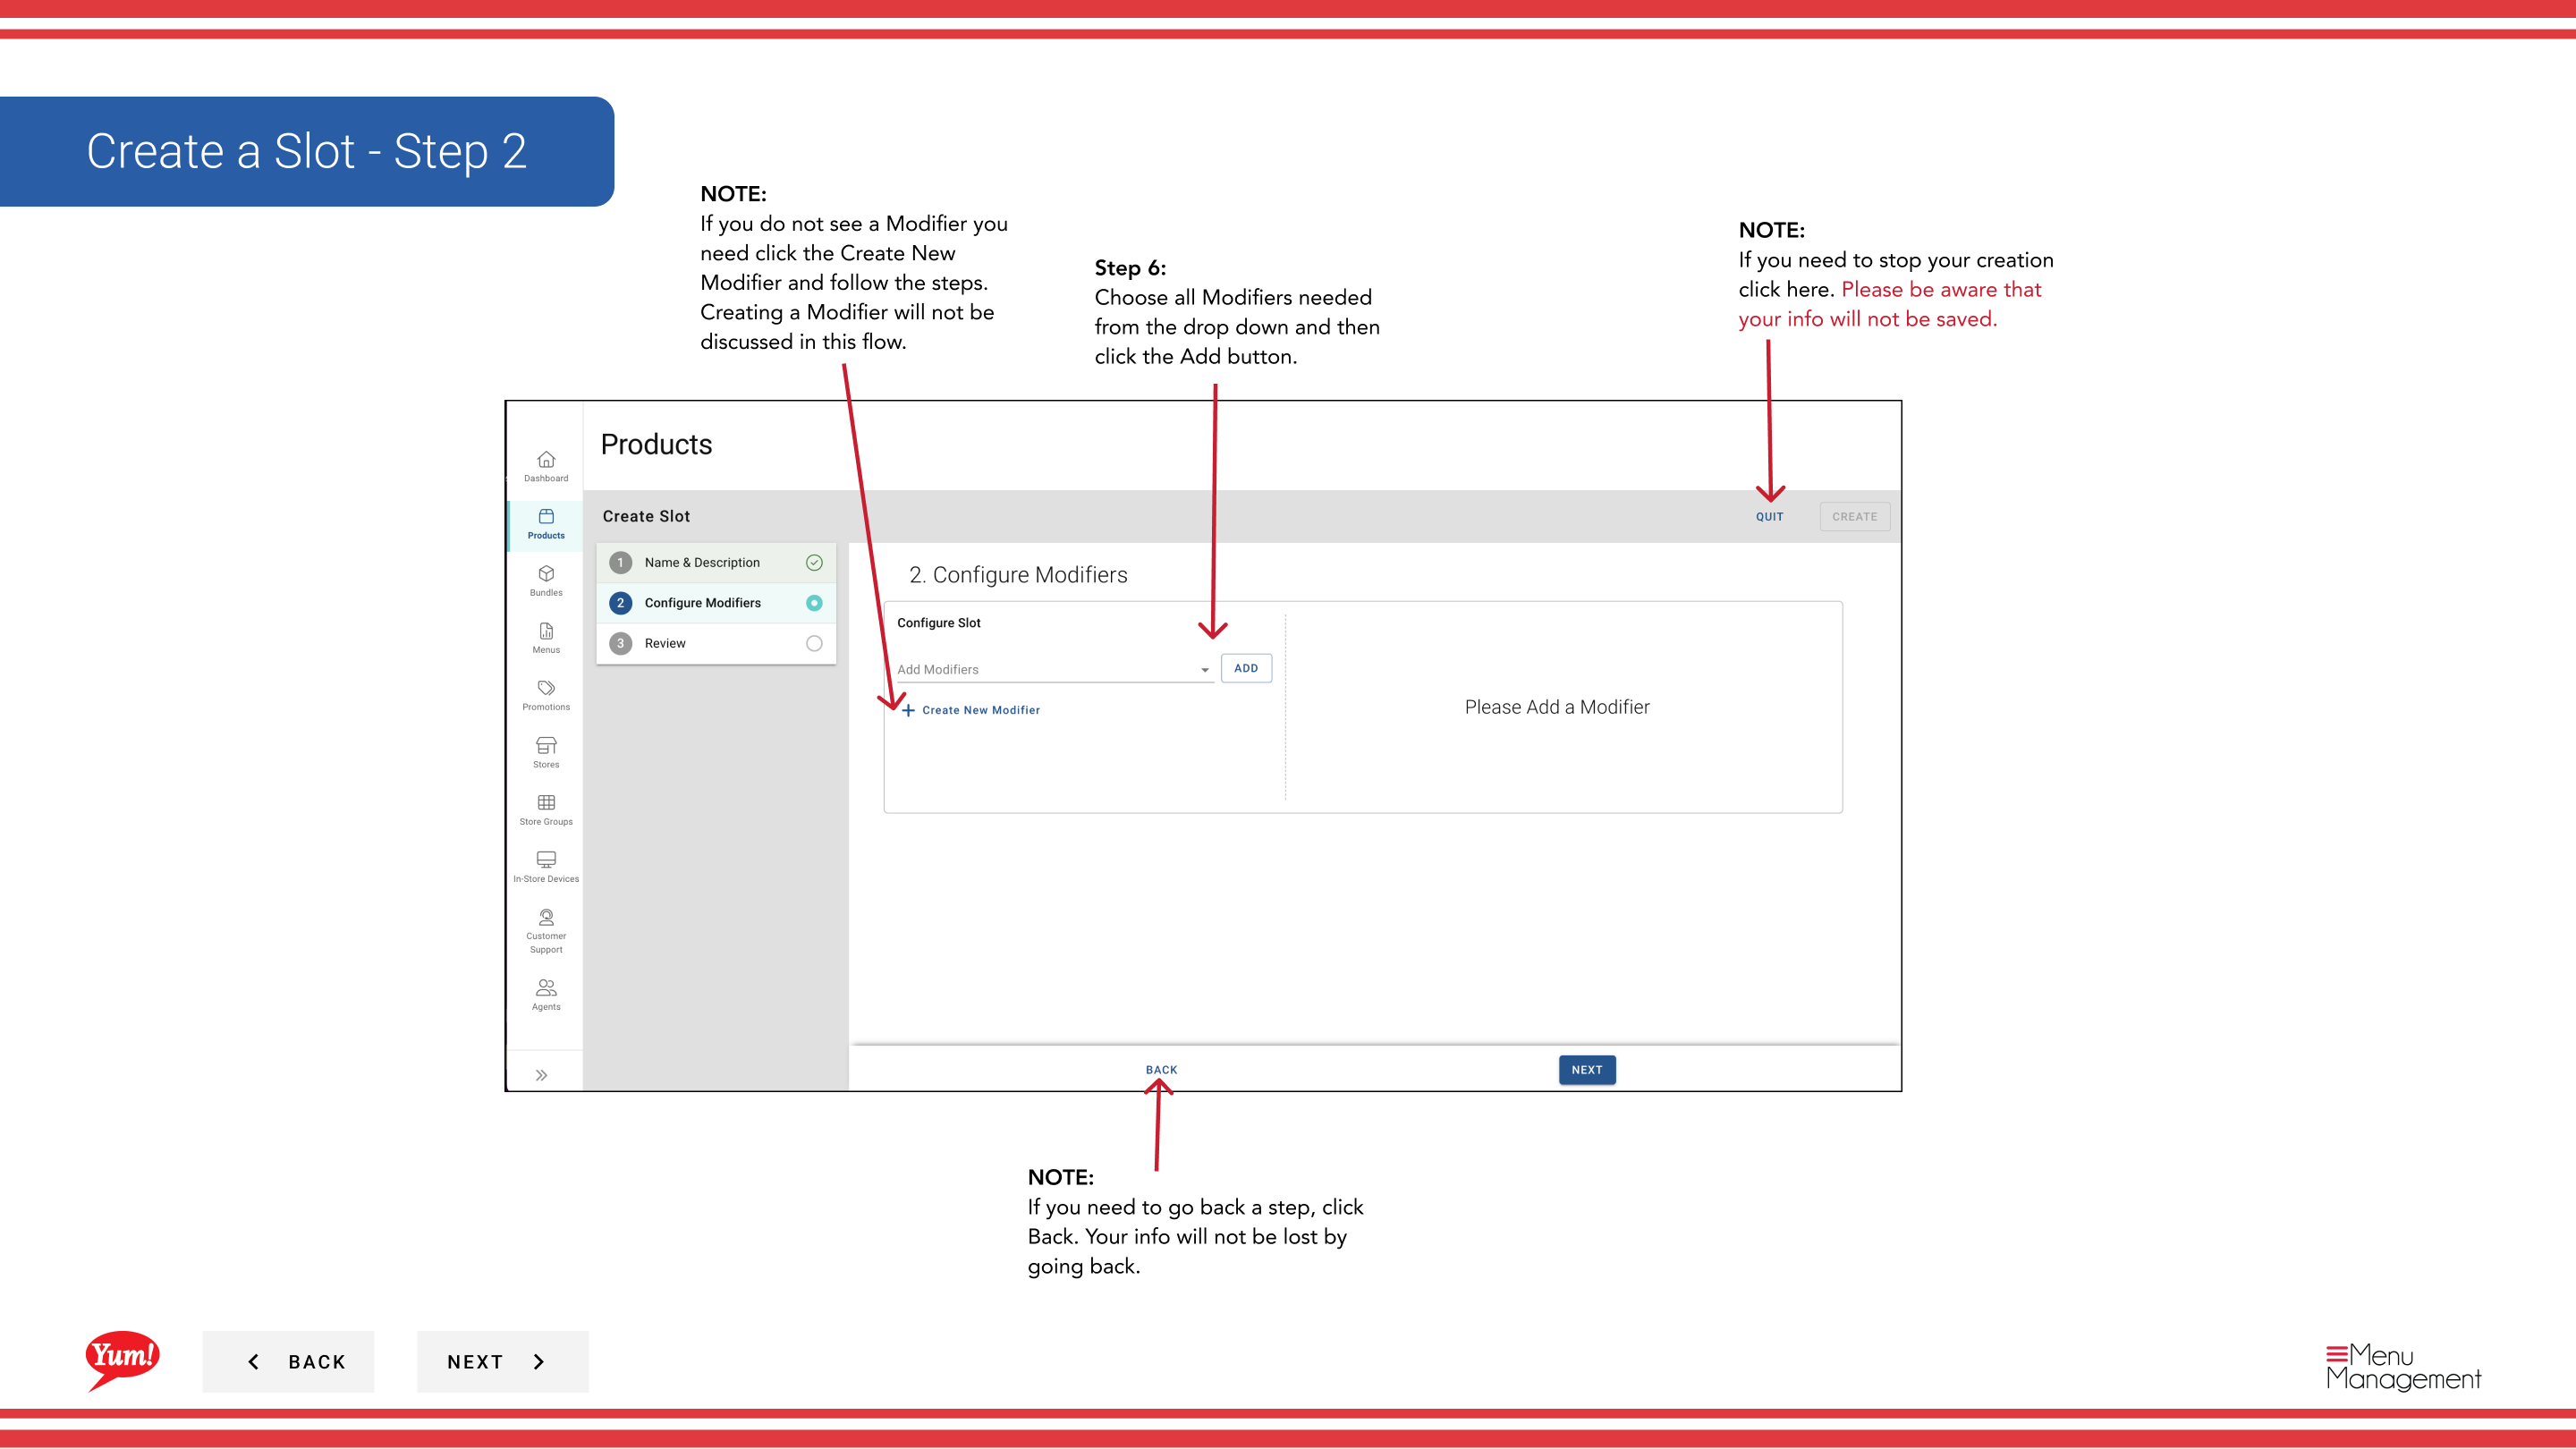
Step 6: Select all modifiers needed for this slot from the dropdown, then click Add for each one.
Step 7: If you do not see the modifier you need, click Create New Modifier to create it first.
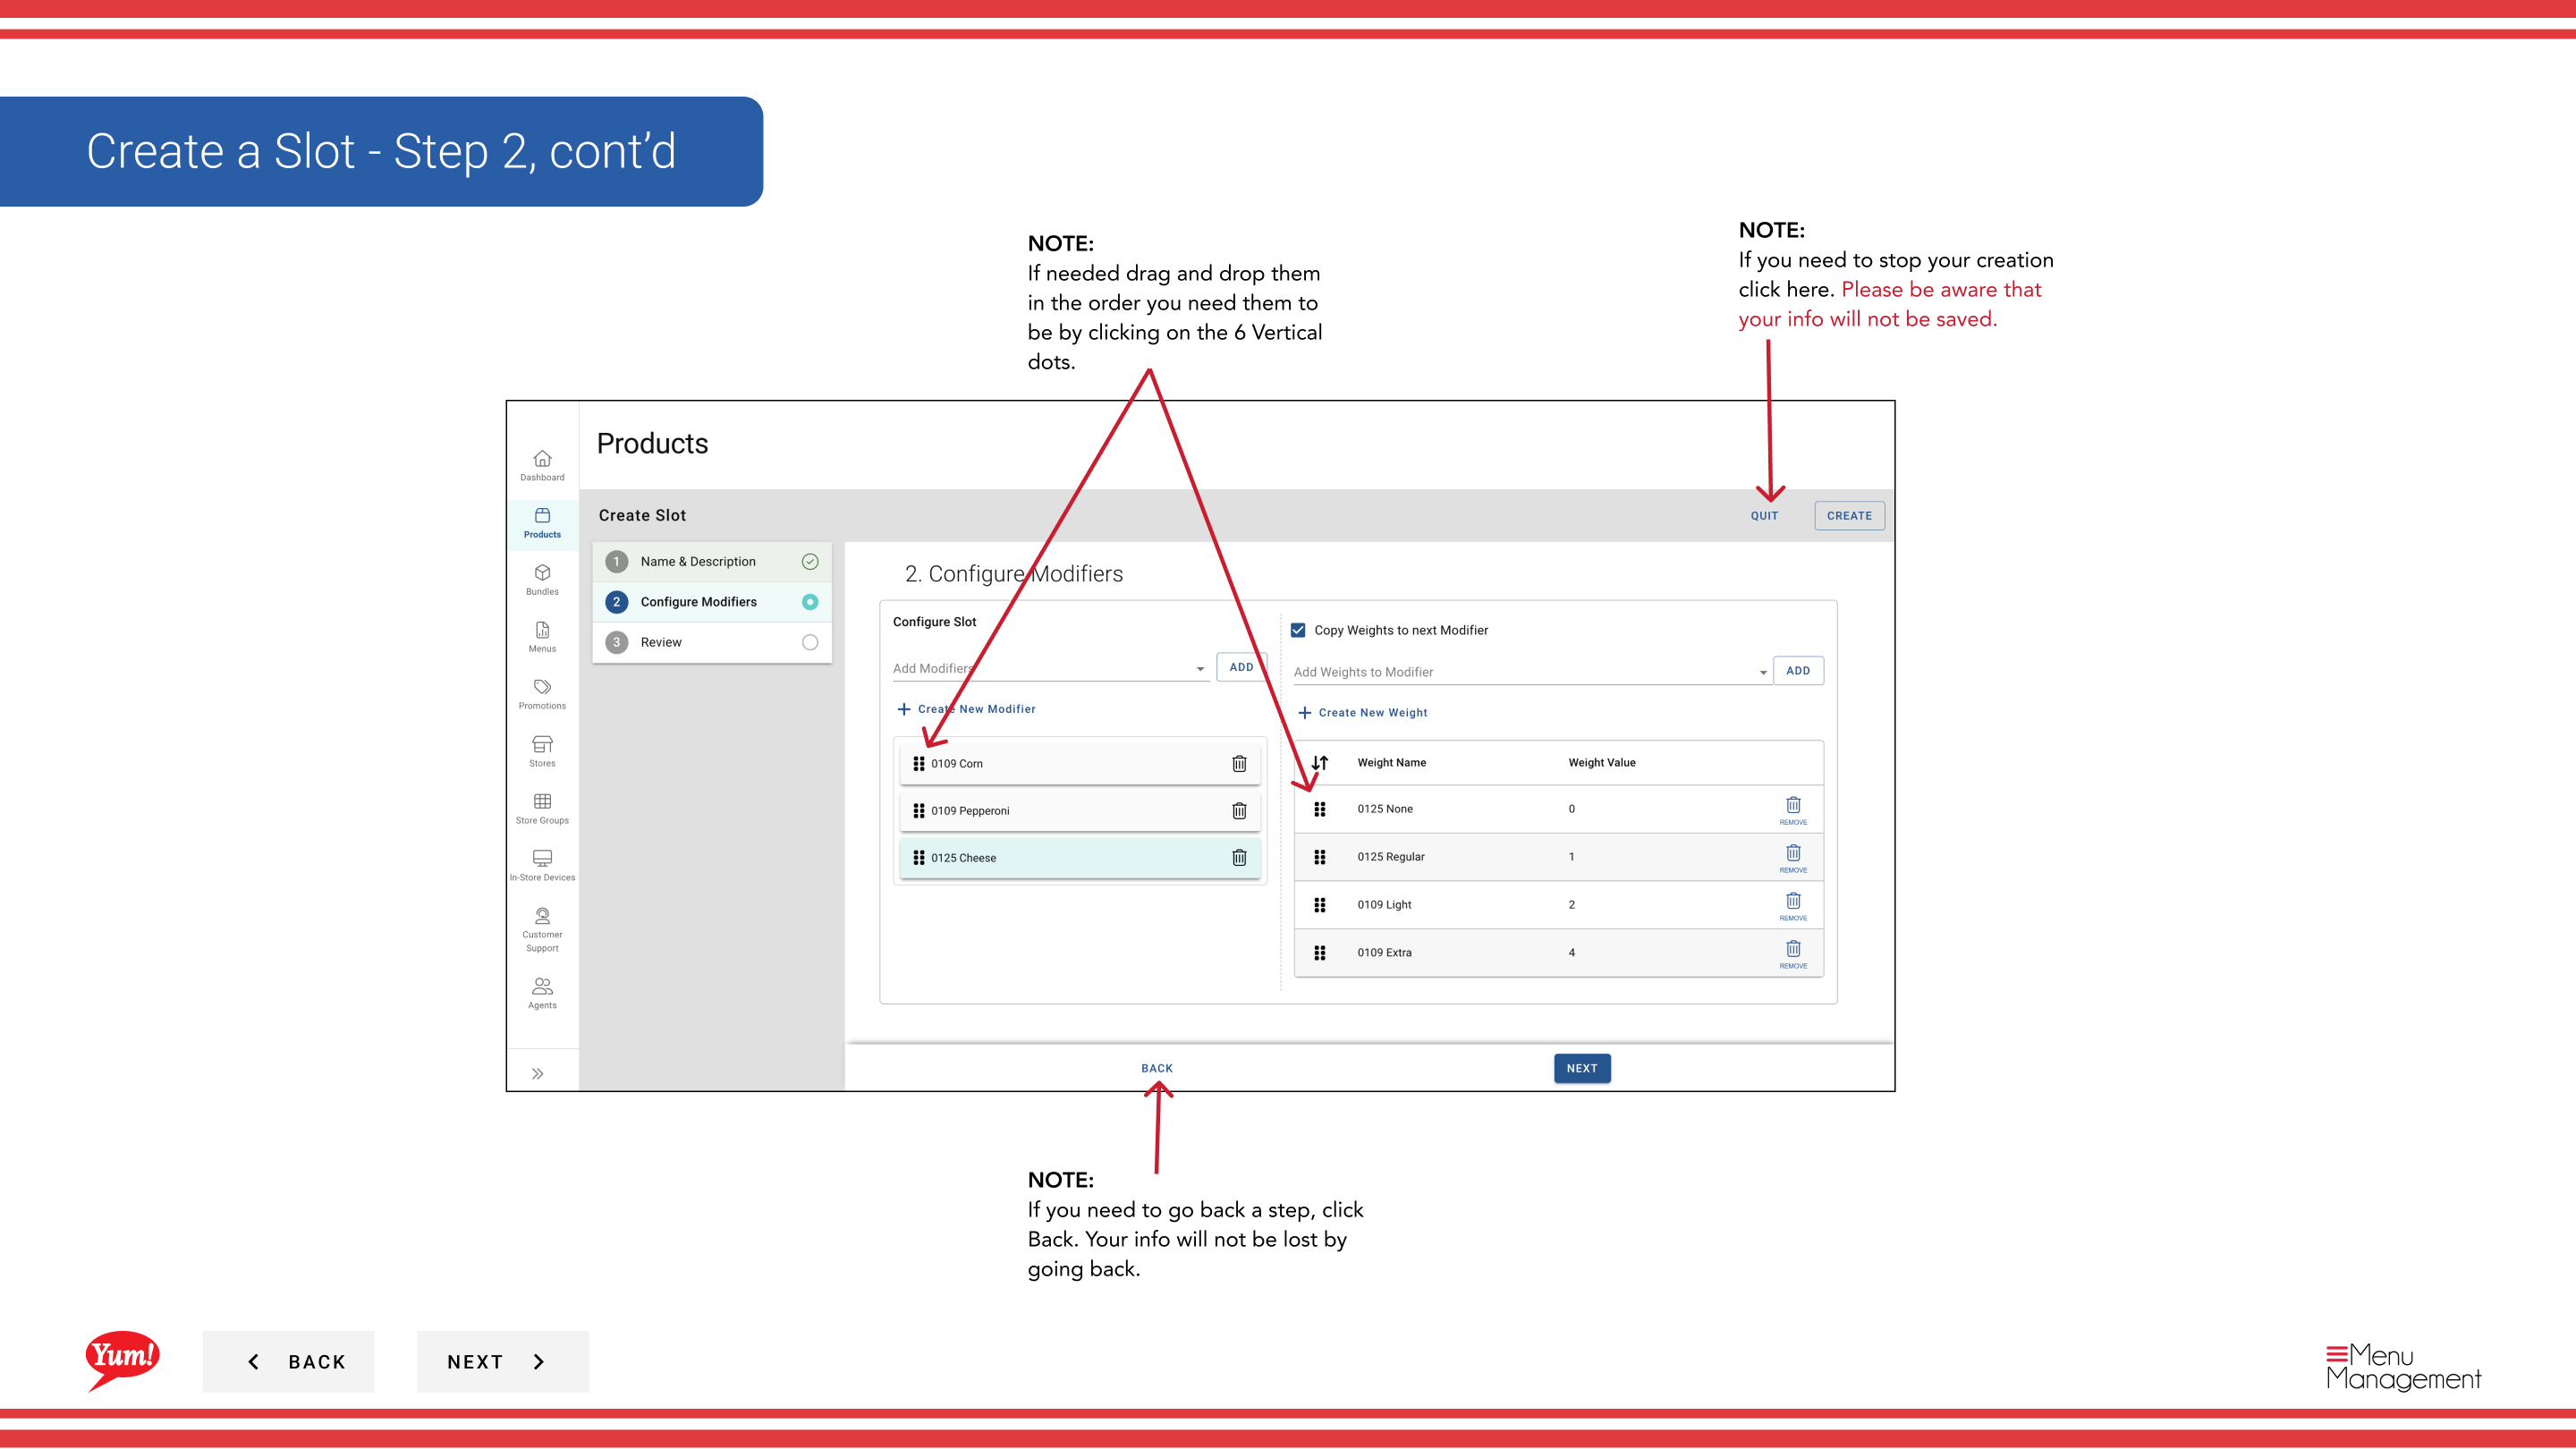
Step 8: To reorder modifiers, click and drag the six-dot drag handle.
Step 9: Click Next to proceed to the Weights page.
Step 3: Add Weights
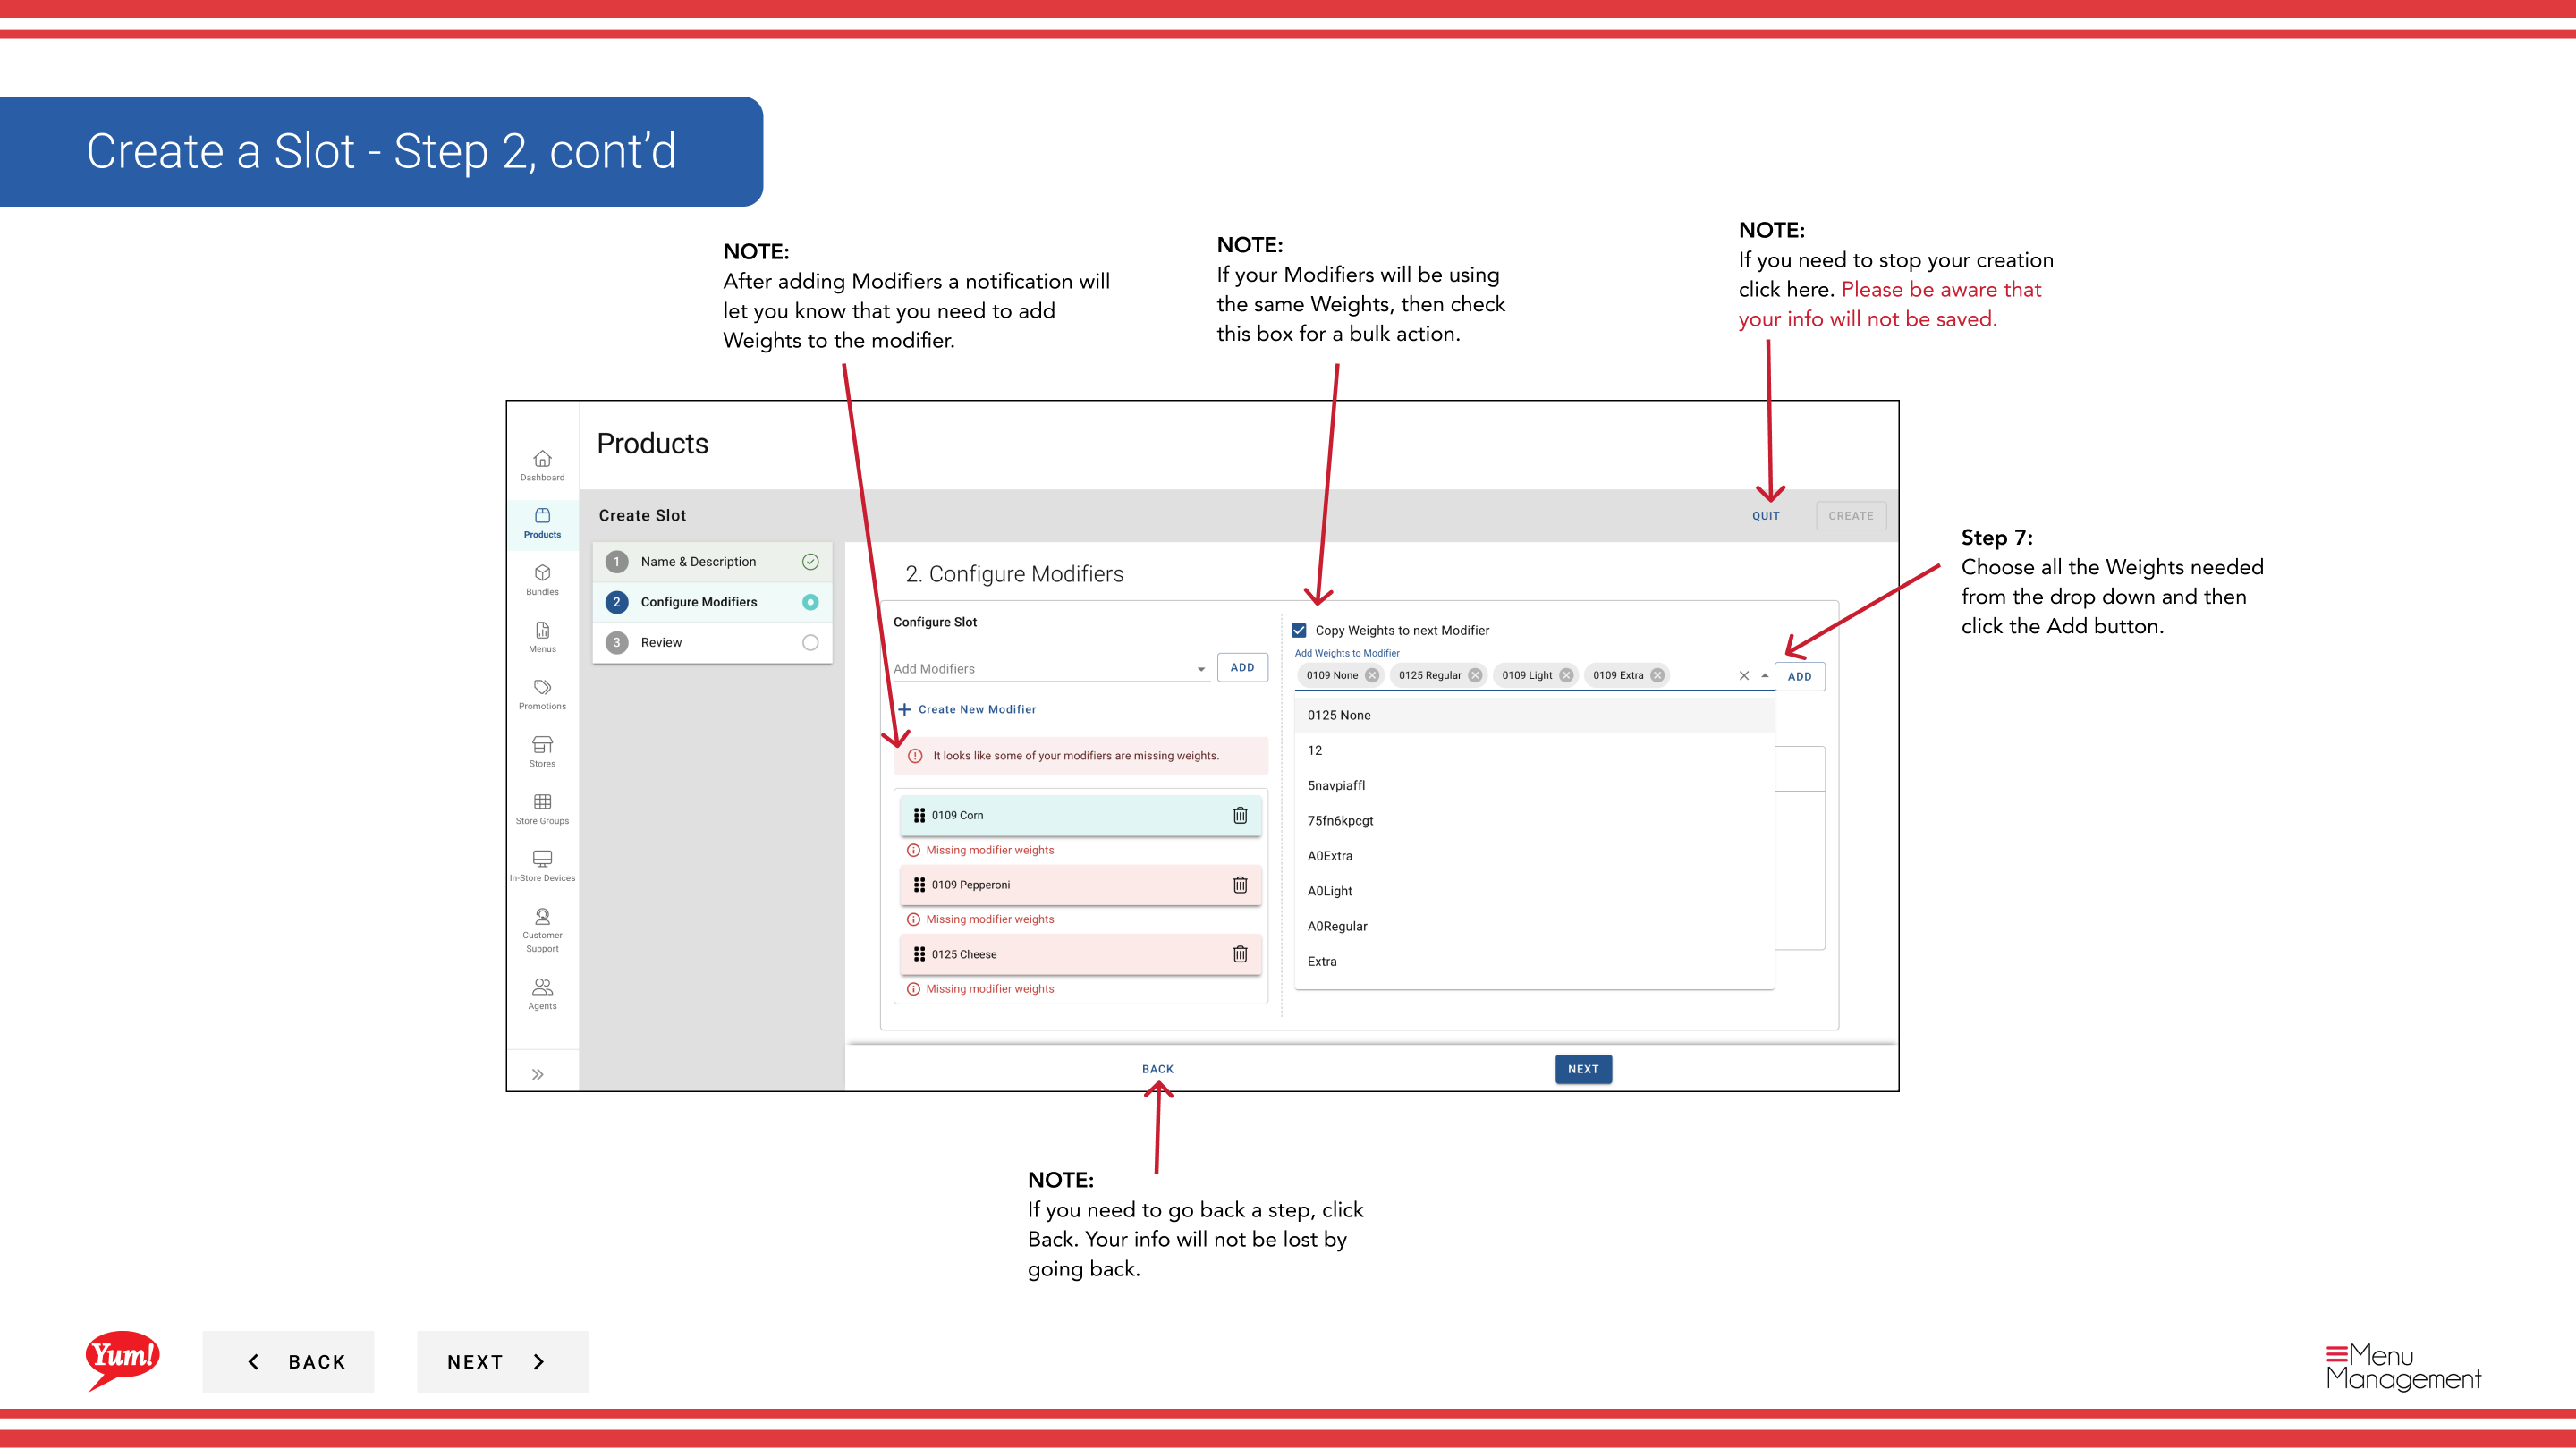
Step 10: Select weight options (portion sizes) for each modifier from the dropdown, then click Add.
Step 11: If multiple modifiers share the same weights, check the Apply to all box to assign those weights to all modifiers at once.
Step 12: To reorder weights, click and drag the six-dot drag handle.
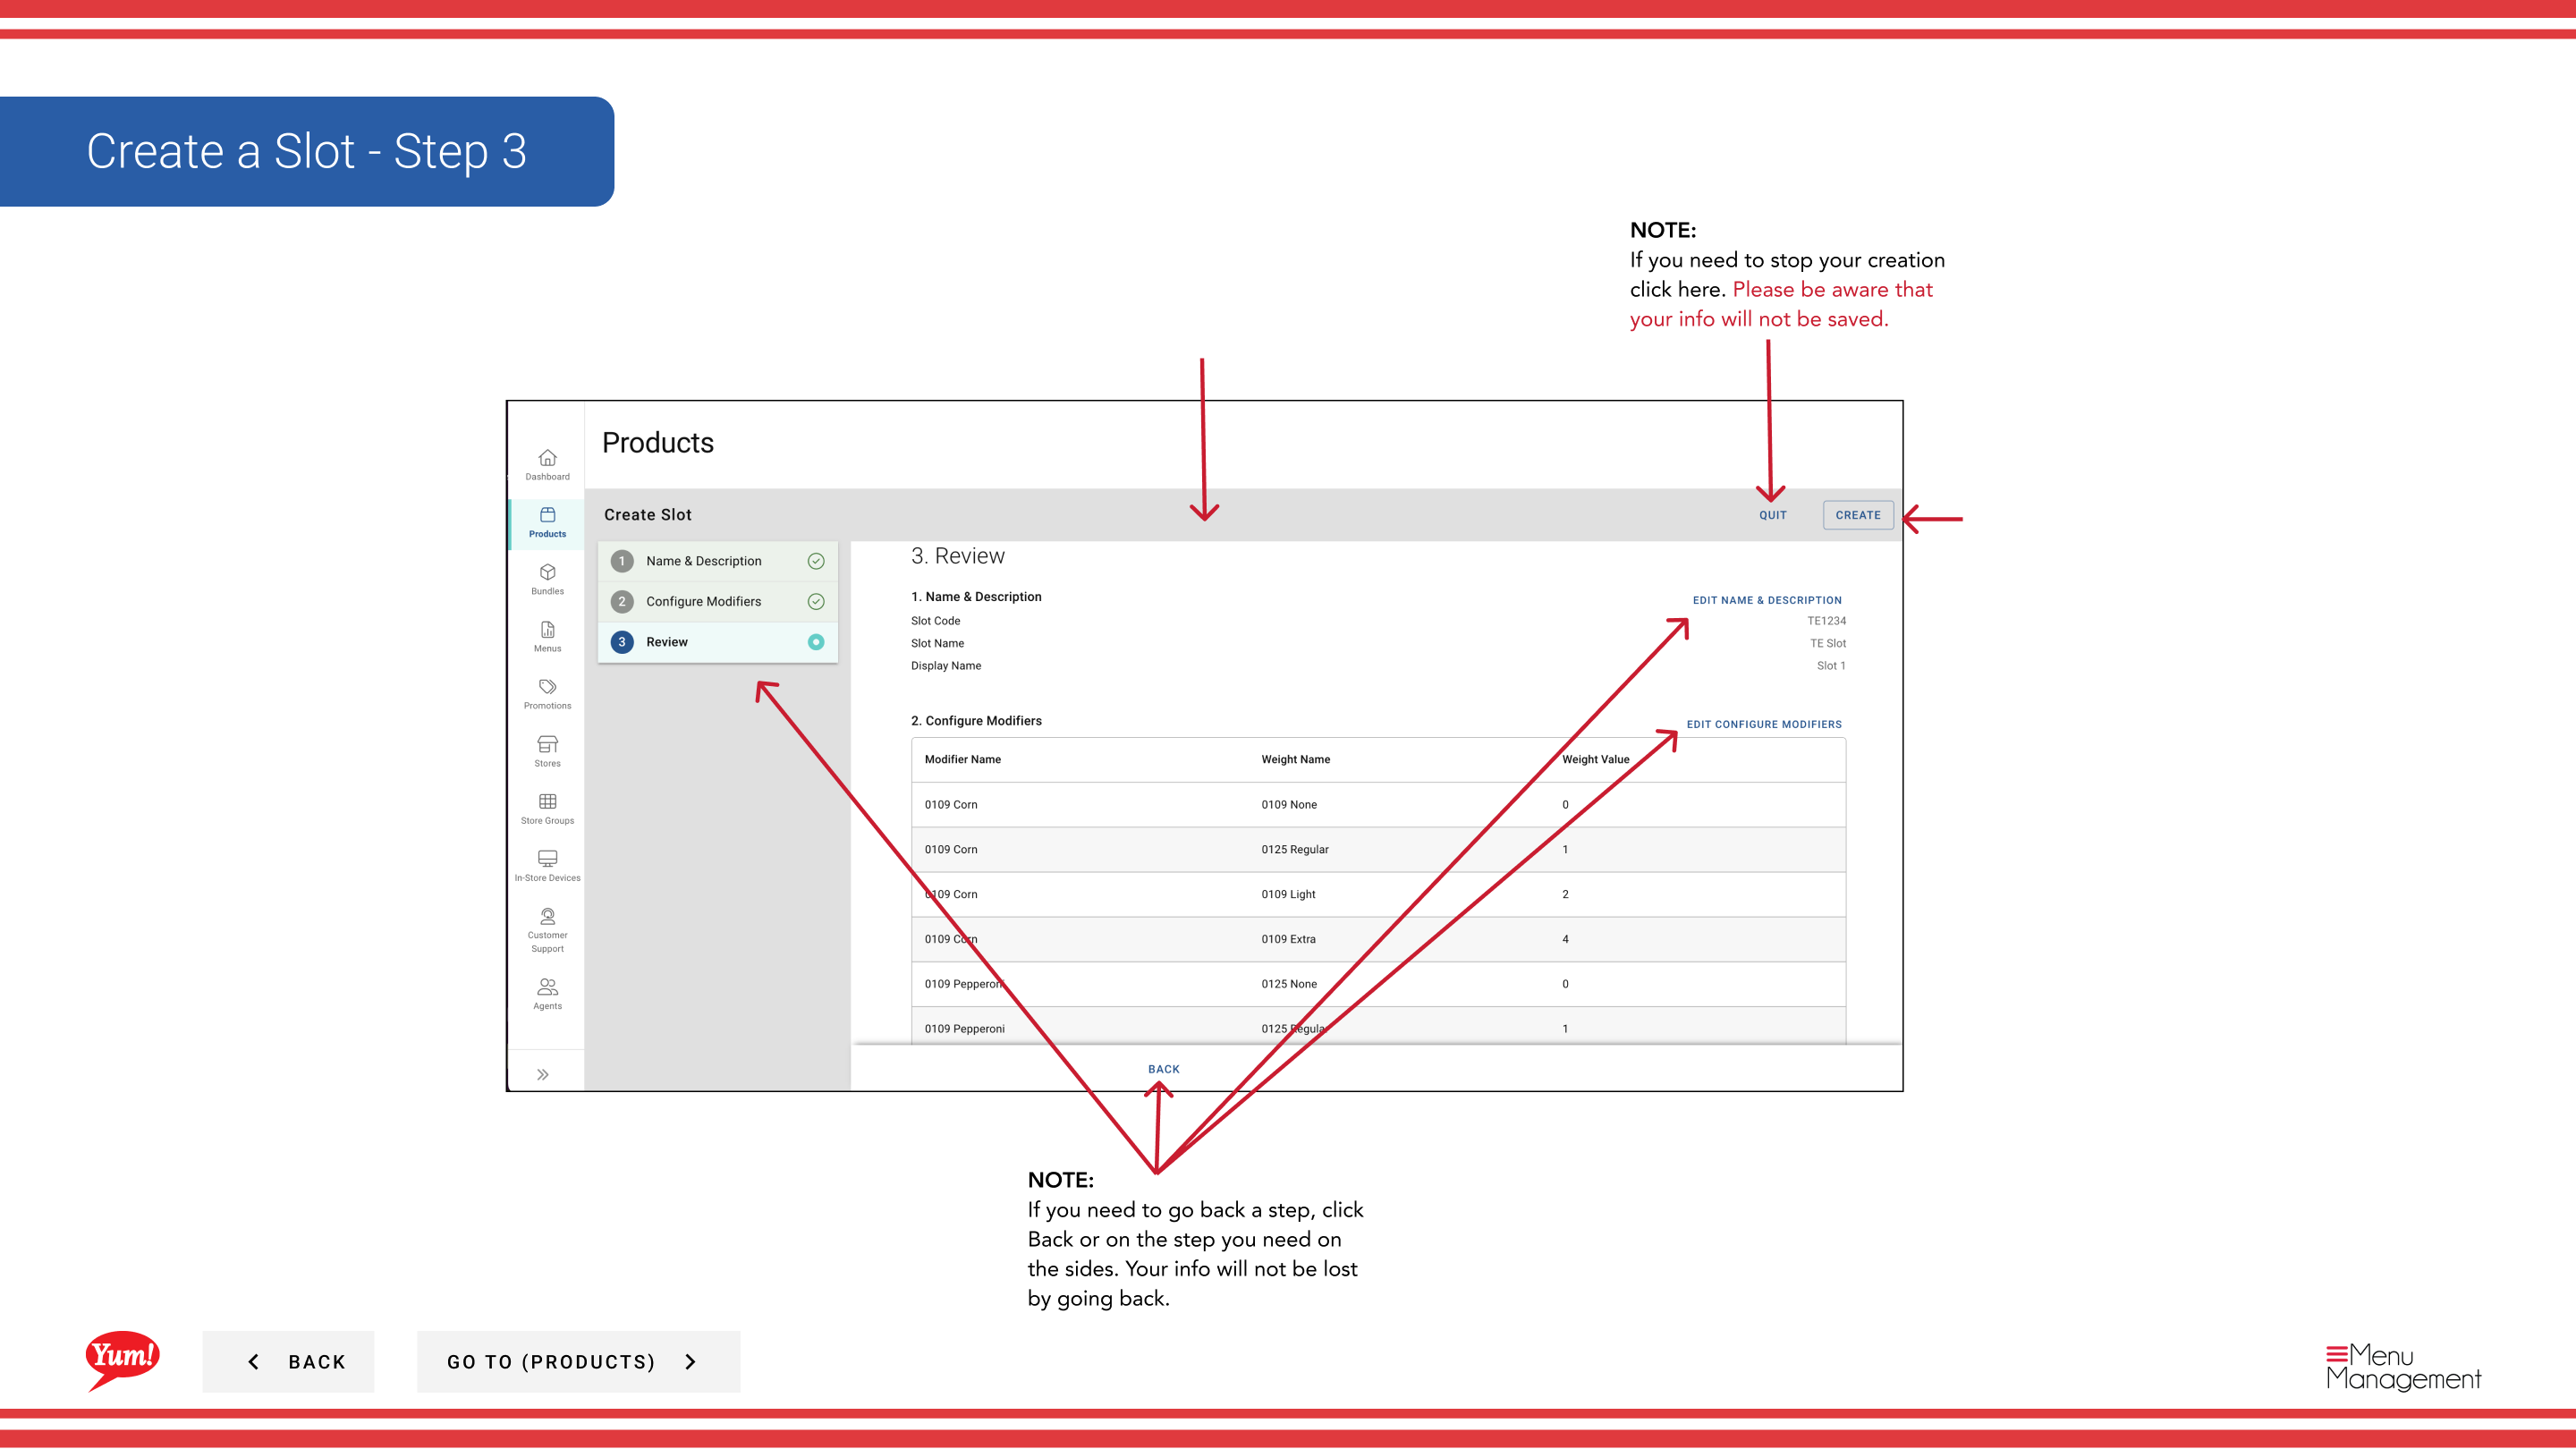
Step 13: Click Create to save the slot.
Notes
Clicking Cancel discards all unsaved information.
If you do not see a modifier you need, click Create New Modifier to add it before proceeding.
You can reorder modifiers and weights using the six-dot drag handles.
Use Apply to all to quickly assign the same weights to multiple modifiers at once.
You can go back to previous steps by clicking Back without losing information.
Part of the Admin Portal Guide · Section: Products