Create a Modifier
What this guide covers
Creates an add-on or customisation item (e.g., “Extra Cheese”) that can be linked to products via slots, allowing customers to personalise their order with optional or required upgrades.
Steps
Step 1: Navigate to the Products section using the left navigation menu.
Step 2: Click the Modifiers tab.
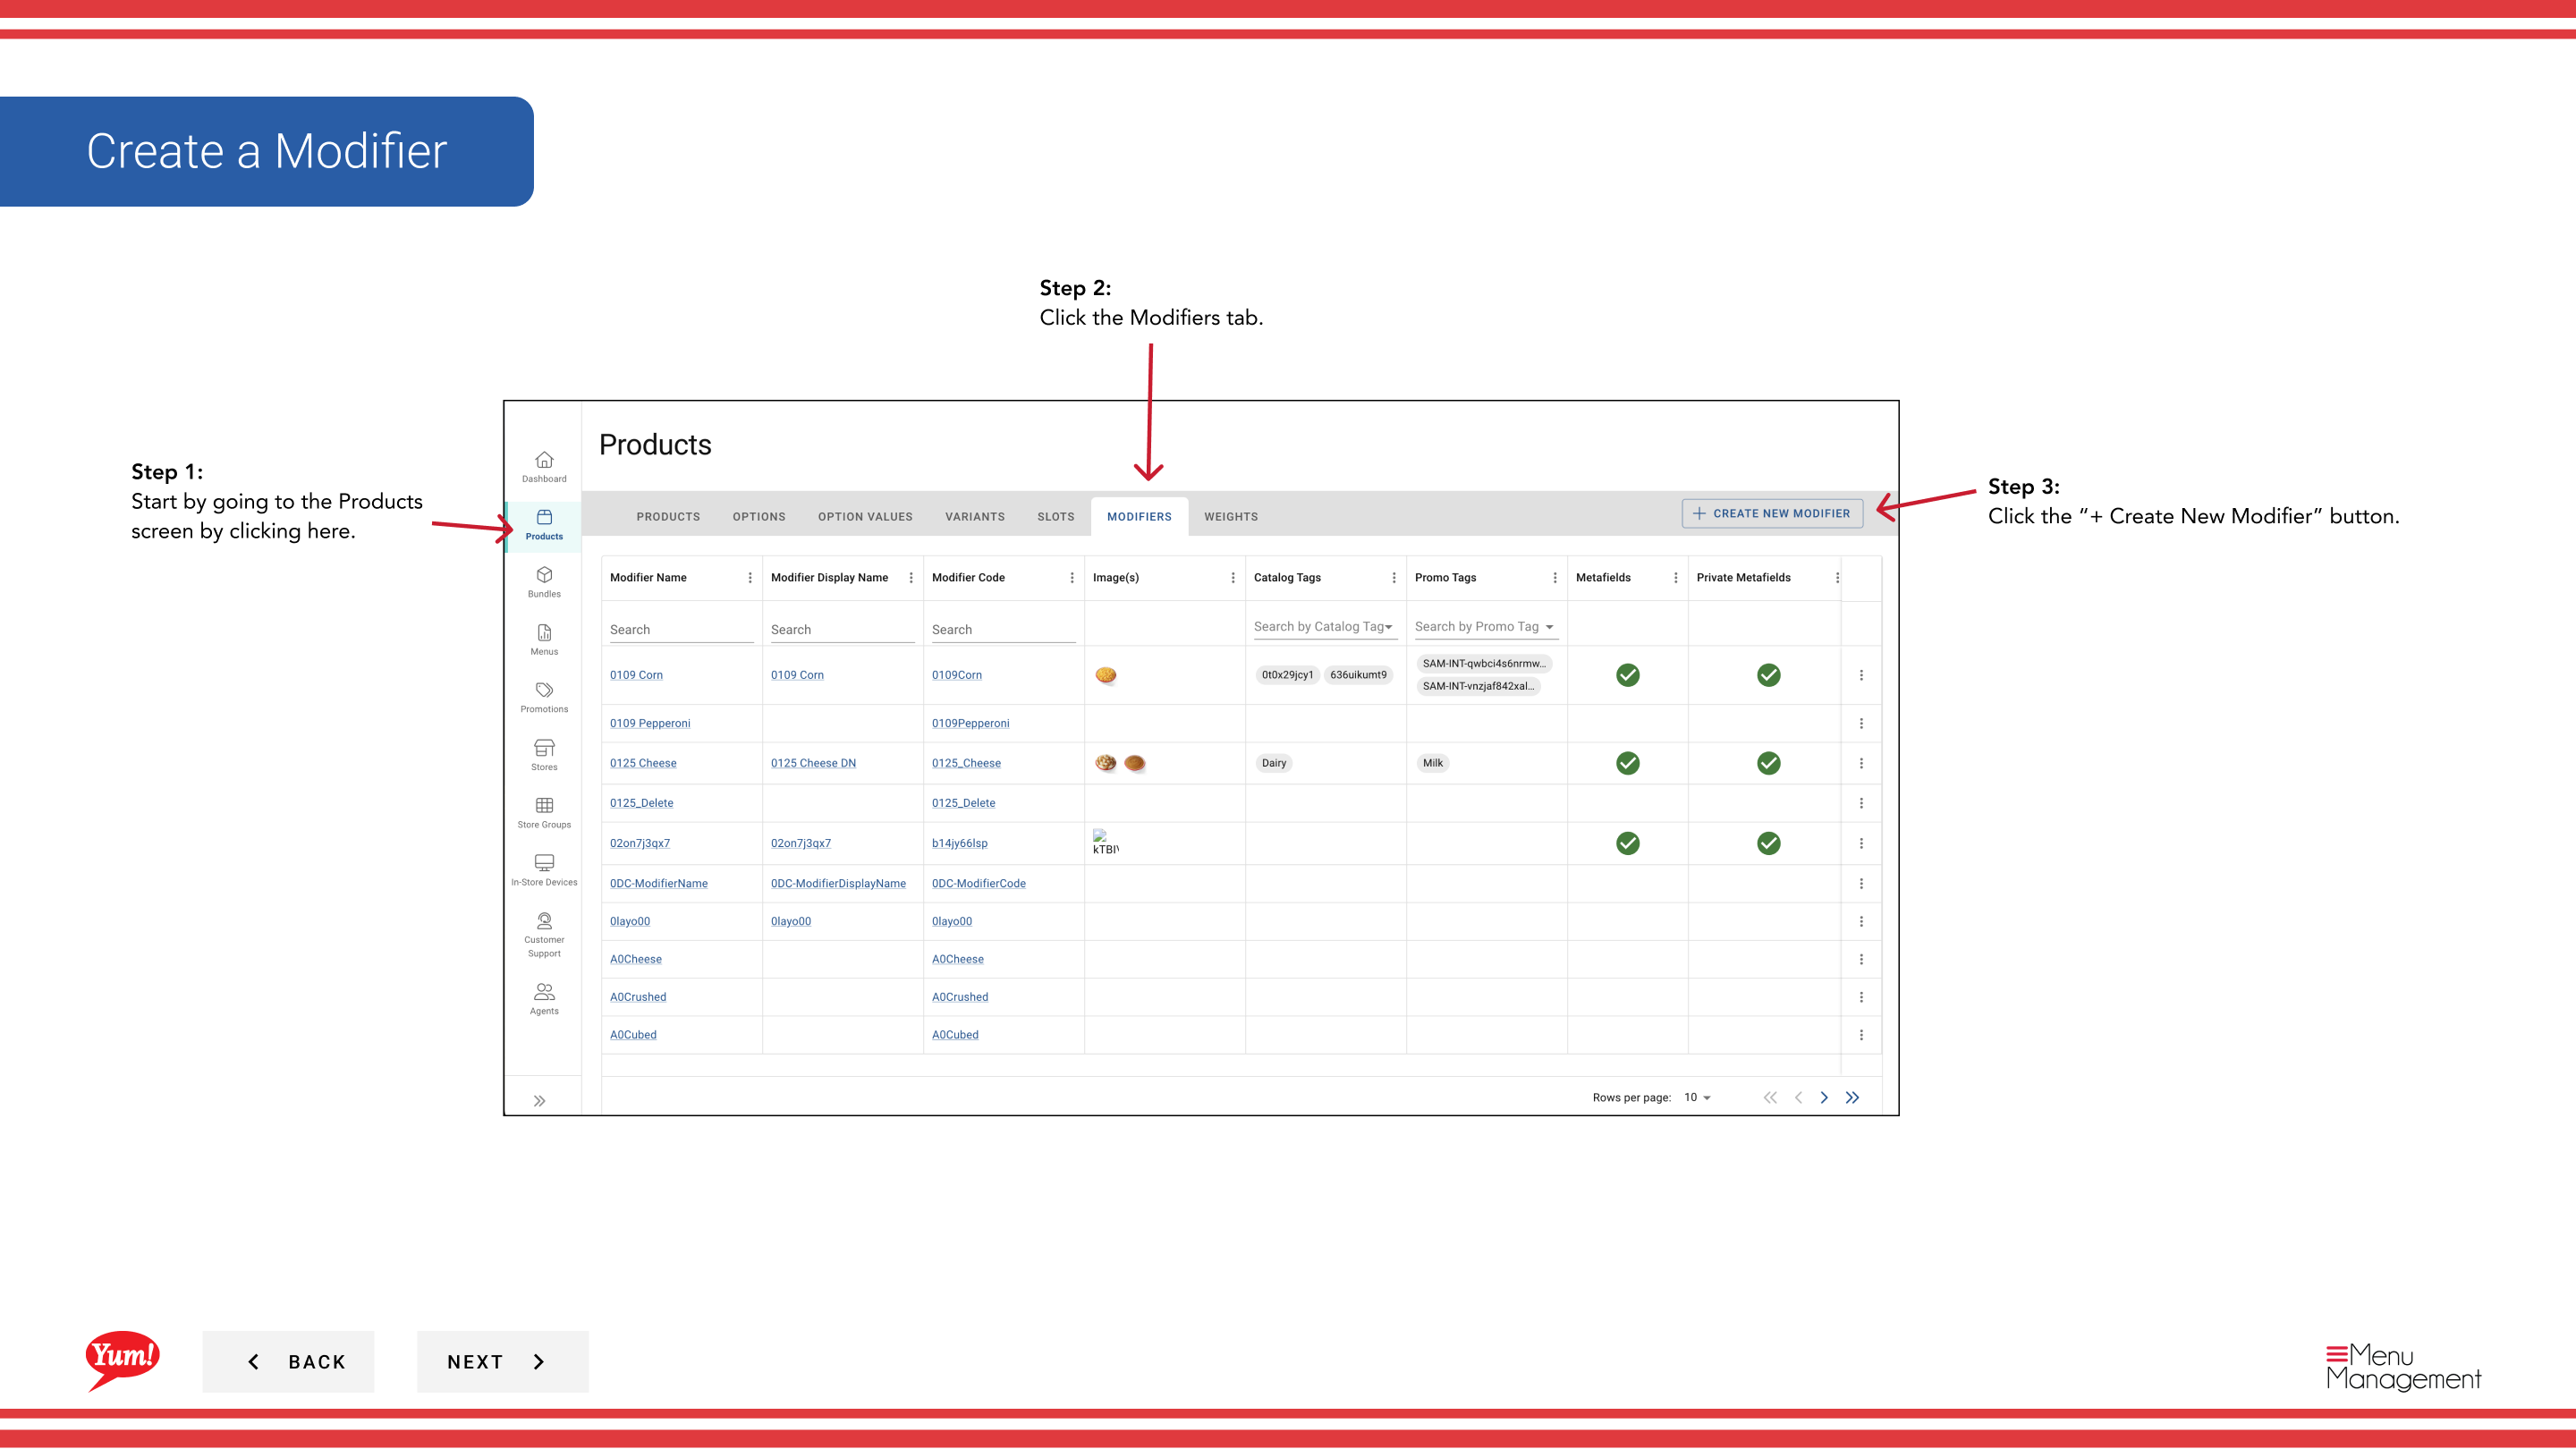
Step 3: Click the + Create New Modifier button.
Step 4: Fill in the modifier details. Fields marked with * are required.
| Field | What to enter | Notes |
|---|---|---|
| Modifier Code * | Unique identifier for this modifier | Use uppercase letters, numbers, and hyphens (e.g., “MOD-EXTRA-CHEESE”) |
| Modifier Name * | Name shown to customers on ordering channels | e.g., “Extra Cheese”, “No Pickles”, “Extra Sauce” |
| Price | Additional charge for selecting this modifier | Enter 0 if there is no extra charge |
| Image | Optional image for this modifier | Toggle Primary Image to Yes to set as main display image. Click Add Another Image to add more. |
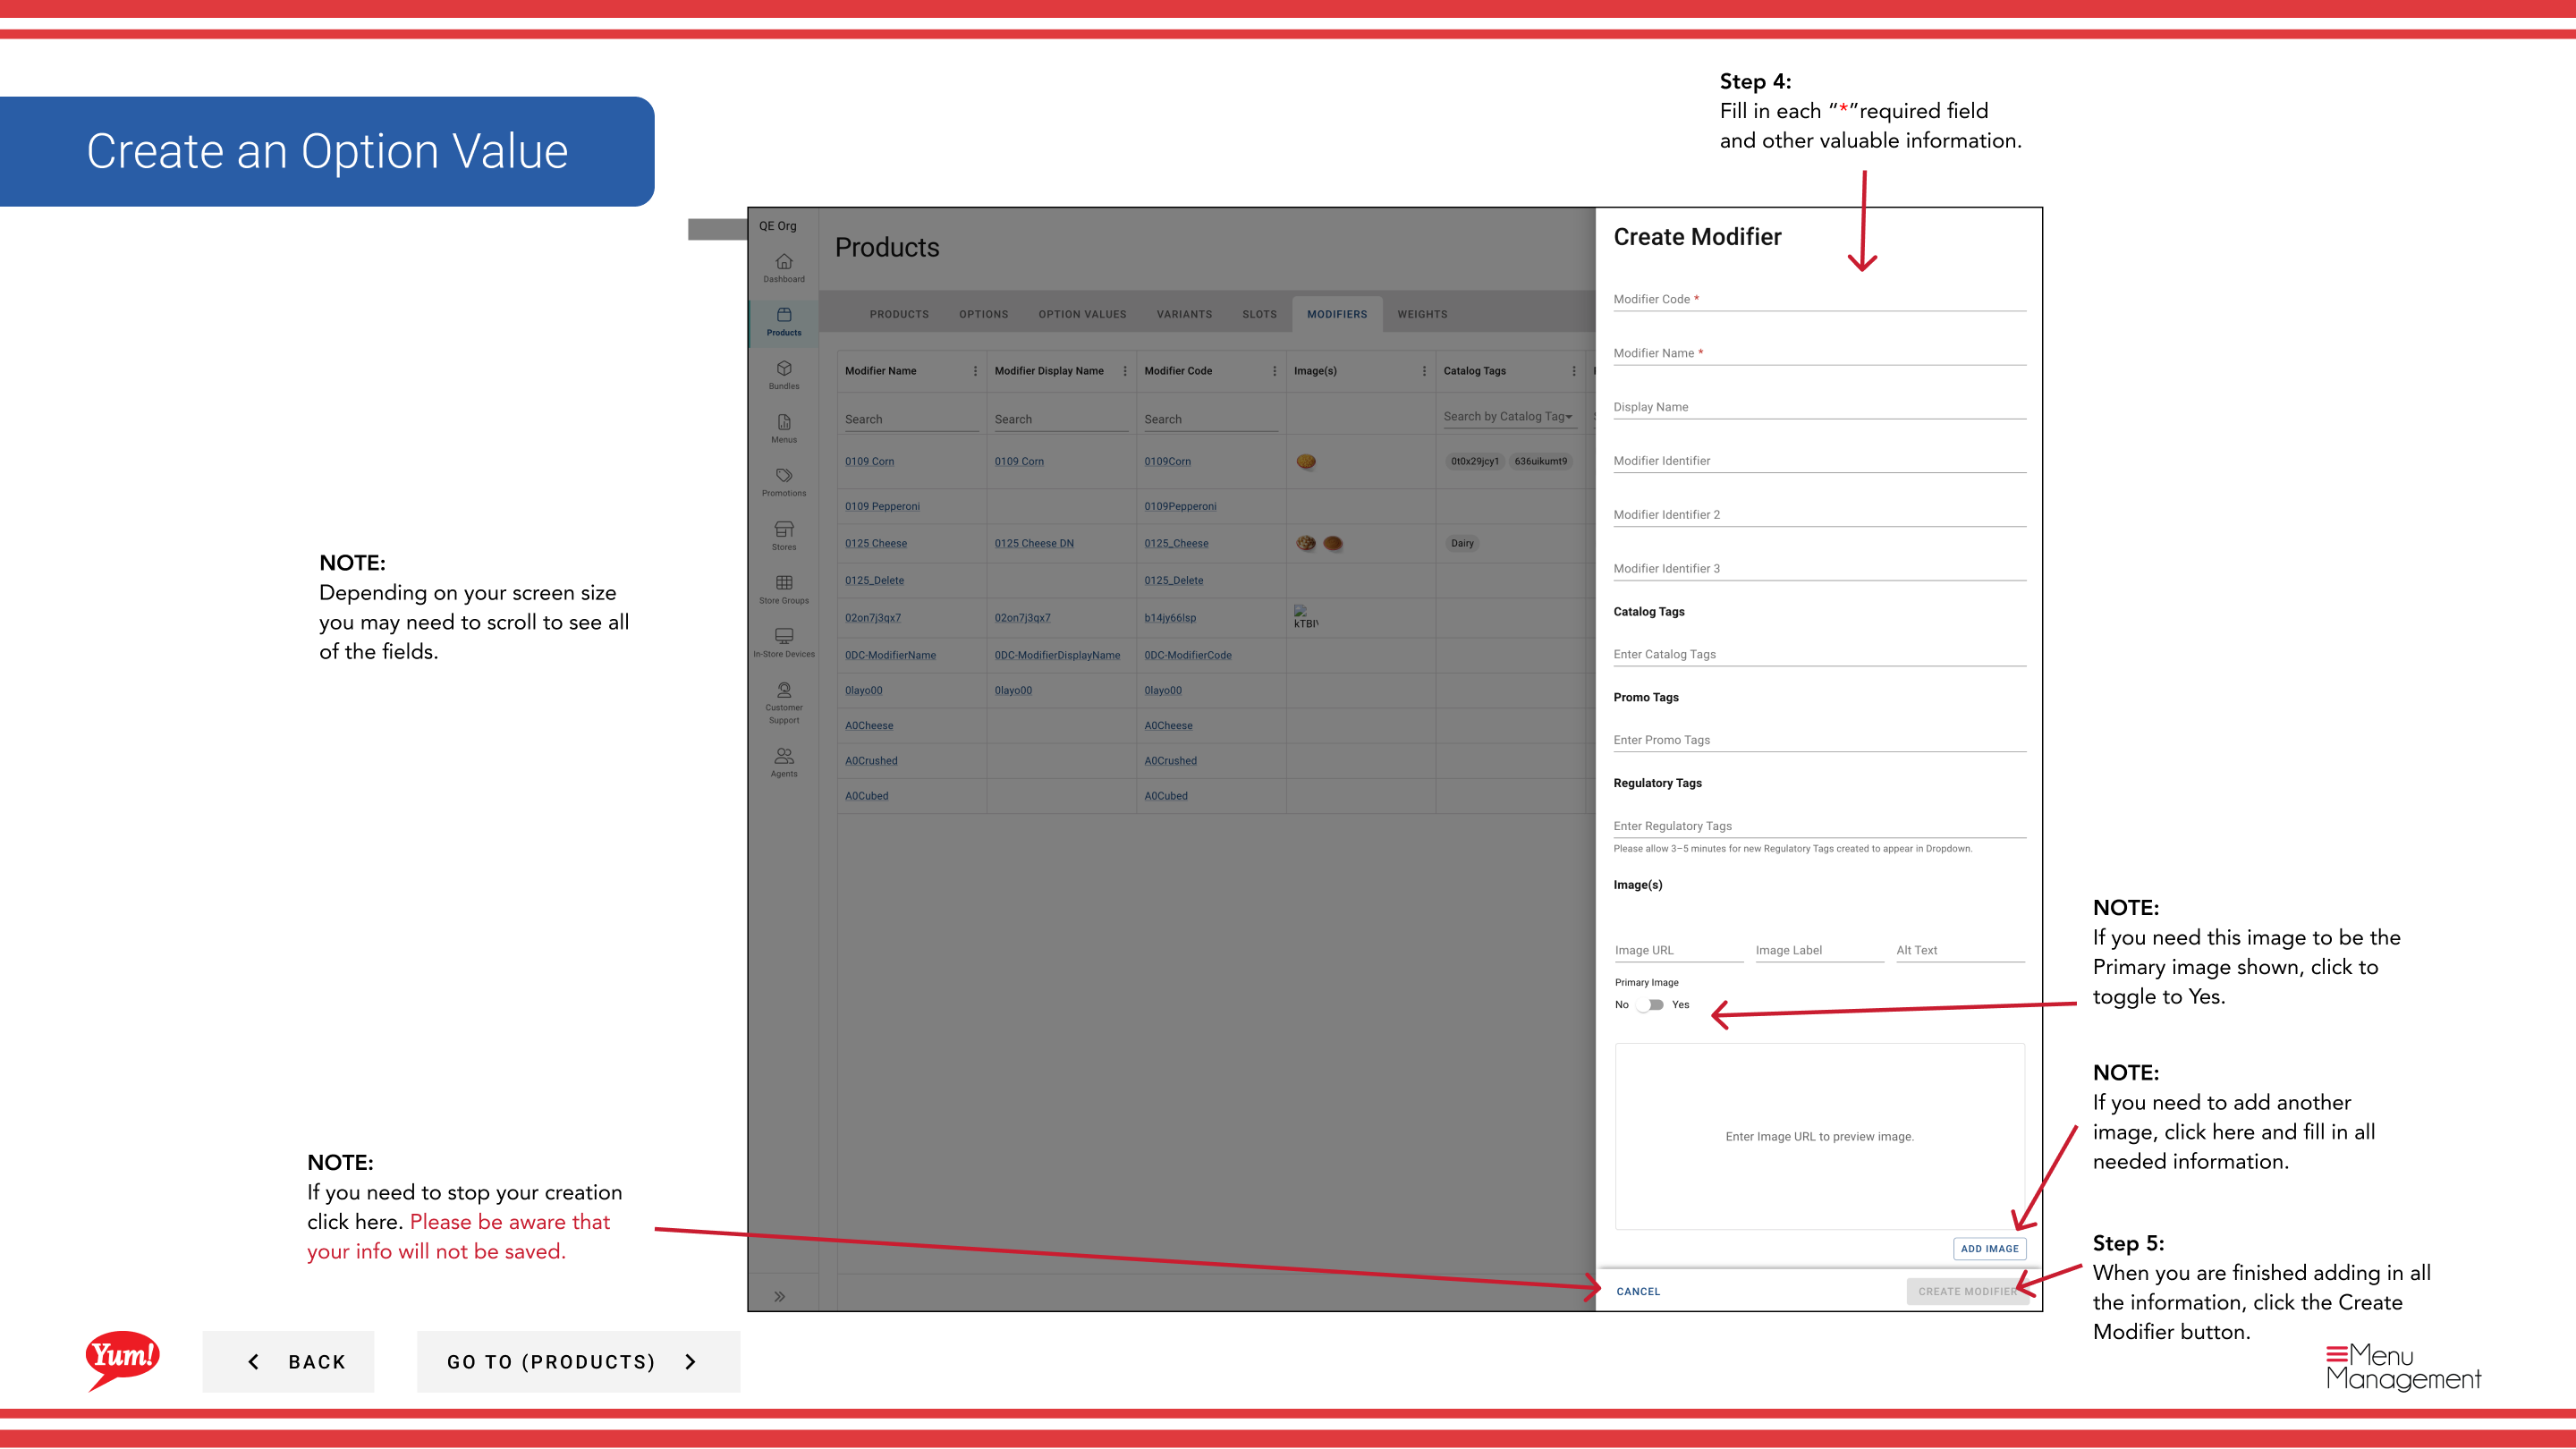
Step 5: When you are finished adding all the information, click the Create Modifier button.
Notes
Clicking Cancel discards all unsaved information.
If this modifier will be the primary image displayed, remember to toggle Primary Image to Yes after uploading.
You can add multiple images by clicking Add Another Image.
Part of the Admin Portal Guide · Section: Products