Create a Bundle
What this guide covers
Builds a combo or meal deal by grouping products together under a single purchasable item, with its own code, pricing, and display information.
Steps
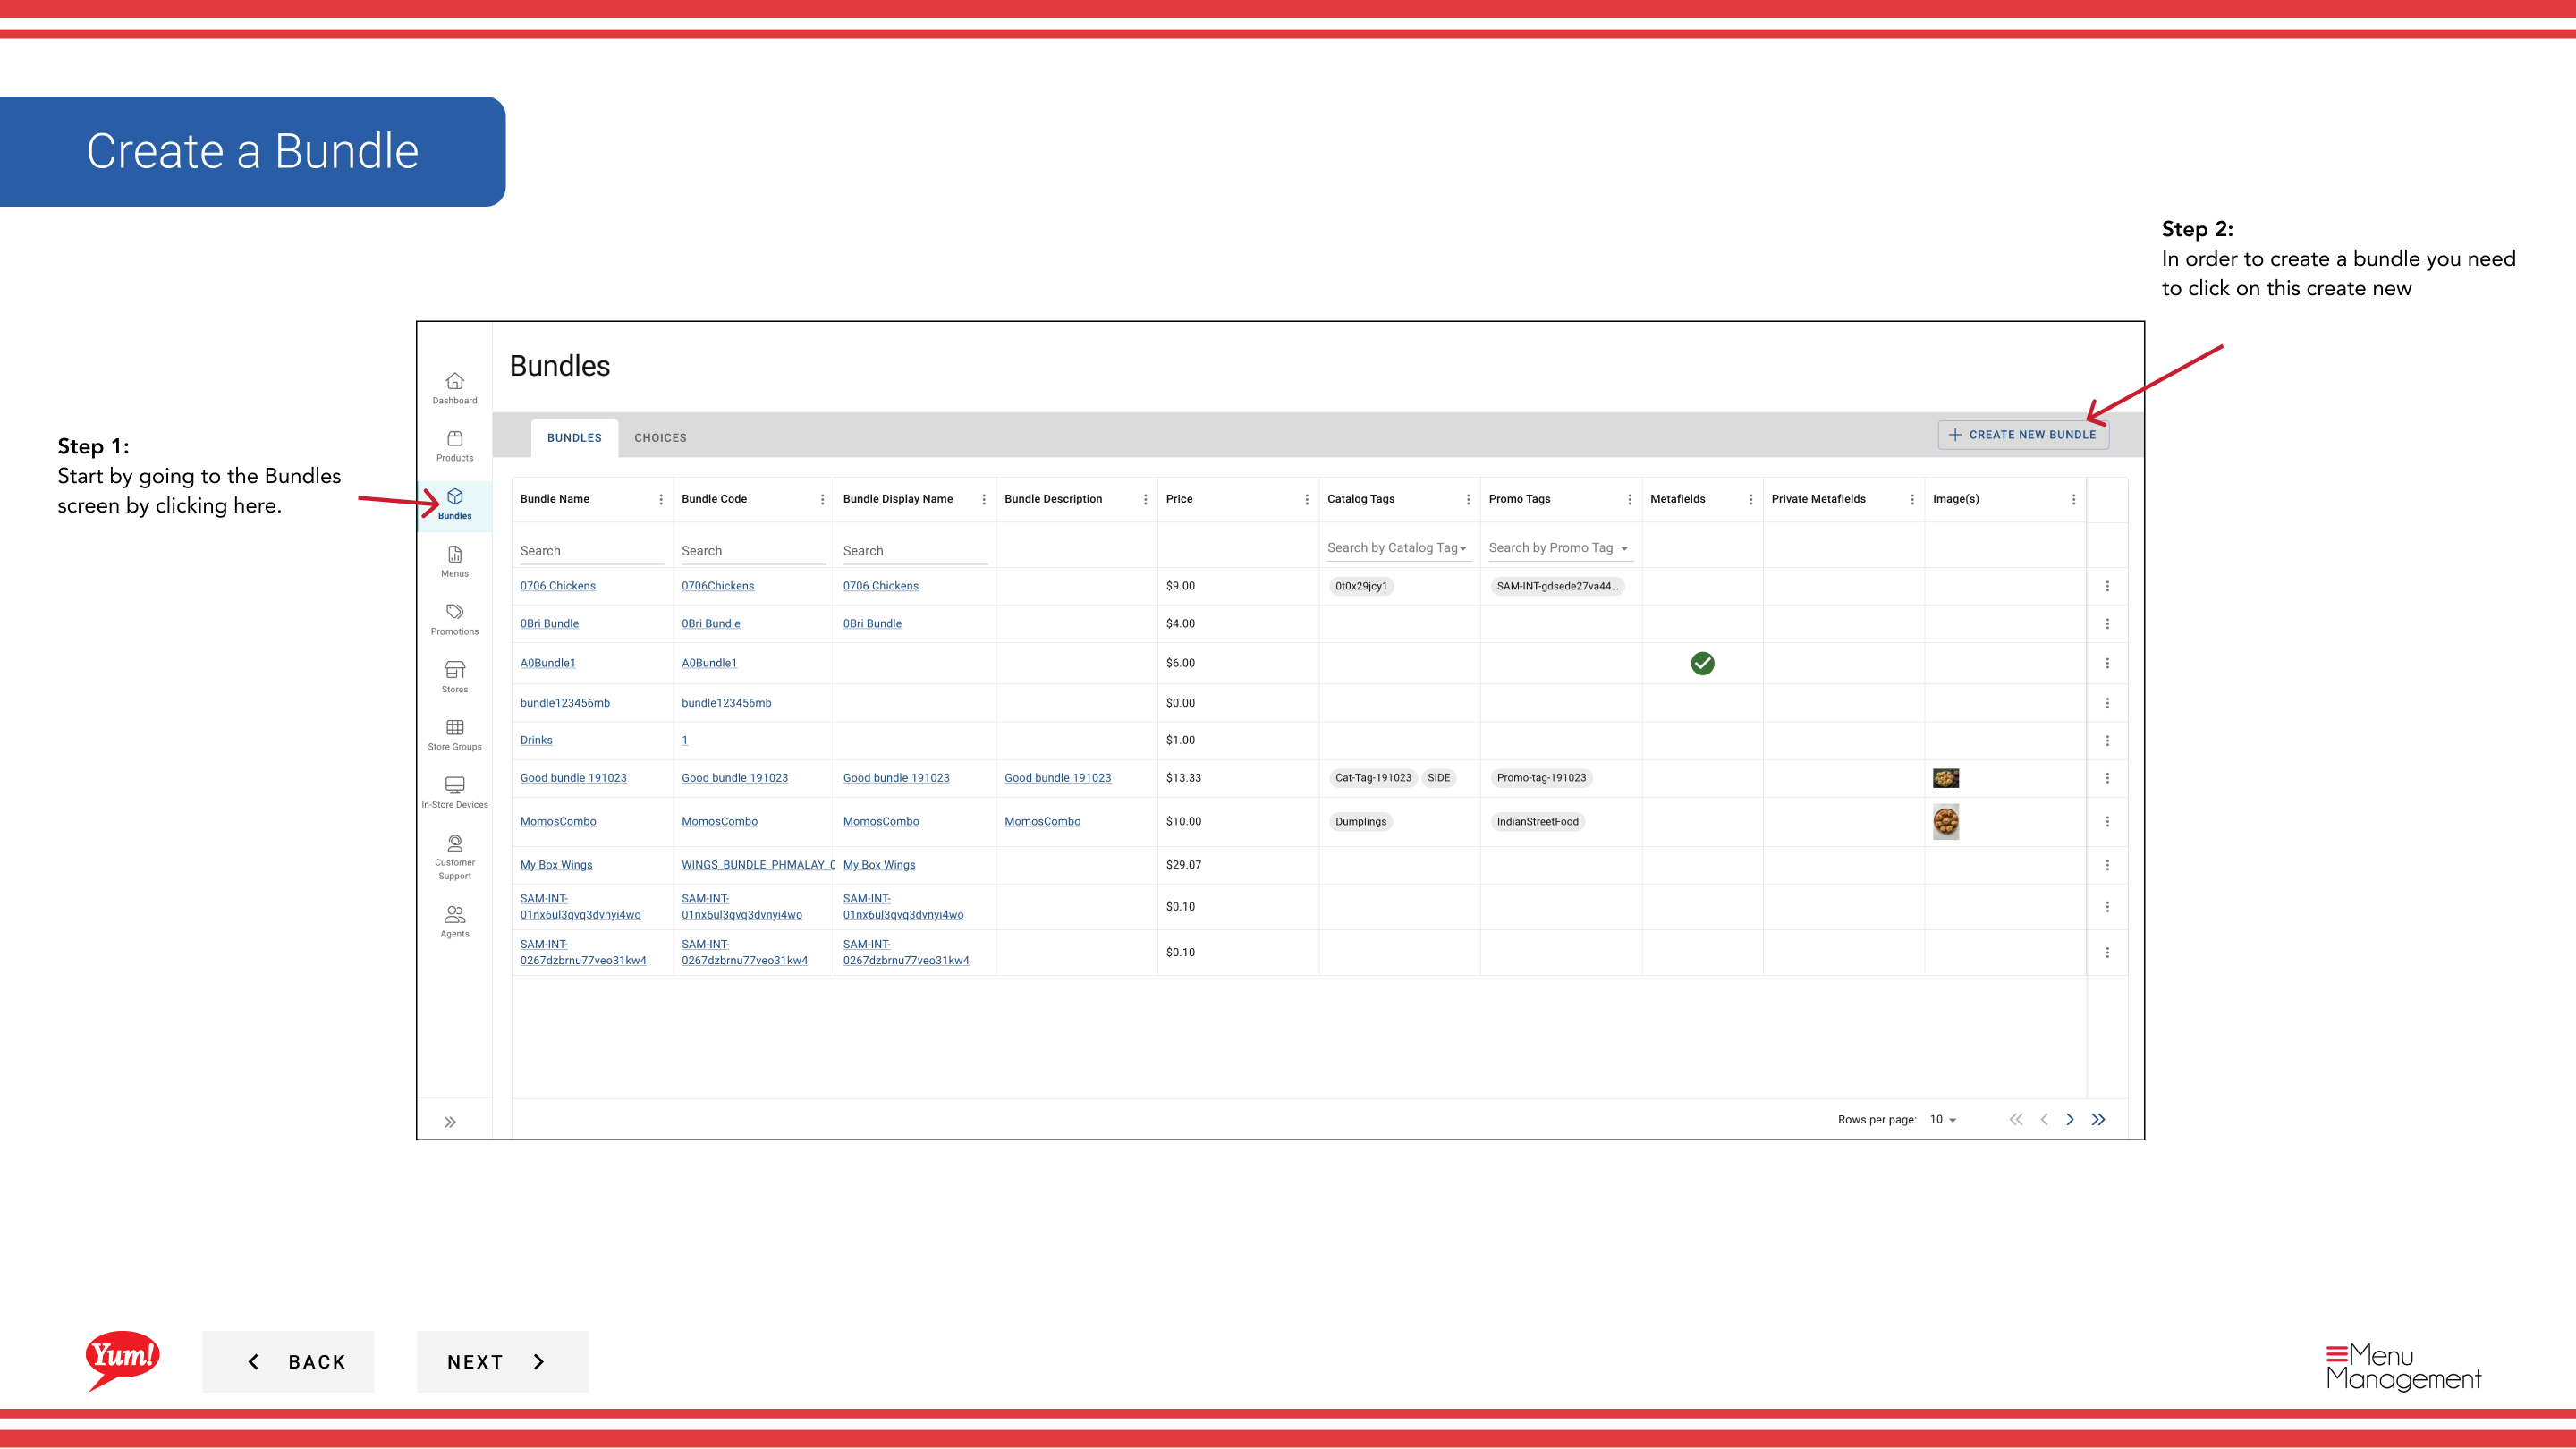
Step 1: Navigate to the Bundles section using the left-hand navigation menu.
Step 2: Click the + Create New Bundle button.
Step 3: Fill in the bundle details on Page 1. Fields marked with * are required.
| Field | What to enter | Notes |
|---|---|---|
| Bundle Code * | Unique system identifier | Use uppercase letters, numbers, and hyphens — e.g., BUNDLE-3PC-MEAL |
| Bundle Name * | Display name shown to customers | e.g., “3-Piece Meal” |
| Display Name | Shorter label for limited-space screens | Defaults to Bundle Name if left blank |
| Description | Customer-facing description of the bundle | Keep it appealing and clear |
Click the Add Details button (or “...”) to add optional information such as Nutrition Information, a Bundle Identifier, Catalog Tags, and Promo Tags.
Click the Item Availability drawer to set availability windows (e.g., “Lunch 11am–3pm”) when this bundle should be orderable.
Step 4: Click Next or select the next step tile at the top to proceed to Page 2 — Choices.
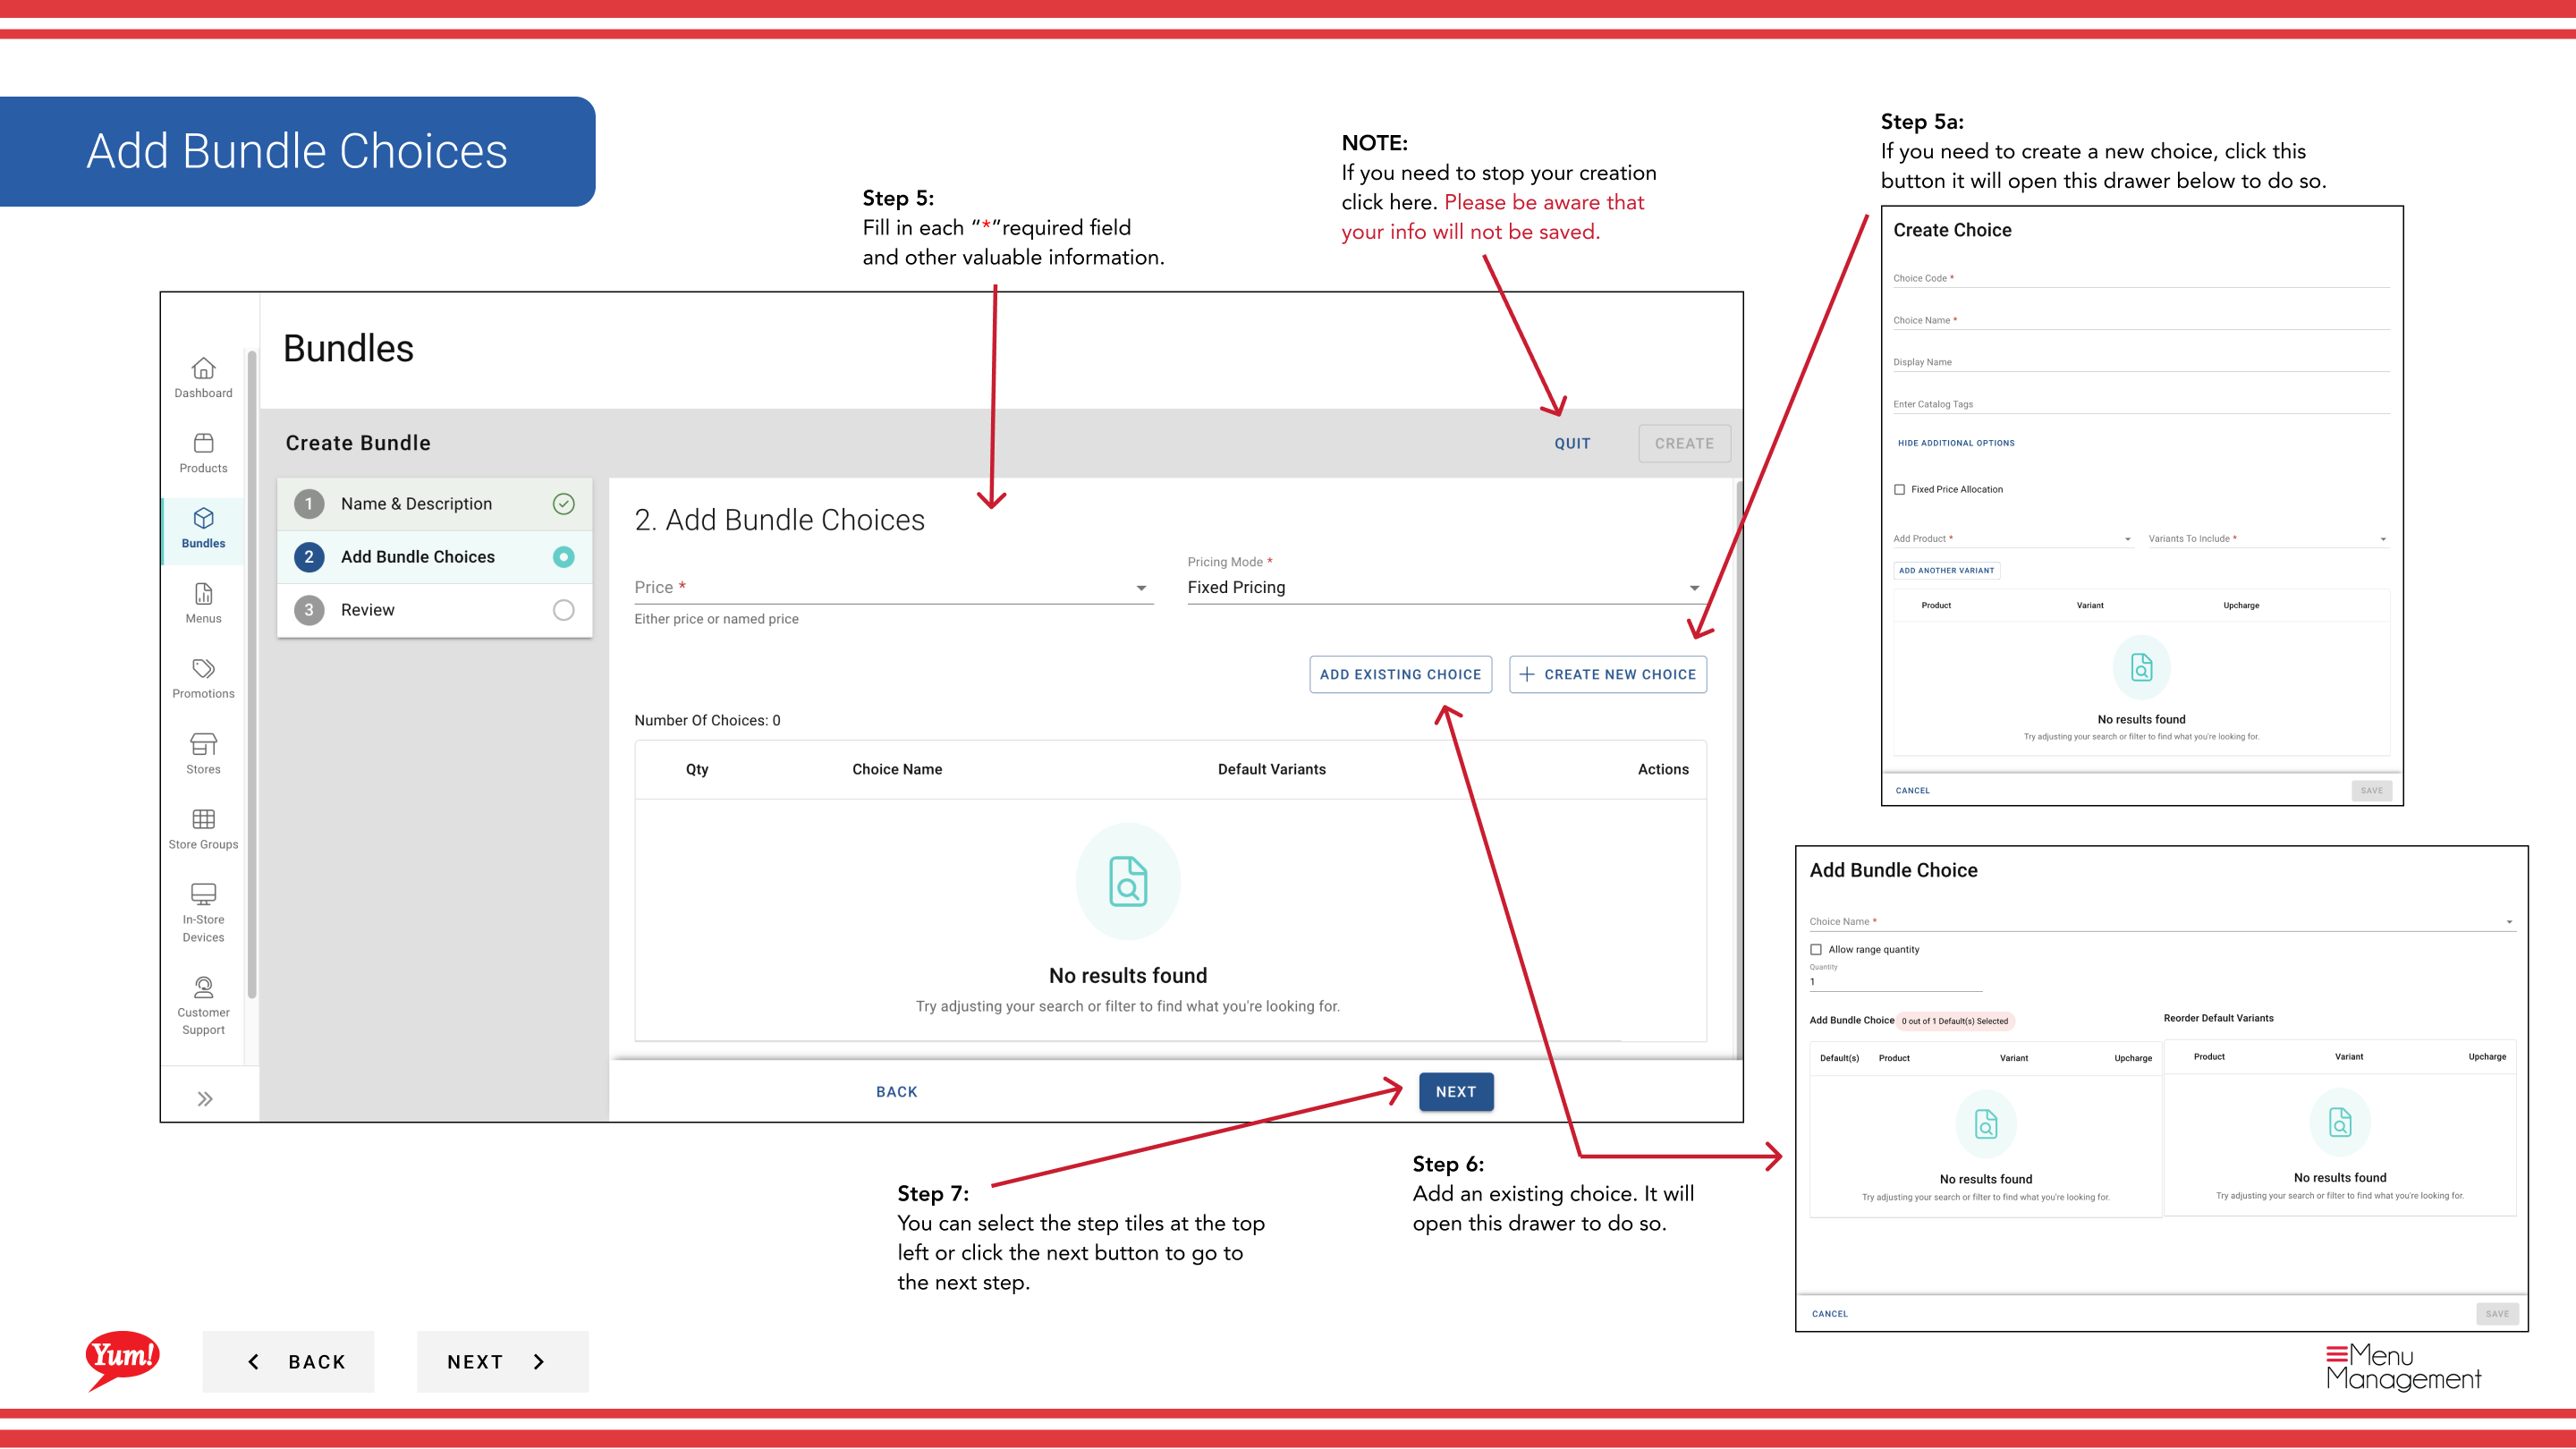
Step 5: Add choices to your bundle. A choice is a selection slot (e.g., “Choose Your Side”).
- To add an existing choice: Click Add Existing Choice. A search drawer opens — type to search and click the choice to select it, then click Add.
- To create a new choice inline: Click Create New Choice and fill in the fields:
| Field | What to enter | Notes |
|---|---|---|
| Choice Code * | Unique identifier | e.g., CHOICE-SIDE |
| Choice Name * | Label shown to customers | e.g., “Choose Your Side”, “Select Your Drink” |
| Min Quantity | Minimum selections required | Set to 0 to make the choice optional |
| Max Quantity | Maximum selections allowed | e.g., 1 for a single-select choice |
| Products | Items available within this choice | Search and add from the product list |

Step 6: Click Next to proceed to Page 3 — Review.
Step 7: Review all entered details. Click any blue section header to jump back and make corrections. Click Create to finalise the bundle.
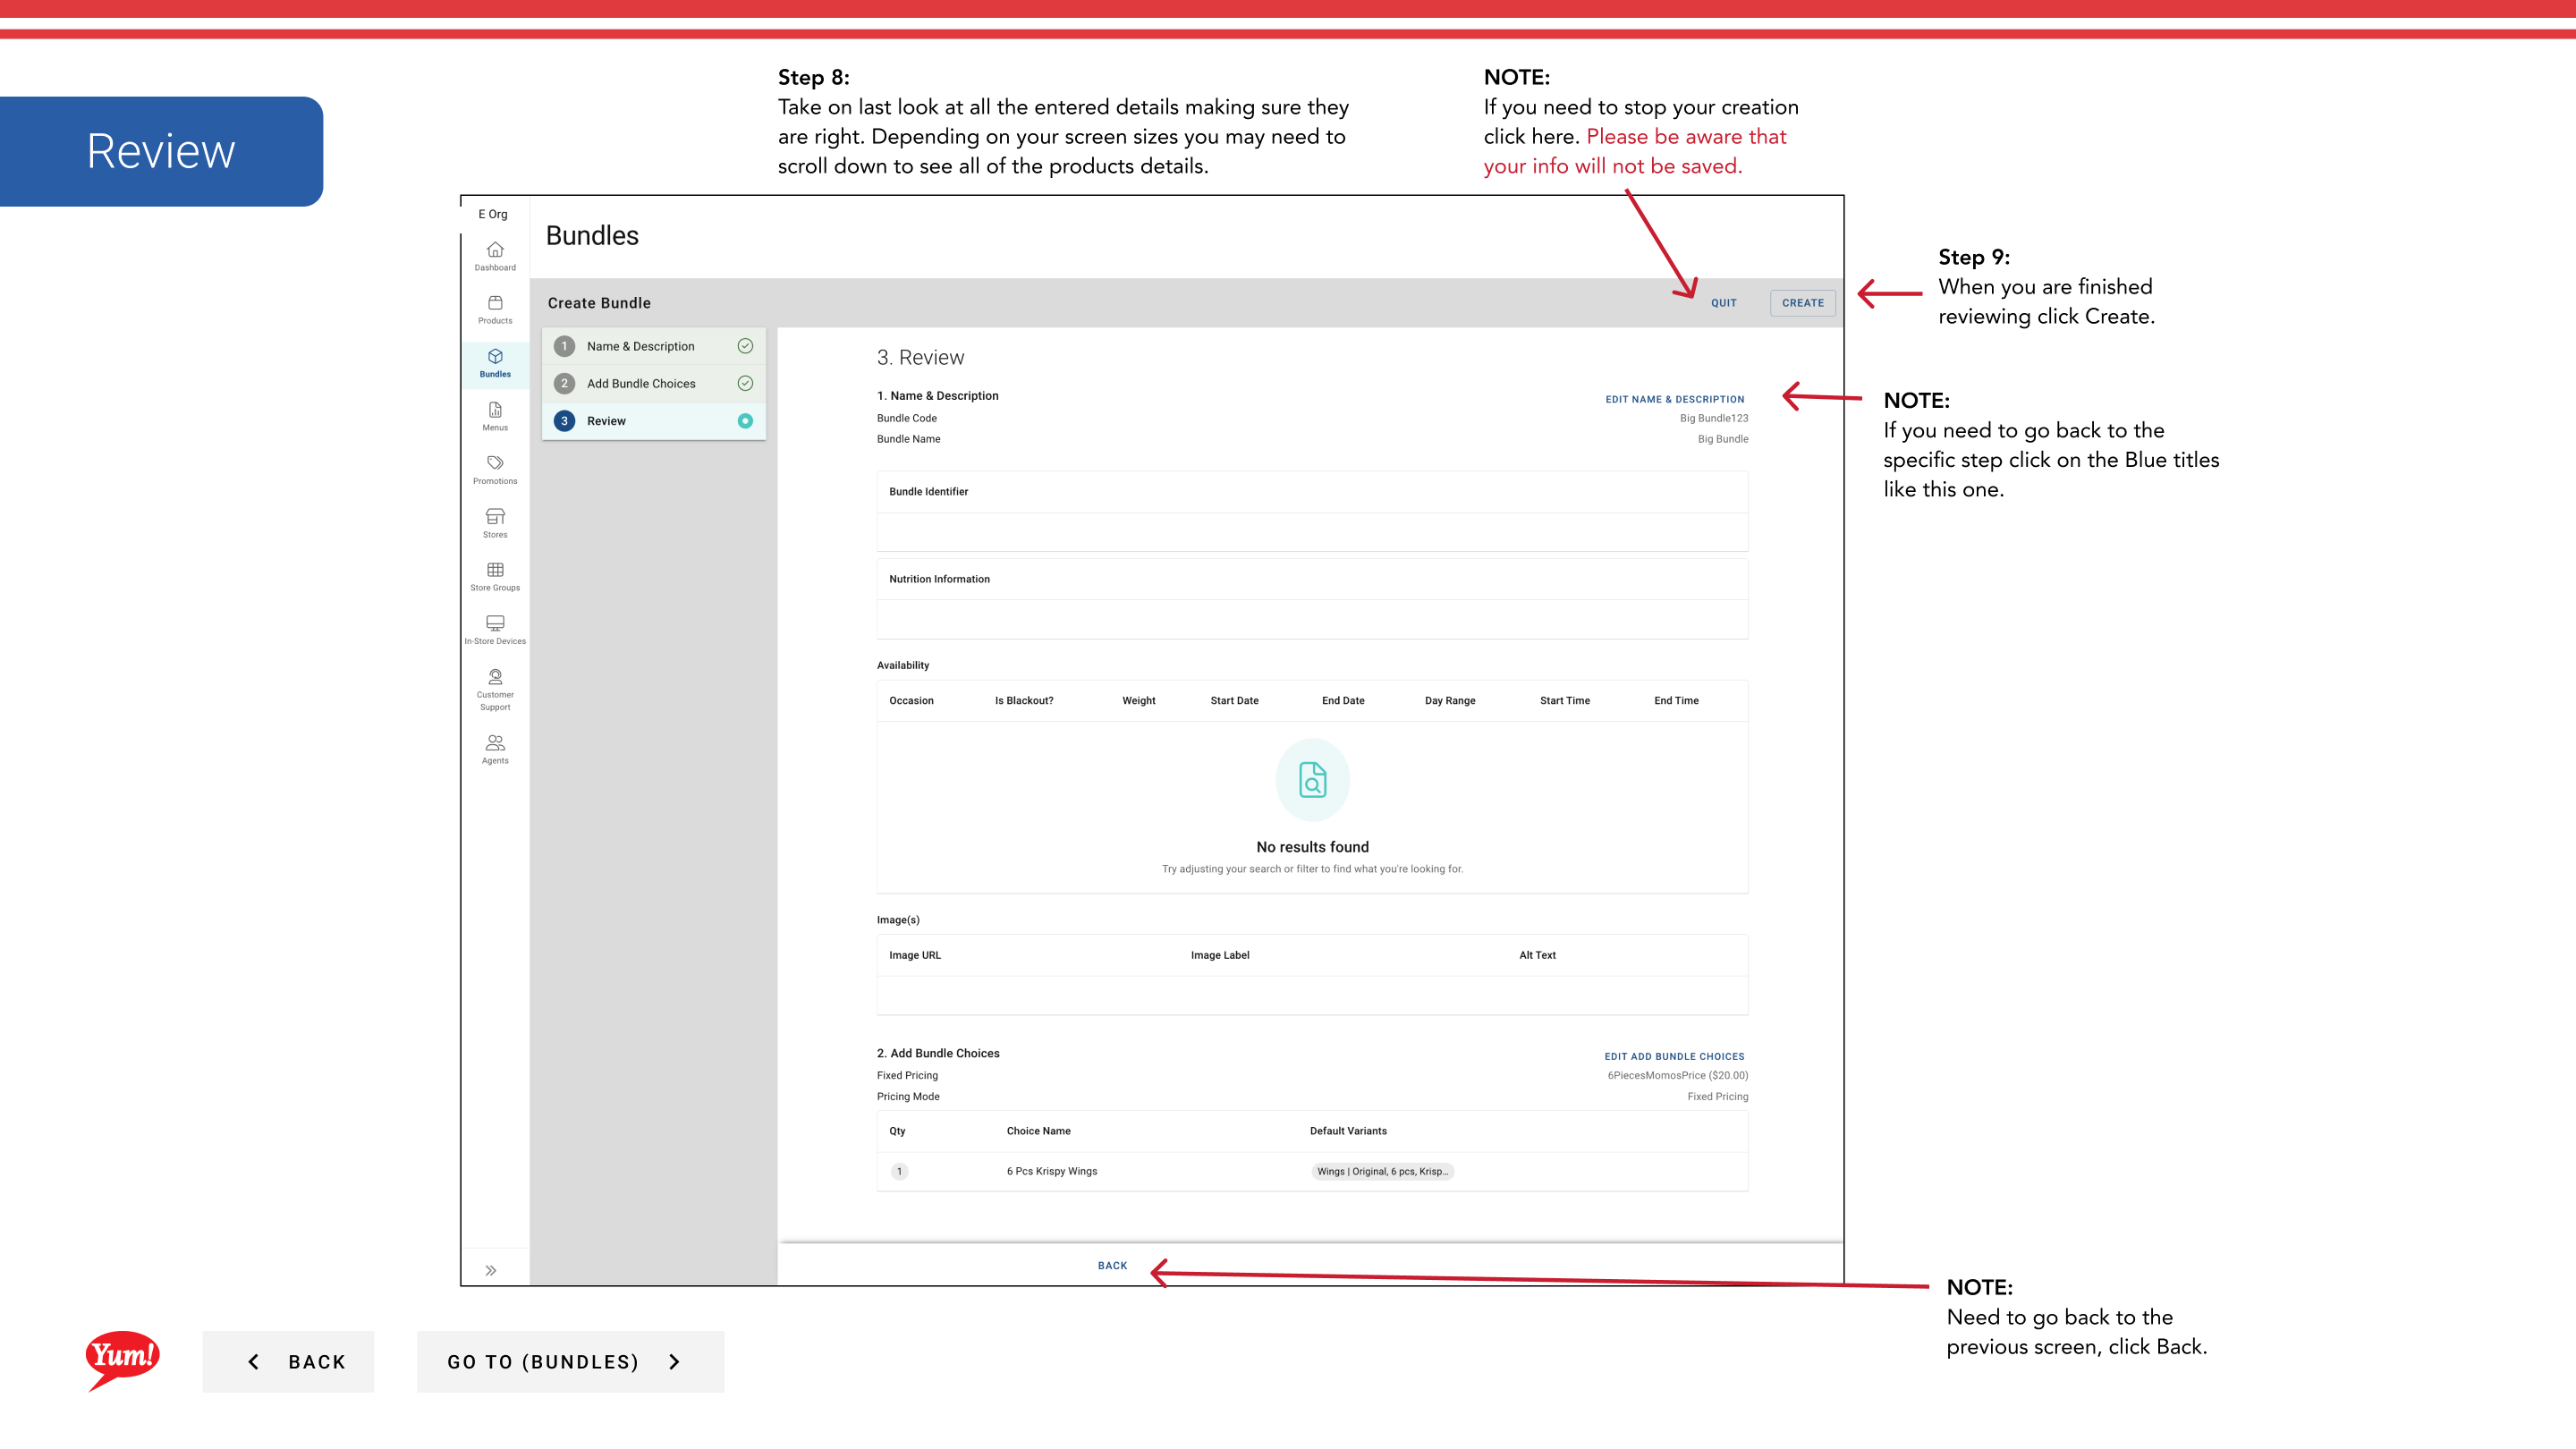
Clicking Cancel at any time discards all unsaved information.
Related guides
Part of the Admin Portal Guide · Section: Bundles