Create a Product
What this guide covers
Builds a complete product from scratch, defining its code, name, variants, options, pricing, slots, modifiers, and availability windows so it is ready to sell across digital channels.
Steps
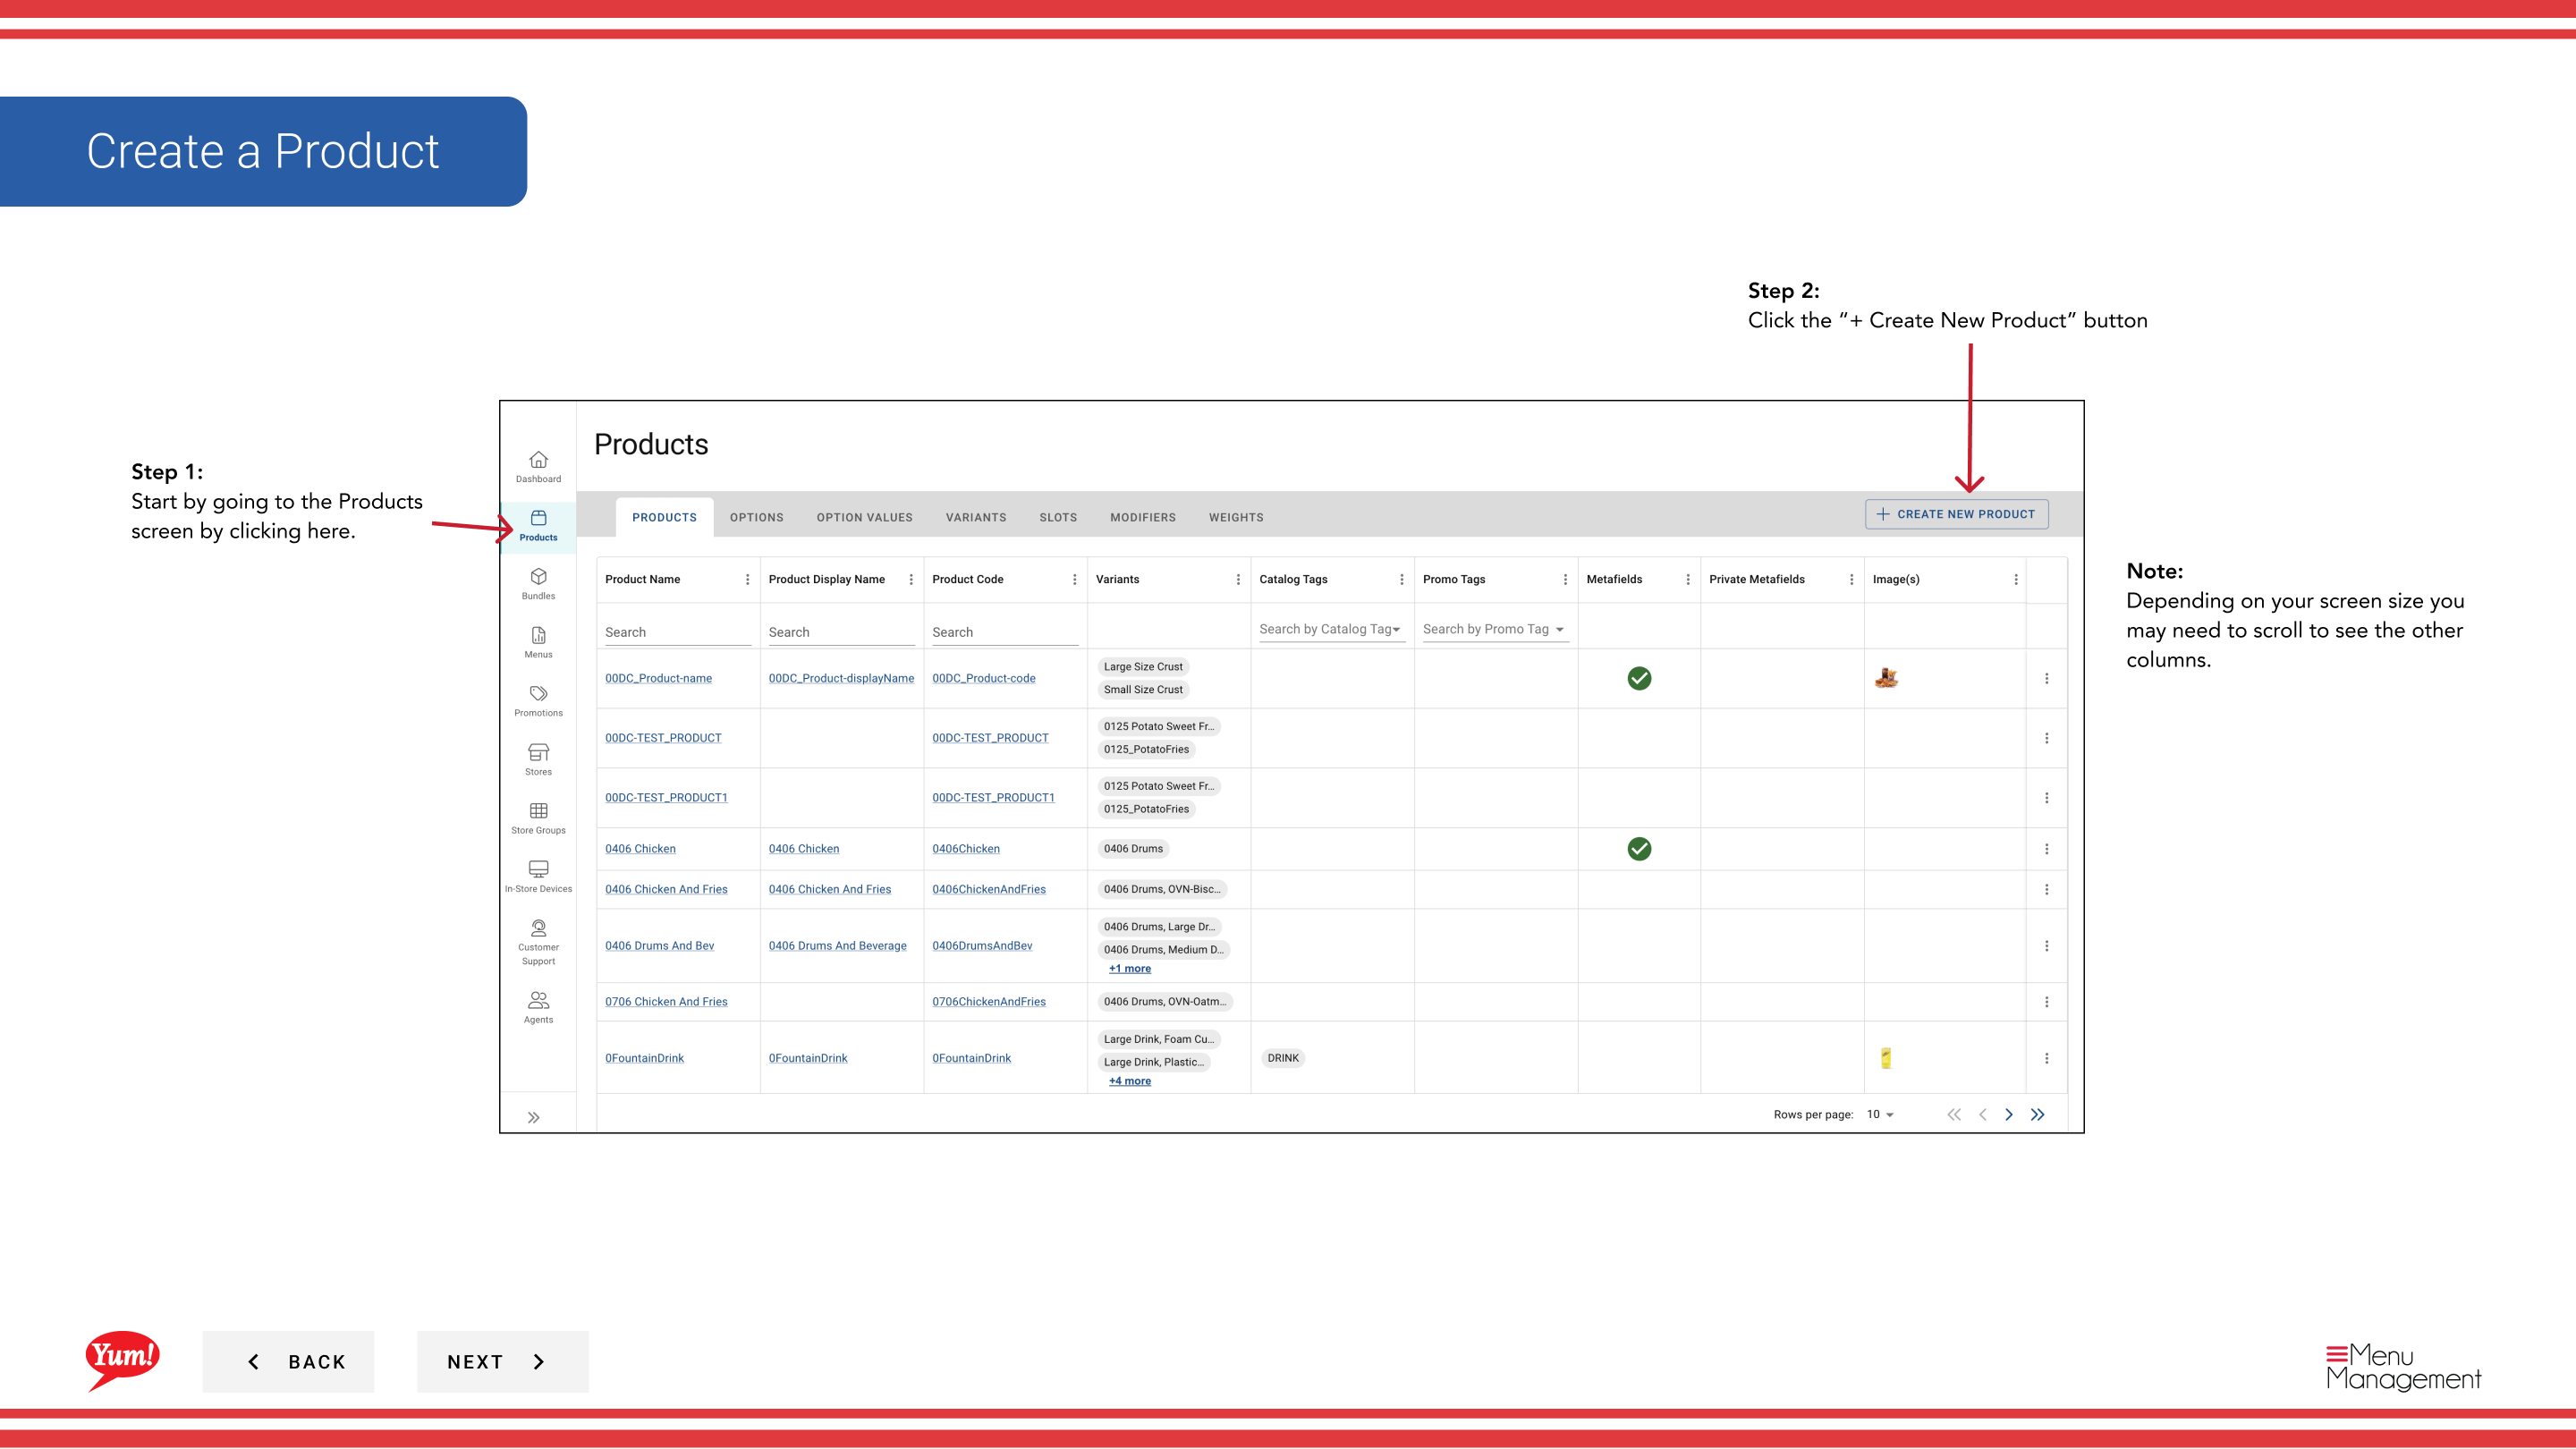
Page 1: Basic Product Information
Step 1: Navigate to the Products section using the left navigation menu.
Step 2: Click the + Create New Product button.
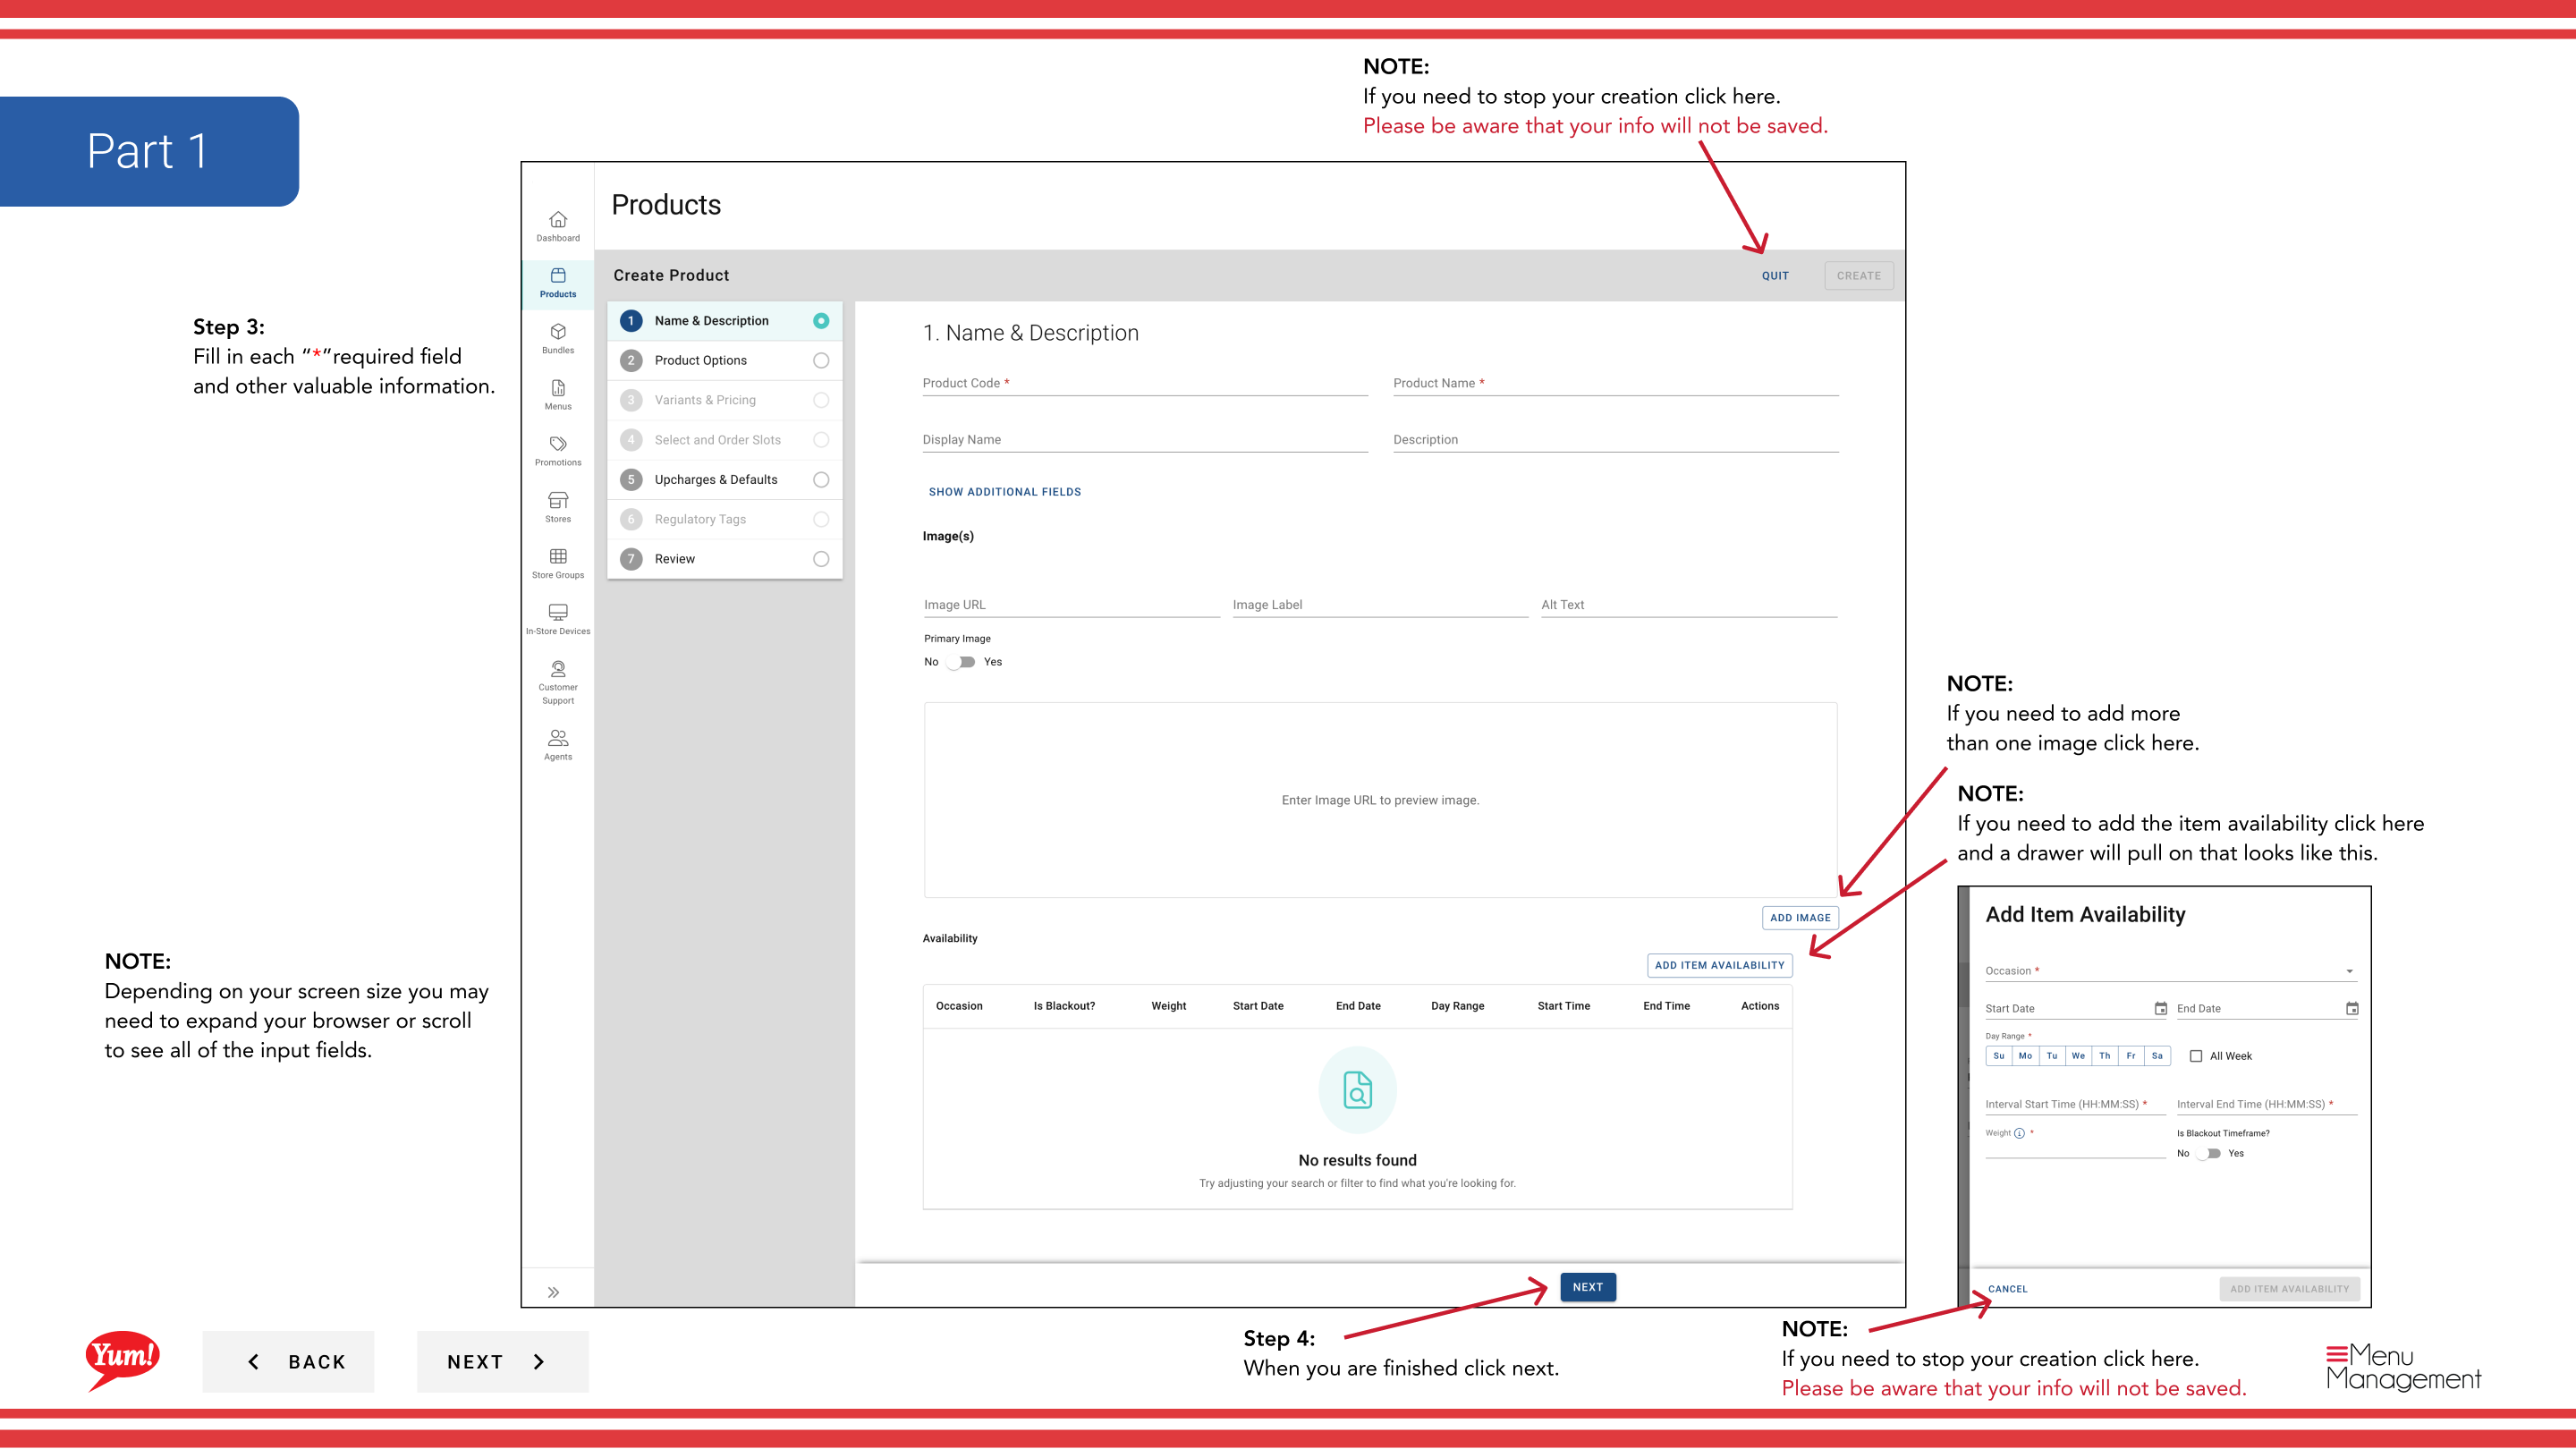
Step 3: Fill in the product details. Fields marked with * are required.
| Field | What to enter | Notes |
|---|---|---|
| Product Code * | Unique system identifier for this product | Use uppercase letters, numbers, and hyphens only (e.g., “ZINGER-BURGER”). Cannot be changed after creation. |
| Product Name * | Full display name shown to customers | e.g., “Zinger Burger” |
| Display Name | Short name for limited screen space | Defaults to Product Name if left blank |
| Description | Product description for customers | Keep it clear and appetising |
| Item Availability | When this product is available for ordering | Click to open a drawer and set time windows (e.g., “Breakfast” 6am–11am). Leave blank for all-day availability. |
| Tags | Optional labels for reporting and filtering | Enter or select from dropdown |
Step 4: Click Next to proceed to the Options page.
Page 2: Options
Step 5: Add customisation groups (e.g., “Size”, “Spice Level”) that customers can choose from when ordering.
| Field | What to enter | Notes |
|---|---|---|
| Options | Customisation groups for this product | Select existing options from the dropdown. If the option you need doesn’t exist, click Create New Option. |
Step 6: To reorder options, click and drag the six-dot drag handle to arrange them in the order you want customers to see them.
Step 7: To remove an option, click the X next to the option name.
Step 8: Click Next to proceed to the Variants page.
Page 3: Variants
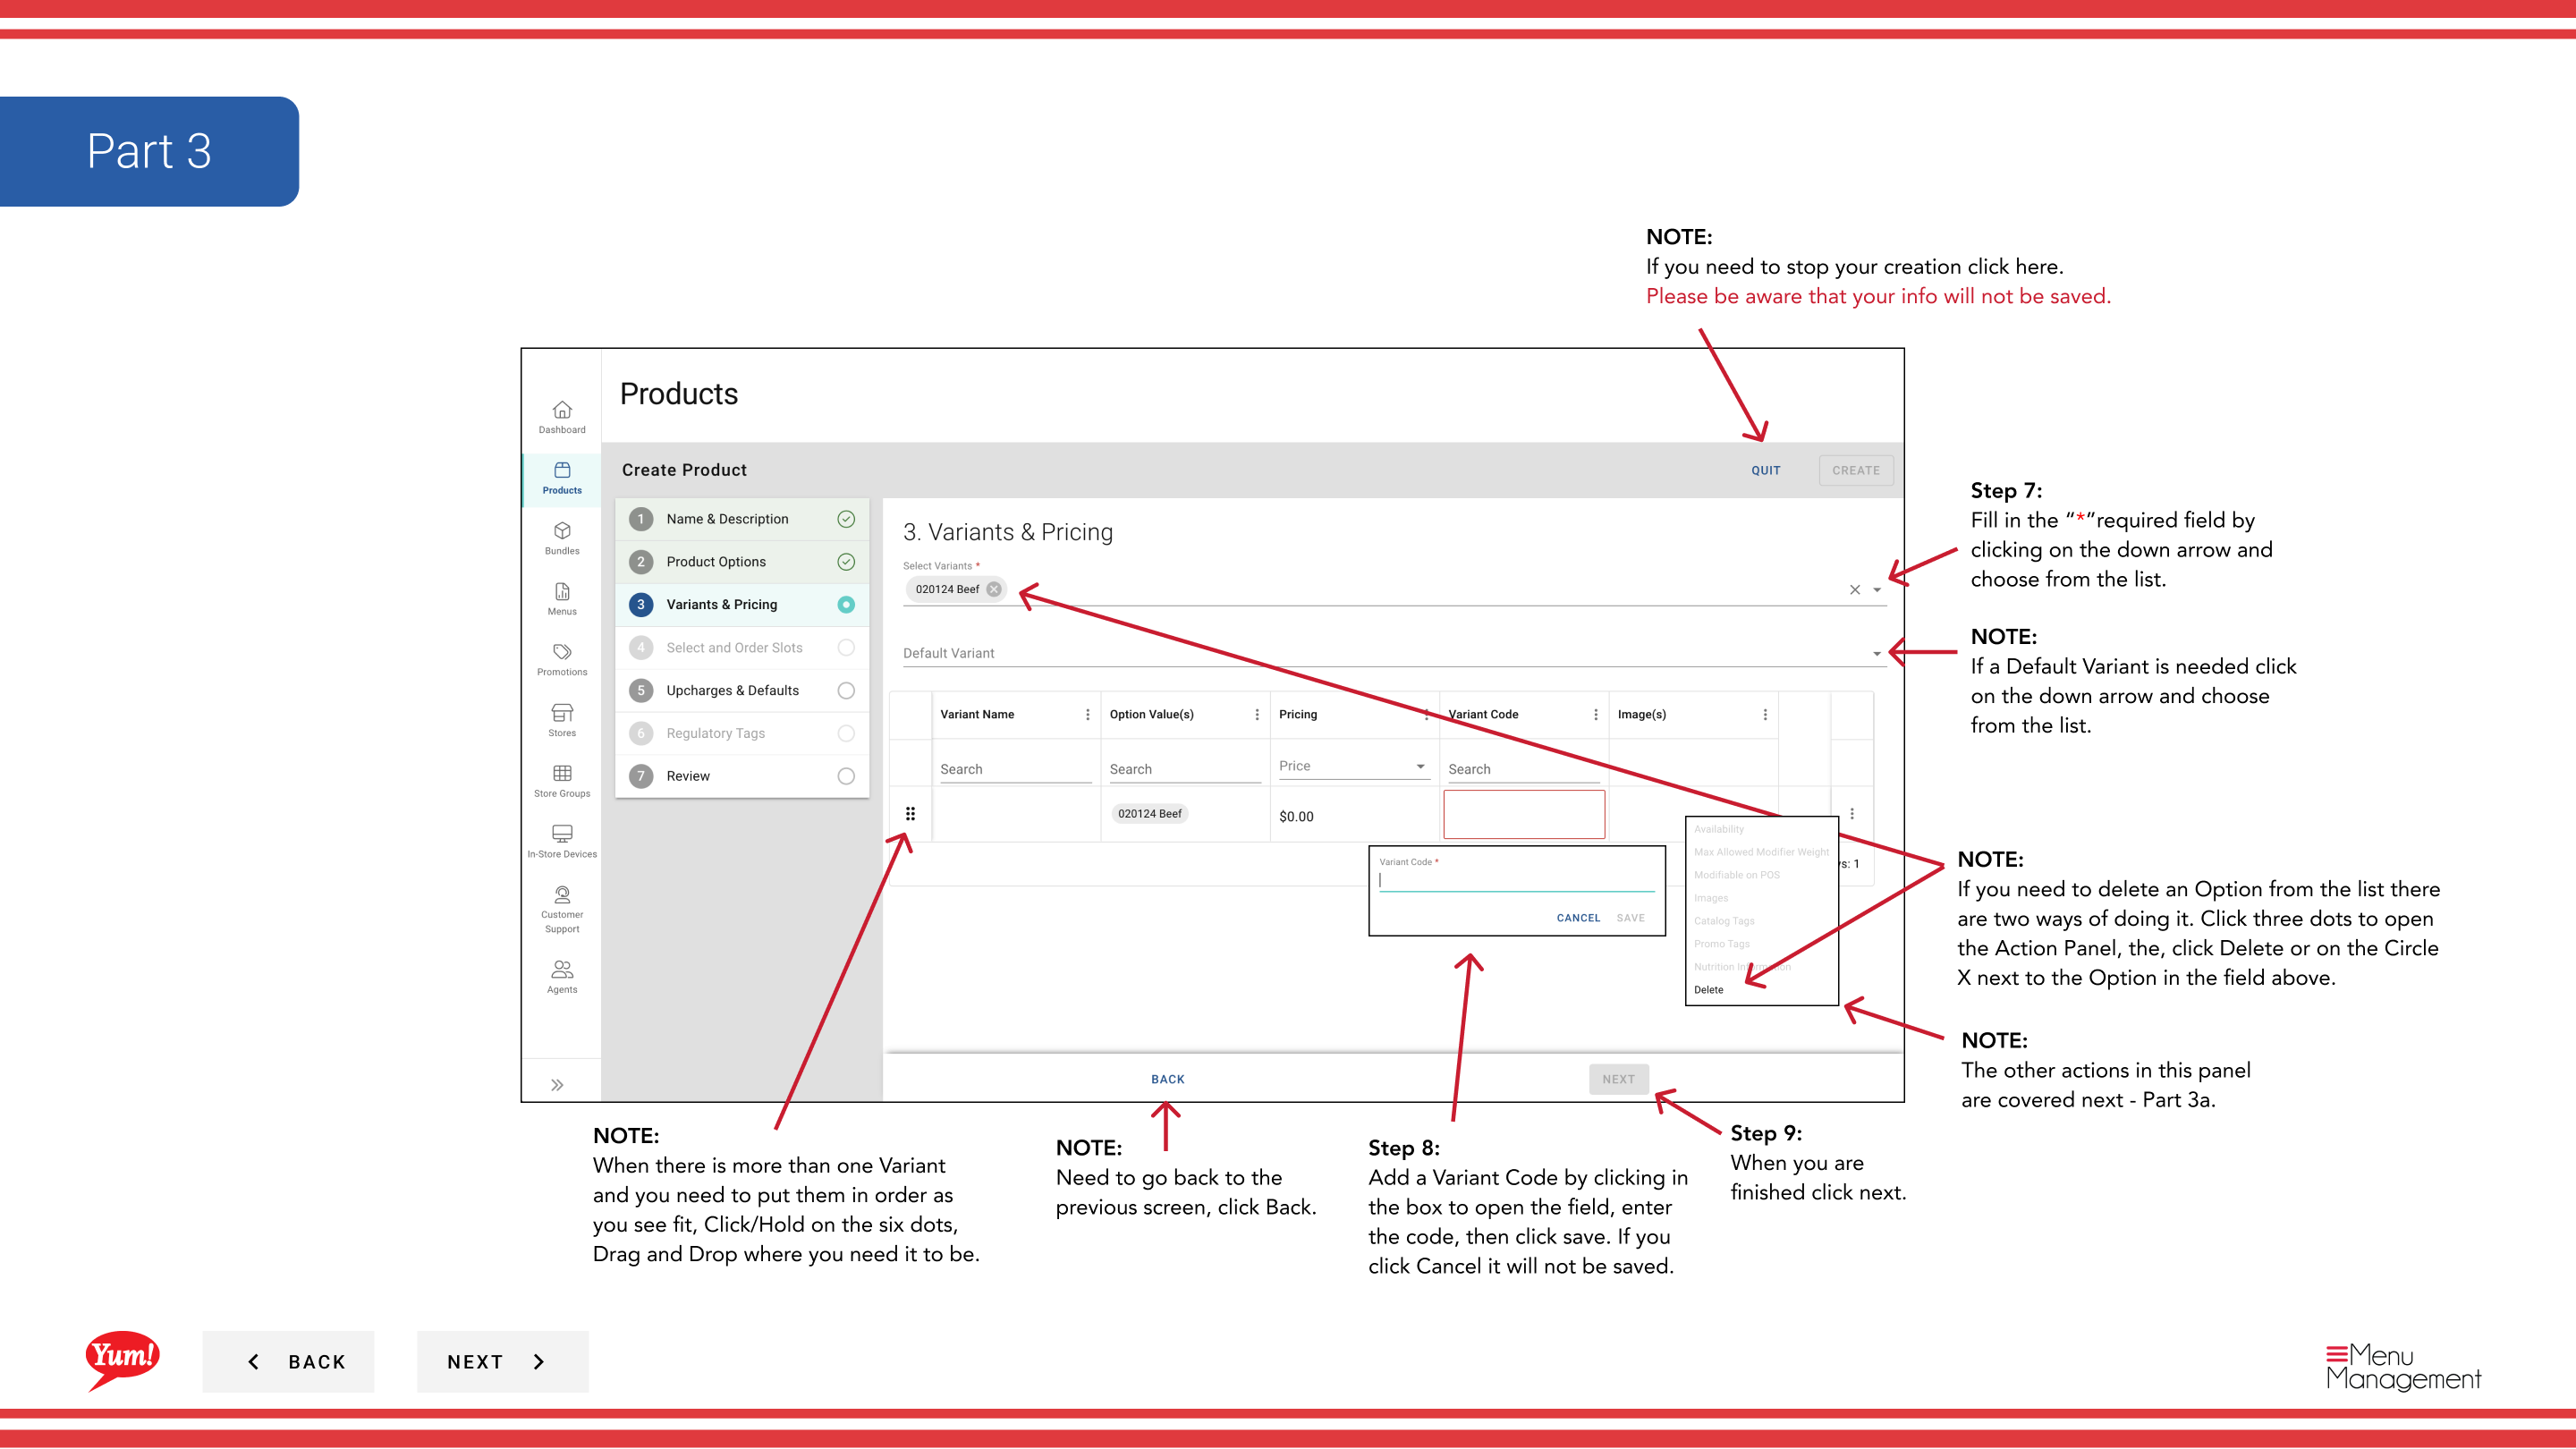
Step 9: Define each purchasable combination of options (e.g., “Zinger Burger - Regular”).
Step 10: For each variant, click in the Variant Code field to open the edit box, enter a unique code (e.g., “ZINGER-REGULAR”), then click Save. Clicking Cancel will discard the code.

Step 11: To set a default variant that customers see first, click the Default Variant dropdown and select the variant.
Step 12: To reorder variants, click and drag the six-dot drag handle.
Step 13: To delete a variant, click the three-dot menu next to the variant and select Delete.
Step 14: Click Next to proceed to the Slots page.
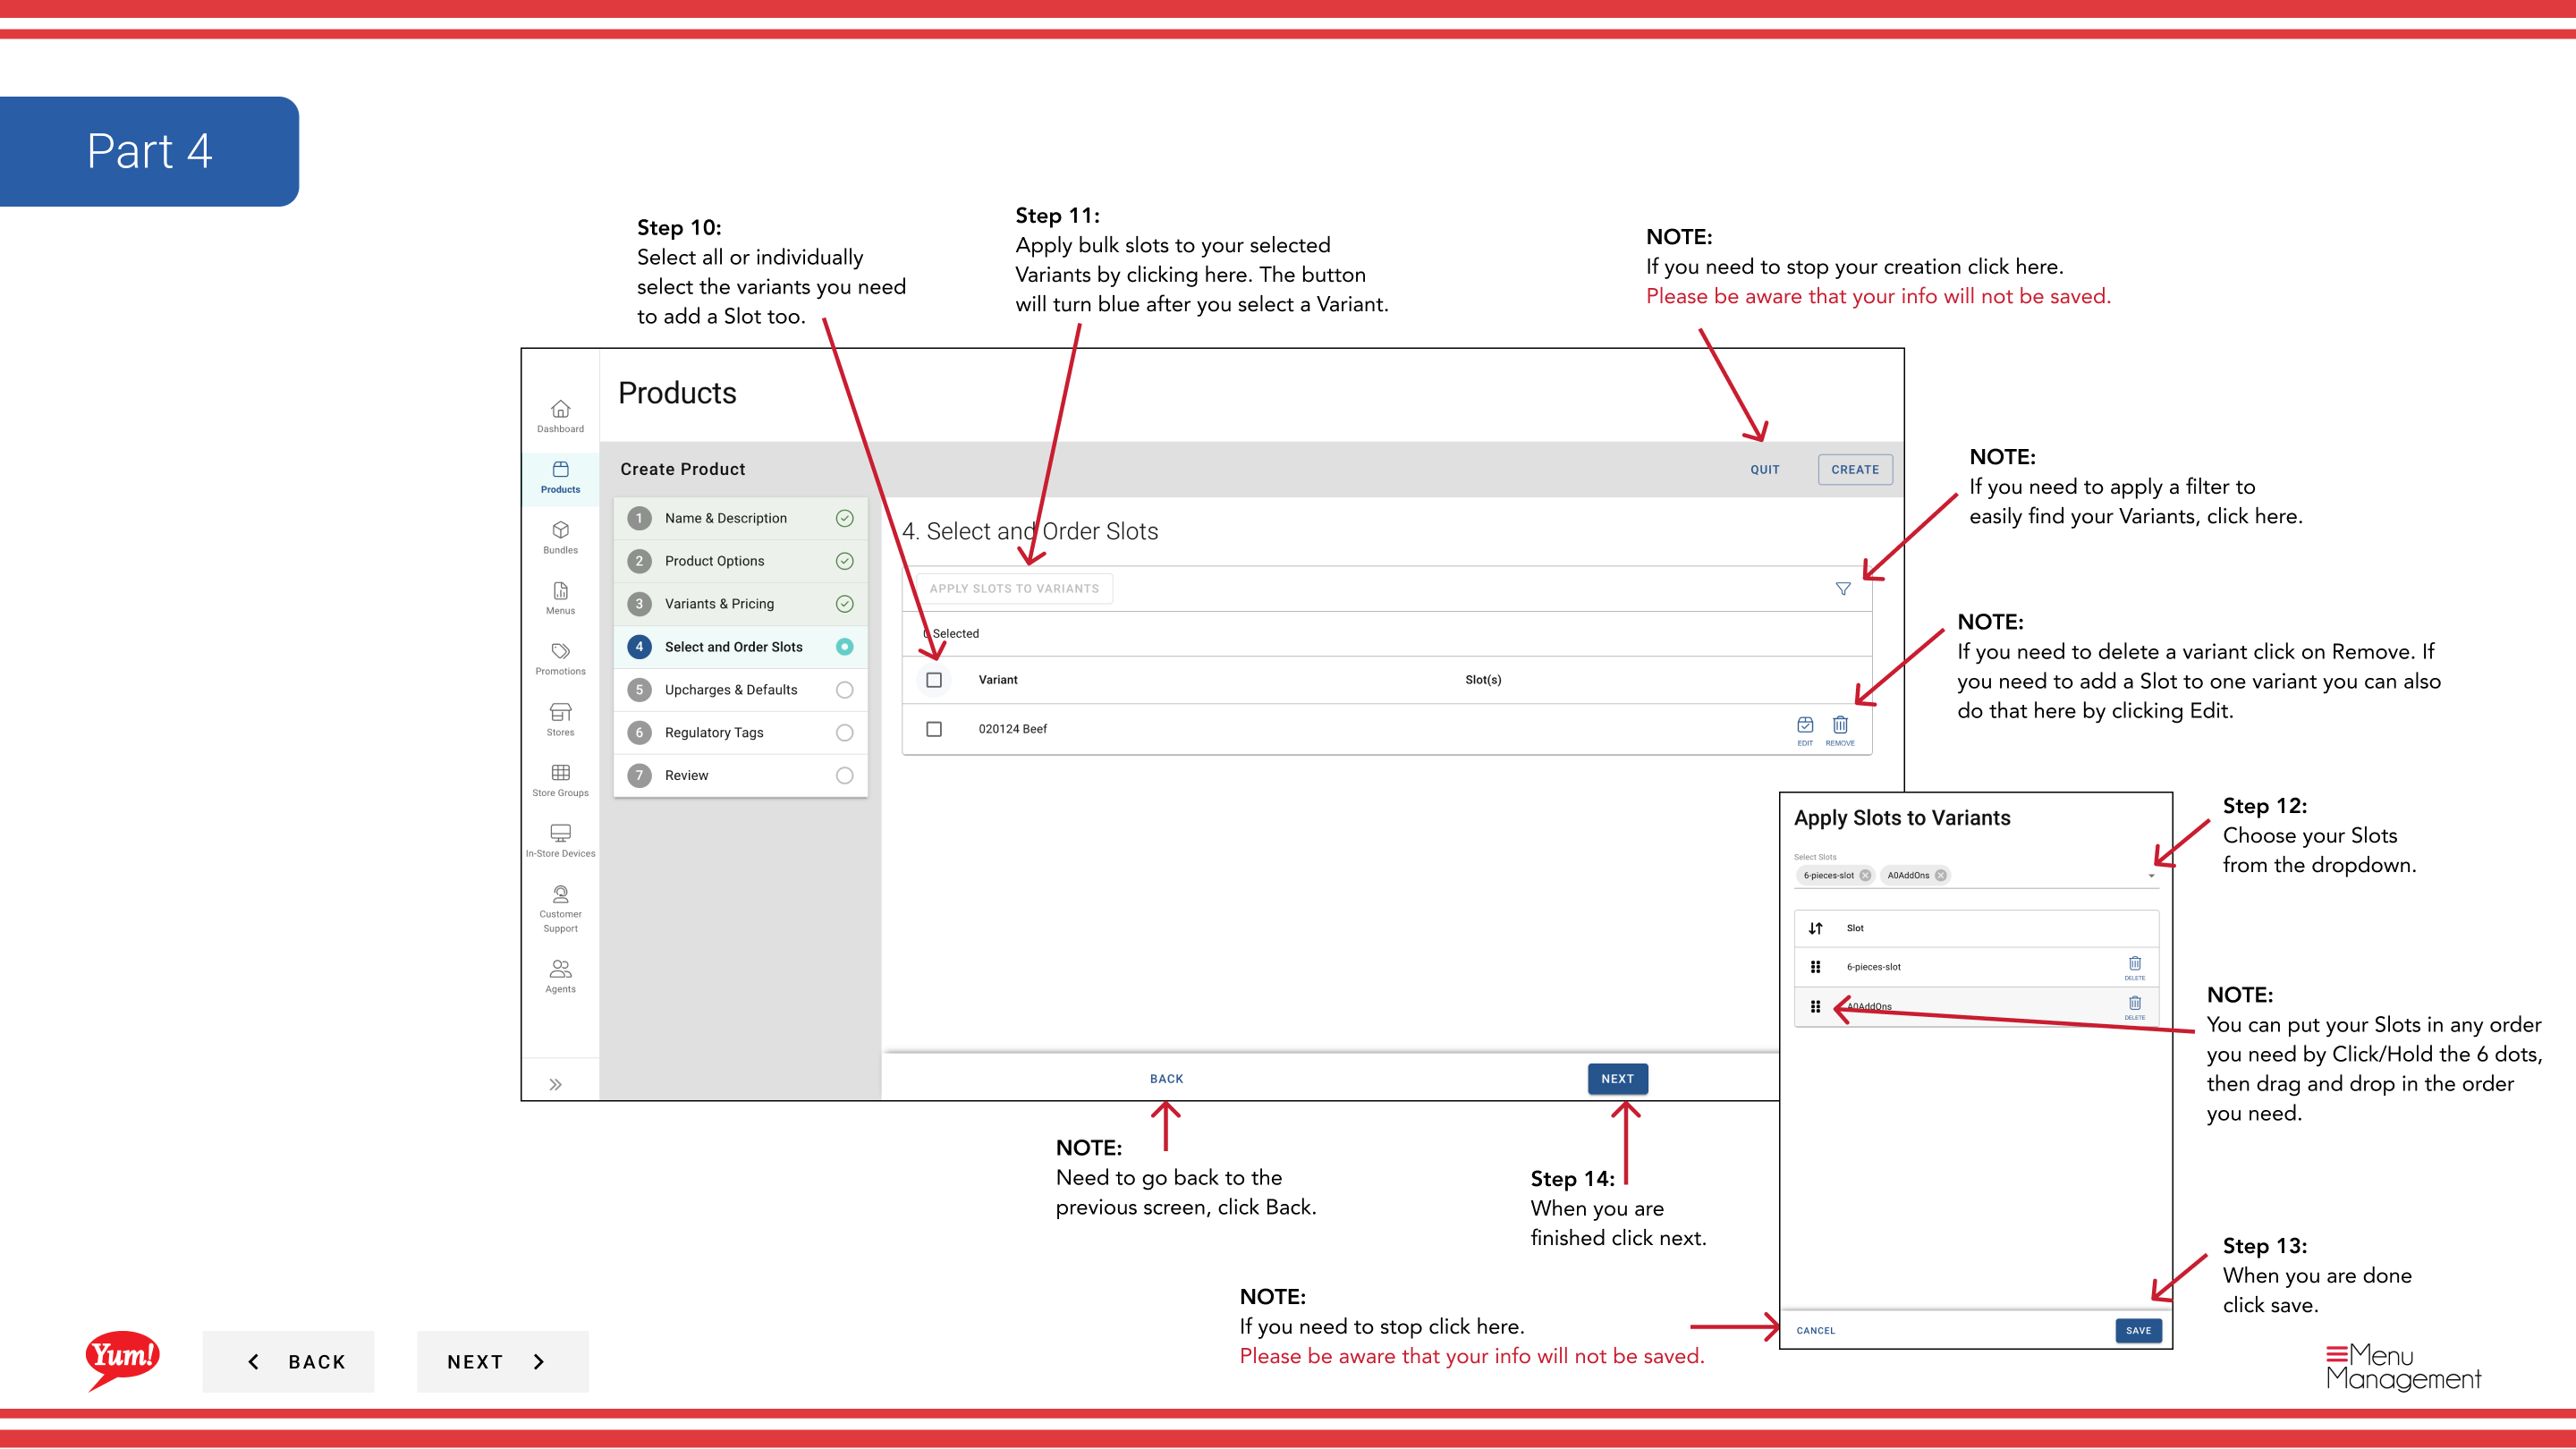
Page 4: Slots
Step 15: Add slots (positions where modifiers can be placed, e.g., “Sauce Selection”, “Cheese Options”).
Step 16: Select variants (individually or all) to apply slots to them.
Step 17: Click Apply Bulk Slots to add the same slots to multiple selected variants at once. Or click Edit on a specific variant to add slots to just that variant.
Step 18: Select your slots from the dropdown and click Add.
Step 19: Click Save when finished.
Step 20: Click Next to proceed to the Bulk Actions page.
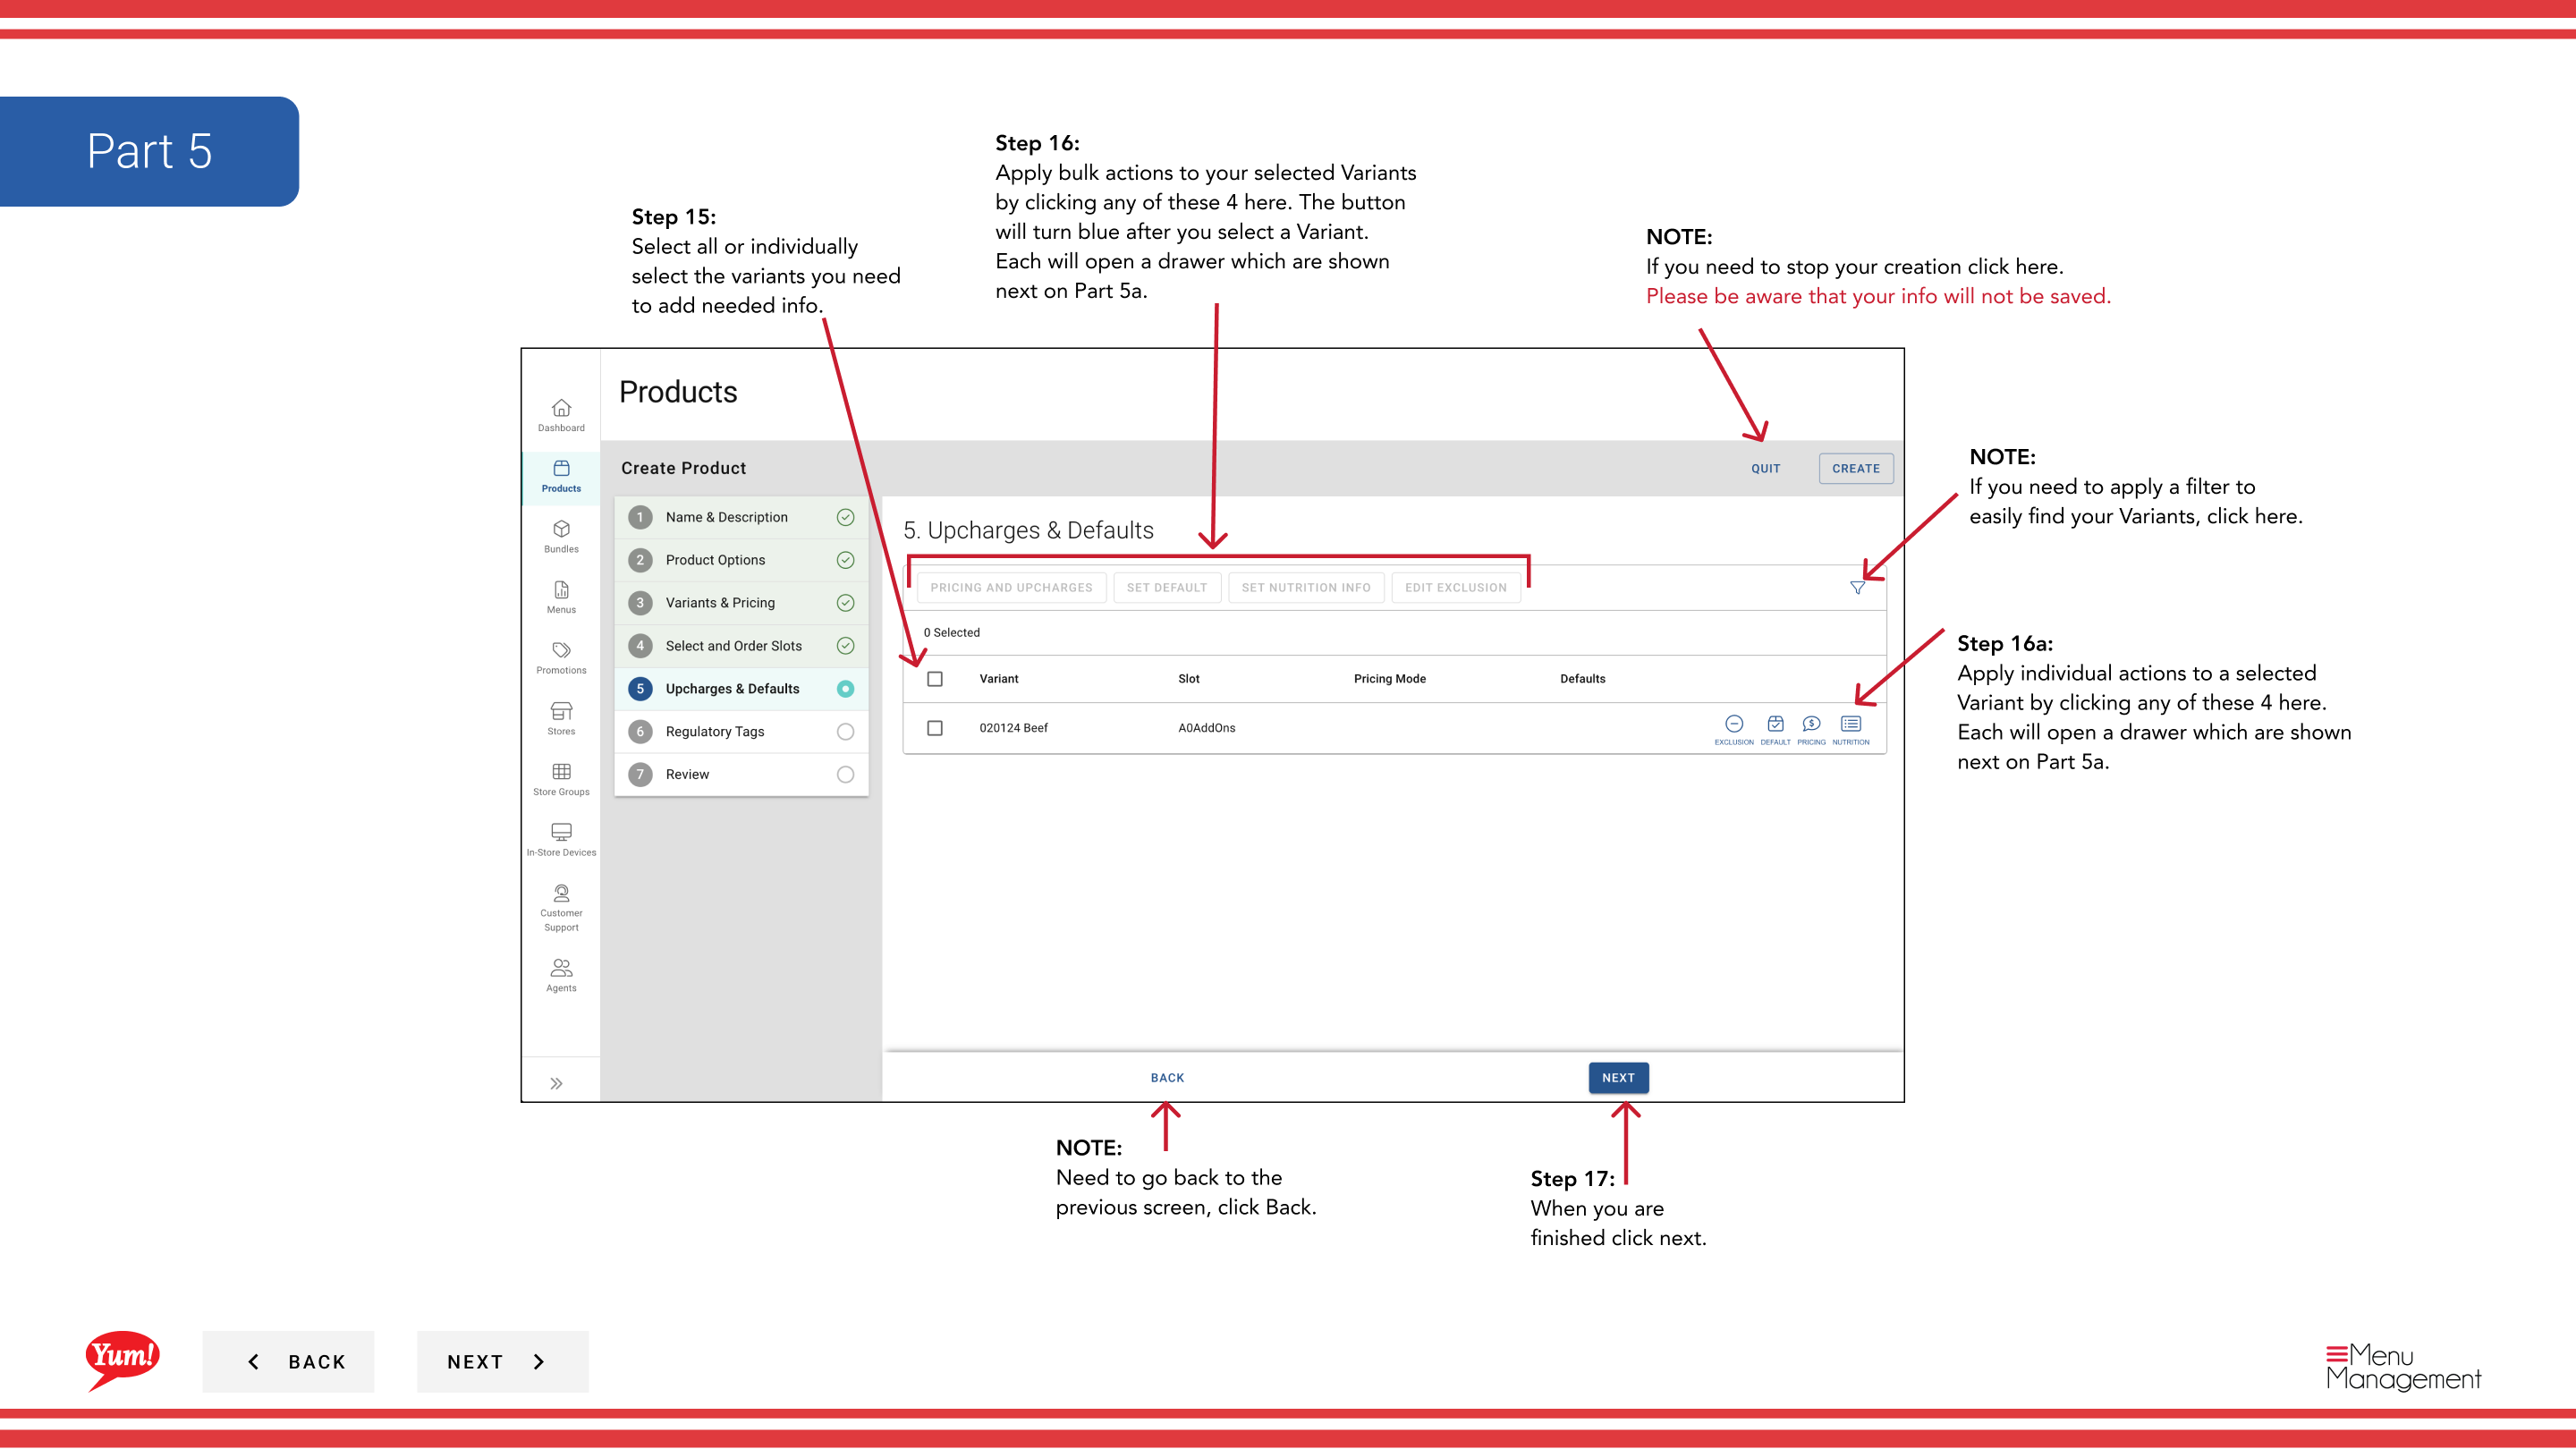
Page 5: Bulk Actions
Step 21: Add pricing, weights, nutrition, or exclusions to variants in bulk.
Step 22: Select variants (individually or all).
Step 23: Click one of these bulk action buttons to apply to all selected variants:
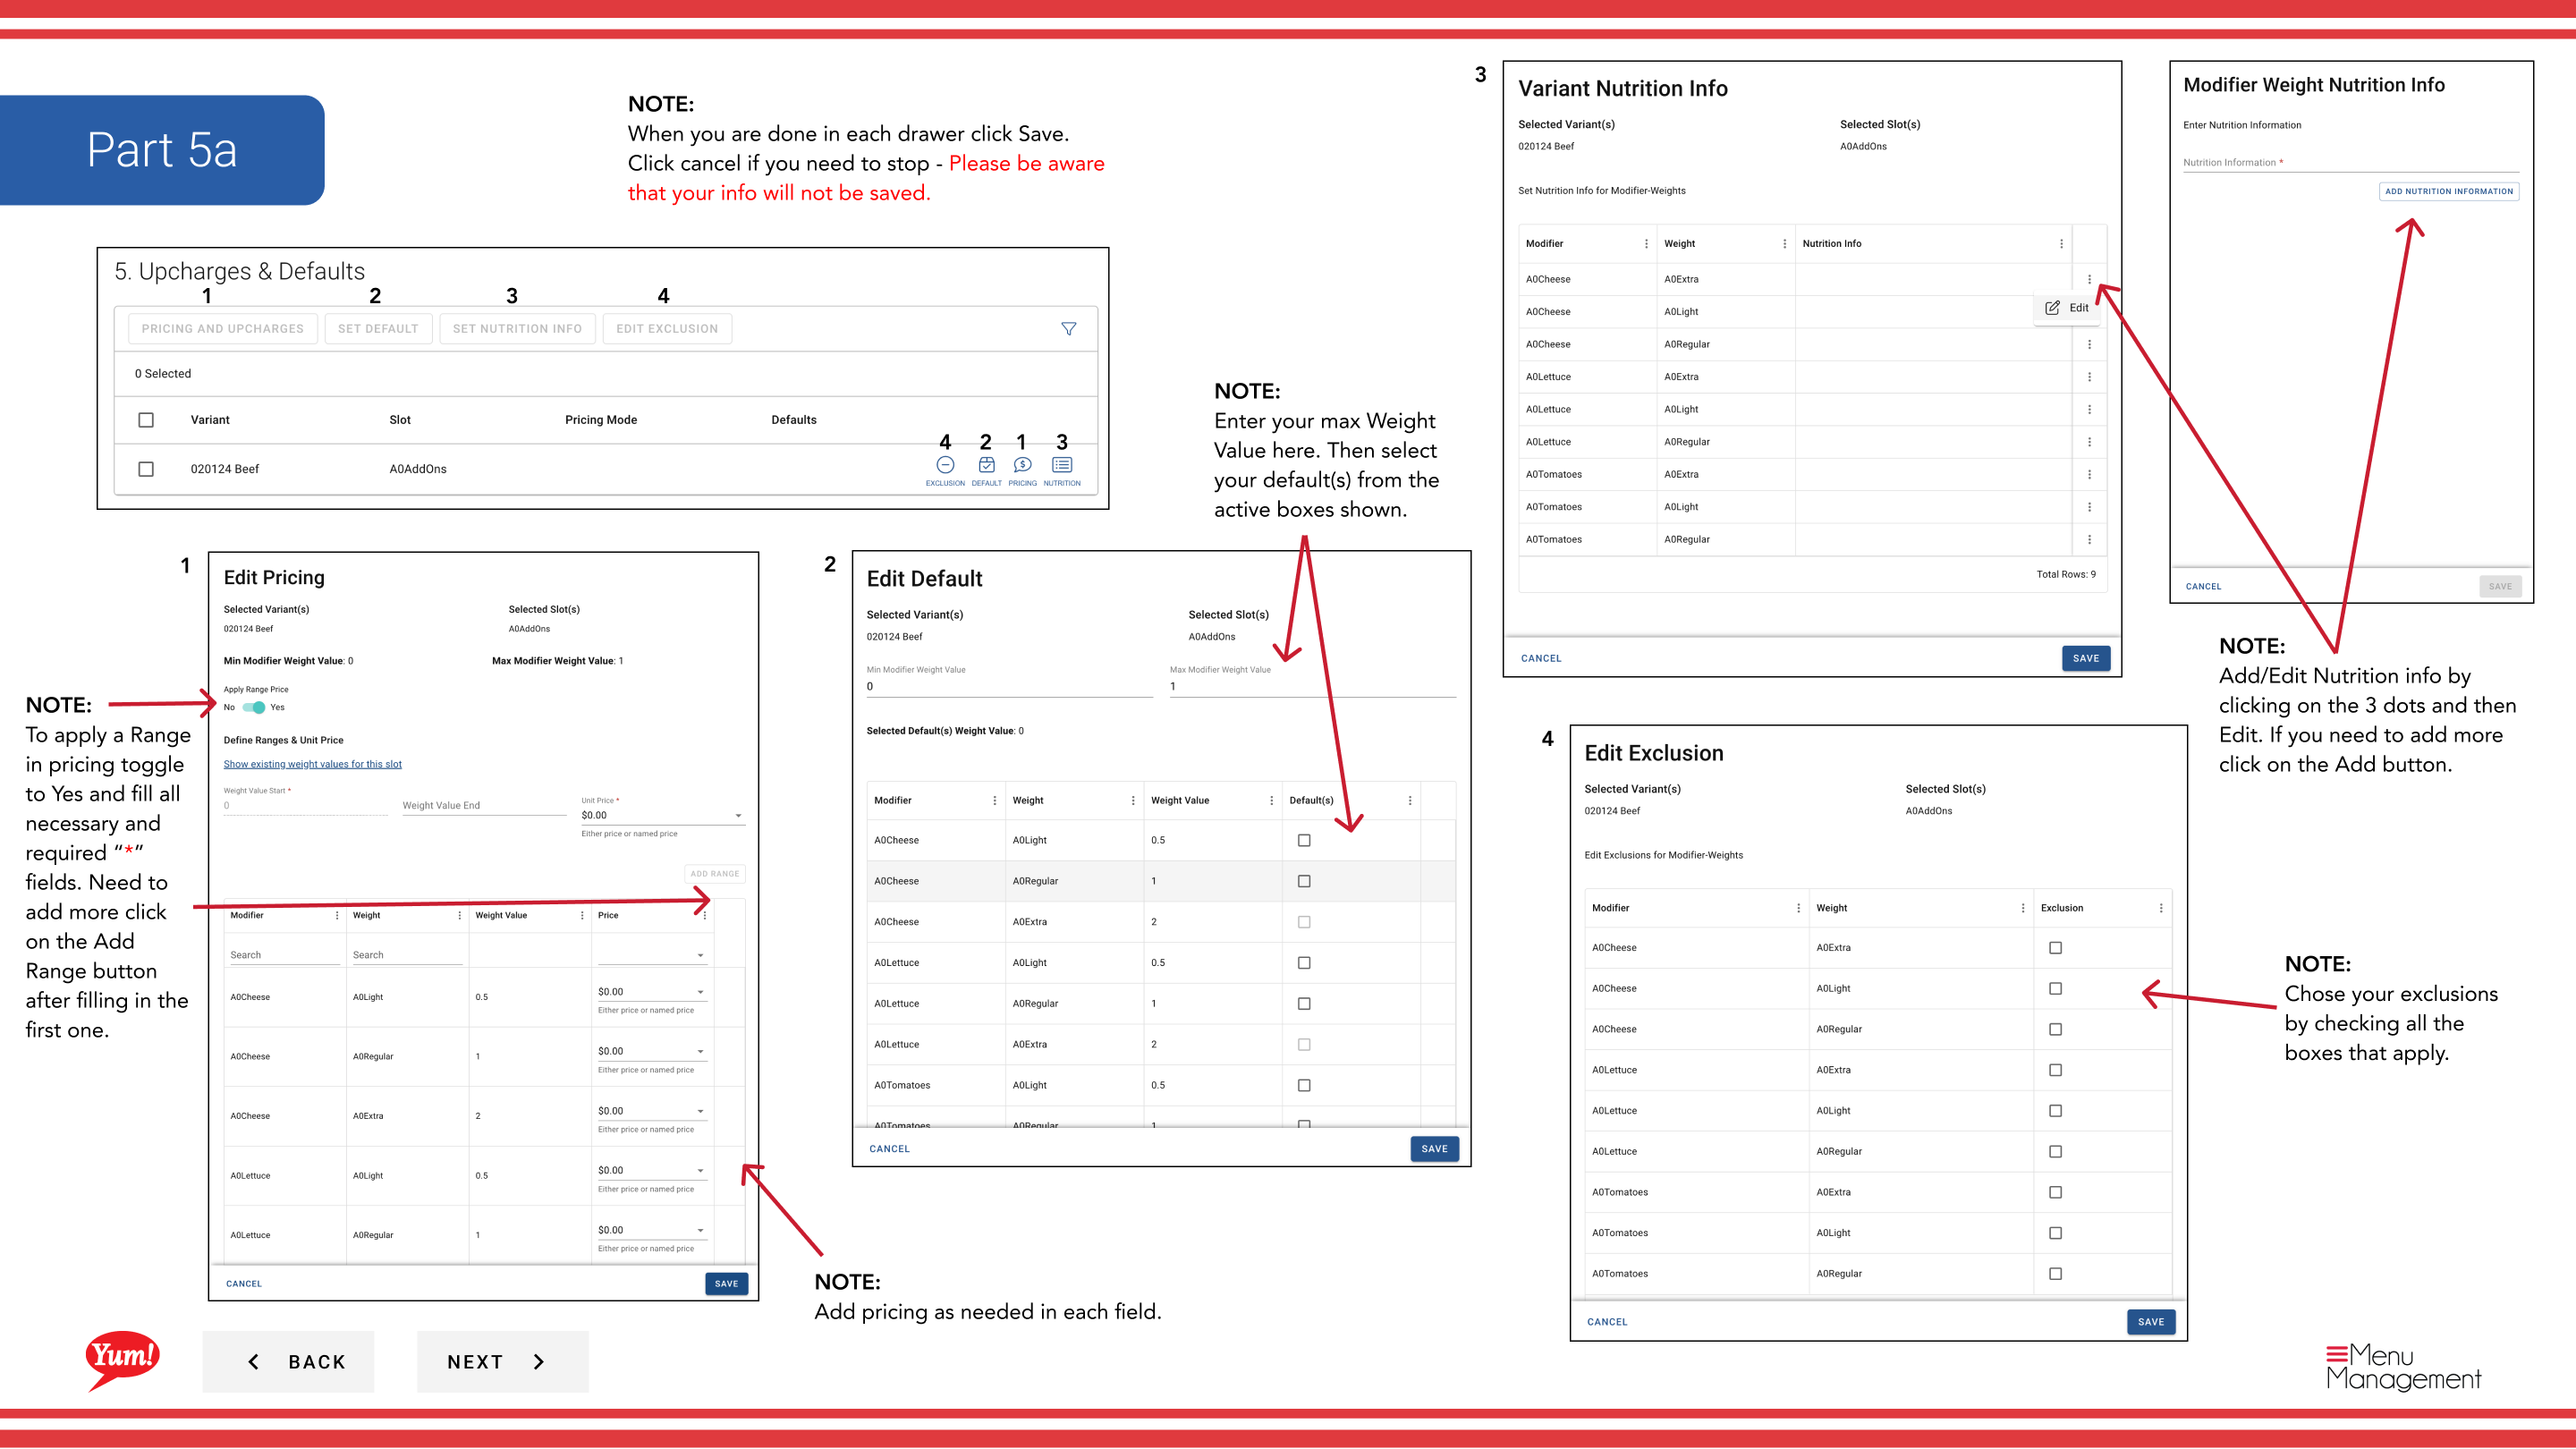
- Add Pricing: Enter the price for each variant. To use a price range, toggle Range to Yes and fill in min/max values.
- Add Weights: Enter the max weight value and select default weight(s).
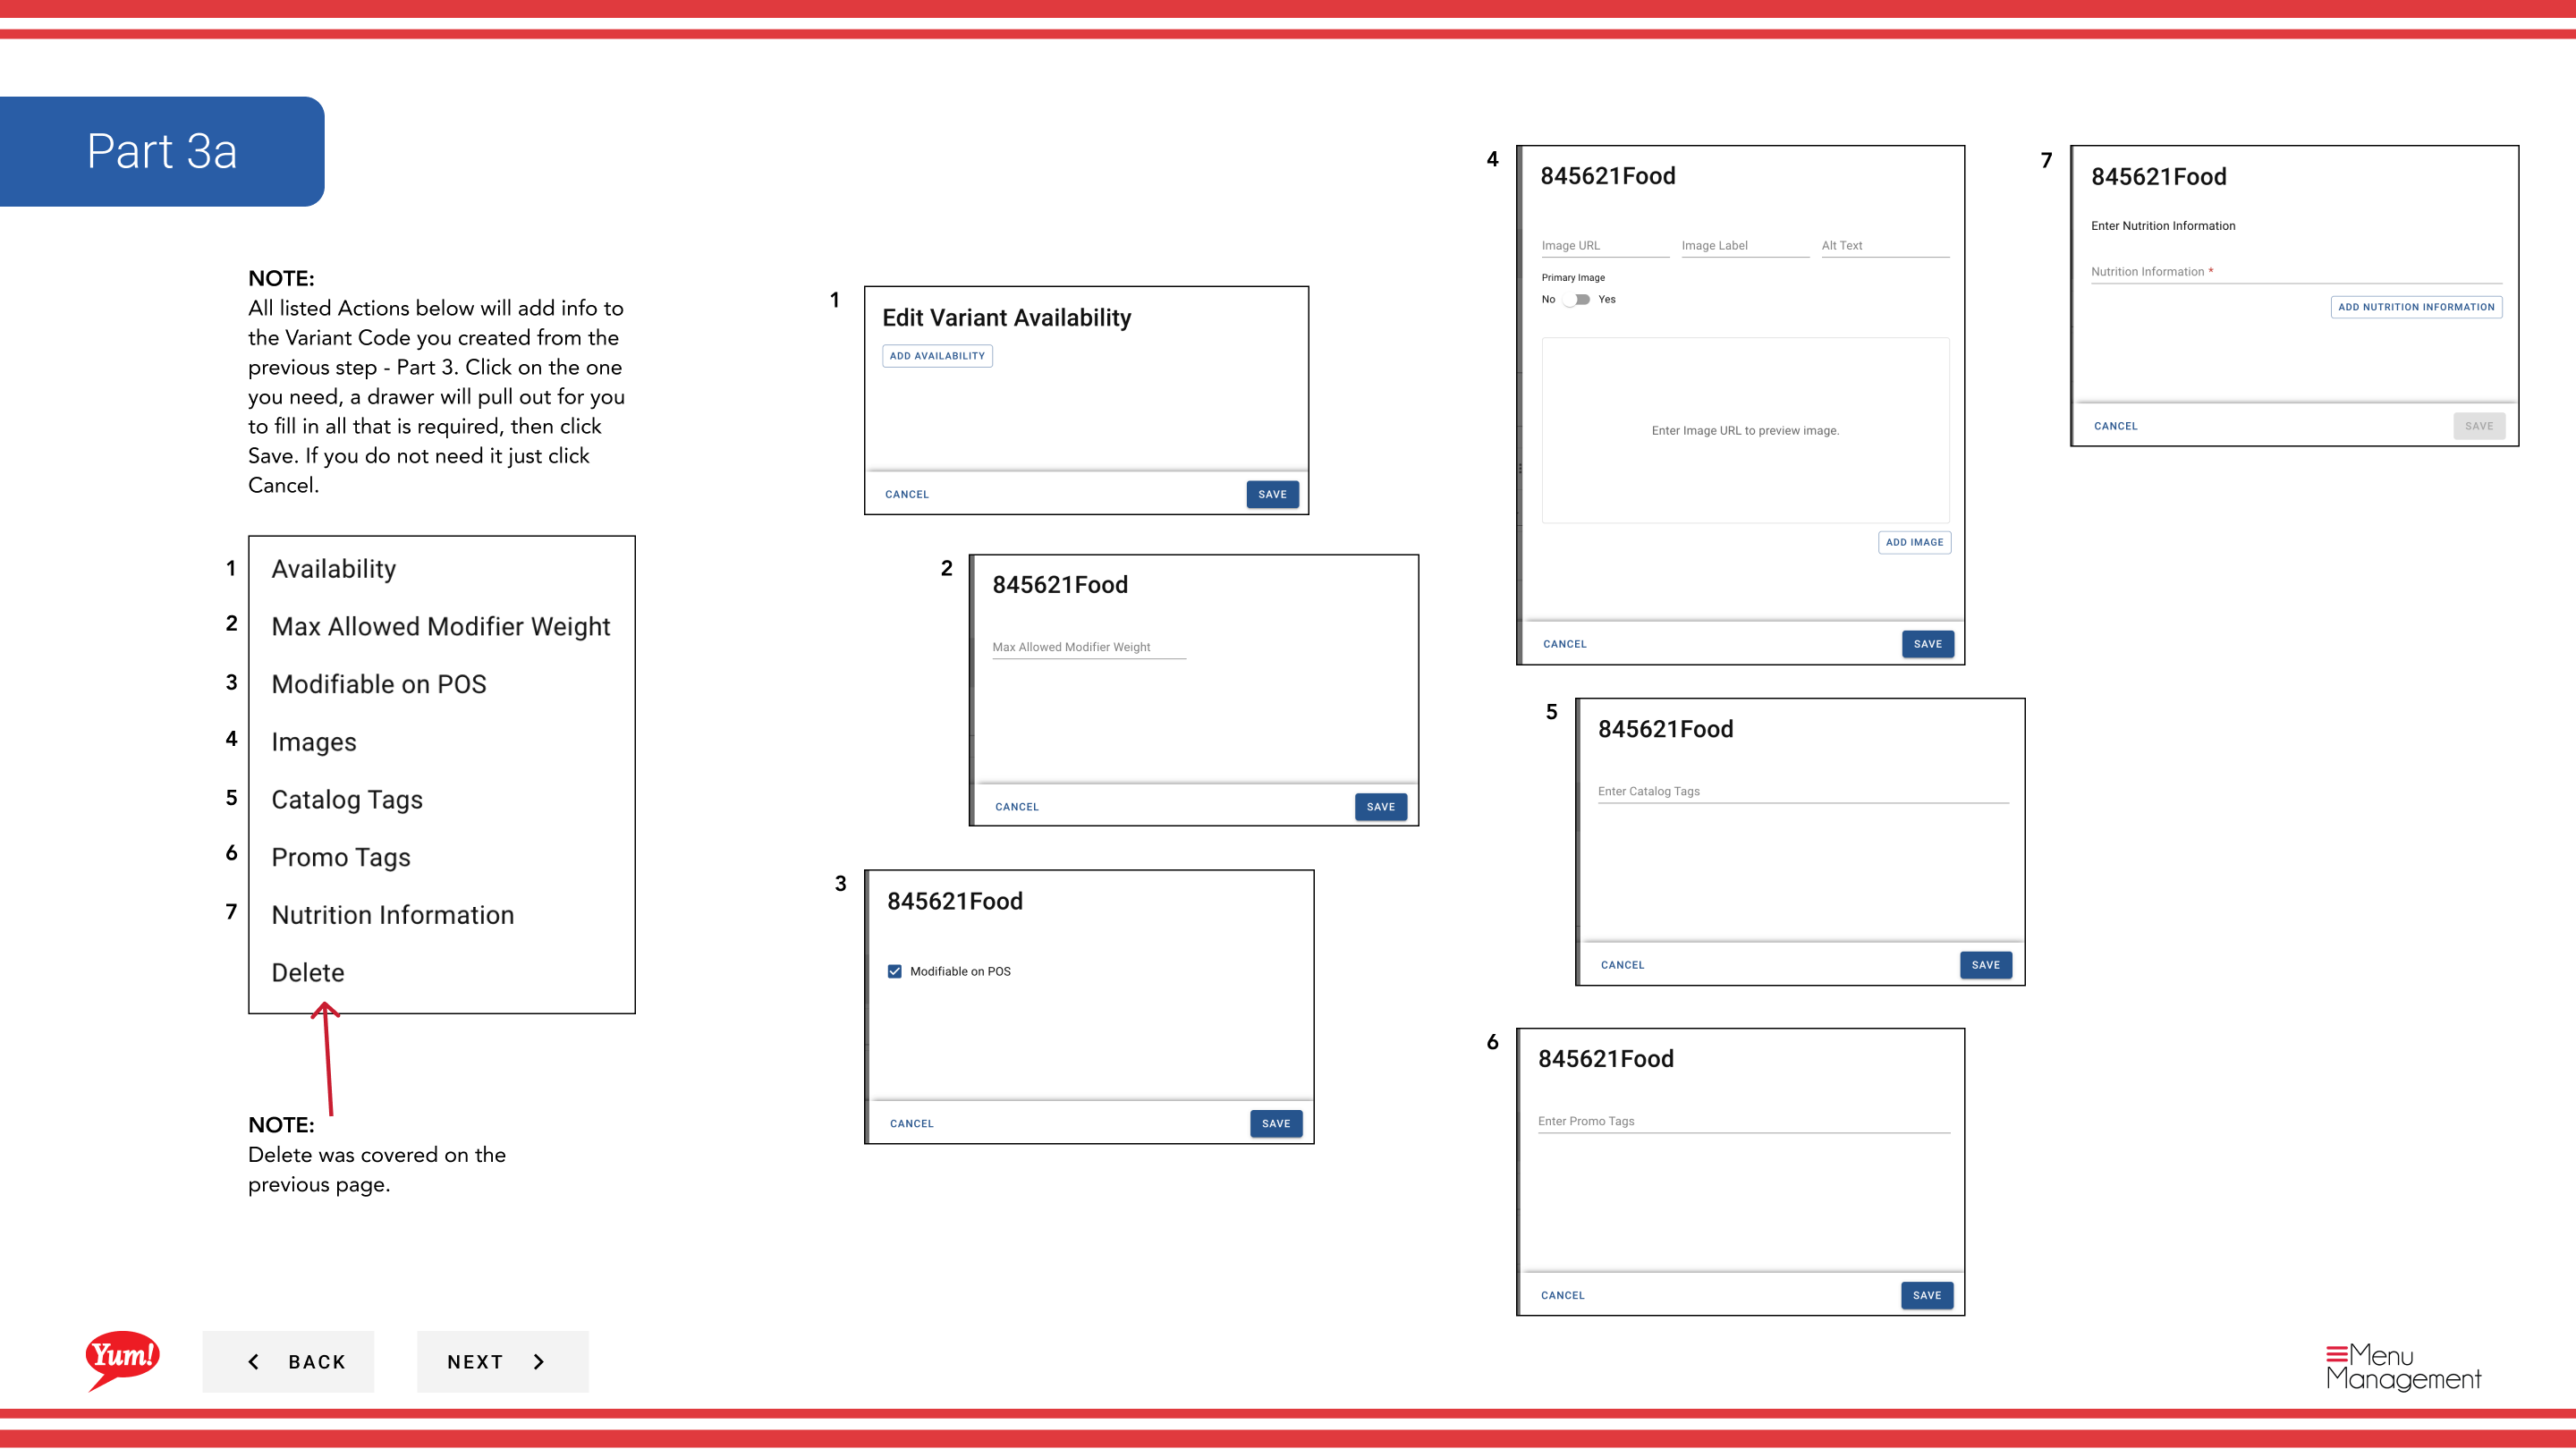
- Add Nutrition: Click the three-dot menu > Edit to add nutritional information.
- Add Exclusions: Check all allergen or dietary exclusion boxes that apply.
Step 24: Click Save in each drawer when finished, or Cancel to discard changes.
Step 25: Click Next to proceed to the Tags page.
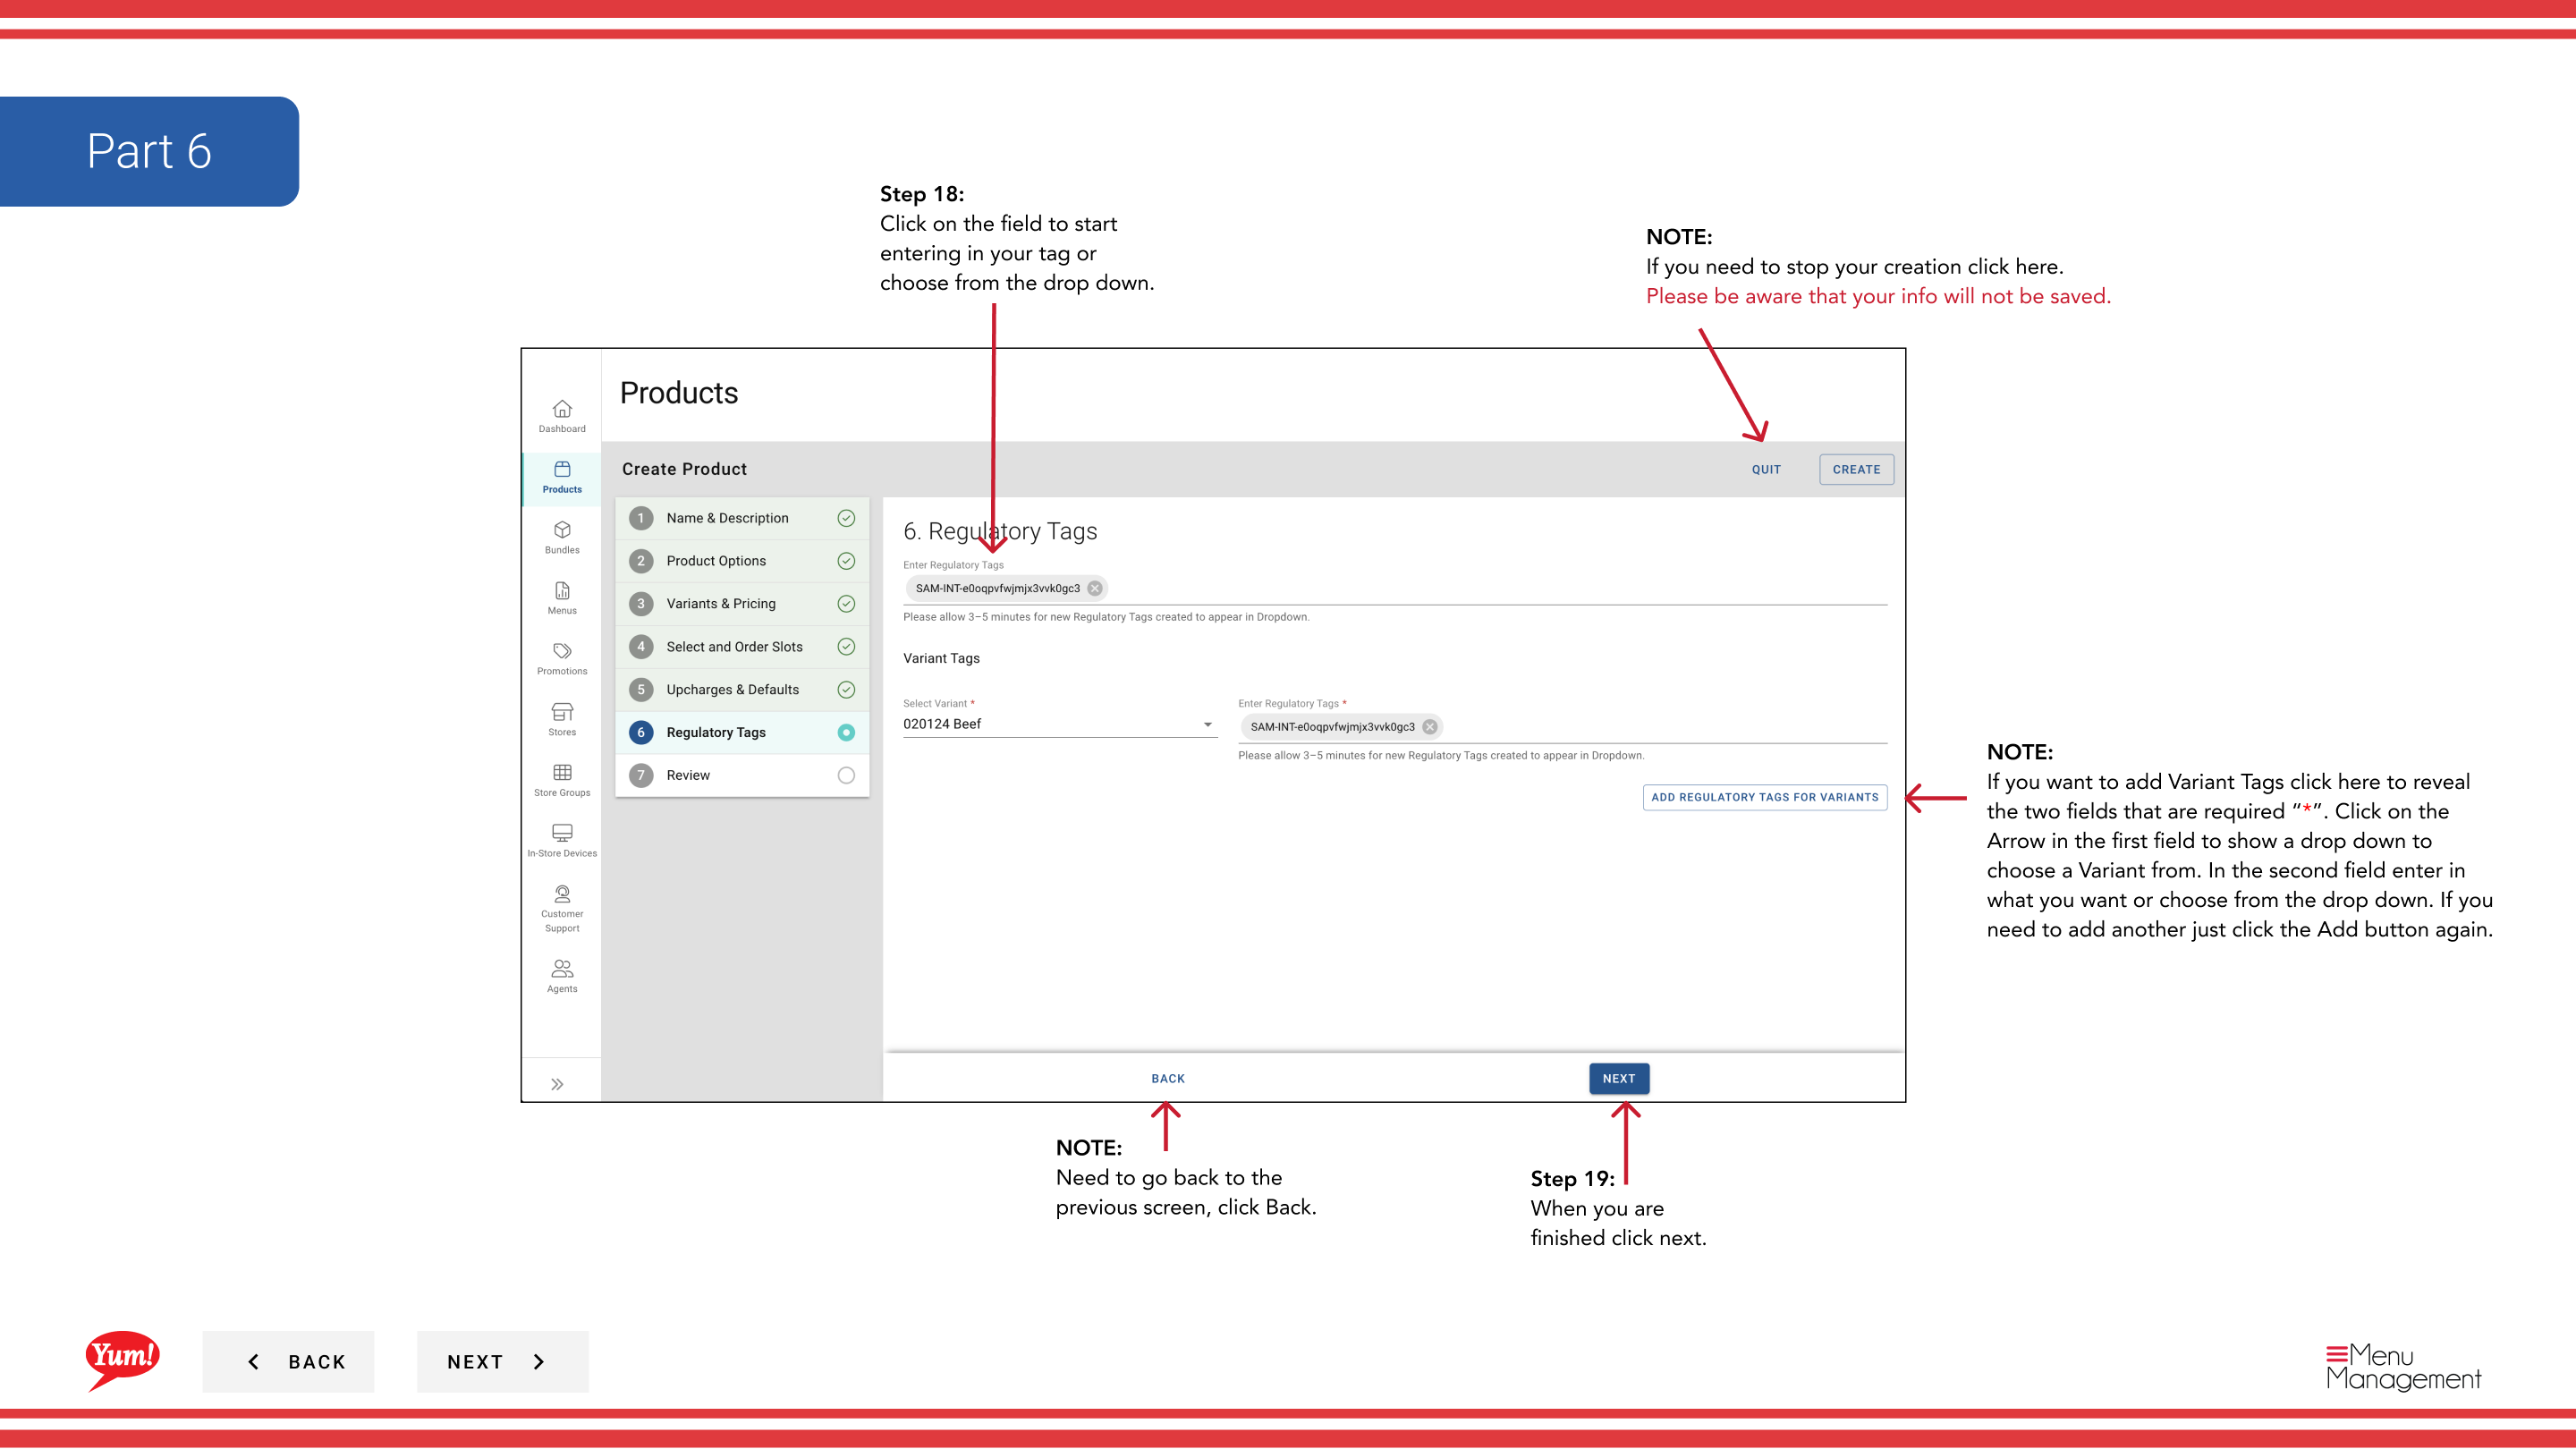
Page 6: Variant Tags
Step 26: Add optional tags to variants for reporting and filtering.
Step 27: Click Add to reveal the required fields. Select a Variant from the first dropdown, then enter or select a tag value from the second field.
Step 28: Click Add again to add more tags if needed.
Step 29: Click Next to proceed to the Review page.
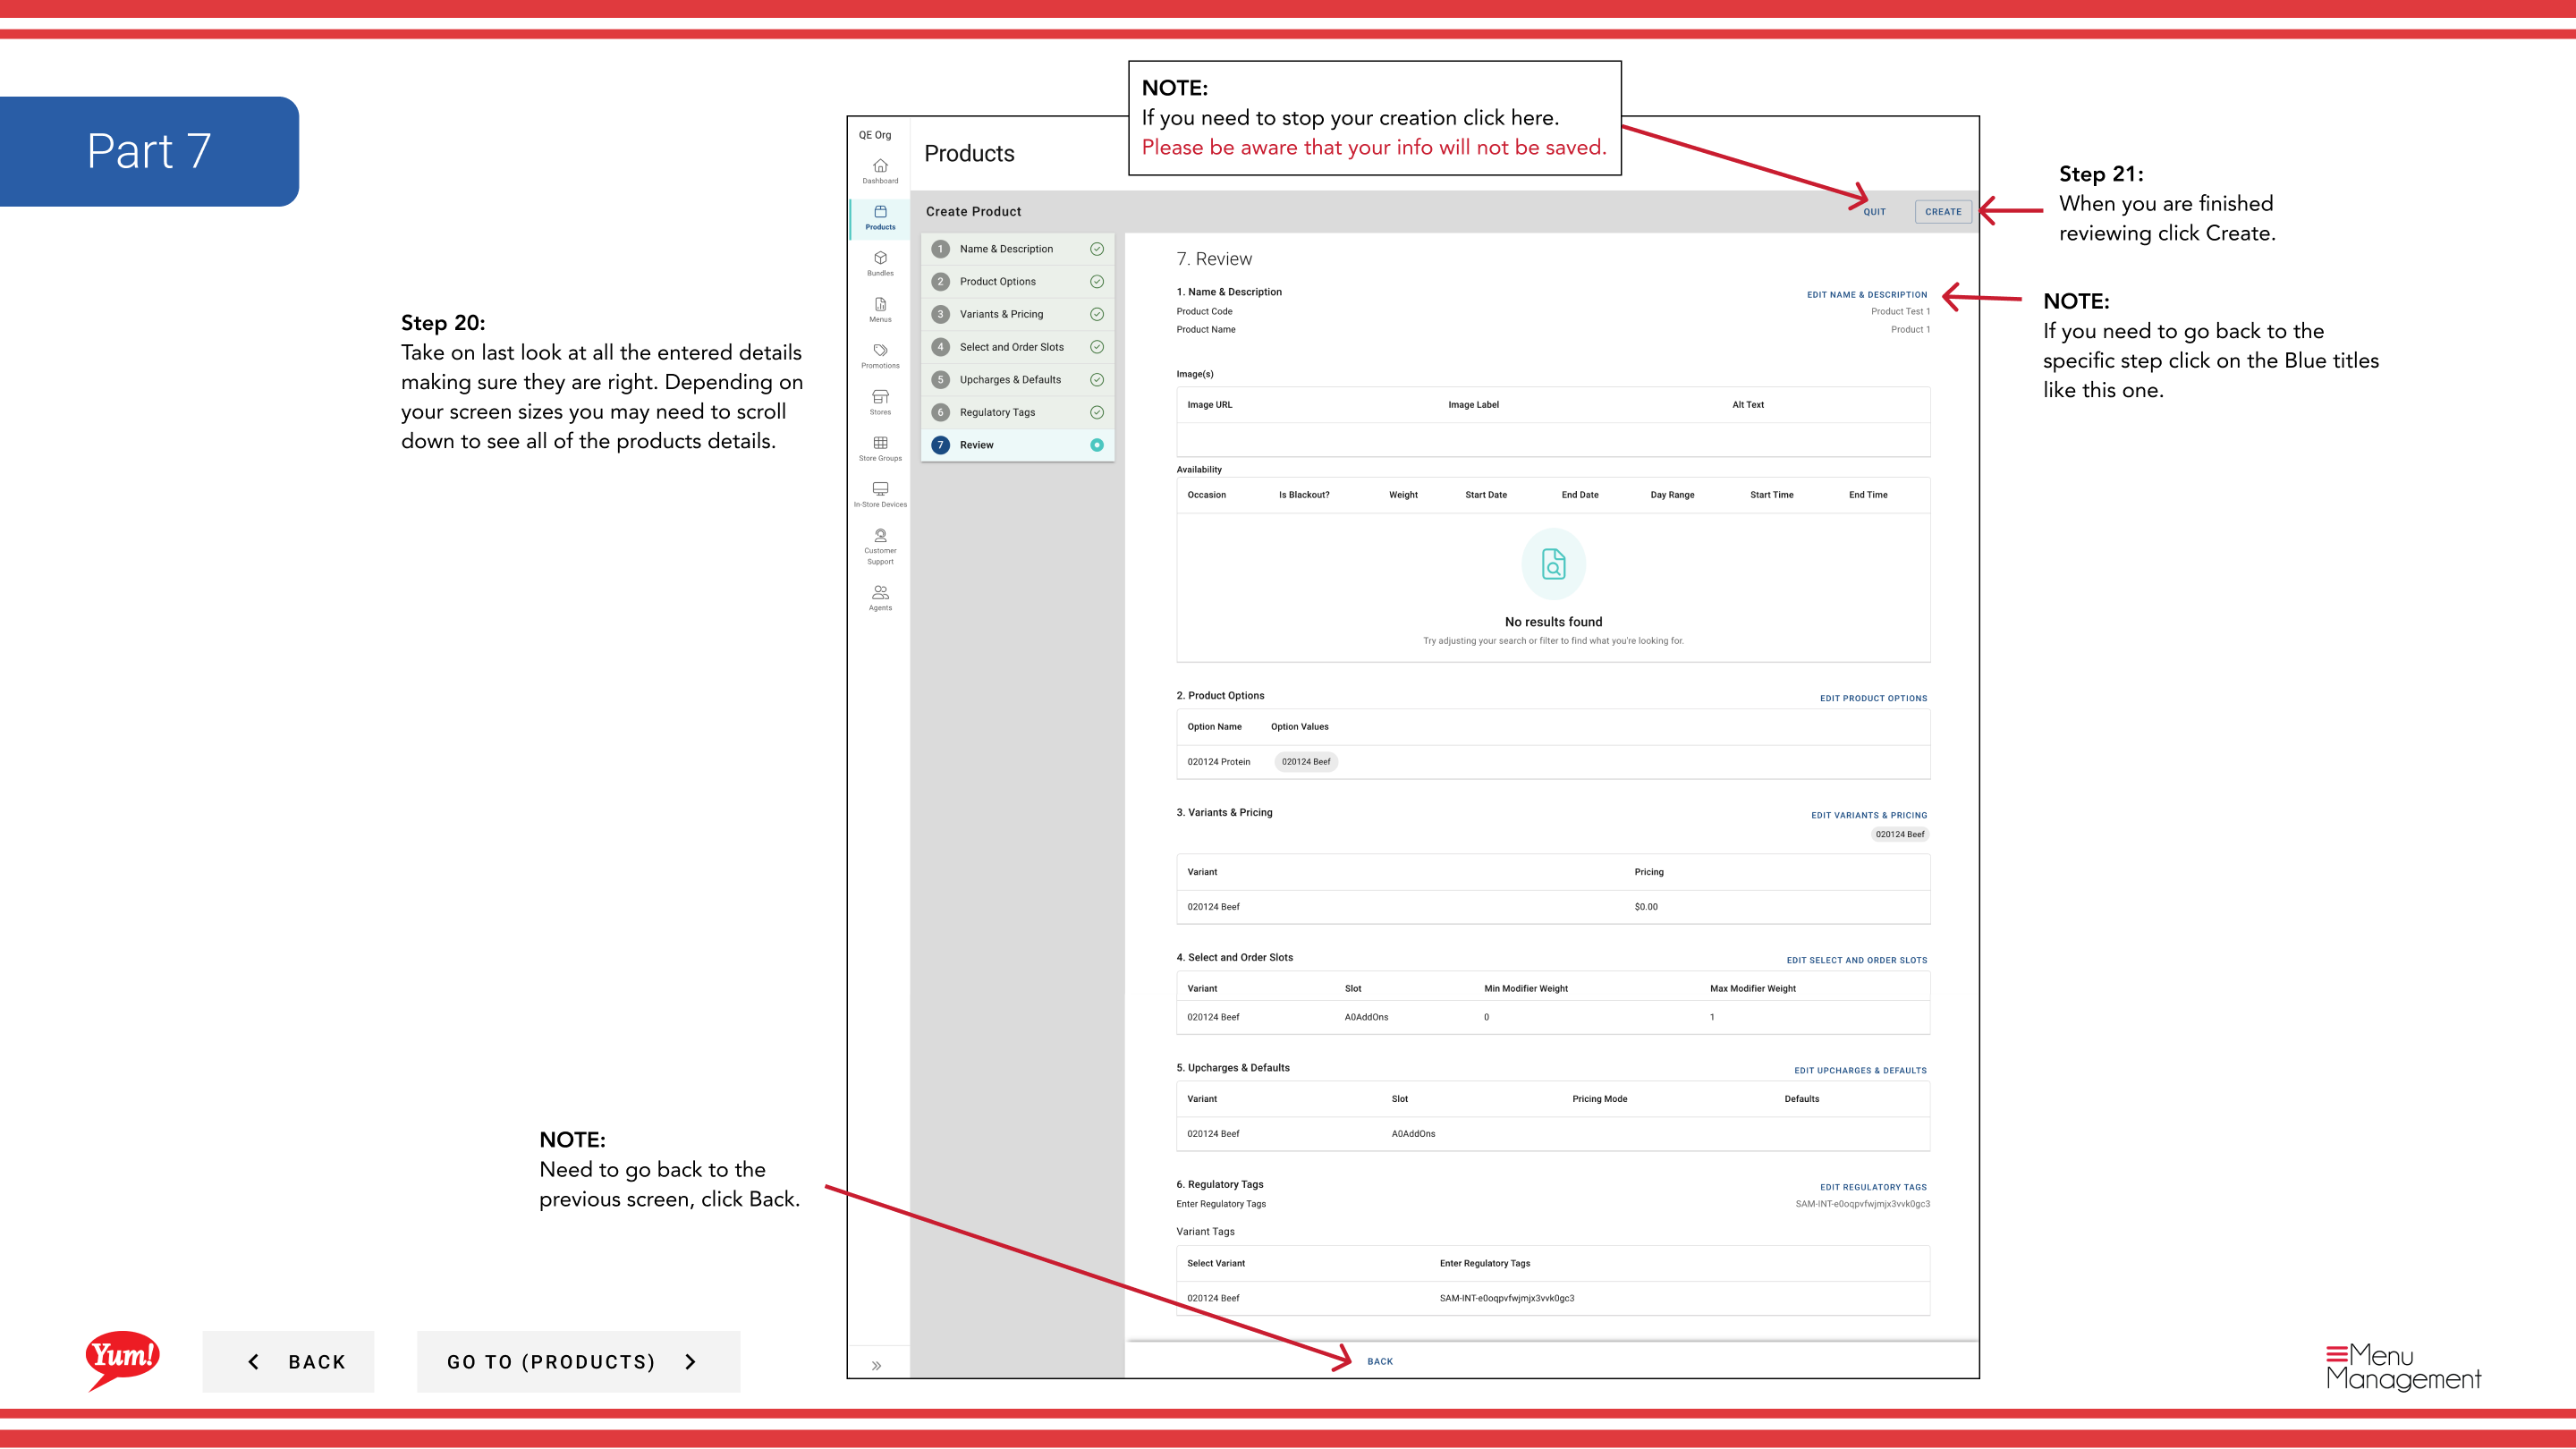
Page 7: Review
Step 30: Review all entered details to ensure they are correct. Use the blue section headers to jump back to a specific page and make corrections if needed.
Step 31: When satisfied, click the Create button to save the product.
Notes
Clicking Cancel at any step discards all unsaved information.
You can jump directly to any page by clicking the blue section header instead of clicking Next repeatedly.
If you need to add more than one image, you can do so on the variant edit screen after creation.
If you don’t see the option you need in the dropdown, click Create New Option to create it first.
You can drag and drop options and variants using the six-dot drag handles to reorder them.
Part of the Admin Portal Guide · Section: Products