Add an Image to a Product
What this guide covers
Uploads and assigns display images to a product so customers see accurate visuals when ordering through digital channels.
Steps
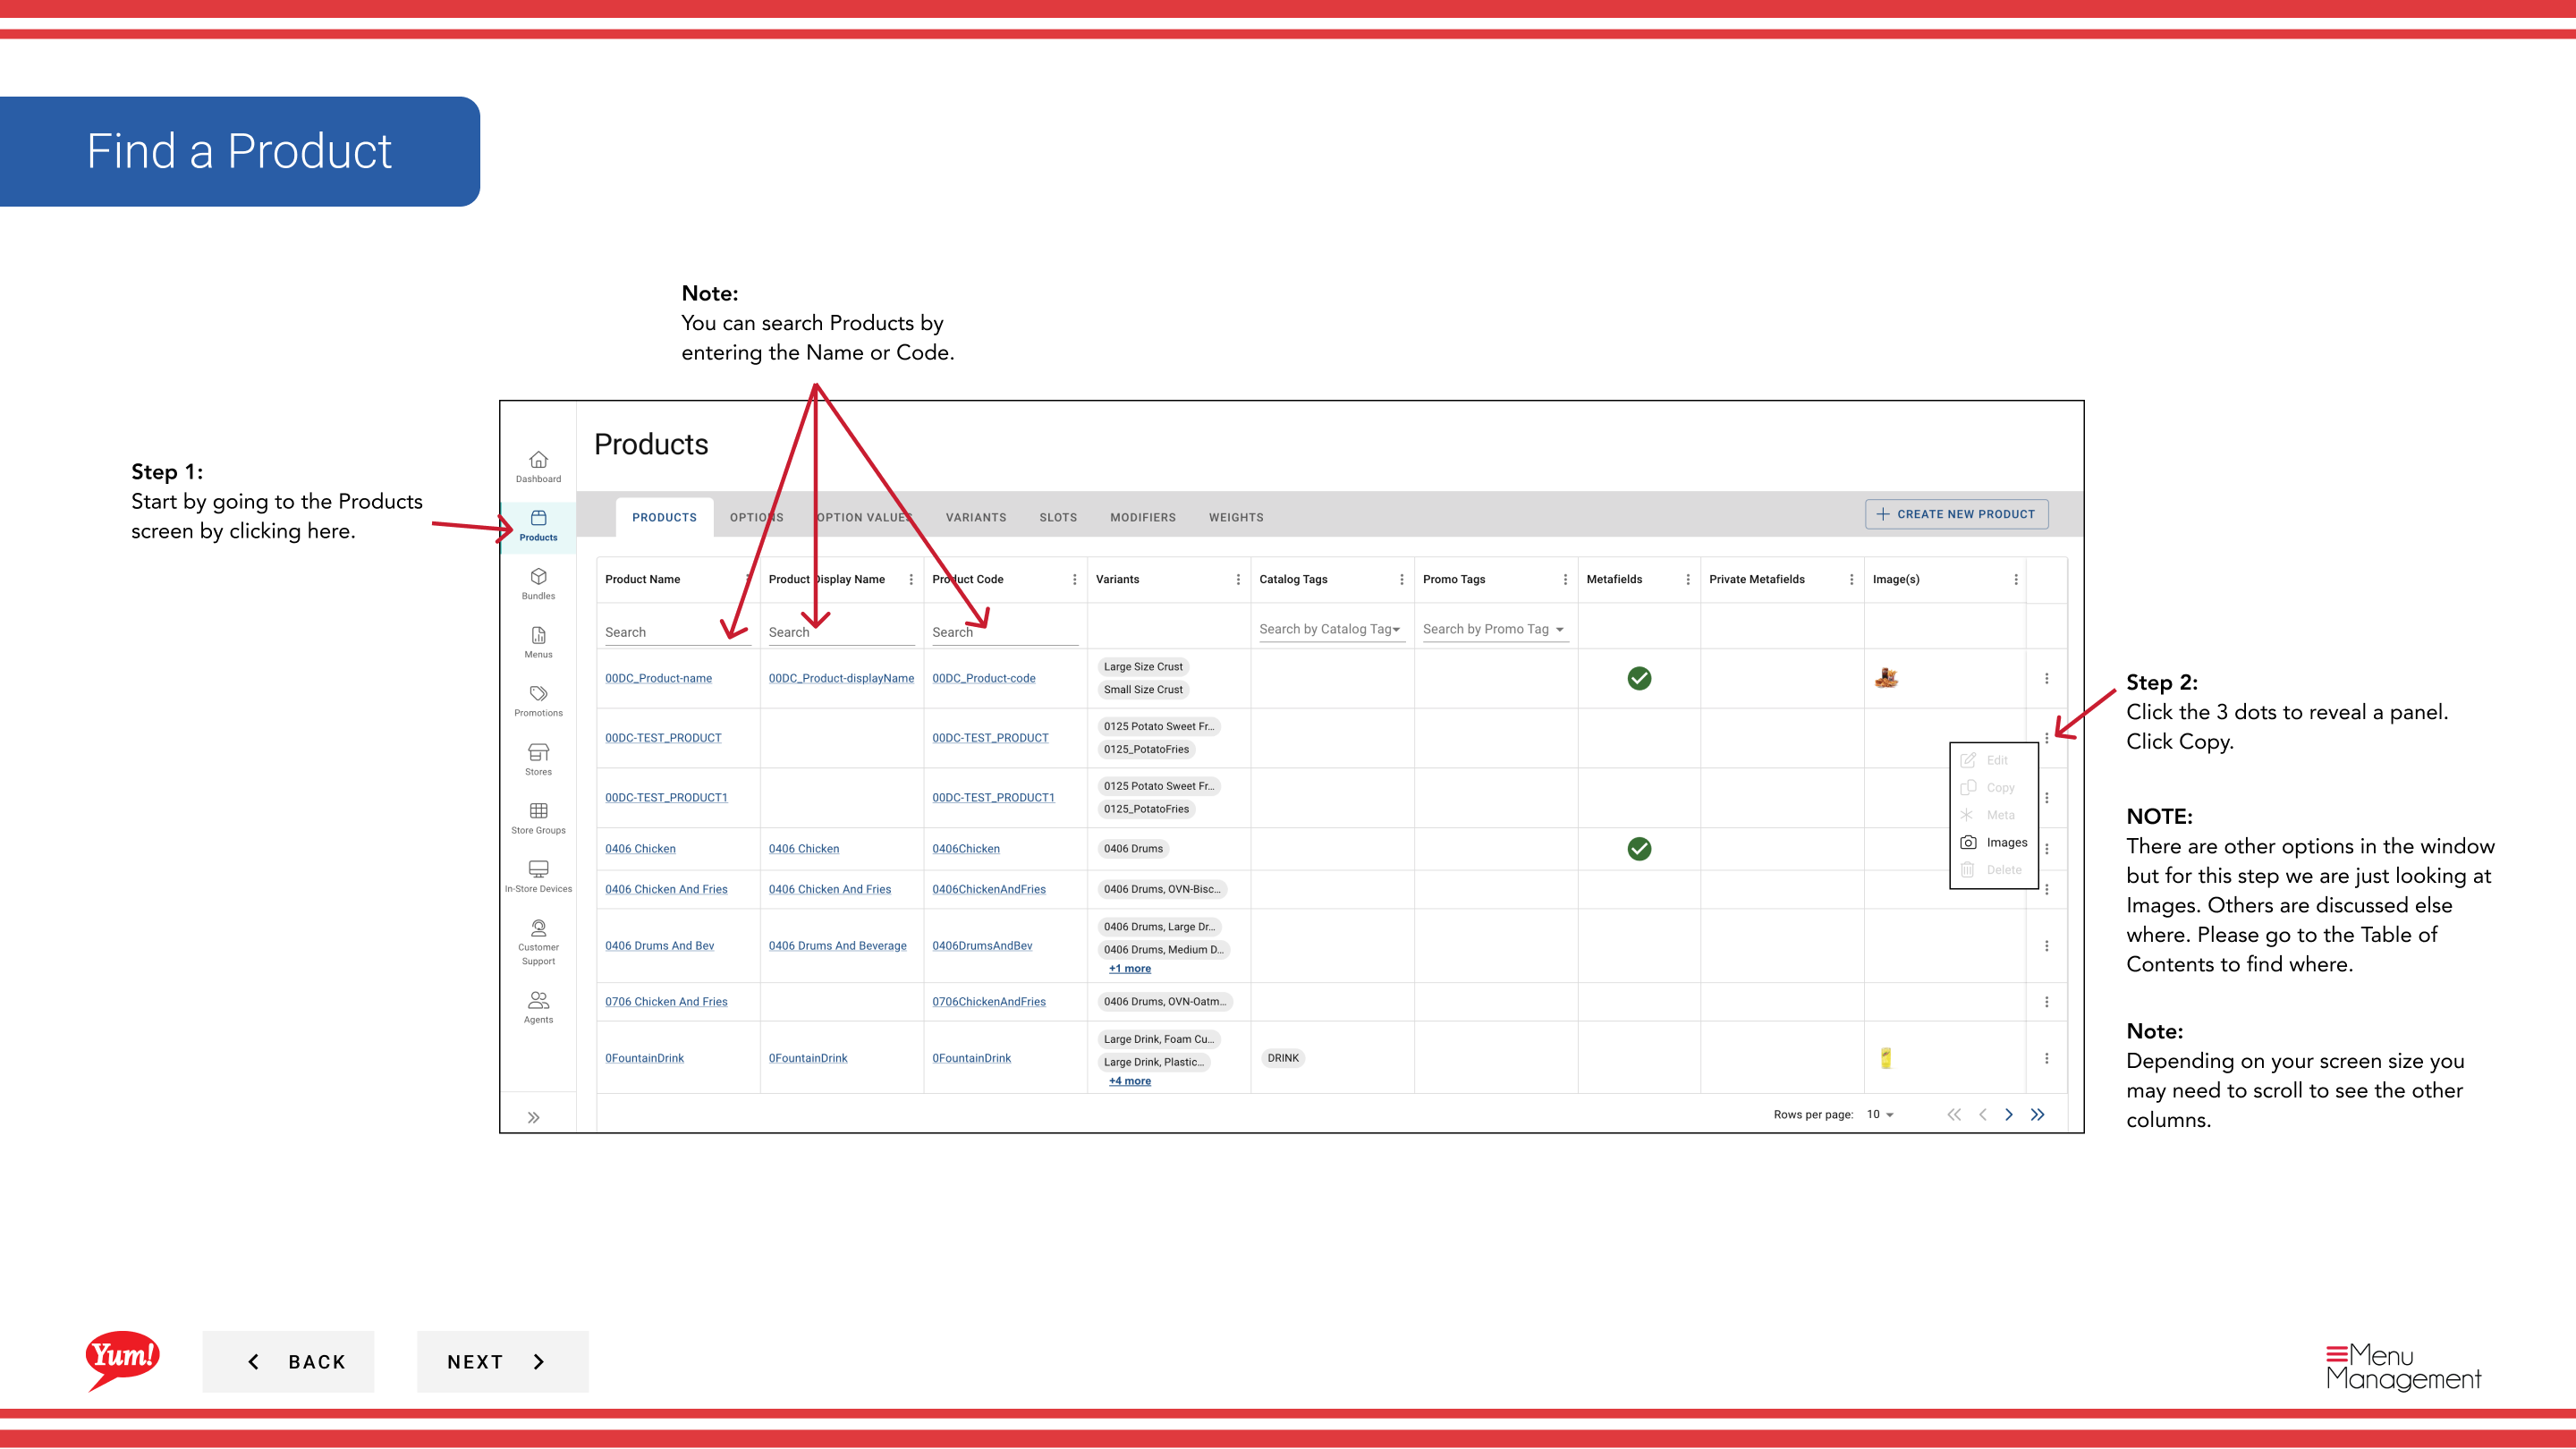
Step 1: Navigate to the Products section using the left navigation menu.
Step 2: Find the product you want to add an image to. You can search by Product Name or Product Code.
Step 3: Click the three-dot menu next to the product name, then select Edit.
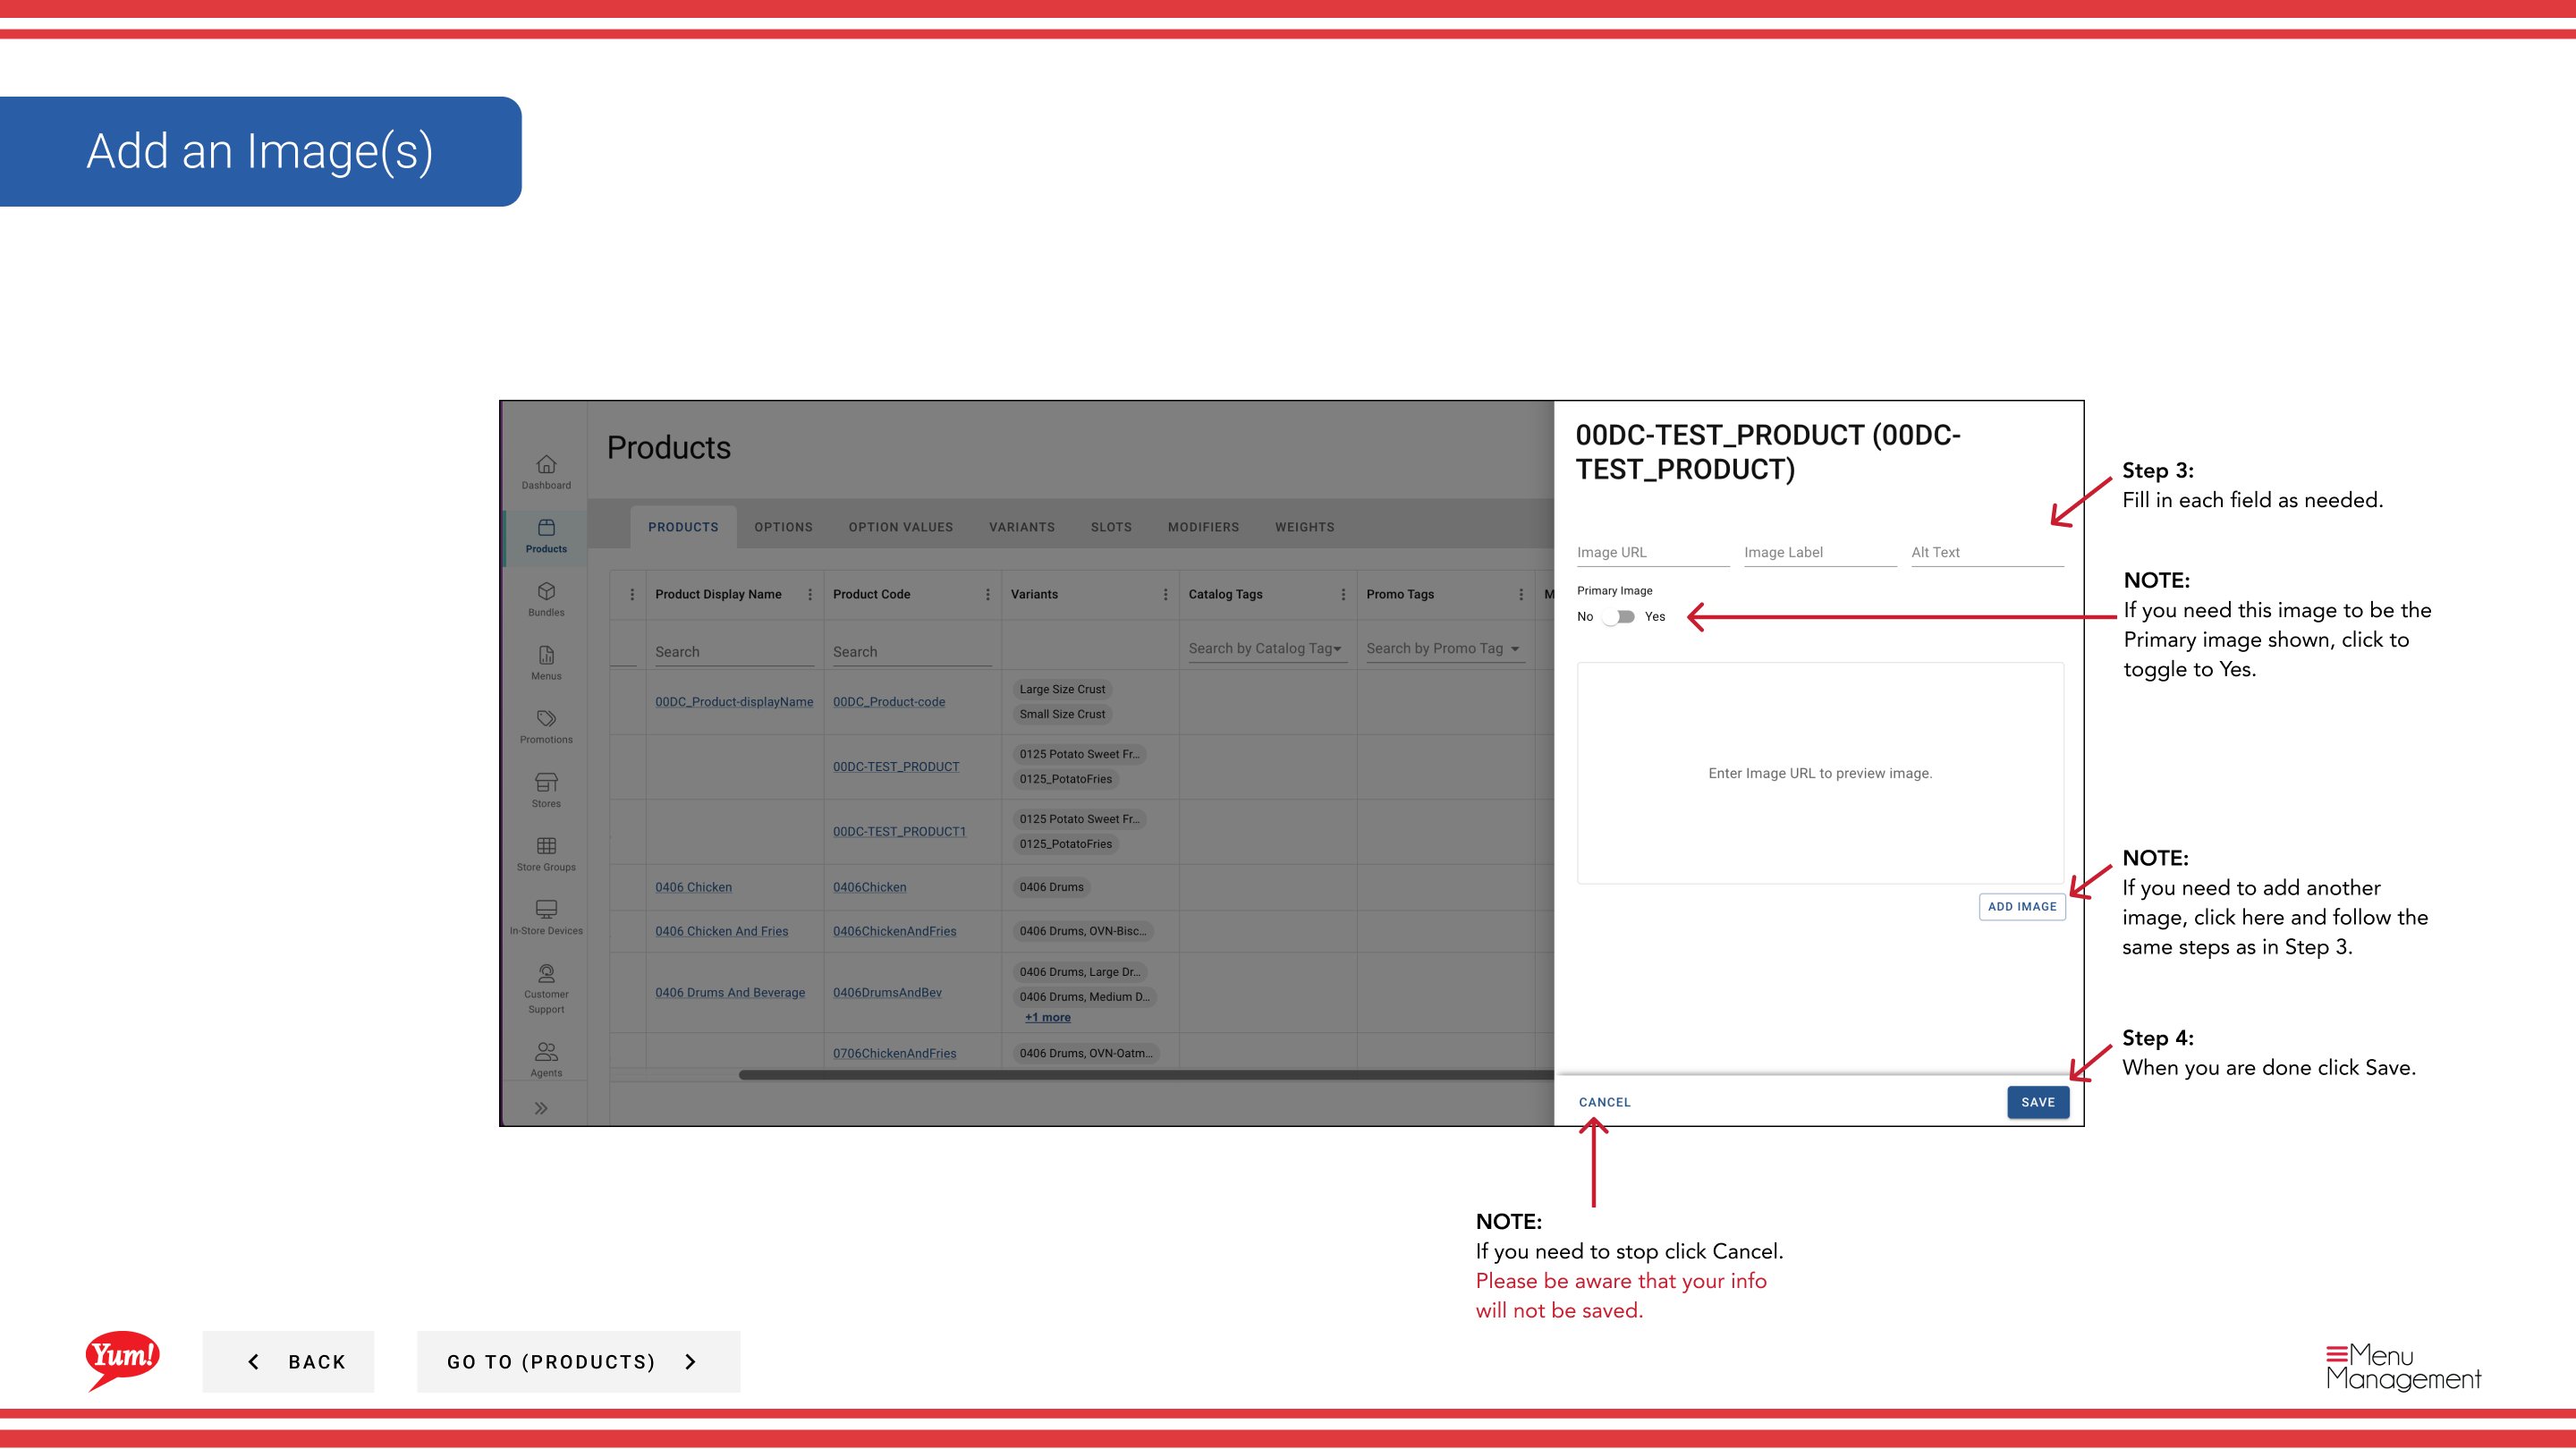
Step 4: In the edit form, navigate to the image section or click Next to reach it. Look for the Images area.
Step 5: Click Add Image or the upload area to select an image file from your computer.
Step 6: Fill in the image details:
| Field | What to enter | Notes |
|---|---|---|
| Image Upload | Click to select an image file | JPG, PNG, and WebP formats are supported |
| Primary Image | Toggle to Yes if this is the main displayed image | Only one image per product should be marked as primary |
Step 7: If you need to add multiple images, click Add Another Image and repeat Steps 5-6.
Step 8: When you are finished, click the Save button.
Notes
Toggle Primary Image to Yes to set this as the main image shown to customers.
You can add multiple images to a product by clicking Add Another Image.
Clicking Cancel discards all unsaved image additions.
Part of the Admin Portal Guide · Section: Products